Ernest Goes To Japan - Let's Play Nioh

The Game

Nioh is a Kou Shibusawa project by Koei Tecmo Games and Team Ninja. It was released in February of 2017 and is an action RPG set in the Sengoku Period in Japan. The game is history inspired with a lot of real references and characters but is a fictional fantasy story. Nioh is about the Irish(Actually Welsh) historical figure William Adams, but also features demons, and the mysterious energy known as Amrita, it is a samurai tale about samurai and Yokai(Demons). We’ll be seeing a lot of monsters and figures from 1600’s Japan, including such people as Tokugawa Ieyasu, Hattori Hanzo, and many more.This game is actually based on a script by Akira Kurosawa.

The Let’s Play

This is an LP that will be done by Tolvo. Hey that’s me! It will not be a no damage run or feature extreme skill, other than that the game itself is very hard. It is not a blind LP. I will be talking a lot about the history and folklore represented and referenced within the game itself. All story relevant missions will be done with possible bonus content but the game has a lot of missions all of which I will not be able to show and often they retread over areas and reuse enemies and bosses. I am recording using the PS4 share system and as a Koei Tecmo game there will be watermarks on all shared footage and images. As of now I will not be doing the DLC as I do not own it. As far as content warnings go expect blood and gore in every update.

I’ll also be showing off a lot of different outfits in the game. That’s right, we’re doing fashion Souls in Nioh! I will have polls for outfits, beards, and haircuts that William will have. The first poll will be for what I should take as my second weapon. My main weapon will be Sword, or as we know it, the Katana.

  • Dual Swords
  • Axe
  • Kusarigama
  • Spear

0 voters

3 Likes

Updates

Update 1 - Introduction
Update 2 - Isle of Demons
Update 3 - Deep in the Shadows
Update 4 - The Spirit Stone Slumbers
Update 5 - The Silver Mine Writhes
Update 6 - The Ocean Roars Again
Update 7 - Spider Nest Castle
Update 8 - Falling Snow
Update 9 -The Demon of Mount Hiei
Update 10 - The Iga Escape
Update 11 - Memories of Death-Lilies
Update 12 - The Defiled Castle
Update 13 - Immortal Flame
Update 14 - Sekigahara
Update 15 - The Source of Evil
Update 16 - A Defiled Holy Mountain
Update 17 - The Samurai from Sawayama
Update 18 - The Demon King Revealed
Update 19 - The Queen’s Eyes
Update 20 - Wrapping Up Base Game

Dragon of the North DLC

Update 21 - Yokai Country
Update 22 - Yokai Realm with a Companion in Dragon of the North
Update 23 - The One-Eyed Dragon’s Castle 1/2

ArkInBlack’s Info

Kato, Daiba, and Isonade
Elements, Ninjutsu, Nurikabe, Fuse-Ushi, and Onmyo Magic
Mizuchi, Smithing, Amrita Memories
Raiken and Paired Raiken
Glory, Clans, and Transformations
Aya-Komori, and Itokuri
Enko, Ii Naomasa, Hi-nezumi
Usura-hicho
Alpha, Beta, and Gyokuto
Defiled Castle Bosses, Dung Balls, and Narikama Tanuki
Suzaku and Kelley’s Yoki

1 Like

Information

Characters

William Adams

William Adams Profile
William Adams is a pirate who is Welsh. For England he has been hunting the world for Amrita to bring back to England to aid in the war with Spain. After he’s been used up he was set up for execution but managed to escape, though in the process lost his Guardian Spirit. He now is on a long journey to get her back. During his journey he made many friends, allies, and enemies in Japan. William gained Guardian Spirits, he grew in power, fought the greatest of monsters and warriors, while fighting for peace in Japan under Tokugawa Ieyasu.

Edward Kelly

Edward Kelly Profile
A mysterious villain working for the Queen of England. He has control over the Amrita and is capable of making demons. Edward has stolen William’s Guardian Spirit. An alchemist, he went to Japan to ensure that the current war would be extra bloody, as it would cause more Amrita to form. Like a trickster god he played both sides of Japan. William continued to chase him.

Hattori Hanzo

Hattori Hanzo Profile
Hanzo is a legendary ninja and samurai who is in service of Tokugawa Ieyasu. He served back when they were known as the Matsudaira clan and was crucial in defenses of the iga clan of ninjas and the protection of Tokugawa Ieyasu. Known also as Demon Hanzo, he has been tasked by Ieyasu with going to the West for aid and dealing with Yokai along the way. Upon appearing he has become an ally to William and both have entered a mutually beneficial alliance.

Okatsu

Okatsu Profile
The daughter of Tokugawa Ieyasu, she refused to grow up a princess and chose instead to run away and study the way of the ninja under Demon Hanzo. Okatsu and William have a sort of friendship and feeling of being kindred spirits. A proud and fierce warrior, she resents her father but still seeks for him to rule Japan in a time of peace.

Nekomata

Nekomata Profile
The Guardian Spirit of Hattori Hanzo. He is a bit of a strange creature that has a bit of a comical tinge to him. Upon arrival in the caverns below Nakatsu he befriends William and posses him to act as a guide. Nekomata sacrificed himself and was turned into the twisted White Tiger before being slain by William.

Oda Nobunaga

Oda Nobunaga Profile
Oda Nobunaga, the Demon of Owari. He was once known as Kipposhi, the Fool of Owari. He rose from a disliked youth of a minor Daimyo to the near-overlord of Japan. Around him many important figures rose, Tokugawa Ieyasu, Toyotomi Hideyoshi, and many more. He was assassinated by his retainer Akechi Mitsuhide, causing the fall of one of Japan’s greatest, most powerful, and terrifying figures.

Toyotomi Hideyoshi

Toyotomi Hideyoshi Profile
Originally known as Kinoshita Hideyoshi, he was a mere soldier who rose up underneath Nobunaga to become one of Japan’s greatest generals. Eventually he became known as Hashibe Toyotomi, after the death of Nobunaga he rose even further and became the ruler of Japan. Hideyoshi planned the ill thought out invasion of Korea and tried to continue Nobunaga’s ambitious ideals. One day Hideyoshi too died leaving a massive power vacuum in Japan that led to the war between the East and West.

Ishida Mitsunari

Ishida Mitsunari Profile
Formerly a loyal servant of Toyotomi Hideyoshi, Mitsunari spent his early years serving his lord with great dedication. After his master’s death he began to sow dissent among others against Tokugawa Ieyasu, who had begun making power plays to take more control over Japan. Sir Ishida took to the west and rallied forces to oppose Ieyasu. One person he took on as an ally was Edward Kelley, he promised Mitsunari his dark magic’s aid in the coming war. After the Battle of Sekigahara Mitsunari retreated to Mount Ibuki where Kelley betrayed him. William defeated him and Tenkai saved his life. Defeated utterly, Mitsunari had no choice but to surrender and submit to his own execution. For the greater good.

Otani Yoshitsugu

Otani Yoshitsugu Profile
One of Ishida Mitsunari’s top generals. He suffers from leprosy and his body is held together via dark magic. Earlier he served under Hideyoshi in both the Kyushu campaign and Korea and formed a deep friendship with Ishida Mitsunari. Yoshitsugu met his end at Sekigahara by the hands of William after turning into a Yokai.

Shima Sakon

Shima Sakon Profile
A powerful samurai and one of Ishida Mitsunari’s top generals. A close friend of Ishida Mitsunari, he served his lord at all times. Many rumors about him insulted Mitsunari but Shima Sakon always found his lord to be a righteous good man. At the battle of Sekigahara he was defeated by William and went on to survive the battle, becoming a wanderer, an obscured figure.

Yasuke

Yasuke Profile
A samurai of African origins, his original name was lost to history. He came to serve under Nobunaga and was heartbroken when his master was killed. After he preserved Nobunaga’s body and guarded him, preparing him for the day he would once again rise.

Saika Magoichi

Saika Magoichi Profile
Leader of the Saika Ikki, he is the third Saika Magoichi. The name is passed down among them to each leader. His real name is Suzuki Shigetomo. He is a master of firearms and serves the Toyotomi and Ishida even after Hideyoshi’s death.

Tokugawa Ieyasu

Tokugawa Ieyasu Profile
Tokugawa Ieyasu, once known as Takechiyo when he was a child. Originally the heir to the Matsudaira, he was taken as a hostage by the Imagawa but Oda Nobuhide had other plans for him. He captured young Takechiyo, helping him meet with Nobuhide’s son, Kipposhi. He would one day be known as Oda Nobunaga. The two formed a friendship which lasted as around them the world changed. Both became Daimyo, both rose in power, both fought together. After Nobunaga’s death Tokugawa allied with Hideyoshi. Again after Hideyoshi’s death Tokugawa saw his chance and made a bid for power. Now he seeks to unite Japan, to bring about a peace with him at the head of it all.

Tenkai

Tenkai Profile
Tenkai is a powerful mage with a lot of knowledge on the Yokai and of magic. He is an old man who covers his face and wears glasses, often appearing to fight the evil that assails Japan. Tenkai eventually revealed that he was really the legendary villain Akechi Mitsuhide, who had assassinated Oda Nobunaga. He saw it as being something he had to do for the greater good, and for the safety of the entire world.

Torii Motatada

Torii Mototada Profile
An old friend of Ieyasu, as a child he was taken hostage by the Imagawa alongside Ieyasu where he served him then. Later on he aided in the campaign against the Hojo and earned a place at Ieyasu’s side with both his tactics and loyalty. At Fushimi Castle he made a last stand in defense of Kyoto and was killed fighting the forces of the Western Army.

Ii Naomasa

Ii Naomasa Profile
Ii Naomasa is a leadinig general of Tokugawa’s. He has served him since Ieyasu found him early on in his life. Commonly wearing red armor, he is seen as a warrior who is a battle scarred veteran.

Honda Tadakatsu

Honda Tadakatsu Profile
One of Tokugawa Ieyasu’s lead general. Tadakatsu has served under Ieyasu for a long time. He has shown up with resolve during Ieyasu’s most needed moments and has become known as one of the greatest warriors in the east.

Kuroda Kanbei

Kuroda Kanbei Profile
A genius strategist who served Toyotomi Hideyoshi, he was instrumental in Hideyoshi’s rise to power. He was imprisoned by Oda Nobunaga and lived many years in tortured isolation.

Kuroda Nagamasa

Nagamasa Profile
The son of Kuroda Kanbei. He served in the Korean campaign and fought under Hideyoshi. Early in life he was a hostage of Oda Nobunaga.

Tachibana Ginchiyo

Tachibana Ginchiyo Profile
The daughter of Tachibana Dosetsu, she ruled the Tachibana clan at a young age and was known for her ferocity and strength. She married Muneshige making him heir to the clan.

Tachibana Muneshige

Tachibana Muneshige Profile
Adopted into the Tachibana family, Muneshige is known as the greatest warrior in the West of Japan. He is married to Ginchiyo and has a mistress named Lady Yachiko.

Kikkawa Hiroie

Kikkawa Hiroie Profile
The son of Kikkawa Motoharu, Shiroie had big shoes to fill and was ill at matching up to the legends of his father, he now leads the Kikkawa clan.

Kobayakawa Hideaki

Kobayakawa Hideaki Profile
The son of Kinoshita Iesada, he was later adopted by Toyotomi Hideyashi then again adopted by Kobayakawa Takakage. He now leads the Kobayakawa clan under the Mori. At the battle of Sekigahara he fought on the side of the Western Army but defected turning the tide of the battle and helped ensure the Eastern Army’s victory.

Matsunaga Hisahide

Matsunaga Hisahide Profile
Once a Miyoshi retainer, he was famous for betraying his master, killing the shogun, and burning a great statue of Buddha. Afterwards he was taken into the Oda clan but rebelled often against Nobunaga. Eventually at Shigisan Castle he made a last stand and blew himself up. Seemingly in Nioh he somehow survived.

Senji Tome

Senji Tome Profile
A blacksmith who travels with William and aids him on his journeys.

Senji Muramasa

Muramasa Profile
One of Japan’s most famous swordsmiths. He is not the first Muramasa, and he will not be the last. His skill is great as is his understanding of using Amrita in the forging of his weapons. He famously created the weapon of Honda Tadakatsu. Tokugawa Ieyasu distrusts his weapons.

Fuku

Fuku Profile
An Onmyo Mage.

Marume Nagayoshi

Marume Nagayoshi Profile
An expert swordsman, Marume studied the blade under his master and spent many years perfecting his form and execution. Known as a master now himself, he aids William in the learning of his katana skills.

Yagyu Sekishusai

Yagyu Sekishusai Profile
A member of the Yagyu clan, he is a famed swordsman who combined military and combat knowledge with philosophies and religions such as Zen, Confucianism, and Buddhism. He has chosen to train William in the way of the sword.

Guardian Spirits

Kato

Kato Icon
“Fire elemental. Legend has t that a she-wolf hit by a shooting star in the first month of her pregnancy will give birth to a Kato. These fire-eating hounds are said to cause the forest fires sparked by lightning strikes. Harbingers of house fires and other misfortunes, Kato are venerated as servants of the God of Fire.”

Isonade

Isonade Icon
"Water elemental. Pronounced ‘EE-soh Nah-day,’ the name means ’ the sea’s caress.’ Following the northern sea winds, Isonade prowls just beneath the surface in search of prey. It uses its powerful tail to entangle and pull victims below the waves. By the time you feel the slightest breeze, it’s already too late. Believing it responsible for stirring up rough seas, local sailors make offerings to Isonade in a prayer for calm sailing.

Daiba-Washi

Daiba-Washi Icon
“Wind elemental. Pronounced ‘DIE-bah WAH-shee,’ the name means ‘horsekiller hawk.’ So called for a mysterious phenomenon in which the wind whips up and horses die suddenly. Observers hve described it as a whirlwind of glowing needles surrounding the hapless animal. Slashing the air in fron of the the horse with a sword will deflect it. On the other hand some actually venerate the Daiba-washi, believing that these same characteristics can shield them from danger.”

Fuze-Ushi

Fuse-Ushi Icon
“Fuse-ushi is a bull spirit that protects believers from misfortune. Bovines have long served alongside humans, providing strength in agriculture and other ways to support our lives. For this reason, some civilizations actually ban the consumption of their meat and venerate them as a sign of thanks. Pat its stomach as a sign of respect, and the Fuse-ushi will absorb negative Ki. The great Kuroda Nagamasa decorated his helm with a bull ornament in hopes of becoming a fierce warrior with a heart as gentle as a Fuse-ushi.”

Mizuchi

Mizuchi Icon
"Pronounced ‘MEE-zoo-chee,’ this dragon serves as guardian spirit of those who harbor great ambitions. Though they normally reside in the abysses of deep rivers, it is believed that upon their death they ascend to the heavens and transform into celestial dragons. True or not, this belief was so widespread in the Warring States period that many aspiring warriors fervently venerated the Mizuchi.

Raiken

Raiken Icon
“Pronounced ‘RYE-ken.’ Written with the characters for ‘thunder’ and ‘dog,’ this pair of holy hounds are venerated as protector spirits. Many of the ‘komainu’ statues placed in shrines throughout Japan resemble them. When those who would defile holy ground were struck down with divine lightning, it is the Raiken who loosed the bolts. Legend has it that when Tachibana Ginchiyo’s father, Tachibana Dosetsu, succeeded at cutting lighting, the defeated lightning spirit transformed into a Raiken, and has served as the Tachibana family’s guardian spirit ever since. It is said that every Raiken has a mate, and their true power manifests when they are paired.”

Paired Raiken

Paired Raiken Icon
“Written with the characters for ‘thunder’ and ‘dog,’ this pair of holy hounds are venerated as protector spirits. Many of the ‘komainu’ statues placed in shrines throughout Japan resemble them. When those who would defile holy ground were struck down with divine lightning, it is the Raiken who loosed the bolts. Legend has it that when Tachibana Ginchiyo’s father, Tachibana Dosetsu, succeeded at cutting lighting, the defeated lightning spirit transformed into a Raiken, and has served as the Tachibana family’s guardian spirit ever since. It is said that every Raiken has a mate, and their true power manifests when they are paired.”

Hi-nezumi

Hi-nezumi icon
“Pronounced ‘Hee-neh-zoo-mee.’ The Hi-nezumi lens strength to those possessing the will to face difficult problems head-on. In the famed ‘Tale of the Bamboo Cutter,’ one of the objects Princess Kaguya asks her would-be suitors to acquire is a Hi-nezumi fur coat. One suitor tried t take the easy route of purchasing such a coat, and failed the task. Perhaps he would have succeeded if he had faced the challenge with enough determination that a real Hi-nezumi had come to his aid.”

Aya-komori

Aya-komori Icon
“Pronounced ‘eye-uh KOH-more-ee,’ this guardian spirit has two sides to its nature. The ‘aya’ part means both ‘string,’ and the metaphorical ‘strings’ that connect people to society and each other. An Aya-komori’s outer self is vivacious and outgoing, but it prefer to reveal its inner self to those trapped by their bonds. Once an Aya-komori has offered its protection, its master may choose to continue coping with their situation or to break free of it entirely; the Aya-komori will help them either way.”

Itokuri

Hokuri Icon
"Pronounced ‘EE-toe COO-ree,’ this spider spirit is not content to merely protect people. It also likes to alter their fates, taking them down a winding path on the way to their destination. As an example, many loathe Matsunaga Hisahide for his villainy, while others remember him as one of the most cultivated gentlemen of his generation. Either way, his influence was huge and far-reaching, though it remains unclear to what extent an Itokuri was involved.

The Itokuri have particular fondness for treasures and historical items that have affected the fates of many. Some people even venerate the Itokuri merely for a chance to associate with such artifacts."

Enko

"Pronounced ‘Enko’ in Japanese, this flame-wreathed guardian

Enemies

Skeleton Warriors

Skeleton Warrior Profile
"Yokai taking the form of armored skeletons. Warriors who are unprepared for their death when it comes, or who take their own lives, return as these angry spirits to roam the battlefield and assault the living indiscriminately.

Being half-decayed skeletons, Skeleton Warriors lack stamina, but they feel no pain and will not stop fighting until they are completely destroyed. They often attack in groups armed with swords and spears, so care must be taken not to become surrounded by them."

Dweller

Oni-b

Karakasa Umbrella

Biwa Boku-boku

Lesser Um-Bozu

Mudman

Sentry

Spider

Kappa

Mujina

Yoki

Amrita Fiend

One-Eyed Imp

One-Eyed Oni

Onyudo

Nurkabe

Wheelmonk

Flying Bolt

Raven Tengu

Bosses

Derrick the Executioner

Derrick the Executioner Profile
An executioner of London. He is the first boss in the game. For this reason he is quite slow moving and uses slow wide swings in three hit combos. His charge has a delay but a wide area and he can slam the ground. Sometimes he will grab somewhat fast with black and white flames enveloping his hand. During his second phase he gets faster and hits harder but is similar to the first phase. Try to dodge towards his back and hit him in between his attacks. If you have your Living Weapon ready during the second phase activating it will instantly end the battle.

Onryoki

Onryoki Profile
Onryoki is a large demon with chains attacked to its wrists with giant iron balls on each end. This boss is generally slow moving in its first phase. As the first boss it is pretty simple, dodge to the side for its overhead strikes and get in 1-3 hits before retreating. When behind Onryoki it will spin, it is possible to dodge through the balls and chains but it is easier to just back off. For its second phase it gets faster and Onryoki gains combo attacks and a grapple. Try to hug its back as now its main reprisal is a quick swipe that is survivable. If you are far away Onryoki will pick up the iron balls and toss them at you, dodge twice if you aren’t confident in your ability to dodge right no time. If you have a living weapon save it for the second phase and wait for Onryoki to miss a heavy attack that leaves it open afterwards. This boss is weak to poison and resistant to fire.

Hino-Enma

Hino-Enma Profile
Hino-Enma is a succubus-like Yokai that is very fast. She has wings and can fly and feasts upon men. There are two main phases to this fight, ground phase and flying phase. When she’s in the air she will fire balls of paralysis that will stun you if they connect before swooping down upon you. Don’t dodge too early for either but both are completely avoidable. She can fire the paralysis orbs still while on the ground unless you are too close to her. Up close she has a few quick hit combos that generally do three strikes which you can dodge through then get hits in on her. Don’t stay in on the attack for too long as she’s quick to strike back and you always want to be ready to dodge her grapple attack which resembles a hugging animation. Side note, does not end in a friendly hug. She is weak to lightning and resist wind and paralysis. For this fight its a good idea to have anti-paralysis needles which can be used to get out of the stun.

Nue

Nue Profile
Nue is a creature similar to a manticore. It is like a tiger with a great maw, a face like a mask, spines, and exudes lightning. The safest place to stay during this fight is at Nue’s side. It can swipe its tail behind and strikes forwards with its claws. You can bait out these attack while being in relative safety. Sometimes Nue spray poison forwards which is best avoided if possible. The belly of the beast is its weakness. When out of ki Nue is still dangerous as its revival fires two lightning bolts in front of itself which can chain stun and one shot the player. When it is vibrating get ready to move and avoid multiple bolts of lightning. If it rears up it is about to roll, avoid at all costs and dodge to the sides. Nue can also fire a concentrated beam of lightning, move to Nue’s right, your left, and avoid it by getting close to Nue or dodge through the beam horizontally. This boss is weak to water and resists poison and lightning.

Tachibana Muneshige

Muneshige Boss Profile
Tachibana Muneshige is fast, really fast. He is the second boss of the level and you must duel him to proceed. He in my opinion is an easier fight than Nue. His ki management is easy to interrupt. When he is making a circle with his blade rush him and interrupt it as this buffs him. Often afterwards he does an iaito move, where he sheathes his blade and sprints at you. Get ready to dodge and don’t do so too early, this hit will hit hard. If far away he will pull out a bow and fire three shots, one down the middle and one on either side. These can be easily blocked or dodged forwards through. Be aggressive with Muneshige and do not let him regain stamina to allow for multiple critical hits. He also can charge up and do a flurry of swings, stay far away during this and he will use up a lot of stamina doing this. When you see him send his Guardian Spirit Raiken on the ground focus on dodging it when it shoots at you. Muneshige is weak to water and resists lightning.

Great Centipede

Great Centipede Profile
The Great Centipede is a massive Yokai made up of multiple pieces of crab rocks that exude poison. This boss is weak to wind, allegedly. It is resistant to earth, poison, and paralysis. Its arena is often filled with poison so it is a good idea to bring multiple antidotes. One can very easily face tank this boss as it does not deal too much damage with most of its attacks other than its slam. You can attack its rear and mid section to break apart the segments which will stun it for a time. The poison spray of the Great Centipede is its weakest attack as you will probably be poisoned already anyway. Anything it fires from its mouth can be easily dodged while its slam requires a bit of extra positioning. When the Great Centipede is approaching while gnashing its mandibles guard to block the hit.

Umi-Bozu

Umi-Bozu Profile:
The Umi-Bozu is a fight that is simply about recognizing patterns. To talk about the fight we also need to cover the arena a bit. It is a medium sized area surrounded by water with three great braziers. By lighting the fires in the level itself these braziers are each lit. At the start of the battle three smaller water monsters spawn where the fires are, each fire lit kills one with three spawning requiring all three fires to be lit for no adds to aid the boss in the fight. If they do spawn they can be ignored while making the rest of the fight more difficult. If you choose to fight them keep your eyes on the boss as the Umi-Bozu likes to fire a beam that one-shots while you’re distracted.

Joro-Gumo

Jorogumo ProfileThe Jorogumo is one of the easier fights in the game. This boss is allegedly weak to wind. She is mostly slow and a lot of her attacks are delayed. In the fight she’ll spit out webbing on the ground to slow you and also spray it onto you directly to slow you for a time. Avoid the webbing at all costs as it levels the playing field for her. Her weakness is her big spider butt but attacking it will cause her to go into a defensive mode. In it she crawls on the ground with her legs wrapped about her butt. The legs of the Jorogumo are shielded and protect her main body while her torso is still available. When low on health she’ll jump about quickly shooting more webs around the arena. Her two most dangerous attacks are a slow open armed grab, and when she spins as she crawls which both should be avoided at all costs.

Yuki-Onna

Yuki Onna Profile
The Yuki-Onna is water based and a lot of her attacks are fast moving bursts of damage. Never stand close to her for too long as she will stomp the ground and cause an ice explosion that hits very hard. She can throw her weapon spinning through the air leaving herself vulnerable. Don’t try to do trading of blows with her as she’ll win. When she rears up she is preparing a grappled attack and dodge this as soon as she starts running at you. Fire is your friend for this fight as she is weak to it. From time to time she’ll try to blow a kiss and will send out a spray of frost to slow you down. Over her head she can spawn two kinds of ice shards. One home in on you and fire. The other fire into the ground and explode after a short time.

White Tiger

White Tiger Profile
The White Tiger is very similar to Nue. It is weak to water and resists lightning, poison, and paralysis. From time to time it will meow leaving itself open to attack. This big cat is fast and swipes in front of it. Be way of standing behind the White Tiger as its tail can both spin and grab you. If they split get out from in between them because it means they are about to grab. When it rears up prepare for to dash at you. It can dash once or twice. If you stay in front of the White Tiger for too long it can do a backflip that strikes very hard. Sometimes when doing a backflip it will shoot out hard hitting fire or throw fire bombs around it. The fire you need to dodge through and the bombs can be avoided by staying close to the White Tiger. Finally it can fire a beam of lightning similar to Nue. The same tactic applies, hug its right side or dodge through it. This is the perfect opportunity to get some hits in.

Giant Toad

Giant Toad Profile
Giant Toad is a boss that is weak at short range. Try to stick to his backside and back off when he jumps up. When at the front he can swipe and thrust with his spear and deal massive amounts of damage in succession. Just in front of him with his pipe he can smack at close range or spray Yokai realm upon the floor stopping your stamina regeneration. He’s weak to lightning and earth, I suggest lightning as it slows him as well. At long range he can thrust with his spear or use his tongue. Demon Hanzo has a wide variety of ninja tools he can use, such as fire bombs, throwing weapons, and paralysis bombs.

Ogress

Ogress Profile
The Ogress is a very straight forward fight. She telegraphs every move of hers quite a bit allowing you to prepare to dodge early, but don’t do so too early as a lot of her attacks are delayed. Lady Tsukiyam can swipe, she can jump and land down with a slam, and smash her claws into the ground then bring up rocks which deal damage. When she’s low on health and stamina she’ll summon lilies that create Yokai realm around the arena. This will slow your Ki regeneration and hasten hers. A dangerous attack of hers is a flurry but if you hug close to her face it will go right over your head. Sometimes she’ll breath fire which you need to dodge through. Generally hug her butt. She is weak to water and earth.

Honda Tadakatsu

Honda Tadakatsu Boss Profile
Honda Tadakatsu is deceptive in his movements. He walks very slowly and telegraphs his attacks heavily but when they strike they are as swift as a coursing river. His attacks hit incredibly hard and he can heal and has a buff as the crystals are controlling him. For this fight you can lead him away from crystals then break them. When all three are broken he’ll be freed and end the fight. Alternatively you can take him head on. Being a spear user, most of his attacks are thrusts with his two main tactics being a charged lunge attack or a quick series of stabs. Try to stick to his backside and note that he is resistant to earth and weak to wind.

Okatsu

Okatsu Boss Profile
Okatsu is the tougher of the two. She’s incredibly fast. You’ll want to conserve your ki and be ready to dodge at any given moment’s notice. The only breathers you’ll get is if you drain her of her stamina and grapple her or knock her down. In between attacks she’ll throw knives in a spread that are best blocked. At times she’ll sheath her blade then rush forward with a powerful blow. As the fight goes on she’ll get faster and activate her living weapon. Okatsu will leap into the air and when she hovers for a second prepare to dodge as she’ll rocket right at you. Her guard is very weak so you can grapple her from time to time. She resists lightning and is weak to water.

Saika Magoichi

Saika Magoichi Boss Profile
Saika Magoichi can be a tough fight depending on your build. High ki regeneration is advised for this fight. Whenever you see him about to fire get ready to block or dodge, blocking his bullets is easy enough. When he throws fire bombs he will throw one or three< be wary of just dodging to the side, and instead try to dodge towards him. Rarely he’ll engage in melee with a few quick hits that deal low damage. When he whistles he’ll summon his Guardian Spirit to send out gusts of wind to where he is facing. Go to the sides to avoid this. When in the air he is very susceptible to ranged attacks and can be easily knocked down then hit while he’s on the ground. Up in the air he can swoop and grab William then throw him to the ground. He is resistant to fire so he takes little damage from the fire in the room. Saika Magoichi is weak to lightning and earth, so I suggest bringing the appropriate Guardian Spirit to be his elemental weakness.

Otani Yoshitsugu

Otani Yoshitsugu Boss Profile
Otani Yoshitsugu is fairly easy as far as bosses go. He focuses mainly on combos that have a poor turning radius allowing him to be easily sidestepped. When his Living Weapon activates he’s a bit dangerous. He can fire waves with his sword swings and do a spinning vertical slash from overhead that should be dodged instead of blocked. If he enters a superman flying pose get ready to dodge as he’ll zip through the air towards you, often doing it twice in a row. Weak to fire, resistant to water, Yoshitsugu presents little of a threat.

Shima Sakon

Shima Sakon Boss Profile
Of the two bosses in Sekigahara, Shima Sakon is definitely the tougher. He is quick moving with slow wind ups. His grapples and push attacks are very fast but either do no damage or little damage. Shima Sakon likes to control where you are. Watch out for his Living Weapon, as it is lightning and if you take a few hits you’ll get slowed down. If he leaps up into the air try to move as far away as possible. Don’t block his slam or his lightning explosions. Shima Sakon eats through stamina quickly but has a high guard. He is a decent target for grapple attacks.

Gasha-dokuro

Gasha-Dokuro Profile
The Gasha-dokuro is more of a puzzle than a straight up fight. You need to damage its limbs to allow Tenkai to pin the Gasha-dokuro. When you see purple/pink beams hitting the boss run up the slopes and get ready to hit its head. Manage your stamina well and if you have your Living Weapon ready pop it early right before the skeleton’s head slams onto the raised ground. Each time you break a limb you’ll have an opportunity to do this. In between the boss will slam its tail, feet, and hands wherever you happen to be. In general dodge towards the boss to escape being crushed. After being pinned the Gasha-dokuro will clap its hands at the top of the slope, make sure to drop down before it does this or you’ll be one-shot. This boss is weak to all elemental types and resists poison and paralysis.

Ishida Mitsunari

Ishida Mitsunari boss Profile
Ishida Mitsunari is a boss that contains a very quick fight. He is fast himself but also has low health all things considered. Mitsunari is weak to lightning, resists wind, paralysis, and poison. His speed is his greatest advantage in the fight. Watch out for his quick attacks and try to circle around him mid combos. He doesn’t have a good turning radius and leaves himself open from behind. From time to time he’ll swing his sword and fire projectile waves from it, these can be dodged through or blocked. Blocking them is the worse option as they deal raw wind damage which will go through your guard. Try to keep near the top or bottom of the slope in the arena. At times he will charge up a flurry of wave attacks in all directions, these can be dodged or using the elevation difference they can merely go above or below you. When he leaps back up in the air dodge immediately as he’s going to swoop at you with a grapple attack. If he runs out of stamina feel free to dump damage on him but understand he will only be staggered for a bit before reactivating his Living Weapon. Almost the entire fight he will have it active.

Obsidian Samurai

Obsidian Samurai Profile
Yasuke is a very simple fight. He uses an axe and a katana. When he has his axe out he is slower, even with his katana he is a bit slow. Circle around him when dodging and hit him from behind. You can repeat much of the tactics used on Honda. The Obsidian Samurai is weak to water and resists lightning, paralysis, and poison. Sometimes he will raise his weapon and buff himself. Rather than using a Living Weapon he’ll do a high leap and slam down with an electrical explosion. Fall back when you see him leap high. If he does a short jump instead he’ll be left wide open after. This fight is again, fairly easy. If you lose sloth it isn’t even a fight anymore he’ll just be a sitting duck.

Oda Nobunaga

Oda Nobunaga Profile
Nobunaga is a straight up fight with elemental elements. Yes I just typed that. Nobunaga is very fast but leaves you openings to get him. Dodge towards him and get behind him, he doesn’t have a great turning radius. Watch out as he summons his Living Weapons and Guardian Spirit. It will have a random element and effect. Fire he slams down from above. Lightning will cause bolts to track you similar to Nue. Wind will give him Mitsunari’s sword blasts. Earth will have big AoE’s of blindness. Water will have spots of water AoE and crystal shards. He is very weak to the sloth talisman and will end the fight at 25% health.

Edward Kelley

Edward Kelley Boss Profile
Edward Kelley is a tricky jerk who likes his spells. Watch out for his Guardian Spirit, he is fond of using it for spacing. He can send it chasing you, run away to the sides. He can send it under, keep moving till it surfaces. It can release in an AoE around him so get ready at any moment to leap back. From time to time he’ll throw spikes underhand really quickly, watch out. If he is running towards you dodge to the side.
He’ll either stab or grab you. Kelley can also teleport and will do so to make you lose focus, get ready to find him and dodge immediately. His guard is weak so its easy to grapple him.

Yamata-no-Orochi

Yamata-no-Orochi Profile
This eight headed serpent is a battle of attrition. Each head is resistant to its corresponding element and weak to all others except for the final head. The heads will have common attacks for all of them. They can spray an element, they can fire a projectile, they can swipe, lunge, and slam. Dodging them is a bit deceptive as you need to dodge a bit late for many of their attacks. It’s easy to get hit from behind when fighting a head so dodge often and back off after a few hits. After each attack the body of the serpent will come closer. After leaving one head behind it will gain all elements and have abilities similar to Nobunaga.
At zero health the head will flop down and its time to grapple attack it for the finishing move.

Hundred Eyes

Hundred Eyes Profile
Hundred Eyes is mostly a simple fight. He swings his staff wide and slams it in front of himself. If you stand at his back he’ll slam his back tendrils down to try and hit you. But it is still mostly safe behind him and you can stay there nearly the entire fight. In front of himself he can do a crossfire with beams that cause discord but its a bit hard to get hit by. When his health gets low enough he’ll stomp his butt down knocking you back if you’re right next to him. He’ll gain a shield and summon floating eyes. Run in circles to bunch them up then kill them with ease. They can drop medicine which is handy. After he’ll get back up and continue the fight. In his new phase he can summon crystals in the air, run to the side until they are all fired. If these hit you they can often be instant death. He’ll also summon the eyes but will continue to fight alongside them.

1 Like

I havent heard or seen anything about this game so I’m excited to see what it is all about. The most I’ve heard about it is that Chip Cheezum may really have enjoyed it so I’m sure this will be fantastic. Mostly with you at the helm of this ship. Take us away captain.

1 Like

Update 1 - Introduction

Welcome to Nioh! Let’s jump right in, the year is 1558 and our main character William Adams, a pirate who hunts for the mystical resource Amrita, is trapped in a cell awaiting execution on the orders of Queen Elizabeth the First. It is time to escape and fight our way out of the Tower of London. Also for the record I referred to myself as a captain before seeing @Callifornia2’s post.

Boss Information:

Derrick the Executioner Profile
An executioner of London. He is the first boss in the game. For this reason he is quite slow moving and uses slow wide swings in three hit combos. His charge has a delay but a wide area and he can slam the ground. Sometimes he will grab somewhat fast with black and white flames enveloping his hand. During his second phase he gets faster and hits harder but is similar to the first phase. Try to dodge towards his back and hit him in between his attacks. If you have your Living Weapon ready during the second phase activating it will instantly end the battle.

Characters Introduced

William Adams

William Adams Profile

Edward Kelly

Edward Kelly Profile

4 Likes

So is this where I tell you I may have psychic abilities and do this often enough that my husband is no longer surprised?

Also silver haired daddy in a top hat? Sign me up.

2 Likes

Ah, Ni-Oh, the latest in the Ninja Gaiden expanded universe~

2 Likes

Just wait till you see him in a hot spring and a clean shave lol. And I still dunno how you did it! It ain’t Halloween anymore so why are you being spooky.

i’ve heard it’s similar to Ninja Gaiden but I’ve never played one.

Calli just has this psychic ability to say things other people say usually just before it happens.

1 Like

I really wish William got some more hair options as the game went out, or with DLC, but there’s other customization options at least. Looking forward to the build choice and maybe lending some of the more esoteric mechanical knowledge when relevant.

1 Like

Update 2 - Isle of Demons

William has landed in Japan in the Kyushu region to the southwest. Alone he walks the land in search of his Guardian Spirit that was stolen from him by the alchemist Edward Kelly. The land is full of strife as bandits have taken over the entire village and areas surrounding it. Yokai, dangerous Japanese spirits also inhabit the Isle of Demons and seek to take the Amrita and life from whoever dares tread in their territory. We fight our first real boss, Onryoki. After defeating the demon in the bowels of a ship we are greeted by the ninja Hattori Hanzo. He seeks our aid and in return for William’s help he expects that things will work out for William.

Boss Information:

Onryoki Profile

Onryoki is a large demon with chains attacked to its wrists with giant iron balls on each end. This boss is generally slow moving in its first phase. As the first boss it is pretty simple, dodge to the side for its overhead strikes and get in 1-3 hits before retreating. When behind Onryoki it will spin, it is possible to dodge through the balls and chains but it is easier to just back off. For its second phase it gets faster and Onryoki gains combo attacks and a grapple. Try to hug its back as now its main reprisal is a quick swipe that is survivable. If you are far away Onryoki will pick up the iron balls and toss them at you, dodge twice if you aren’t confident in your ability to dodge right no time. If you have a living weapon save it for the second phase and wait for Onryoki to miss a heavy attack that leaves it open afterwards. This boss is weak to poison and resistant to fire.

Characters Introduced

Hattori Hanzo

Hattori Hanzo Profile

3 Likes

I don’t know. I always love a man with a little scruff. I’m sorry! I don’t mean to be spooky it’s just my nature! Also sleepy puppies are the cutiest of puppies. I accept this.

Well, not only does it share some similarities with Ninja Gaiden, sharing the same developers and certain design ethos (and maybe animations?), but one of the DLCs (not sure if this is spoilers?) actually features a Hayabusa ninja, apparently!

1 Like

Some Neat Facts time, the armor set William uses in his official art and most of the intro cinematic is the Youngblood Armor set. There’s one small segment (the fiery stairs part) where he’s wearing the Unusual Armor set, whose description mentions that it suits William, while the Youngblood set doesn’t mention Will at all.

One of my favorite things about Nioh is entirely the Guardian Spirits. Nioh’s packing a lot of ghost animal pals to befriend and leverage against your foes and each is distinct from each other, even among Spirits of the same element. Let’s talk about the three starters you can pick from after the Tower of London; Kato, Isonade, and Daiba-Washi, but let’s cover the basics of Spirits first.

Every Spirit packs Five abilities, plus a baseline 20% Spirit Protection just for having a Guardian Spirit active. Each ability besides the Spirit Protection requires a minimum Spirit to be active, earlier spirits requiring less Spirit for their effects. With the starting 5 spirit you’ll get the second passive ability of the three starters for sure, the third generally coming online with 6. Getting to 11 Spirit will activate each of the three starters sixth ability, and such each earlier ability. Later spirits have higher requirements to activate their passives, and vary in complexity of what those passives do.

Each also has a stat breakdown for their Living Weapon effect, Might is a number that determines how much Guage is lost when your hit using it, with higher numbers being better. It also uses letter grades to note how much of the Gauge attacking during Living Weapon costs (Action), Edit:I was wrong on what Recovery does, it’s instead how much is added to the Gauge when you gain Amrita during Living Weapon, increasing duration.(Recovery), how effective the Living Weapon is when used at Critical HP (Tenacity), and the rate at which the Gauge is charged by collecting Amrita (Gauge Rate). It also shows the percentage damage boost while using that Guardian’s Living Weapon, the Elemental Damage added during it, and how long Living Weapon will last if you don’t attack or get hit. And then there’s the Summon Attack each Guardian has that can be activated by specific Items or hitting Circle + Triangle during Living Weapon, with each Spirit having it’s own unique attack.

If it sounds like a lot, it kind of is. Five passive abilities, some Living Weapons being noticeably less damage, some having Summon Attacks of varying degrees of usefulness, there’s a lot of angles to what Spirit you want to use. It’s also why I appreciate the system because the depth is such that based on what you want out of your guardian spirit and what your play style is there’s a depth of choice. Let’s finally look at the first three spirits.

Kato has Close Combat Attack 5%; Ki +10; Ki Recovery Speed +20%; Close Combat Ki Usage (Critical) -20%; and Skill Damage +15%

Summary

Close Combat Attack is pretty simple, 5% damage with melee weapons. Ki is just more max Ki and +10 is a decent chunk early on. Tolvo has 98 in video there, so that’d be a flat 10% boost to Ki. Recovery Speed is pretty self explanatory, Ki regenerates 20% faster. Doesn’t affect how quickly it starts regenerating however. The (Critical) tag comes up on armor and spirit skills and means when below 30% max HP the effect turns on. If your HP bar is flashing red, Critical skills are active. -20% Ki usage on melee attacks is pretty good in a pinch. Skill Damage just makes Skills do more damage, which stacks with Close Combat Attack boosts. Kato’s Living Weapon boasts excellent Might, Tenacity and Recovery while having average Action and Gauge Rate, and packs a 20% boost to damage making it a really good Living Weapon spirit. Really Kato’s only weakness is that it’s summon attack is fairly weak, the fire wolf leaps forward at a steep downward angle; if lined up it can hit twice but the damage is pretty low even with both hits connecting. If you can get the two hit with the Summon you can just stab your enemy and it’s a better use of the Gauge. All around Kato’s a solid offensive spirit that if you want to be aggressive will do work for you. Also is a heckin’ good doggo, Kato gets a 13/10.

Isonade has Sense Enemies on Radar; Life +100; Close Combat Health Recovery 100; Human Close Combat Damage +9%; Strong Attack Ki Usage -10%

Summary

Isonade is my favorite starter entirely because of Sense Enemies on Radar. It makes all enemies show up on the Radar on the top right of the screen which is incredibly powerful in a Souls game. Life +100 is just an additional 100 HP. A decent chunk early on again, but drops off faster than Ki bonuses. Close Combat Health Recovery means you heal the amount when you get a kill with a Melee weapon, a solid way to not need to burn Elixirs working through a level. Human being in a skill name means it only works against Human enemies, so Isonade does more damage to Humans with melee attack than Kato, but Kato does more against Yokai. Finally Strong Attack Ki Usage is just less Ki spent with Strong Attacks, whose usefulness depends on not only your weapon but your stance as well. As a rule they use more Ki so -10% isn’t bad but it’s not the reason to use Isonade. Isonade’s Living Weapon is worse than Kato’s in every category except Action, where’s it’s one letter better, applying 10% damage boost and Water instead of 20% and Fire. Isonade’s Summon is a little difficult to use, summoning a ghost shark that dashes around a decent sized area in front of you at various heights, doing really weak damage that has high staggering potential to enemies that the spirit touches, until it’s final dash where is rapidly bites as it passes through the area, doing a decent chunk of damage to any enemy in its path. It’s unpredictable and hard to line up so it hits where you need it to, but it can rapidly chunk through guarding enemy’s ki, setting you up to finish the job. Isonade is real, and strong, and they’re my friend, and gets a 13/10.

Daiba-Washi has Evasion Ki Usage -15%; Equipment Drop Rate +20%; Quick Attack Damage +8%; Luck +40; Life Recovery (Finished Using Living Weapon) +400

Summary

Evasion Ki Usage does what is says on the tin, and 15% less Ki to dodge is good regardless of armor type. Light lets you leverage your better dodging further, and for Heavy users it mitigates the cost of Dodging so you can hit more. Equipment Drop Rate is better chances of something dropping from enemies, good for kitting yourself out. Quick Attack Damage is solid, giving your Light/Quick/Square attacks just a bit of a damage boost. Notably Quick and Strong Attack boosts don’t apply to Skills, while Close Combat Attack boosts do. Yes this means Kato is really good with Skills. Luck is a secondary stat you can really only increase with gear or Spirits, affecting drop rates and chances of getting rarer gear. The Life Recovery bit means when your Living Weapon ends for any reason, you get healed for the amount. 400 isn’t bad by any stretch and manages to keep up better than Isonade’s Close Combat Life Recovery. Daiba-Washi’s living weapon is even setup to leverage this bonus, with 5% damage boost and Wind and the worst Might of the starter spirits (680 while Kato and Isonade both have over 1200) but with the best possible Gauge Rate and good Recovery means you can Living Weapon often to get that healing. Daiba-Washi’s summon attack is probably the strongest of the Starters, appearing to cause a small tornado to pop up directly in front of William after a short delay. Lighter enemies (like every Human enemy in the game.) get knocked into the air when hit by this and until later difficulties they’re dramatically open to the ground stab you can perform on grounded enemies with Strong Attack/Triangle. Larger enemies just take some low damage hits that stagger even Yokai, making it a decent way to interrupt a combo and get a few hits in. Since release a patch to reduce air juggle capabilities rolled around, meaning you can’t keep enemies in the air forever anymore. A solid pick regardless, good for dodge-y types that also want to get some more and better stuff more often while having some self sustain. Daiba-Washi earns a 12/10.

3 Likes

Yeah @Zero-ELEC I guess that would count as spoilers, but that is neat.

@Callifornia2 I might have to avoid giving him a clean shave later on haha.

@ArkInBlack thanks for all the info. Perhaps you should be the one doing the LP lol. I did not know all that about the Guardian Spirits. II like to take Daiba for the dodging but I probably should go with Kato more often.

1 Like

I’m actually kinda bad at the game, a lot of this knowledge is what I use to overcome my so-so execution. I did a fresh start to see how bad I’d be without hundreds of skill points to use and took an hour to get through the Isle of Demons, and only part of that was because I spent too much time trying to figure out how Dual Katanas work with less than ten skill points to spend. (Very poorly when you’re used to having 200ish Ki and Living Water and suddenly have neither.)

1 Like

I’m not really sure whether or not I’m good at the game myself. But it is such a hard game I’d still say you’re good for just being able too even play it and beat stuff. Most people I know can’t get past Isle of Demons.

1 Like

Update 3 - Deep In the Shadows

Kuroda Kanbei has tasked William Adams with finding his son Nagamasa. He has gone beneath the mountains of Nakatsu in the Kyushu region to defeat a band of rogues but is yet to return.Upon arrival William is greet by Nekomata a strange spirit of a white cat. He acts as a guide during the mission into the caverns and abyss below the mountains. Beyond mere bandits there are Yokai are present and one of greater power seems to be deeper in. We face the third boss of Nioh, the succubus-like Hino-Enma. After fighting her William finds Nagamasa who is mostly unharmed and go on to then drink with the samurai much to William’s frustration, and meet a mysterious female ninja.

Boss Information:

Hino-Enma Profile
Hino-Enma is a succubus-like Yokai that is very fast. She has wings and can fly and feasts upon men. There are two main phases to this fight, ground phase and flying phase. When she’s in the air she will fire balls of paralysis that will stun you if they connect before swooping down upon you. Don’t dodge too early for either but both are completely avoidable. She can fire the paralysis orbs still while on the ground unless you are too close to her. Up close she has a few quick hit combos that generally do three strikes which you can dodge through then get hits in on her. Don’t stay in on the attack for too long as she’s quick to strike back and you always want to be ready to dodge her grapple attack which resembles a hugging animation. Side note, does not end in a friendly hug. She is weak to lightning and resist wind and paralysis. For this fight its a good idea to have anti-paralysis needles which can be used to get out of the stun.

Characters Introduced

Nekomata

Nekomata Profile

Kuroda Kanbei

Kuroda Kanbei Profile

Kuroda Nagamasa

Nagamasa Profile

Okatsu

Okatsu Profile

2 Likes

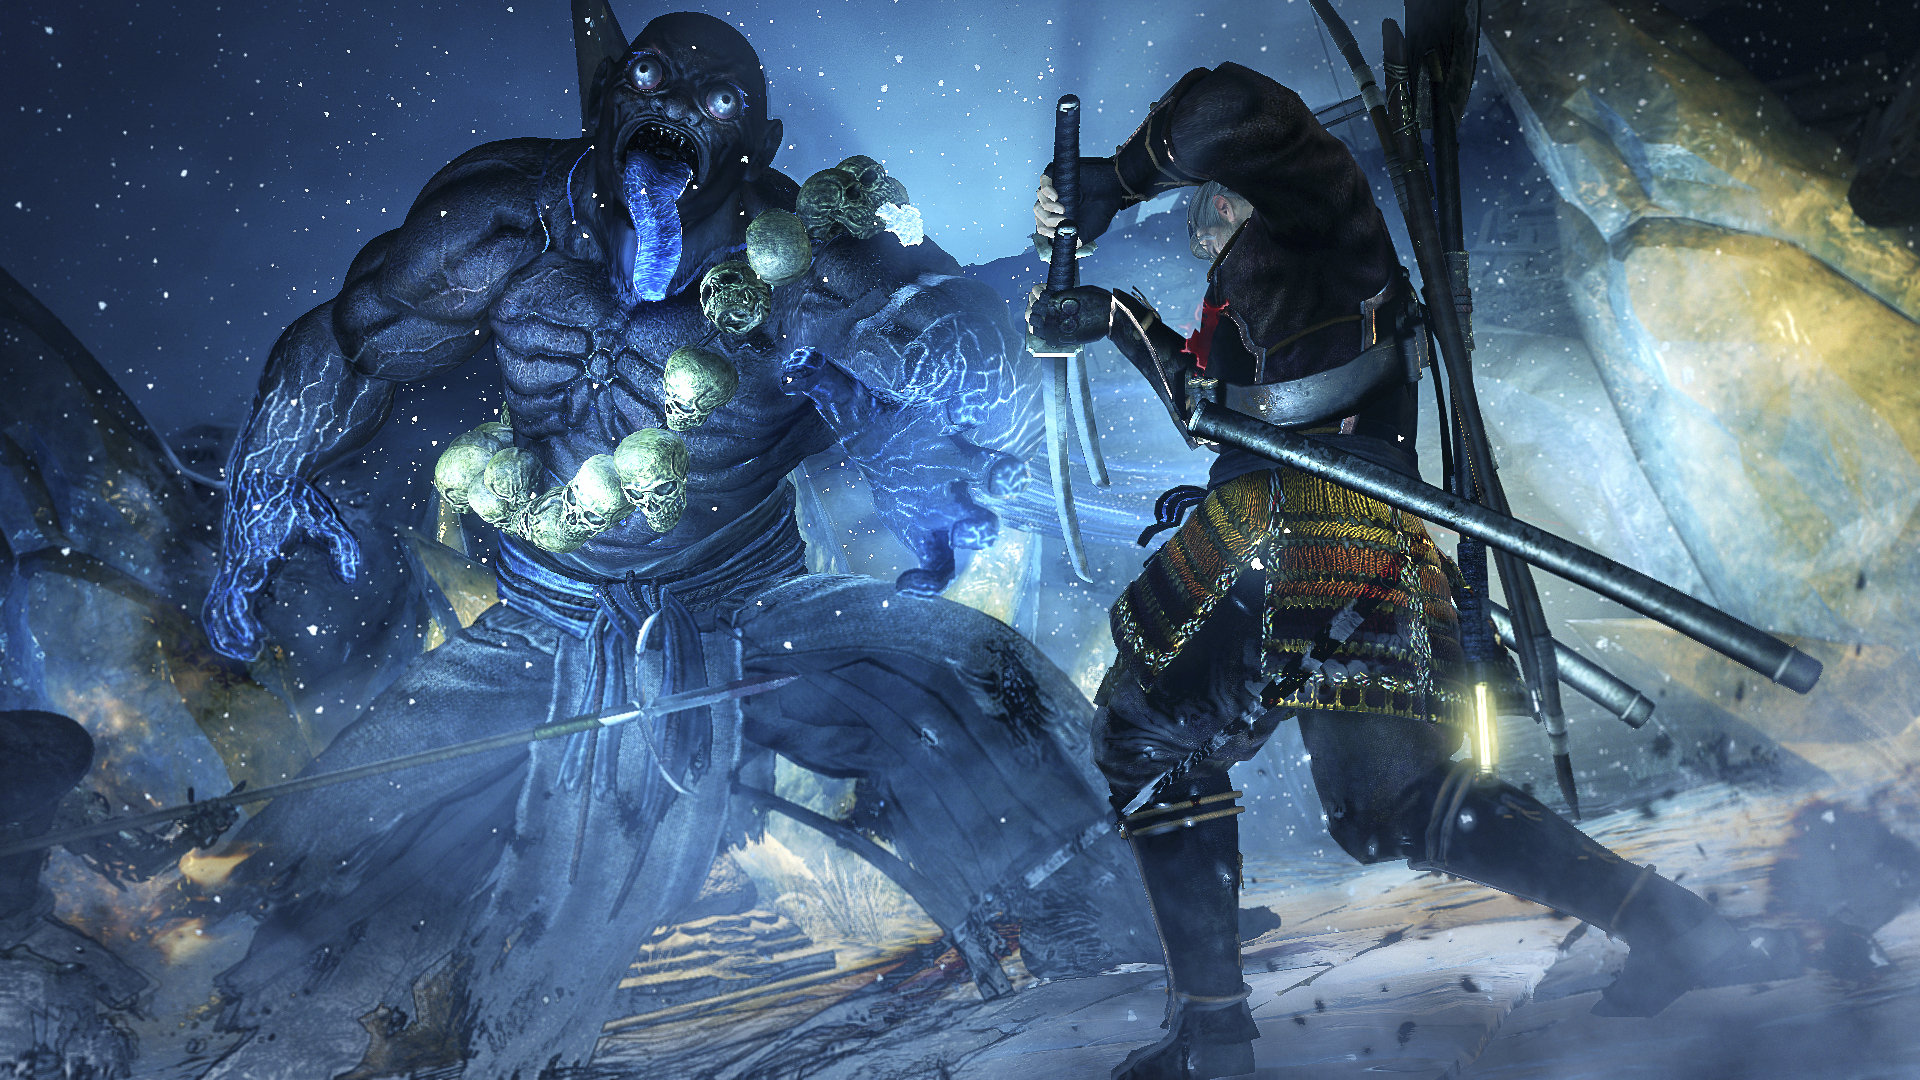
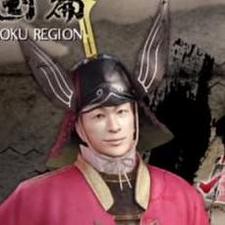
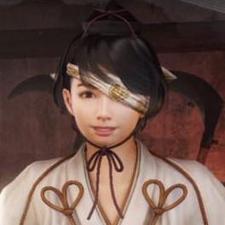
I love Okatsu destroying William there, like damn. He respawned at a shrine after that cutscene, for sure.

Mechanical talking points of today, our new Spirit pal, Nurikabe, Ninjutsu, Onmyo Magics, and a breakdown of the Elements.

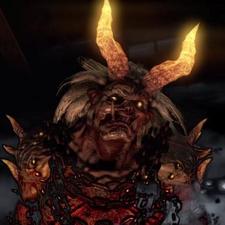
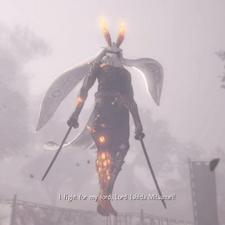
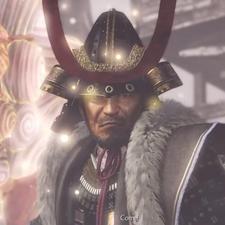
First off, Fuse-Ushi! Life +200; Guard Ki Usage -20%; vs. Poison +20; Recurrent Damage from Poison -25%; Life Recovery From Amrita Absorption +30

Summary

This Bull Found One Weird Trick to Ward Off Poison! Antidote Salesmen hate him!
Joking aside, Fuse-Ushi is there for Blocking types. Guard Ki Usage is less Ki spent to block and 20% is big. vs. Poison is just poison resist and +20 is A Lot. Recurrent Damage reduces the damage ticks of ongoing damage effects like Fire and Poison, here only applying to Poison to cement Fuse-Ushi’s hatred of poison. The last passive is neat if unimpressive, healing William for 30 Life every time he absorbs Amrita, which is when he checks a deady body, opens a chest, kills an enemy. Really the Passives worth considering is Guard Ki Usage and early on the bonus Life. If you’re in a poison-rich area that’ll come in handy, if you aren’t it’s two empty slots. Good thing Fuse-Ushi’s Living Weapon stats are good. +15% damage with Earth, higher Might, than the three starters. High Action and Recovery, balanced by average Tenacity and bad Gauge Rate. It’s a build up but once the Bull is loose you’ll start bowling over your opposition. Fuse-Ushi’s summon attack is Kato, but good. Coming down at the same angle, instead of doing a short spin on landing Fuse-Ushi hits the ground running and keeps going, doing good Earth damage and battering aside anyone he hits. Bigger enemies can get hit multiple times, making it good against enemies like the Ogres showcased in the video. Does less damage before hitting the ground but once he’s charging he goes on a fair distance. Outshone later on, solid beginner Spirit with a good summon attack. 12/10

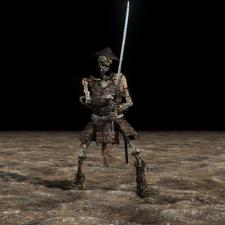
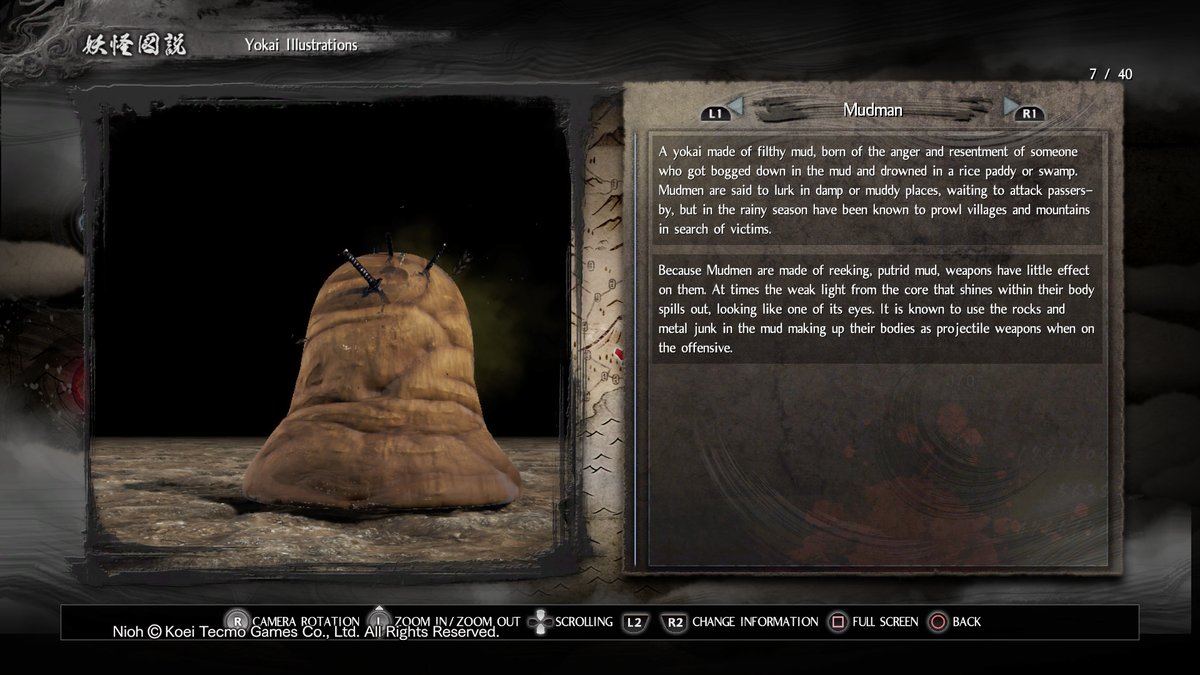
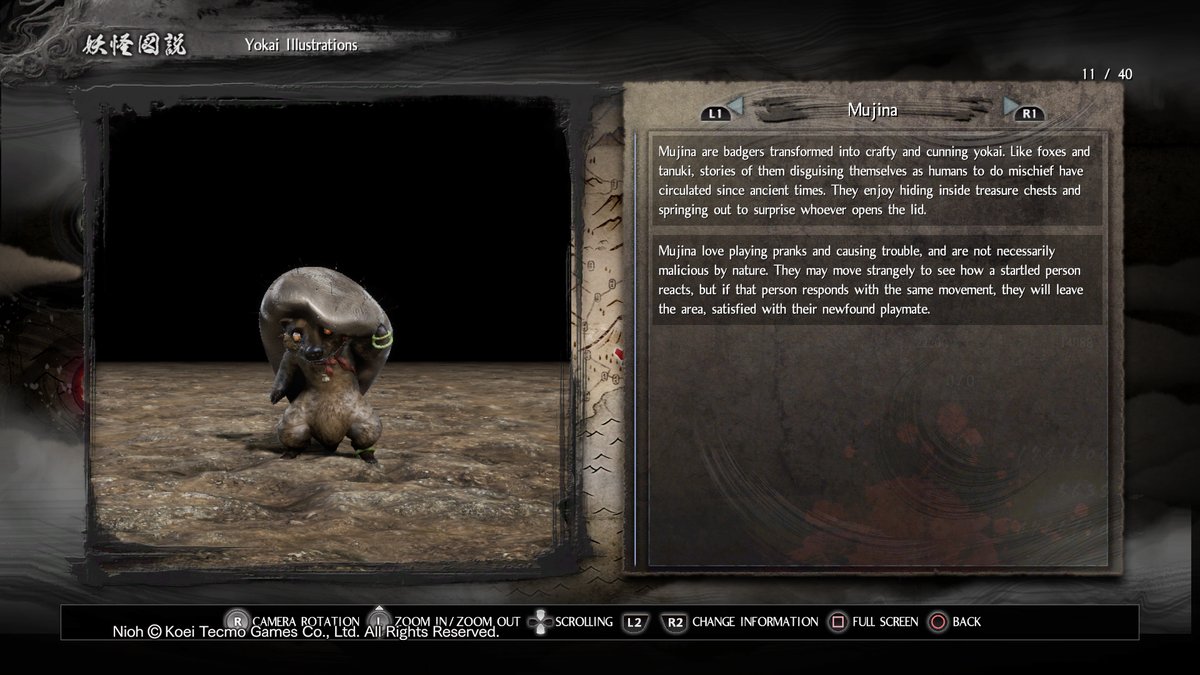
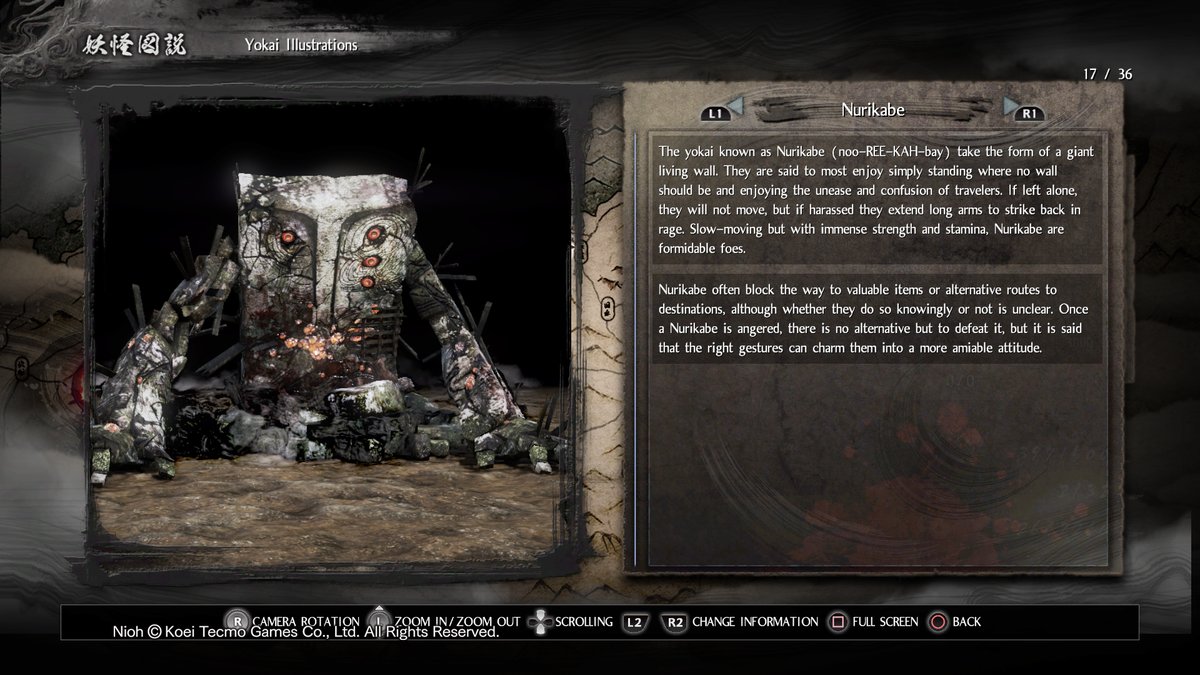
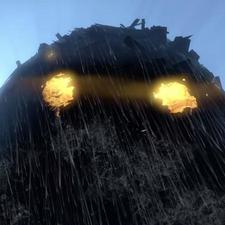
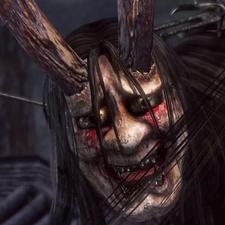
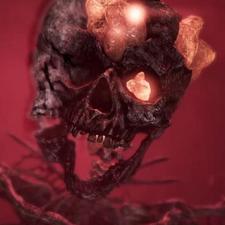
Nurikabe (the Wall yokai)

Summary

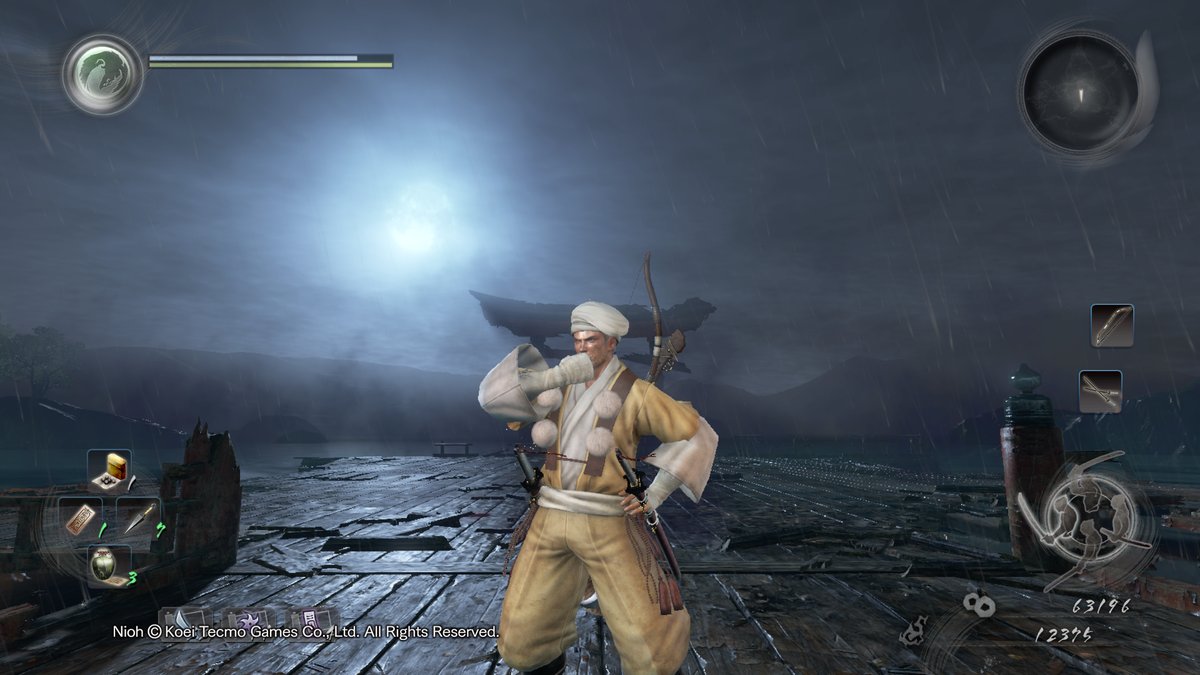
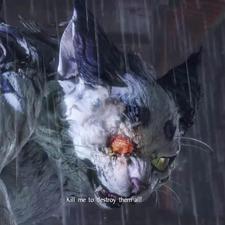
They have a trick to it poorly hinted at by that Amrita memory from the corpse Tolvo picked up before Nekomata rudely interrupted. More helpful is the graves (revenant summon points) as each Grave, player and NPC, list their cause of death. Deaths caused by nurikabe read “killed for their _____ behavior”, with word like friendly in the blank, with a color. Friendly is Blue, Neutral is Yellow, and finally is Aggressive or Hostile, I forget which, that’s colored Red. Eagle eyed viewers will note when Tolvo pulls up the emote menu each has a color associated with this and you might see where this is going. Emoting the correct type of gesture at Nurikabe will have the yokai peacefully leave, dropping loot (but not Amrita) as if they were defeated. The first time you incorrectly gesture or hit them, their eyes will narrow and glow fiercer. A second incorrect gesture/strike leads to a tussle. The specific gesture doesn’t matter, just the color associated with it. So if you see graves near a nurikabe, check what killed them, and then use the other types of Gesture until you hit the correct one and you won’t need to fight a wall.

Ninjutsu; How I Learned To Stop Worrying And Love The Mega Horoku-Dama

Summary

Here’s the trick to Nioh, everything is viable and cool. Ninjutsu, like Onmyo, runs off its own point pool that putting points into the related stat increases, with non-passive skills having a Ready Cost with your Limit being based the related stat, Dexterity for Ninjutsu. You can’t ready Ninjutsu than your Ninjutsu limit, can’t have more Onmyo than your Onmyo limit.
Jutsus readied work like spells from Dark Souls, you have a number of uses that refill with a stop a shrine. However they occupy the Item slots in the lower left, to be assigned as you like. They can even be used from the menu if you have a long duration low impact buff.

At the start of Isle of Demons you have a tiny amount of Ninja skills open, but immediately after Isle of Demons you unlock the mission Way of the Ninja:Novice which is largely a tutorial on Ninjutsu and some of the skills you unlock the ability to purchase after completing it. This is how all the skill trees work, you have a section immediately available and unlock Dojo Missions as you go through the game that you need to complete for access to the rest.

Most of the early tools are things you can get from consumable items you just find, one of the immediately available skills is just being able to prepare 3 Kayaku-Dama (Firebombs) whenever you visit a shrine, which are uncommon items you can find as loot or just buy in the shop between missions. The Novice skills open up some of Ninjutsu’s unique abilities, the Sneak Attack Tolvo shown being one but also Anti-Toxin Pills and Shikan-gan Pills. These are Antidote+ and Anti-paralytic Needle+, clearing the same effecting and also giving a hefty boost to resist their specific element (Notably enough to require Hino-Enma a second blast to paralyze you.) They’re also really cheap in Ready Cost and you get the three pills for free every shrine visit.

There’s other self-buff items such as the Power Pill which is just a good reliably way to get a damage buff and importantly every item skill has multiple ranks, each rank costs more skill points to buy but gives you an additional package to ready, usually for 1 less Ready Cost than the previous ranks. You can in fact stack multiple packages so you can Ready Power Pill three times to have 6 Power Pills to use between shrine visits, and even if you don’t need 6 power pills, the third rank costs 2 less to Ready than the first rank, letting you slot in more tricks. And boy howdy does Ninjutsu have a lot of tricks, ranging from even better Firebombs, caltrops, bombs that leave caltrops, throwable poison gas clouds, mines, mines that also leave paralyzing gas, bombs that leave caltrops, and the Mega Horoku-Dama mentioned at the top that is a torso-sized bomb that William has to heft and throw before it explodes into Horoku-Dama, the black firebomb equivalent, making it a big cluster bomb.

For the more personal, self buffing types there’s things to let you move without noise and become invisible, dramatically reducing the radius enemies will detect you, increased ammo capacity for your ranged weapons, a way to negate terrain effects like Fire, and culminating in this type of Ninjutsu are Touch-Me-Not and Quick Change. Touch-Me-Not is incredibly cheap in point cost, Ready Cost, and gives a fair amount per package, the rub being it makes you explode when you die. Not useful unless you’re Visitor, acting as a summon ala Souls-series, until you bring Quick-Change into the mix. While you have the Quick-Change buff active, after a short delay when you die, you reappear above where you died with 30% of your max HP. This resets all buffs and debuffs and you’re dropping, which can leave you vulnerable to getting hit again and dying for real, but Touch-Me-Not still triggers and will knockback and buy space for you having cheated death to heal or just apply another Quick-Change, because you can 100% do a dropping attack from a Quick-Change death.

Long story short, if you want to do Ninja bullshit, invest in Dexterity and by all means do it, it’s right there for you to become the next Hokage. Believe it!

Onmyo Magic; The Arcanist’s Cookbook

Summary

Onmyo is like Ninjutsu in terms of working of a separate point pool, Ready Cost, and Limit. Uses the Magic Stat instead of Dexterity. However it lacks anyway to inflict or cure Poison or Paralysis, and only has a single Talisman that increases resistance to both. Onmyo deals with the five elements, there’s some skills to debuff your enemies and buff yourself, a few things to enhance your ability to deal with Yokai, and a few odds and ends like sacrificing your weapons Familiarity (Each individual weapon gets XP as you use it, eventually increasing all of it’s numbers, to a maximum based on its rarity. This is separate from your Proficiency which is how much you’ve used a weapon type. Have I mentioned there’s a lot to Nioh?) to deal non-elemental damage or do a large AoE knockback.

All five of the elements get a weapon enchantment, making your weapon deal that element based on your magic. These are largely the only things available to you until you do Way of the Mage Novice, which isn’t unlocked after Isle of Demons. Later you unlock a projectile shot for an element, a damage resist for the element, and culminates in a big flashy unique attack spell for each of the five elements. Elements are important but we’ll cover them separately.

Other things include reducing a specific enemy’s damage (more effective than you might think), reducing an enemy’s defense, this line culminates in the Sloth Talisman, the debuff so powerful every boss in all three DLCs are set so the debuff duration is like five seconds. All it does is slow down the enemy affected. By half. This includes attack animations. Sloth is incredibly powerful and is a reason to be a Mage in and of itself. And there’s more and while it’s not as ridiculous it’s still very good, like Ninjutsu where there’s a lot and it’s all good.

One of my personal favorites is Guardian Talisman. This skill gives you a refilling version of the item Moment Talisman, which when used has your Guardian Spirit do its Summon Attack, which means this Talisman entirely depends on what your Spirit’s summon attack if it’s useful, but means it’s more flexible investment than say, Fire Shot because I can be more than a single projectile of fire, and how Daiba-Washi got abused to hell and back before patches rolled in.

Long story short, Onmyo magic is powerful because debuffs are powerful and the Elements are even more powerful and Onmyo’s how you really leverage them.

The Elements; By the gods, fear them, Laurence.

Summary

The five elements are Fire, Water, Lightning, Wind, Earth. Each has their own unique color for damage and their own unique status effect they can apply if you or an enemy take enough damage of that type. Being resistant to an element makes it much harder for that element’s status effect you hit you. Each buff and debuff shows on the health bar of the affected as an icon, if the icon is bright it’s in effect and counting down, if it’s dim it’s showing a build up, like for the five elemental effects or Poison and Paralysis.

Fire’s status effect is Scorched, which means you’re on fire. You rapidly take low fire damage (that doesn’t refresh the status) for the duration. Dodging while Scorched reduces the duration by about 1/4th of the max duration, three dodges of any sort will clear the effect, which is about how fast the ticks of damage come and how short the duration is. Poison comparatively does its damage much slower, in larger chunks, and lasts longer. But Scorched comes from dealing fire damage, while poisoned weapons don’t deal the upfront Fire damage like a Fire Enchant does. A target can be poisoned and scorched at the same time. Scorched is still the weakest of the five elemental status effects.

Water’s status effect is Saturated. Saturated targets take significantly more physical damage. Want to hurt a boss more with stabbing? Use water damage to Saturate them. This stacks with Weakness Talisman, meaning apply both and the boss is in for a world of hurt.

Lightning’s status effect is Electrified. It’s mini-Sloth. Electrified targets move and attack and do everything slightly slower. Not as slow as a target affected by Sloth but guess what, they stack. Both at once are incredibly rare to deal with as a player. Luckily for enemies and you, being resistant to Lightning makes it REALLY hard to apply Electrified. Easily the scariest elemental effect to be facing.

Wind’s status effect is Blustered. It reduces physical damage dealt by a good chunk. Stacks with the Devigorate Talisman meaning with both up a boss does way less physical damage. Less good if they really only do elemental damage, and overall not as useful as making something die easier. Still better than Scorched by itself.

Earth’s status effect is Muddied. It increases Ki costs and reduces Ki regen. While it does slow their Ki regen in Yokai pools, the second part isn’t super good against Yokai. However the first part is pretty significant against hearty enemies across the board. You can break through a guarding enemy’s Ki and Grapple them much faster if they’re muddied, and while Yokai pack Super Armor with any amount of Ki, when Ki-less any hit staggers them out of animations. Watch out since every Yokai has a panic move it’ll do if you wail on it too long that it can’t get staggered out of and spawns a yokai pool. Muddied is good against humans and really good against Yokai, by itself.

Now, that’s all well and good, but none of the explains why Elements are so, so good. It’s because there’s a Sixth elemental effect, one without an associated Element. Discord (Or confusion, it’s translated different between regions.) is applied when a target is under two different elemental status effects at the same time. Note Poison/Paralysis/Every Onmyo-specific debuff are not elemental at all and do not count. While Discorded, Human Enemies (or you) lose dramatically more Ki and take dramatically more damage, stacking with every other debuff under the sun so Weakness Talisman, Sloth Talisman, put Lightning on your blade and hit until they’re Electrified then activate a Water Living Weapon and apply Saturated and you can vanish a boss’ health bar while he moves in super slowmo.

Discord works differently against Yokai. They also take the same massive increase to damage received, but rather than taking more Ki damage, their Ki is SET TO ZERO FOR THE DURATION OF THE DISCORD. Refer back to earlier when I noted Yokai without Ki are Staggered by every hit they take. Yokai’s desperation attack is way less effective under Discord, since while it can hit you and knock you out of combos, they still can’t have Ki, even in a Yokai Pool so you can just resume slamming into them at your leisure. A yokai enemy who’s Discorded is at your mercy for the entire duration of the effect and it lasts a good while. Here is what you can do fresh off the Liefde and some point investment.

1 Like

Very great info, it seems like you should have your own wiki. I might add a section beneath information linking to your posts for those who want more stats and stuff.