Well, not only does it share some similarities with Ninja Gaiden, sharing the same developers and certain design ethos (and maybe animations?), but one of the DLCs (not sure if this is spoilers?) actually features a Hayabusa ninja, apparently!
1 Like
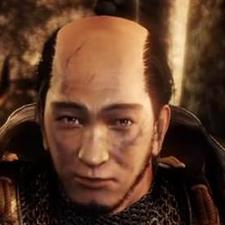
Some Neat Facts time, the armor set William uses in his official art and most of the intro cinematic is the Youngblood Armor set. There’s one small segment (the fiery stairs part) where he’s wearing the Unusual Armor set, whose description mentions that it suits William, while the Youngblood set doesn’t mention Will at all.
One of my favorite things about Nioh is entirely the Guardian Spirits. Nioh’s packing a lot of ghost animal pals to befriend and leverage against your foes and each is distinct from each other, even among Spirits of the same element. Let’s talk about the three starters you can pick from after the Tower of London; Kato, Isonade, and Daiba-Washi, but let’s cover the basics of Spirits first.
Every Spirit packs Five abilities, plus a baseline 20% Spirit Protection just for having a Guardian Spirit active. Each ability besides the Spirit Protection requires a minimum Spirit to be active, earlier spirits requiring less Spirit for their effects. With the starting 5 spirit you’ll get the second passive ability of the three starters for sure, the third generally coming online with 6. Getting to 11 Spirit will activate each of the three starters sixth ability, and such each earlier ability. Later spirits have higher requirements to activate their passives, and vary in complexity of what those passives do.
Each also has a stat breakdown for their Living Weapon effect, Might is a number that determines how much Guage is lost when your hit using it, with higher numbers being better. It also uses letter grades to note how much of the Gauge attacking during Living Weapon costs (Action), Edit:I was wrong on what Recovery does, it’s instead how much is added to the Gauge when you gain Amrita during Living Weapon, increasing duration.(Recovery), how effective the Living Weapon is when used at Critical HP (Tenacity), and the rate at which the Gauge is charged by collecting Amrita (Gauge Rate). It also shows the percentage damage boost while using that Guardian’s Living Weapon, the Elemental Damage added during it, and how long Living Weapon will last if you don’t attack or get hit. And then there’s the Summon Attack each Guardian has that can be activated by specific Items or hitting Circle + Triangle during Living Weapon, with each Spirit having it’s own unique attack.
If it sounds like a lot, it kind of is. Five passive abilities, some Living Weapons being noticeably less damage, some having Summon Attacks of varying degrees of usefulness, there’s a lot of angles to what Spirit you want to use. It’s also why I appreciate the system because the depth is such that based on what you want out of your guardian spirit and what your play style is there’s a depth of choice. Let’s finally look at the first three spirits.
Kato has Close Combat Attack 5%; Ki +10; Ki Recovery Speed +20%; Close Combat Ki Usage (Critical) -20%; and Skill Damage +15%
Summary
Close Combat Attack is pretty simple, 5% damage with melee weapons. Ki is just more max Ki and +10 is a decent chunk early on. Tolvo has 98 in video there, so that’d be a flat 10% boost to Ki. Recovery Speed is pretty self explanatory, Ki regenerates 20% faster. Doesn’t affect how quickly it starts regenerating however. The (Critical) tag comes up on armor and spirit skills and means when below 30% max HP the effect turns on. If your HP bar is flashing red, Critical skills are active. -20% Ki usage on melee attacks is pretty good in a pinch. Skill Damage just makes Skills do more damage, which stacks with Close Combat Attack boosts. Kato’s Living Weapon boasts excellent Might, Tenacity and Recovery while having average Action and Gauge Rate, and packs a 20% boost to damage making it a really good Living Weapon spirit. Really Kato’s only weakness is that it’s summon attack is fairly weak, the fire wolf leaps forward at a steep downward angle; if lined up it can hit twice but the damage is pretty low even with both hits connecting. If you can get the two hit with the Summon you can just stab your enemy and it’s a better use of the Gauge. All around Kato’s a solid offensive spirit that if you want to be aggressive will do work for you. Also is a heckin’ good doggo, Kato gets a 13/10.
Isonade has Sense Enemies on Radar; Life +100; Close Combat Health Recovery 100; Human Close Combat Damage +9%; Strong Attack Ki Usage -10%
Summary
Isonade is my favorite starter entirely because of Sense Enemies on Radar. It makes all enemies show up on the Radar on the top right of the screen which is incredibly powerful in a Souls game. Life +100 is just an additional 100 HP. A decent chunk early on again, but drops off faster than Ki bonuses. Close Combat Health Recovery means you heal the amount when you get a kill with a Melee weapon, a solid way to not need to burn Elixirs working through a level. Human being in a skill name means it only works against Human enemies, so Isonade does more damage to Humans with melee attack than Kato, but Kato does more against Yokai. Finally Strong Attack Ki Usage is just less Ki spent with Strong Attacks, whose usefulness depends on not only your weapon but your stance as well. As a rule they use more Ki so -10% isn’t bad but it’s not the reason to use Isonade. Isonade’s Living Weapon is worse than Kato’s in every category except Action, where’s it’s one letter better, applying 10% damage boost and Water instead of 20% and Fire. Isonade’s Summon is a little difficult to use, summoning a ghost shark that dashes around a decent sized area in front of you at various heights, doing really weak damage that has high staggering potential to enemies that the spirit touches, until it’s final dash where is rapidly bites as it passes through the area, doing a decent chunk of damage to any enemy in its path. It’s unpredictable and hard to line up so it hits where you need it to, but it can rapidly chunk through guarding enemy’s ki, setting you up to finish the job. Isonade is real, and strong, and they’re my friend, and gets a 13/10.
Daiba-Washi has Evasion Ki Usage -15%; Equipment Drop Rate +20%; Quick Attack Damage +8%; Luck +40; Life Recovery (Finished Using Living Weapon) +400
Summary
Evasion Ki Usage does what is says on the tin, and 15% less Ki to dodge is good regardless of armor type. Light lets you leverage your better dodging further, and for Heavy users it mitigates the cost of Dodging so you can hit more. Equipment Drop Rate is better chances of something dropping from enemies, good for kitting yourself out. Quick Attack Damage is solid, giving your Light/Quick/Square attacks just a bit of a damage boost. Notably Quick and Strong Attack boosts don’t apply to Skills, while Close Combat Attack boosts do. Yes this means Kato is really good with Skills. Luck is a secondary stat you can really only increase with gear or Spirits, affecting drop rates and chances of getting rarer gear. The Life Recovery bit means when your Living Weapon ends for any reason, you get healed for the amount. 400 isn’t bad by any stretch and manages to keep up better than Isonade’s Close Combat Life Recovery. Daiba-Washi’s living weapon is even setup to leverage this bonus, with 5% damage boost and Wind and the worst Might of the starter spirits (680 while Kato and Isonade both have over 1200) but with the best possible Gauge Rate and good Recovery means you can Living Weapon often to get that healing. Daiba-Washi’s summon attack is probably the strongest of the Starters, appearing to cause a small tornado to pop up directly in front of William after a short delay. Lighter enemies (like every Human enemy in the game.) get knocked into the air when hit by this and until later difficulties they’re dramatically open to the ground stab you can perform on grounded enemies with Strong Attack/Triangle. Larger enemies just take some low damage hits that stagger even Yokai, making it a decent way to interrupt a combo and get a few hits in. Since release a patch to reduce air juggle capabilities rolled around, meaning you can’t keep enemies in the air forever anymore. A solid pick regardless, good for dodge-y types that also want to get some more and better stuff more often while having some self sustain. Daiba-Washi earns a 12/10.
3 Likes
Yeah @Zero-ELEC I guess that would count as spoilers, but that is neat.
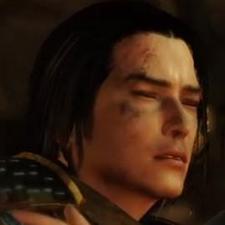
@Callifornia2 I might have to avoid giving him a clean shave later on haha.
@ArkInBlack thanks for all the info. Perhaps you should be the one doing the LP lol. I did not know all that about the Guardian Spirits. II like to take Daiba for the dodging but I probably should go with Kato more often.
1 Like
I’m actually kinda bad at the game, a lot of this knowledge is what I use to overcome my so-so execution. I did a fresh start to see how bad I’d be without hundreds of skill points to use and took an hour to get through the Isle of Demons, and only part of that was because I spent too much time trying to figure out how Dual Katanas work with less than ten skill points to spend. (Very poorly when you’re used to having 200ish Ki and Living Water and suddenly have neither.)
1 Like
I’m not really sure whether or not I’m good at the game myself. But it is such a hard game I’d still say you’re good for just being able too even play it and beat stuff. Most people I know can’t get past Isle of Demons.
1 Like
Update 3 - Deep In the Shadows
Kuroda Kanbei has tasked William Adams with finding his son Nagamasa. He has gone beneath the mountains of Nakatsu in the Kyushu region to defeat a band of rogues but is yet to return.Upon arrival William is greet by Nekomata a strange spirit of a white cat. He acts as a guide during the mission into the caverns and abyss below the mountains. Beyond mere bandits there are Yokai are present and one of greater power seems to be deeper in. We face the third boss of Nioh, the succubus-like Hino-Enma. After fighting her William finds Nagamasa who is mostly unharmed and go on to then drink with the samurai much to William’s frustration, and meet a mysterious female ninja.
Boss Information:

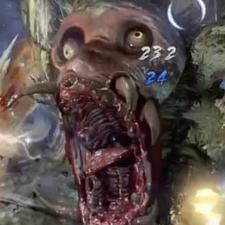
Hino-Enma is a succubus-like Yokai that is very fast. She has wings and can fly and feasts upon men. There are two main phases to this fight, ground phase and flying phase. When she’s in the air she will fire balls of paralysis that will stun you if they connect before swooping down upon you. Don’t dodge too early for either but both are completely avoidable. She can fire the paralysis orbs still while on the ground unless you are too close to her. Up close she has a few quick hit combos that generally do three strikes which you can dodge through then get hits in on her. Don’t stay in on the attack for too long as she’s quick to strike back and you always want to be ready to dodge her grapple attack which resembles a hugging animation. Side note, does not end in a friendly hug. She is weak to lightning and resist wind and paralysis. For this fight its a good idea to have anti-paralysis needles which can be used to get out of the stun.
Characters Introduced
Nekomata

Kuroda Kanbei

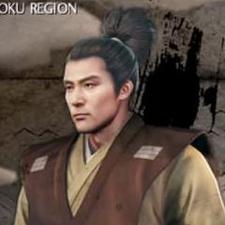
Kuroda Nagamasa
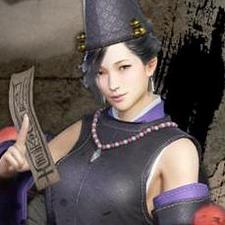
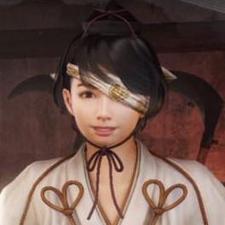
Okatsu

2 Likes
I love Okatsu destroying William there, like damn. He respawned at a shrine after that cutscene, for sure.
Mechanical talking points of today, our new Spirit pal, Nurikabe, Ninjutsu, Onmyo Magics, and a breakdown of the Elements.
First off, Fuse-Ushi! Life +200; Guard Ki Usage -20%; vs. Poison +20; Recurrent Damage from Poison -25%; Life Recovery From Amrita Absorption +30
Summary
This Bull Found One Weird Trick to Ward Off Poison! Antidote Salesmen hate him!
Joking aside, Fuse-Ushi is there for Blocking types. Guard Ki Usage is less Ki spent to block and 20% is big. vs. Poison is just poison resist and +20 is A Lot. Recurrent Damage reduces the damage ticks of ongoing damage effects like Fire and Poison, here only applying to Poison to cement Fuse-Ushi’s hatred of poison. The last passive is neat if unimpressive, healing William for 30 Life every time he absorbs Amrita, which is when he checks a deady body, opens a chest, kills an enemy. Really the Passives worth considering is Guard Ki Usage and early on the bonus Life. If you’re in a poison-rich area that’ll come in handy, if you aren’t it’s two empty slots. Good thing Fuse-Ushi’s Living Weapon stats are good. +15% damage with Earth, higher Might, than the three starters. High Action and Recovery, balanced by average Tenacity and bad Gauge Rate. It’s a build up but once the Bull is loose you’ll start bowling over your opposition. Fuse-Ushi’s summon attack is Kato, but good. Coming down at the same angle, instead of doing a short spin on landing Fuse-Ushi hits the ground running and keeps going, doing good Earth damage and battering aside anyone he hits. Bigger enemies can get hit multiple times, making it good against enemies like the Ogres showcased in the video. Does less damage before hitting the ground but once he’s charging he goes on a fair distance. Outshone later on, solid beginner Spirit with a good summon attack. 12/10
Nurikabe (the Wall yokai)
Summary
They have a trick to it poorly hinted at by that Amrita memory from the corpse Tolvo picked up before Nekomata rudely interrupted. More helpful is the graves (revenant summon points) as each Grave, player and NPC, list their cause of death. Deaths caused by nurikabe read “killed for their _____ behavior”, with word like friendly in the blank, with a color. Friendly is Blue, Neutral is Yellow, and finally is Aggressive or Hostile, I forget which, that’s colored Red. Eagle eyed viewers will note when Tolvo pulls up the emote menu each has a color associated with this and you might see where this is going. Emoting the correct type of gesture at Nurikabe will have the yokai peacefully leave, dropping loot (but not Amrita) as if they were defeated. The first time you incorrectly gesture or hit them, their eyes will narrow and glow fiercer. A second incorrect gesture/strike leads to a tussle. The specific gesture doesn’t matter, just the color associated with it. So if you see graves near a nurikabe, check what killed them, and then use the other types of Gesture until you hit the correct one and you won’t need to fight a wall.
Ninjutsu; How I Learned To Stop Worrying And Love The Mega Horoku-Dama
Summary
Here’s the trick to Nioh, everything is viable and cool. Ninjutsu, like Onmyo, runs off its own point pool that putting points into the related stat increases, with non-passive skills having a Ready Cost with your Limit being based the related stat, Dexterity for Ninjutsu. You can’t ready Ninjutsu than your Ninjutsu limit, can’t have more Onmyo than your Onmyo limit.
Jutsus readied work like spells from Dark Souls, you have a number of uses that refill with a stop a shrine. However they occupy the Item slots in the lower left, to be assigned as you like. They can even be used from the menu if you have a long duration low impact buff.
At the start of Isle of Demons you have a tiny amount of Ninja skills open, but immediately after Isle of Demons you unlock the mission Way of the Ninja:Novice which is largely a tutorial on Ninjutsu and some of the skills you unlock the ability to purchase after completing it. This is how all the skill trees work, you have a section immediately available and unlock Dojo Missions as you go through the game that you need to complete for access to the rest.
Most of the early tools are things you can get from consumable items you just find, one of the immediately available skills is just being able to prepare 3 Kayaku-Dama (Firebombs) whenever you visit a shrine, which are uncommon items you can find as loot or just buy in the shop between missions. The Novice skills open up some of Ninjutsu’s unique abilities, the Sneak Attack Tolvo shown being one but also Anti-Toxin Pills and Shikan-gan Pills. These are Antidote+ and Anti-paralytic Needle+, clearing the same effecting and also giving a hefty boost to resist their specific element (Notably enough to require Hino-Enma a second blast to paralyze you.) They’re also really cheap in Ready Cost and you get the three pills for free every shrine visit.
There’s other self-buff items such as the Power Pill which is just a good reliably way to get a damage buff and importantly every item skill has multiple ranks, each rank costs more skill points to buy but gives you an additional package to ready, usually for 1 less Ready Cost than the previous ranks. You can in fact stack multiple packages so you can Ready Power Pill three times to have 6 Power Pills to use between shrine visits, and even if you don’t need 6 power pills, the third rank costs 2 less to Ready than the first rank, letting you slot in more tricks. And boy howdy does Ninjutsu have a lot of tricks, ranging from even better Firebombs, caltrops, bombs that leave caltrops, throwable poison gas clouds, mines, mines that also leave paralyzing gas, bombs that leave caltrops, and the Mega Horoku-Dama mentioned at the top that is a torso-sized bomb that William has to heft and throw before it explodes into Horoku-Dama, the black firebomb equivalent, making it a big cluster bomb.
For the more personal, self buffing types there’s things to let you move without noise and become invisible, dramatically reducing the radius enemies will detect you, increased ammo capacity for your ranged weapons, a way to negate terrain effects like Fire, and culminating in this type of Ninjutsu are Touch-Me-Not and Quick Change. Touch-Me-Not is incredibly cheap in point cost, Ready Cost, and gives a fair amount per package, the rub being it makes you explode when you die. Not useful unless you’re Visitor, acting as a summon ala Souls-series, until you bring Quick-Change into the mix. While you have the Quick-Change buff active, after a short delay when you die, you reappear above where you died with 30% of your max HP. This resets all buffs and debuffs and you’re dropping, which can leave you vulnerable to getting hit again and dying for real, but Touch-Me-Not still triggers and will knockback and buy space for you having cheated death to heal or just apply another Quick-Change, because you can 100% do a dropping attack from a Quick-Change death.
Long story short, if you want to do Ninja bullshit, invest in Dexterity and by all means do it, it’s right there for you to become the next Hokage. Believe it!
Onmyo Magic; The Arcanist’s Cookbook
Summary
Onmyo is like Ninjutsu in terms of working of a separate point pool, Ready Cost, and Limit. Uses the Magic Stat instead of Dexterity. However it lacks anyway to inflict or cure Poison or Paralysis, and only has a single Talisman that increases resistance to both. Onmyo deals with the five elements, there’s some skills to debuff your enemies and buff yourself, a few things to enhance your ability to deal with Yokai, and a few odds and ends like sacrificing your weapons Familiarity (Each individual weapon gets XP as you use it, eventually increasing all of it’s numbers, to a maximum based on its rarity. This is separate from your Proficiency which is how much you’ve used a weapon type. Have I mentioned there’s a lot to Nioh?) to deal non-elemental damage or do a large AoE knockback.
All five of the elements get a weapon enchantment, making your weapon deal that element based on your magic. These are largely the only things available to you until you do Way of the Mage Novice, which isn’t unlocked after Isle of Demons. Later you unlock a projectile shot for an element, a damage resist for the element, and culminates in a big flashy unique attack spell for each of the five elements. Elements are important but we’ll cover them separately.
Other things include reducing a specific enemy’s damage (more effective than you might think), reducing an enemy’s defense, this line culminates in the Sloth Talisman, the debuff so powerful every boss in all three DLCs are set so the debuff duration is like five seconds. All it does is slow down the enemy affected. By half. This includes attack animations. Sloth is incredibly powerful and is a reason to be a Mage in and of itself. And there’s more and while it’s not as ridiculous it’s still very good, like Ninjutsu where there’s a lot and it’s all good.
One of my personal favorites is Guardian Talisman. This skill gives you a refilling version of the item Moment Talisman, which when used has your Guardian Spirit do its Summon Attack, which means this Talisman entirely depends on what your Spirit’s summon attack if it’s useful, but means it’s more flexible investment than say, Fire Shot because I can be more than a single projectile of fire, and how Daiba-Washi got abused to hell and back before patches rolled in.
Long story short, Onmyo magic is powerful because debuffs are powerful and the Elements are even more powerful and Onmyo’s how you really leverage them.
The Elements; By the gods, fear them, Laurence.
Summary
The five elements are Fire, Water, Lightning, Wind, Earth. Each has their own unique color for damage and their own unique status effect they can apply if you or an enemy take enough damage of that type. Being resistant to an element makes it much harder for that element’s status effect you hit you. Each buff and debuff shows on the health bar of the affected as an icon, if the icon is bright it’s in effect and counting down, if it’s dim it’s showing a build up, like for the five elemental effects or Poison and Paralysis.
Fire’s status effect is Scorched, which means you’re on fire. You rapidly take low fire damage (that doesn’t refresh the status) for the duration. Dodging while Scorched reduces the duration by about 1/4th of the max duration, three dodges of any sort will clear the effect, which is about how fast the ticks of damage come and how short the duration is. Poison comparatively does its damage much slower, in larger chunks, and lasts longer. But Scorched comes from dealing fire damage, while poisoned weapons don’t deal the upfront Fire damage like a Fire Enchant does. A target can be poisoned and scorched at the same time. Scorched is still the weakest of the five elemental status effects.
Water’s status effect is Saturated. Saturated targets take significantly more physical damage. Want to hurt a boss more with stabbing? Use water damage to Saturate them. This stacks with Weakness Talisman, meaning apply both and the boss is in for a world of hurt.
Lightning’s status effect is Electrified. It’s mini-Sloth. Electrified targets move and attack and do everything slightly slower. Not as slow as a target affected by Sloth but guess what, they stack. Both at once are incredibly rare to deal with as a player. Luckily for enemies and you, being resistant to Lightning makes it REALLY hard to apply Electrified. Easily the scariest elemental effect to be facing.
Wind’s status effect is Blustered. It reduces physical damage dealt by a good chunk. Stacks with the Devigorate Talisman meaning with both up a boss does way less physical damage. Less good if they really only do elemental damage, and overall not as useful as making something die easier. Still better than Scorched by itself.
Earth’s status effect is Muddied. It increases Ki costs and reduces Ki regen. While it does slow their Ki regen in Yokai pools, the second part isn’t super good against Yokai. However the first part is pretty significant against hearty enemies across the board. You can break through a guarding enemy’s Ki and Grapple them much faster if they’re muddied, and while Yokai pack Super Armor with any amount of Ki, when Ki-less any hit staggers them out of animations. Watch out since every Yokai has a panic move it’ll do if you wail on it too long that it can’t get staggered out of and spawns a yokai pool. Muddied is good against humans and really good against Yokai, by itself.
Now, that’s all well and good, but none of the explains why Elements are so, so good. It’s because there’s a Sixth elemental effect, one without an associated Element. Discord (Or confusion, it’s translated different between regions.) is applied when a target is under two different elemental status effects at the same time. Note Poison/Paralysis/Every Onmyo-specific debuff are not elemental at all and do not count. While Discorded, Human Enemies (or you) lose dramatically more Ki and take dramatically more damage, stacking with every other debuff under the sun so Weakness Talisman, Sloth Talisman, put Lightning on your blade and hit until they’re Electrified then activate a Water Living Weapon and apply Saturated and you can vanish a boss’ health bar while he moves in super slowmo.
Discord works differently against Yokai. They also take the same massive increase to damage received, but rather than taking more Ki damage, their Ki is SET TO ZERO FOR THE DURATION OF THE DISCORD. Refer back to earlier when I noted Yokai without Ki are Staggered by every hit they take. Yokai’s desperation attack is way less effective under Discord, since while it can hit you and knock you out of combos, they still can’t have Ki, even in a Yokai Pool so you can just resume slamming into them at your leisure. A yokai enemy who’s Discorded is at your mercy for the entire duration of the effect and it lasts a good while. Here is what you can do fresh off the Liefde and some point investment.
1 Like
Very great info, it seems like you should have your own wiki. I might add a section beneath information linking to your posts for those who want more stats and stuff.
Update 4 - The Spirit Stone Slumbers
[Warning for a reference to rape, and miscarriage for Part 2]
Tachibana Ginchiyo has reached out to William. Her husband Tachibana Muneshige has gone missing. While he may just be with his mistress she is worried all the same and sends us to a shrine to try and find him. Bandits and even ninja are about as well as the Yokai of the region. Half-way through we face the spirit Nue and afterwards go down deep underground and fight through more demons and ancient guardians to reach Ginchiyo herself. She fights alongside us until we reach Muneshige. But something is wrong. It isn’t really him, the real one is nearby and unconscious. We face Edward Kelly in the guise of Tachibana Muneshige to rescue the real one. Afterwards Kelly escapes with the Amrita.
Boss Information:
Nue is a creature similar to a manticore. It is like a tiger with a great maw, a face like a mask, spines, and exudes lightning. The safest place to stay during this fight is at Nue’s side. It can swipe its tail behind and strikes forwards with its claws. You can bait out these attack while being in relative safety. Sometimes Nue spray poison forwards which is best avoided if possible. The belly of the beast is its weakness. When out of ki Nue is still dangerous as its revival fires two lightning bolts in front of itself which can chain stun and one shot the player. When it is vibrating get ready to move and avoid multiple bolts of lightning. If it rears up it is about to roll, avoid at all costs and dodge to the sides. Nue can also fire a concentrated beam of lightning, move to Nue’s right, your left, and avoid it by getting close to Nue or dodge through the beam horizontally. This boss is weak to water and resists poison and lightning.
Tachibana Muneshige is fast, really fast. He is the second boss of the level and you must duel him to proceed. He in my opinion is an easier fight than Nue. His ki management is easy to interrupt. When he is making a circle with his blade rush him and interrupt it as this buffs him. Often afterwards he does an iaito move, where he sheathes his blade and sprints at you. Get ready to dodge and don’t do so too early, this hit will hit hard. If far away he will pull out a bow and fire three shots, one down the middle and one on either side. These can be easily blocked or dodged forwards through. Be aggressive with Muneshige and do not let him regain stamina to allow for multiple critical hits. He also can charge up and do a flurry of swings, stay far away during this and he will use up a lot of stamina doing this. When you see him send his Guardian Spirit Raiken on the ground focus on dodging it when it shoots at you. Muneshige is weak to water and resists lightning.
Characters Introduced
Tachibana Ginchiyo

Tachibana Muneshige
Fuku
3 Likes
Ginchiyo is very right when she says she know how to use Raikiri, in her hands it does waaaay more Lightning damage. That one room you have her is a great spot to learn about Discord, since there’s an achievement to Discord an enemy for the first time. If you circle the room before fighting the Ogre you’ll run into the Fire heads, likely kill one and get the buff, and then using that against the ogre with Ginchiyo will swiftly Discord the ogre.
The reason to Forge items at the Smith is tied up mostly in when you get Smithing Texts to drop. If you want unique Armor Sets and Unique Weapons (Like Raikiri and Warrior of the West’s Honor) at your level and rarity you want, you either grind like mad or go to the Forge. If you get the smithing texts. Some are mission rewards but most are tied to bosses and are ridiculously rare to drop, but once you get to NG+ they’re a godsend if you have a specific set in mind for a build, or just want a very good baseline like the Raikiri is.
Another little detail is the Amrita Memories option in your menu works differently in and out of mission. Out of mission it breaks out into a sub-menu with five options: Thought Amrita, Yokai Illustrations, Guardian Spirit Illustrations, Character Directory, and The Tale of Nioh. In mission it just puts you straight into Thought Amrita which has Tutorials and some other minor details that come from corpse amrita. The middle three serve as information on enemies, allies, and list of ghost pals, and Tales of Nioh lets you rewatch cutscenes.
Just talking about Mizuchi today, who has Enemies Defeated Damage Bonus (A); Gold Earned +15%; Amrita Sense; VS Water +20; Amrita Earned +12.5%
Summary
Enemies Defeated Damage Bonus crops up here and on equipment, based on the letter grade it gives you stacking damage for every enemy you defeat that resets to zero when you die, leave a mission, or use a shrine. A rank gives about 1% more damage per kill, to a max of 15%. If you have multiple sources of this bonus, only the highest rank gets used and in general isn’t great. Gold Earned +15%?  You wanna get paid, Mizuchi’s got deals. Amrita sense means the various intractable points show up on the radar, which give an item or two, some Amrita, and occasionally some dialogue. Very good in levels where specific Amrita points drop Skill point items when you first interact with them. Mizuchi’s also our first spirit with Element resist, +20 is a fair amount. Amrita earned is, well. Want more XP? Want to charge your gauge faster? Yeah, your living weapon charges based on Amrita received, so if you get more through buffs like this you charge quicker. Speaking of Living Weapon, Mizuchi’s is about on par with Daiba-Washi, just slightly better stats everywhere but Gauge Rate. Even with the Amrita Earned Daiba-Washi charges faster. Really the only thing keeping Isonade from being the better Water Spirit is Mizuchi’s summon is distinctly superior, pushing forward in a serpentine pattern dealing light damage. It can multihit and as such inflicts Saturated easily, and any human enemy hit will be knocked to the ground after they stop receiving damage from the summon, leaving them open to attack. Nothing special happens to Yokai however. 11/10
2 Likes
Update 5 - The Silver Mine Writhes
[Content Warning for Centipedes]
Before going to the main mission we deal with sub missions. Tachibana Muneshige has challenged William to a duel. The great Warrior of the West wishes to test their skill to see who is the greater warrior. We’ll see this as a recurring theme with a lot of the samurai we meet.
On our journey further east William’s ship the Liefde is attacked by an Umi-Bozu. Narrowly the crew escape with most of their lives. Landing in a new region, they need to wait as their ship is repaired before going to meet Tokugawa Ieyasu. Afterwards we defend a gateway to the underworld from a bunch of Yokai.
A message arrives from Kikkawa Hiroie who is a subordinate to the Mori Clan. Their silver mine is overrun with Yokai and request help from William. Delving into the mind, we discover it is full of poison. After fighting through it William is ambushed by the Great Centipede and must battle it. Sir Anjin returns to the mines later to find a fire to aid the blacksmith Senji Tome. He finally gets a haircut and a shave as well.
Boss Information:
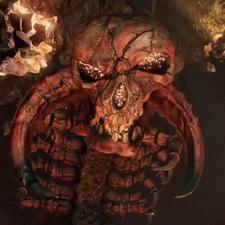
The Great Centipede is a massive Yokai made up of multiple pieces of crab rocks that exude poison. This boss is weak to wind, allegedly. It is resistant to earth, poison, and paralysis. Its arena is often filled with poison so it is a good idea to bring multiple antidotes. One can very easily face tank this boss as it does not deal too much damage with most of its attacks other than its slam. You can attack its rear and mid section to break apart the segments which will stun it for a time. The poison spray of the Great Centipede is its weakest attack as you will probably be poisoned already anyway. Anything it fires from its mouth can be easily dodged while its slam requires a bit of extra positioning. When the Great Centipede is approaching while gnashing its mandibles guard to block the hit.
Characters introduced
Shima Sakon

Kikkawa Hiroie
Senji Tome
2 Likes
A detail I love about Muneshige is he largely does things that you can, the exceptions being his multi-arrow shots, that attack buff where he slowly brings his sword around, and flurry of slices he likes to follow up that buff with. Which means he’s pretty good as a way to learn parry timings for Katana users.
So Dwellers, the miner yokai, are a pain in the butt when crawling since Nioh has the part of attacks that hit match the model. This cuts both ways so on inclines you can play fun games with enemies, particularly human, but there’s something to leverage against this. Stances! More on those under the break.
Summary
Talking general about stances is incredibly hard because each weapon has slightly different details that go against the generalization. The specifics that are constant are High Stance attacks don’t bounce of guarding opponents and deal more damage, Life and Ki, making them good against Blocking opponents. They have large openings as well, and do a slower more vulnerable roll as their dodge. Middle Stance blocks better, having innate cost reduction to blocking baked into it. Middle Stance attacks also go wider generally, doing horizontal attacks that are good for keeping multiple foes in check. It can do a quick step and immediately hitting dodge during/after that quickstep follows up with a roll. It’s weakness is poor vertical coverage. Low Stance has better, cheaper dodges. First dodge in a chain will be a rapid spin that’s even more iframes than the quickstep, each successive input doing the quickstep from middle stance, until you stop dodging or run out of Ki. Which will take a while with how cheap they are. Low Stance attacks have excellent vertical coverage and are cheap and fast, but are noticeably less damaging, Ki included. Each stance holds an advantage over another stance. It’s not strictly a hard counter but blocking a high stance axe attack is a really bad life choice, even in Mid Stance, while you have plenty of time and Ki to dodge and hit with Low.
There’s two really common armor sets to see player revenants decked out in and Warrior of the West’s Honor the first, coming early and being solid. Sets are a thing, usually involving one weapon and some armor pieces but some sets have seven pieces, Warrior of the West’s Honor included, having a katana, a bow, and a piece for all the armor slots; Head, Chest, Hands, Legs, Feet. It’s a solid set, that synergizes with Raiken/Paired Raiken and electrifying enemies. With one drawback. The 7 piece bonus is Close Combat Damage (No Rear Damage Bonus) +14%. That (No Rear Damage Bonus) tag means while that passive is active you do not get back attack damage boosts at all, period. And baseline the Back Attack bonus is a helluva lot more that 14%, and that’s before you get access to things that boost Back Attack damage. Common knowledge holds to skip the katana, using Raikiri since the innate Lightning pairs well with the 5-piece bonus which grants bonus damage against Electrified enemies.
I skipped talking about Raiken before because it’s strictly a weaker spirit until you defeat Muneshige in the duel, lacking it’s final passive and having lower Living Weapon stats, and even having a different Summon Attack. Single Raiken’s summon is what Muneshige uses, calling the pup out who dashes forward after a short delay, dealing light damage. But as for Paired Raiken, it brings Dash Endurance 15%, Skill Ki Damage +12.5%, VS Lightning +25, Treasure Sense, and exclusive to Paired is Yokai Close Combat Damage +15%.
Summary
Dash Endurance reduces the Ki cost of sprinting, Skill Ki Damage is how much Ki damage skills do. Yeah that’s separate from Skill Damage, and this makes skills that are good against blocking enemies even better, while making them better at chunking out Ki in general. Lightning has a nasty status effect tied to it and Paired Raiken gets 25 more Lighting Defense. Treasure sense makes chests show up on the Radar, which generally have better loot first time through a mission. 15% more damage against half the enemies in the game is Good. And unlisted but the most powerful upgrade Raiken gets going from Raiken to Paired Raiken is it doubles the number of puppers. I don’t even need to finish 14/10 heckin’ good bargain a doggo for each hand.
To actually talk Living Weapon, Paired Raiken is powerful, being the first to have better elemental damage at 42 Lightning where each previous Spirit has had 30 of their element. Packing 15% damage boost, good Might, Recovery, Best possible Tenacity and great Gauge Rate, the only stat below a B is Action, at a C. Even if the enemy resists Lightning there’s still the 15% damage boost and you get it quick. Surely there’s a mediocre summon attack to stop these lighting dogs? Ha ha no, cute kills. Paired Raiken packs a potent Summon whose only weakness is not dealing Physical damage so Lightning resistant foes are largely unaffected. The attack summons down both Raiken who dash forward. When they hit an enemy, instead of continuing forward they rapidly dash back and forth in the area, centered on the poor sap who’s now the focus of two incredibly excited puppies, each dealing low lightning damage per hit. The number of hits means anything not resistant is Electrified, and enemies other than the one hit can still get tripped up by the attack. Heckin’ good and powerful dogs.
2 Likes
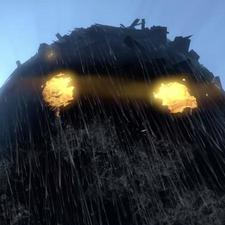
Update 6 - The Ocean Roars Again
Okatsu has a job for William. It is to delve into some ruins that belong to three ancient gods. We are to purge them of the Yokai tainting the sacred grounds. In doing so we gain the other two Guardian Spirits from the beginning of the game.
Kobayakawa Hideaki informs us of a ghost haunting Itsukushima. For helping them out he will aid us in getting our ship repaired. It is none other than the Umi-Bozu that is haunting the waters and frightening the crews. William first links the flames to aid him in warding off evil and in subduing the great water spirit. He fights it near the waters.
It is revealed Ishida Mitsunari is indeed working with Edward Kelly. They have formed an alliance to defeat Tokugawa Ieyasu. A dark alliance which abuses the Amrita for evil.
William goes on to practice with the famed Marume Nagayoshi. Further on still Hideaki requests our aid in cleansing a bridge of more evil. Hiroie goes on to ask for help in retrieving an important sword and we learn of the two Nioh and of his insecurities.
Boss Information
 :
:
The Umi-Bozu is a fight that is simply about recognizing patterns. To talk about the fight we also need to cover the arena a bit. It is a medium sized area surrounded by water with three great braziers. By lighting the fires in the level itself these braziers are each lit. At the start of the battle three smaller water monsters spawn where the fires are, each fire lit kills one with three spawning requiring all three fires to be lit for no adds to aid the boss in the fight. If they do spawn they can be ignored while making the rest of the fight more difficult. If you choose to fight them keep your eyes on the boss as the Umi-Bozu likes to fire a beam that one-shots while you’re distracted.
As for the boss itself it can fire wrecked ships or tainted water that creates a pool of Yokai realm where it lands. These can be dodged just by strafing. Stand far away from the boss and wait for it to strike at you with its arms. It has different patterns so rather than just dodging after a set time dodge when you see the arms about to whip down. Hit the yellow glowing parts for extra damage. When it fires its beam you can run up and strike at or shoot its core when exposed after firing. When it uses two arms at once back up to the left, wait for them to land, then attack.
For its second phase it jumps and lands on the arena. It will rear up and slam down, dodge this and hit the core. If too close to it the Umi-Bozu will jump then land dealing damage, afterwards the core is exposed for extra damage. Sometimes it swipes with a tendril which is very fast but easy to block, though it can be dodged. The boss is weak to fire, and in the second phase spawns three more adds which you’ll have to deal with if the fires aren’t lit. If they are lit as well you can use them up to light your weapon on fire for a time.
Characters Introduced
Otani Yoshitsugu
Kobayakawa Hideaki
Marume Nagayoshi
Also for the LP, what haircut should William sport?
- Ponytail
- Samurai Knot
- Pirate Bun
- Wakajishi
0 voters
2 Likes
Update 7 - Spider Nest Castle
[Spiders Suicide Mention]
Guess what? Someone lost another sword. So naturally they turned to expert sword finder, William Adams. After retrieving it from the clutches of a ninja Yokai we go to a cemetery to discover the source of a crying woman.
Afterwards Ii Naomasa has something for us. A castle has turned into a nest of spiders. We go to Shigisan, the former castle of Matsunaga Hisahide. There we fight spider after spider while learning about the horrors committed by Matsunaga Hisahide and his soldiers. Then we discover the Jorogumo and defeat her in combat. To our surprise Matsunaga Hisahide himself appears, offering William tea and a bit more information on the mystery of a man he was to even Oda Nobunaga himself.
Boss Information:

The Jorogumo is one of the easier fights in the game. This boss is allegedly weak to wind. She is mostly slow and a lot of her attacks are delayed. In the fight she’ll spit out webbing on the ground to slow you and also spray it onto you directly to slow you for a time. Avoid the webbing at all costs as it levels the playing field for her. Her weakness is her big spider butt but attacking it will cause her to go into a defensive mode. In it she crawls on the ground with her legs wrapped about her butt. The legs of the Jorogumo are shielded and protect her main body while her torso is still available. When low on health she’ll jump about quickly shooting more webs around the arena. Her two most dangerous attacks are a slow open armed grab, and when she spins as she crawls which both should be avoided at all costs.
Characters introduced
Torii Mototada
Ii Naomasa
## Matsunaga Hisahide

2 Likes
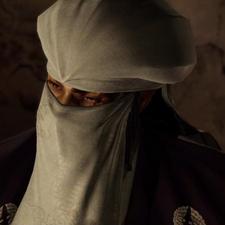
So all the transformations for the ladies were added somewhere around the second DLC and are all more expensive than any of the men. Okatsu alone costs ten times more than 90% of any of the men. Other details are while their armor looks are set, your weapons are shown and if you turn off display helmets in basic options the transforms will also ditch their helmets.
To talk about Glory now that the reason to bother is shown, the clan wars are maybe the most simple of Nioh’s systems. Each period the clans are randomly split between White and Red and then begin tracking Glory earned. Players receive extra Glory at the end of a clan battle based on if their team won, how much glory their clan earned compared to other clans, and how much glory they earned compared to others in their clan. What this means is there’s a handful of clans with a lionshare of the players for their passive benefits, as some are better than others. Date being incredibly popular for it’s synergy with a build that just got nerfed less than a month ago. Other uses for Glory is buying crafting mats, new gestures, rolling for gear ala Diablo 3 bloodshards, and buying consumables you otherwise can’t.
Earning Glory is a matter of interacting with players. Co-op and revenant killing, and when actual PVP got patched in that way. They also added the ability to donate gear, which works like selling gear, but for Glory and each clan has rotating Wanted items that reward items and bonus glory after donating enough of what’s asked for.
The first fight with Jorogumo has a gimmick, in that for each piece of the teakettle retrieved in map removes the armored chitin on her back legs. Which just count as a guarding target, so if you high stance and attack her abdomen while she’s protecting it your attack won’t reflect and will likely hit the weak point anyway.
1 Like
Oh never knew that about her legs!
I was curious if you know. For all the post game super tough multi boss fights, do they give any story or can I completely avoid them for the LP? I ask because they are so fucking hard I have actually been injured trying to do them and it’s really destroying me mentally to keep trying them to practice for the lp.
Just extra entries in the Character Directory for one specific person, as their fight in the main story doesn’t count as defeating them. Most of those were added in later patches and shouldn’t be taken on before you get all Divine items in your gear slots. While most don’t have a shrine, that Yellow Torii gate symbol on the map screen means it can be co-op’d through Yokai Realm With A Companion, which makes them way less horseshit. Looking at you, Return of the Gourd.
1 Like
Oh really doing them in co-op counts? Thank goodness, and I know exactly who you are talking about,. I’m gonna do those in co-op then for the LP because fuuuuuuck how hard they are.
I do wonder though, do ya’ll think I should maybe add under info a sort of directory for bosses and enemies too? Finally looking at the in game directories and I could add them.
- Add Them
- Don’t Add Them
0 voters
Spirit talk time!
Aya-Komori brings Unlimited Ninjutsu +15%; VS Paralysis +20; Damage From Behind +12%; Life Recovery from Final Blow 120; Agility Damage Bonus A
Summary
UN! LIMITED! NINJUTSU! This is a 15% chance to not use a charge of a Ninjutsu item when you use it. Even with gear rolling Unlimited Ninjutsu you can’t get the raw numbers up to 100% but still, if you’re invested into being a ninja just getting more charges occasionally is fine to great, depending on the Jutsu. (More Quick-Change charges is Good.) Not getting paralyzed when you could be paralyzed is Good. Damage From Behind is where Aya-Komori steps out and introduces why you should be friends, because that gets added to the damage boost already present. Damage from Behind is a Great skill and is why you should hang out with Aya-Kmori. Final Blow is the downstab you preform on enemies on the ground, getting 120 Life for doing that is a neat reward, with the real reward being Final Blows get the Damage From Behind bonus unless turned off by other effects. Agility is your weight category, so you get a damage boost base on your grade of agility. The four types are Blue, the lightest; Green, the general sweet spot for most players; Yellow, which is rough on dodge distance and Ki regen, and Red which happens when you go over your max weight. Don’t do that for any reason. Either way the bonus damage isn’t much to write home about even with blue weight, but it’s there and is extra damage even if you have green weight. The Living Weapon stats are pretty bad, the only high points is how quickly you can build it up and the short cooldown after using it and there’s builds that synergize with that, but by itself Living Weapon is not why you use Aya-Komori. The Summon Attack is similarly mediocre, a few bats rush forward dealing light wind damage. Against bigger targets it’ll Bluster pretty quick with multiple hits. 12/10 just for how good Damage from Behind is.
Itokuri brings Luck +50; Human Item Drop Rate +30%; Familiarity Bonus +16%; Yokai Item Drop Rate +30%; Paralysis +30
Summary
Item Drop Rate means that enemy type drops stuff more often, not just equipment. Familiarity Bonus increases how much Familiarity you get with Gear. This bundled with the Luck makes Itokuri the farm Spirit for sure. Gear can have abilities with a symbol that looks like |>| on part that means if you use it as Soul Matching material the item it’s getting fused into will inherit that ability, but only if the item has max familiarity. Paralysis +30 adds a bit of paralysis to all of your hits but it’s not enough to be worth it, especially since the weapons best at applying status effects are multihit, and getting hit while paralyzed clears the effect entirely. Itokuri’s Living Weapon Stats are as mediocre as Aya-Komori, but it’s Earth instead of Wind. It’s summon attack is neat however, a small spider swings in and shoots out four webs one at a time. Enemies hit take light damage and have their movement speed slowed. The webs stick around on the ground, also slowing movement speed while the enemy is standing in them. This doesn’t affect attack speed, just how quickly they move, and the debuff stacks with the terrain effect. Useful for running away or herding enemies into a big clump for something like a cluster bomb getting thrown at them, or other AoE effects. Still, really only bring Itokuri for grinding gear. 11/10
2 Likes
Update 8 - Falling Snow
[Suicide Mention]
Something is wrong, it’s snowing in the summer? Hanzo knows that something is up and asks William to go to Honnoji Temple and discover the source of what is going on. There are the sounds of a crying woman coming from the temple. After fighting our way through the temple’s various Yokai, we discover the origin of the snow. A Yuki-Onna, who in reality is Oda Nobunaga’s wife, Lady No.
Ii Naomasa has challenged Sir Anjin to a duel. Being a warrior, William cannot refuse such a request and fights a grueling battle against Naomasa.
William goes to the grasslands yet again to deal with the Yokai there and once again we fight Onyroki.
Then at a bridge a giant ghost has been haunting the place. William faces it in a one on one battle to the death.
Boss Information:

The Yuki-Onna is water based and a lot of her attacks are fast moving bursts of damage. Never stand close to her for too long as she will stomp the ground and cause an ice explosion that hits very hard. She can throw her weapon spinning through the air leaving herself vulnerable. Don’t try to do trading of blows with her as she’ll win. When she rears up she is preparing a grappled attack and dodge this as soon as she starts running at you. Fire is your friend for this fight as she is weak to it. From time to time she’ll try to blow a kiss and will send out a spray of frost to slow you down. Over her head she can spawn two kinds of ice shards. One home in on you and fire. The other fire into the ground and explode after a short time.
Characters Introduced
Tenkai
2 Likes