Just extra entries in the Character Directory for one specific person, as their fight in the main story doesn’t count as defeating them. Most of those were added in later patches and shouldn’t be taken on before you get all Divine items in your gear slots. While most don’t have a shrine, that Yellow Torii gate symbol on the map screen means it can be co-op’d through Yokai Realm With A Companion, which makes them way less horseshit. Looking at you, Return of the Gourd.
1 Like
Oh really doing them in co-op counts? Thank goodness, and I know exactly who you are talking about,. I’m gonna do those in co-op then for the LP because fuuuuuuck how hard they are.
I do wonder though, do ya’ll think I should maybe add under info a sort of directory for bosses and enemies too? Finally looking at the in game directories and I could add them.
- Add Them
- Don’t Add Them
0 voters
Spirit talk time!
Aya-Komori brings Unlimited Ninjutsu +15%; VS Paralysis +20; Damage From Behind +12%; Life Recovery from Final Blow 120; Agility Damage Bonus A
Summary
UN! LIMITED! NINJUTSU! This is a 15% chance to not use a charge of a Ninjutsu item when you use it. Even with gear rolling Unlimited Ninjutsu you can’t get the raw numbers up to 100% but still, if you’re invested into being a ninja just getting more charges occasionally is fine to great, depending on the Jutsu. (More Quick-Change charges is Good.) Not getting paralyzed when you could be paralyzed is Good. Damage From Behind is where Aya-Komori steps out and introduces why you should be friends, because that gets added to the damage boost already present. Damage from Behind is a Great skill and is why you should hang out with Aya-Kmori. Final Blow is the downstab you preform on enemies on the ground, getting 120 Life for doing that is a neat reward, with the real reward being Final Blows get the Damage From Behind bonus unless turned off by other effects. Agility is your weight category, so you get a damage boost base on your grade of agility. The four types are Blue, the lightest; Green, the general sweet spot for most players; Yellow, which is rough on dodge distance and Ki regen, and Red which happens when you go over your max weight. Don’t do that for any reason. Either way the bonus damage isn’t much to write home about even with blue weight, but it’s there and is extra damage even if you have green weight. The Living Weapon stats are pretty bad, the only high points is how quickly you can build it up and the short cooldown after using it and there’s builds that synergize with that, but by itself Living Weapon is not why you use Aya-Komori. The Summon Attack is similarly mediocre, a few bats rush forward dealing light wind damage. Against bigger targets it’ll Bluster pretty quick with multiple hits. 12/10 just for how good Damage from Behind is.
Itokuri brings Luck +50; Human Item Drop Rate +30%; Familiarity Bonus +16%; Yokai Item Drop Rate +30%; Paralysis +30
Summary
Item Drop Rate means that enemy type drops stuff more often, not just equipment. Familiarity Bonus increases how much Familiarity you get with Gear. This bundled with the Luck makes Itokuri the farm Spirit for sure. Gear can have abilities with a symbol that looks like |>| on part that means if you use it as Soul Matching material the item it’s getting fused into will inherit that ability, but only if the item has max familiarity. Paralysis +30 adds a bit of paralysis to all of your hits but it’s not enough to be worth it, especially since the weapons best at applying status effects are multihit, and getting hit while paralyzed clears the effect entirely. Itokuri’s Living Weapon Stats are as mediocre as Aya-Komori, but it’s Earth instead of Wind. It’s summon attack is neat however, a small spider swings in and shoots out four webs one at a time. Enemies hit take light damage and have their movement speed slowed. The webs stick around on the ground, also slowing movement speed while the enemy is standing in them. This doesn’t affect attack speed, just how quickly they move, and the debuff stacks with the terrain effect. Useful for running away or herding enemies into a big clump for something like a cluster bomb getting thrown at them, or other AoE effects. Still, really only bring Itokuri for grinding gear. 11/10
2 Likes
Update 8 - Falling Snow
[Suicide Mention]
Something is wrong, it’s snowing in the summer? Hanzo knows that something is up and asks William to go to Honnoji Temple and discover the source of what is going on. There are the sounds of a crying woman coming from the temple. After fighting our way through the temple’s various Yokai, we discover the origin of the snow. A Yuki-Onna, who in reality is Oda Nobunaga’s wife, Lady No.
Ii Naomasa has challenged Sir Anjin to a duel. Being a warrior, William cannot refuse such a request and fights a grueling battle against Naomasa.
William goes to the grasslands yet again to deal with the Yokai there and once again we fight Onyroki.
Then at a bridge a giant ghost has been haunting the place. William faces it in a one on one battle to the death.
Boss Information:

The Yuki-Onna is water based and a lot of her attacks are fast moving bursts of damage. Never stand close to her for too long as she will stomp the ground and cause an ice explosion that hits very hard. She can throw her weapon spinning through the air leaving herself vulnerable. Don’t try to do trading of blows with her as she’ll win. When she rears up she is preparing a grappled attack and dodge this as soon as she starts running at you. Fire is your friend for this fight as she is weak to it. From time to time she’ll try to blow a kiss and will send out a spray of frost to slow you down. Over her head she can spawn two kinds of ice shards. One home in on you and fire. The other fire into the ground and explode after a short time.
Characters Introduced
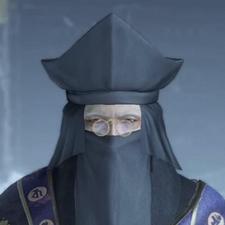
Tenkai
2 Likes
The way to know how Amrita Fiends are going to explode is as they take damage of their element their crystal glows brighter and brighter until eventually they fall to the ground and explode. The explosion is purely elemental of their respective element, and affects enemies too. With a bit of Magic investment and the right elemental shot you can use one talisman to turn an Amrita Fiend into a powerful bomb to open a fight with.
Ii Naomasa is a rough duel because like all NG duels he follows the rules of his gear set, and where Muneshige slower Ki regen Naomasa clearly is rocking that blue agility, meaning his dodges are better and he regens Ki very quickly when not attacking or blocking. There’s a few tricks you can use to put a finger on the scale early, Lifeseal Talismans dramatically slow Ki regen and Shockwave Talismans do big Ki damage. For ninja, throwing shuriken and kunai to interrupt his movements and make him block (the AI likes to block when many attacks are pushed at them) which gives you a chance to recover your own Ki, as throwing crap doesn’t use Ki and lets you keep regenerating Ki. Depending on your weapon load out you can even use the block happy AI against itself, bringing skills that have excellent Guard Break and just being hyper aggressive to smash his Ki and then Grapple him, though straight katana users have some issues as their best Guard Break skill is Kick, a combo move that can only be done in Low/Mid Stance, whose attacks will bounce off blocks. Further, Naomasa doesn’t Living Weapon, just fakes it with the one thing he can do that players cannot, he’s managed to mix a Guardian Talisman and Fire Enchant Talisman into one, applying a fire buff to his weapon while Summoning Enko. Speaking of Enko, deep dive!
Enko has Strong Attack Ki Reduction -8%; Break +15; Fire Damage +12%; Grapple Damage +25%; Strong Attack Damage +13%
Enko Details
Enko’s a good pick if you’re using Strong Attacks a lot, which if you’re using Spear all of its stances have very good Strong Attacks. Break is how good a weapon is at dealing with blocking opponents, higher break deal more Ki damage to blocks. It’s not terribly relevant as a stat as what Skill you’re using matters more than the weapon’s break but it’s there. Grapples do big damage, so adding 25% more to them is Good. Enko’s Living Weapon stats are more aggressive than Kato’s, packing a 22% damage boost and 42 Fire and similar Action, Might, and Gauge Rate while having one grade lower Recovery and Tenacity. Enko is here to hurt. On the topic of Summon attacks, recent testing has shown Kato can hit more than twice, the number of hits linked to how far the spirit travels before hitting something, so close range it can hit somewhere like six to seven times. Still doesn’t hold a candle to Enko’s summon, as Naomasa demonstrates for me, the tiger leaps forward and slams the ground causing a fire pillar to erupt, then two more at an angle from the initial pillar. The pillars do big damage and knock human enemies into the air, meaning they crash land and are ready to be hit with a Final Blow immediately. Big kitty for big damage 12/10
Ii, The Red Demon set is the other set you will see a metric ton of, lasting longer than even Warrior of the West’s Honor as Way of the Strong (NG+) will absolutely be littered with people in full Red Demon armor. It’s fairly lackluster because it doesn’t add much in the way of bonus damage and it’s 6 piece is Ki Recovery Speed, which since Red Demon gear is light armor, matters way less since there’s no way you aren’t Blue agility if you have the 6 piece Ii, The Red Demon. It’s not even saved by the Ii clan passive bonus, for aligning with the Ii you get Close Combat Attack +2% and +8% Toughness per piece of Red Demon armor equipped but 40% of light armor’s toughness is barely reaching Medium armor levels and there’s cooler things Clan passives can do (like clearing status effects when you use an Elixir or extending Living Weapon duration.)
And that’s a wrap… Wait what was that other fire Spirit in the video? We’ve just seen Kato and Enko now… Oh! It’s Hi-nezumi!
Hi-nezumi brings Onmyo Magic Power +50; Stealth for Enemies A+; VS Fire +20; Close Combat Attack (Critical) +18%; Unlimited Onmyo +15%
Hi-nezumi Details
Onmyo Magic Power affects Onmyo magic damage and +50 is solid. Stealth for Enemies makes enemies detection much worse and let me setup this 100% unintentional joke. Resist is resist, moving on. Recently I’ve learned that Close Combat Attack is not Close Combat Damage. CCAttack only works with non-skills, so just Quick and Strong attacks, while CCDamage is all damage. Still 18% more damage from a majority of your attacks is Good if risky. And a 15% chance to not use a charge of Onmyo is Good to Great since on average the big spells are way cooler to just get more of for free. Hi-nezumi’s Living Weapon stats are largely comparable to Aya-komari, but slightly worse in a few spots. The summon is also lackluster if unique. Hi-nezumi pops out, scurrying in a triangle pattern and dropping small explosives onto the three corners of its run. Contact with the spirit deals light damage, and the bombs detonate after a short time or contact with an enemy, dealing slightly better damage. It’s unique but also underwhelming, likely to keep Guardian Talismans from being too ridiculous with the Unlimited Onmyo. Also smokes a pipe; tiny sneaking mission magic mouse 12/10
2 Likes
Update 9 - The Demon of Mount Hiei
Edward Kelly has gone to Mount Hiei, a barrier to the northeast of Kyoto. Sir Anjin goes to the mountain to discover his plans. It is dangerous for the evil alchemist to be there as the Amrita spikes he creates can release a great amount of dark energy. Along the way William breaks many of them weakening Edward’s grip on the area. Evil Onmyo Mages working in the service of Kelley have also appeared and are dealt with. A confrontation happens, William catches up to Edward who releases the Amrita and Nekomata uses himself as a shield to protect Tenkai, Fuku, and William. Hanzo rushes off to warn Ieyasu who Kelley said he is coming for. Nekomata becomes a tainted version of the White Tiger and William must defeat him to purge the malice within.
Boss Information:
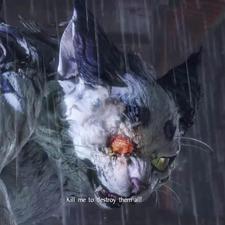
The White Tiger is very similar to Nue. It is weak to water and resists lightning, poison, and paralysis. From time to time it will meow leaving itself open to attack. This big cat is fast and swipes in front of it. Be way of standing behind the White Tiger as its tail can both spin and grab you. If they split get out from in between them because it means they are about to grab. When it rears up prepare for to dash at you. It can dash once or twice. If you stay in front of the White Tiger for too long it can do a backflip that strikes very hard. Sometimes when doing a backflip it will shoot out hard hitting fire or throw fire bombs around it. The fire you need to dodge through and the bombs can be avoided by staying close to the White Tiger. Finally it can fire a beam of lightning similar to Nue. The same tactic applies, hug its right side or dodge through it. This is the perfect opportunity to get some hits in.
Characters Introduced
Sakata Kintoki
2 Likes
The Fox Spirits were actually added to the game with DLC, the same patch added them to a few mainline missions to add to the enemy diversity since once Amrita Fiends show up new enemy types kinda dry up a bit. It also helps for getting crafting mats for Forging gear, which I recently found out forging armor halves the stat requirements to get the Armor’s effects. A nice tip for min/maxing, make your own stuff. Other gear related note is that getting gear unlocks the ability to refashion it, but not if it was looted from a Player Revenant.
Another note of Mount Hiei’s main mission is those smaller grey crystals can be broken by your attacks and doing so gives you a Lightningstop Talisman buff, dramatically increasing your Lightning defense. The smaller crystals don’t buff enemies, so they’re strictly there as a buff that make Nue+ easier to handle in that cramped ditch. and deal with the myriad Lightning elemental yokai in the mission.
I also completely forgot about Usura-hicho ruining my unintentional goof with Hi-nezumi so here we go.
Usura-hicho has Life Recovery from Purification 150; Evasion Ki Usage -20%; VS Yokai Realm +300; Water Damage +15%; Strong Attack Ki Damage +15%
Usura-hicho Details
Clearing a Yokai pool is Purifying it, so when you clear those pools you get 150 Life. Evasion Ki Usage returns, and better than Daiba-Washi. VS Yokai Realm increases your resistance to the Yokai Realm, reducing the amount to slows down your Ki regen. 300 is quite a lot of it, but it’s still not a dealmaker. Water Damage +15% is where the good stuff comes in, increasing ALL Water damage you deal by 15%. Onmyo Spells? Check. Weapon Enchant? Check. Living Weapon bonus elemental damage? Check. Strong Attack Ki Damage is alright but only affects basic Strong Attacks and only how much Ki damage it does. Weapon dependant, works well with Axes.
Living Weapon Stats Usura-hicho is another like Aya-komori and Hi-nezumi, but packs the innate 42 Water over the baseline 30, which gets boosted by the Water Damage 15%. Packing weak might and 4% damage boost it doesn’t hit big numbers and breaks easily when hit, but packs good Action and best Recovery and Gauge Rate means you can use Living Weapon a lot and if you avoid taking hits can stay in it a while. An important note is Ki Pulsing properly during Living Weapon not only purifies yokai pools but unleashes a small burst of the elemental damage. The Summon Attack is a decent defensive one, summoning a small horde of snow butterflies that drift in front in a short fan pattern, of you dealing light damage to enemies caught in the area repeatedly and staggering them (including yokai, most Spirit Summons do). It comes out incredibly quick but has a short range. Catching bigger enemies like Yoki or the bigger bosses in the attack all but guarantees Saturating them. 11/10
1 Like
Man, I knew I was missing out on something intresting when I quit this game on the second level. The combat just really didn’t click with me and I didn’t find the levels all that interesting. So thanks for playing this so I don’t have to!
1 Like
Isle of Demons and Deep in the Shadows are pretty rough just for what you’re dropped into and what you have. Isle expects some grind and deaths I feel like, while Deep in the Shadows has a hidden third shrine and a fairly lengthy run to the boss from the second. Onryoki gets more complicated when his chains breaks, going from slow and predictable to faster and more aggressive, while Hino-enma in the new player grinder. Fun tips for Hino-enma is she (and most other flying enemies from basic testing, like the oni heads) take increased damage from projectiles while in the air, making shuriken and kunai really good at chunking out her Ki while she’s throwing blasts at you from the sky. I haven’t tried using a bow or a gun on her but I know hand cannons can do some silly work against bosses if you line up the shots quickly enough.
1 Like
Yeah I find Nioh not exactly new user friendly. Something I was hoping with this LP is to show tips to people to help them through the game as well or get them more invested in it. But it’s also cool for people it doesn’t click with to enjoy the game through the LP without playing it.
And I can confirm arrows and bullets work just as well against her. I suggest the bow since it’s faster to use for when you need to dodge her blasts.
Update 10 - The Iga Escape
Ishida Mitsunari’s army is in the way of us. They’ve blocked off our paths to Tokugawa, but Hanzo has a plan. He takes us through a mansion in the Iga territory. Formerly the Iga ninja clan was wiped out by Oda Nobunaga. Surprisingly this isn’t a walk in the park. Edward Kelley has resurrected the Iga ninjas as revenants of evil. William must fight his way through while exorcising the spirits of the dead. At the end he faces a Giant Toad, who is Hattori Hanzo the elder, our Hanzo’s father. Who was known as Demon Hanzo.
Boss Information:
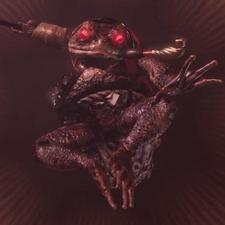
Giant Toad is a boss that is weak at short range. Try to stick to his backside and back off when he jumps up. When at the front he can swipe and thrust with his spear and deal massive amounts of damage in succession. Just in front of him with his pipe he can smack at close range or spray Yokai realm upon the floor stopping your stamina regeneration. He’s weak to lightning and earth, I suggest lightning as it slows him as well. At long range he can thrust with his spear or use his tongue. Demon Hanzo has a wide variety of ninja tools he can use, such as fire bombs, throwing weapons, and paralysis bombs.
2 Likes
Just thought I’d mention I decided to buy the Nioh DLC so after I beat and practice it I’ll be doing it in the LP as well.
Update 11 - Memories of Death-Lilies
On the way to joining up with Tokugawa Ieyasu around the castle and town of Futamata lilies and Yokai have appeared. Hanzo cannot join us but Okatsu knows the area. Both her and William head to Futamata. After fighting his way through the Yokai, William discovers the source of the lilies. A large weeping Ogress who is in reality Tokugawa Ieyasu’s former wife Lady Tsukiyama.
Boss Information:
The Ogress is a very straight forward fight. She telegraphs every move of hers quite a bit allowing you to prepare to dodge early, but don’t do so too early as a lot of her attacks are delayed. Lady Tsukiyam can swipe, she can jump and land down with a slam, and smash her claws into the ground then bring up rocks which deal damage. When she’s low on health and stamina she’ll summon lilies that create Yokai realm around the arena. This will slow your Ki regeneration and hasten hers. A dangerous attack of hers is a flurry but if you hug close to her face it will go right over your head. Sometimes she’ll breath fire which you need to dodge through. Generally hug her butt. She is weak to water and earth.
Characters introduced
Senji Muramasa

1 Like
Fun fact times, there was an Alpha and Beta for Nioh, the Alpha had one stage, Isle of Demons, and Beta had a second stage, Memory of Death Lilies. This is why compared to some levels there’s a whole mess of Amrita Memory in both, though Isle has being the first stage with the meat of the game mechanics. I believe the Beta used the enemy layout of the Twilight Mission version of Death Lilies. Twilight Missions are harder versions of Main Missions, stronger enemies and meaner enemy layout. Each day two will be randomly available, but you can’t do them unless you’ve completed the main mission they’re a remix of.
And a new pal, Gyokuto the lightning bunny! Bringing Elixir Effect on Life Recovery +20%; Dash Speed +10%; Low Attack Damage +8%; Luck(Using Living Weapon) +100; Ninjutsu Power +75
Gyokuto
20% more healing from Elixirs, getting more out of your healing can be useful depending on your Life total and armor of choice. Dash Speed makes you sprint faster, which since you can freely sprint in any direction even while locked on you can use that to reposition quickly, it’s alright. Low Attack Damage is weapon dependant but good (Single Katana low stance is very good so boosting it’s damage generically is pretty good), you get more Luck than Itokori, but only when using a Living Weapon and no boost to droprate so, eh. Ninjutsu power at +75 is pretty big. Living Weapon wise it’s another low might lower damage Living Weapon with good Gauge. Gyokuto’s summon attack is Hi-nezumi’s if it was good, popping out and jumping in a box-like pattern, leaving 7 lightning balls behind. They deal incredibly low damage but incredible Electrify potential, hitting most non-bosses with the status effect in two ticks of damage. Notably the sparks remain even when contacting with an enemy and last a good long while, which pairs well with something like Poison bomb or poison groundfires, or murdering a slowed opponent, or you have bonus damage against Electrified foes. 11/10
2 Likes
I really wish this game bumped a few of these more interesting bosses to the beginning, I think that really would have helped draw new players in.
It’s a bit of a double edged sword though since a lot of the more interesting bosses are harder to fight simply because of their mechanics.
2 Likes
Update 12 - The Defiled Castle
[Content Warning for Human Waste]
We’ve made our way to Ieyasu. Just as things start to look right Edward Kelley strikes again. This time his target is Edo Castle, Ieyasu’s seat of power. It is what functions as his capital and home. William is sent to take the castle back, but must enter through the only way available. The human waste tunnels beneath the castle. He gets really stinky on this filthy adventure and sneaks into the castle while freeing Tokugawa soldiers. Along the way he is stopped by a mind controlledHonda Tadakatsu. Tadakatsu is a tough fight but before long William is back to climbing up the tenshu of the castle. At its very top he finds a familiar face, only Okatsu is under Kelley’s control like many of the other warriors present.
Kelley manages to nearly capture Okatsu before escaping, she gets away from his clutches through her ninja ingenuity. But, it was all just a distraction. While Tokugawa was preoccupied with Edo castle, Ishida Mitsunari raised an army in the west to fight Tokugawa’s army. Tokugawa Ieyasu bleeds from his mouth, a man who has given up everything for peace, including family. With his heavy burden on his shoulders he rallies his own forces and plans to meet Mitsunari in the field of war.
Boss Information

Honda Tadakatsu is deceptive in his movements. He walks very slowly and telegraphs his attacks heavily but when they strike they are as swift as a coursing river. His attacks hit incredibly hard and he can heal and has a buff as the crystals are controlling him. For this fight you can lead him away from crystals then break them. When all three are broken he’ll be freed and end the fight. Alternatively you can take him head on. Being a spear user, most of his attacks are thrusts with his two main tactics being a charged lunge attack or a quick series of stabs. Try to stick to his backside and note that he is resistant to earth and weak to wind.
Okatsu is the tougher of the two. She’s incredibly fast. You’ll want to conserve your ki and be ready to dodge at any given moment’s notice. The only breathers you’ll get is if you drain her of her stamina and grapple her or knock her down. In between attacks she’ll throw knives in a spread that are best blocked. At times she’ll sheath her blade then rush forward with a powerful blow. As the fight goes on she’ll get faster and activate her living weapon. Okatsu will leap into the air and when she hovers for a second prepare to dodge as she’ll rocket right at you. Her guard is very weak so you can grapple her from time to time. She resists lightning and is weak to water.
Characters Introduced
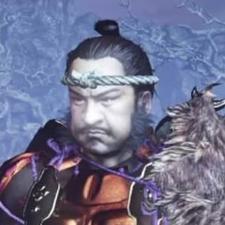
Honda Tadakatsu
2 Likes
So! Ryunoshin, the Dung Ball guy, is related to an achievement in the game. Give him A dung ball, get a gesture. Give him 15, get a Soulstone, a large amrita item. Give him 30 or so, get his helmet and the achievement, and he’ll open his door for you if you haven’t defeated Tadakatsu. This lets you skip him entirely, making him the only skippable main mission boss.
Boss Stuff
As for Okatsu, she’s a Low Stance boss for sure. Blocking the kunai is easy even in low Axe and the significant dodge Ki reduction in low stance with the better dodging makes her moves less pressuring. Okatsu’s interesting because she uses her Living Weapon works entirely differently than yours and everyone else’s. It doesn’t fall off once applied and doesn’t add to her damage, just opening up more moves she can combo into. Less Living Weapon, more phase change. Either way, the hot strat is she’s human and Mizuchi’s water and knocks humans on their face (for the most part) so River Dragon>Lightning Bunny. I also love Kelly’s reaction at the end, that wasn’t according to plan.
And our new spirit pal! Narikama Tanuki brings Retrieve Lost Amrita 50%; VS Earth +20; Unlimited Elixir +15%; Strong Attack Damage +10%; Auto Life Recovery (Critical)
Narikama Tanuki
Retrieve Lost Amrita means if you die you get a percentage of the amrita stored at your grave. VS Earth exists, moving on. Unlimited Elixir, like unlimited Onmyo and Ninjutsu, gives you a percent chance to not consume a charge an elixir when using one, handy when it procs. Strong Attack Damage good with weapons with good strong attacks. Auto Life Recovery (Critical) gives you a significant HP Regen effect when you’re knocked into Critical health. Importantly it’s not just active while in Critical once activated. It’s about 1.7% of your max HP per tick. Not great by itself, except it (and all other heal over time effects) stack with other sources of it. Still not great past NG.
In terms of Living Weapon Narikama Tanuki’s defensive as all get out, packing better might than Fuse-ushi and a mighty 20 second duration base. Damage wise it’s a respectable 12% and 30 Earth, with it’s only weak stat in Gauge Rate. The Summon Attack is fairly potent, summoning the Spirit who does a few adorable flips in front of you until it contacts with an enemy, dealing a single hit of average damage before disappearing, to suddenly slam down in a giant Yoki sized form that knocks down human sized opponents and deals big damage to large enemies who aren’t knocked down. Notably the giant slam has a good shot at smash Yoki/Amrita Fiends’ horns, flooring them anyway. Slightly awkward to use in close range due to the angle the Tanuki initial comes in at, enemies directly in your face aren’t likely to be hit. Still can call a raccoon dog to do flips and shit 12/10
2 Likes
Great info like always! I have finally gotten around to adding links to your posts beneath the update section since your posts are so informative and I feel are a great addition to the LP.
Update 13 - Immortal Flame
Torii Mototada is sacrificing himself at Fushimi Castle. While the Western Army spends eleven days attacking the castle buying time for Tokugawa Ieyasu. William has decided to go to aid Mototada. His last stand need not happen, and we fight our way through the forces of Ishida Mitsunari and the Saika Ikki. Edward Kelley’s Yoki creations are mixed in with the enemy. William manages to make it to the keep while the castle burns. With fire all around him the castle begins to crumble. Before he can reach Torii Mototada he is stopped by Saiki Magoichi. Their duel in the blazing inferno ends with William the victor and the Saika retreat. Sir Anjin reaches Mototada who goes on to fight till the end, ordering William to escape via a secret tunnel. His brave sacrifice ends up allowing Tokugawa Ieyasu to muster his forces and ready the Eastern Army for a major battle to come.
Boss Information:
Saika Magoichi can be a tough fight depending on your build. High ki regeneration is advised for this fight. Whenever you see him about to fire get ready to block or dodge, blocking his bullets is easy enough. When he throws fire bombs he will throw one or three< be wary of just dodging to the side, and instead try to dodge towards him. Rarely he’ll engage in melee with a few quick hits that deal low damage. When he whistles he’ll summon his Guardian Spirit to send out gusts of wind to where he is facing. Go to the sides to avoid this. When in the air he is very susceptible to ranged attacks and can be easily knocked down then hit while he’s on the ground. Up in the air he can swoop and grab William then throw him to the ground. He is resistant to fire so he takes little damage from the fire in the room. Saika Magoichi is weak to lightning and earth, so I suggest bringing the appropriate Guardian Spirit to be his elemental weakness.
Characters Introduced
Saika Magoichi

3 Likes