Great info like always! I have finally gotten around to adding links to your posts beneath the update section since your posts are so informative and I feel are a great addition to the LP.
Update 13 - Immortal Flame
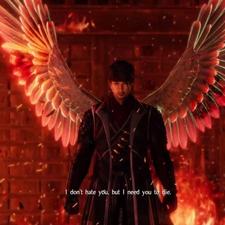
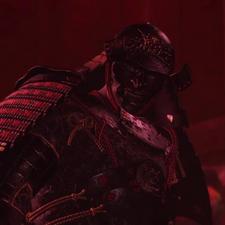
Torii Mototada is sacrificing himself at Fushimi Castle. While the Western Army spends eleven days attacking the castle buying time for Tokugawa Ieyasu. William has decided to go to aid Mototada. His last stand need not happen, and we fight our way through the forces of Ishida Mitsunari and the Saika Ikki. Edward Kelley’s Yoki creations are mixed in with the enemy. William manages to make it to the keep while the castle burns. With fire all around him the castle begins to crumble. Before he can reach Torii Mototada he is stopped by Saiki Magoichi. Their duel in the blazing inferno ends with William the victor and the Saika retreat. Sir Anjin reaches Mototada who goes on to fight till the end, ordering William to escape via a secret tunnel. His brave sacrifice ends up allowing Tokugawa Ieyasu to muster his forces and ready the Eastern Army for a major battle to come.
Boss Information:
Saika Magoichi can be a tough fight depending on your build. High ki regeneration is advised for this fight. Whenever you see him about to fire get ready to block or dodge, blocking his bullets is easy enough. When he throws fire bombs he will throw one or three< be wary of just dodging to the side, and instead try to dodge towards him. Rarely he’ll engage in melee with a few quick hits that deal low damage. When he whistles he’ll summon his Guardian Spirit to send out gusts of wind to where he is facing. Go to the sides to avoid this. When in the air he is very susceptible to ranged attacks and can be easily knocked down then hit while he’s on the ground. Up in the air he can swoop and grab William then throw him to the ground. He is resistant to fire so he takes little damage from the fire in the room. Saika Magoichi is weak to lightning and earth, so I suggest bringing the appropriate Guardian Spirit to be his elemental weakness.
Characters Introduced
Saika Magoichi

3 Likes
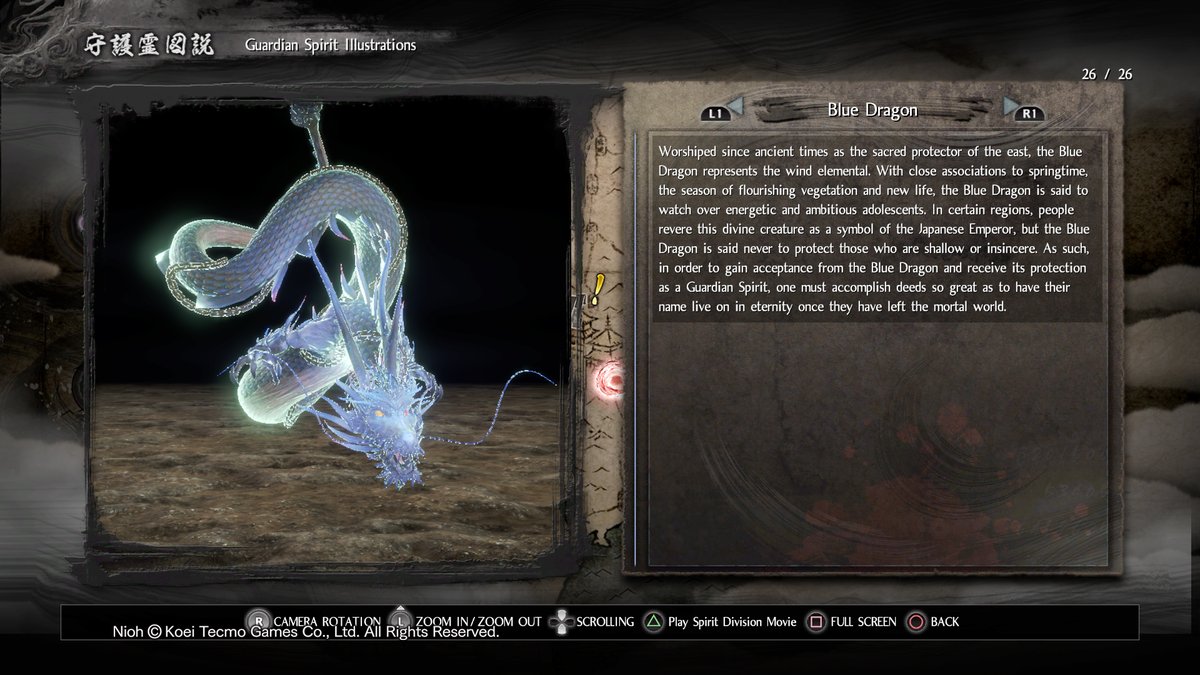
Aw yiss time to talk about the best boy, the Vermillion Bird of the South, Suzaku brings Activate Living Weapon (No Life), VS Fire +20, Amrita Earned Using Living Weapon +25%, Fire Damage +15%, Auto-Charge Amrita Gauge (Critical)
Suzaku
Immediately Suzaku gets to the point, Activate Living Weapon (No Life) means if you have a full Amrita Gauge and take lethal damage you will be left with 1 Life and Living Weapon activates. This skips the animation and it’s iframes but this gives you an entire second health bar and hyper armor, and you can use items like Elixir in Living Weapon. This can save you from death and turn around bad situations. VS Element still exists. Amrita Earned Using Living Weapon is self explanatory but as a reminder, gaining Amrita during living weapon extends the duration, based on the amount gained. Suzaku also packs best Recovery, meaning with this you can sustain Suzaku’s living weapon for a long freaking time. Bonus fire damage works great with a Fire spirit, and Auto-Charge Amrita Gauge (Critical) slowly charges your Amrita Gauge while you’re Critical. It’d not the best since Suzaku’s Gauge rate is quite poor.
Importantly however is Suzaku packs 15% damage boost and 50 Fire, decent Might, Best Recovery and Tenacity, and okay Action. The base duration of Suzaku is a little low and the aforementioned worst Gauge Rate balances the fact that the Vermillion Bird will keep you from dying and then put you in a solid offensive Living Weapon to scorch your enemies away. Suzaku’s summon attack is incredibly good, the rather large spirit swoops down, slowly circling around you until reaching the front of you (from where you cast) before flying up and bombing into the center of the circle path it flew, causing a burst of fire. Contact with the spirit does good damage and knocks hit foes back base on what part of Suzaku hits them. If lined up just right they’ll get shoved in front of Suzaku, who will hit them again, shoving them in front of Suzaku again, repeating until finally they’re released from the strafing run just in time to get dive bombed. This deals potent fire damage with the boost and while the contact hits don’t build the status effect quickly the final burst heavily inflicts it meaning one contact and the final burst will scorch most foes on NG. The full loop can shred Fire Weak enemies Life quickly and have I mentioned that you get to cheat death on top of having this incredibly good summon attack? 14/10
As for Kelly’s yoki, if you look close the red runes closely match what Kelly has going on. Not one to one but same style, on top of using those red amrita spikes Kelly shoved into Derrick way back in London to make him grow. The important thing to note about the red amrita spikes is that they can be used as a ranged attack or a close range grab, and if it hits a wall or the ground, will explode a few seconds later. Even more importantly, they cause Discord build up by themselves, later one inflicting the effect with a single hit. Don’t let that happen.
2 Likes
Update 14 - Sekigahara
The battle of Sekigahara is underway! Both the Eastern Army and Western Army have clashed in Mino just outside of Gifu castle at Sekigahara. The Eastern Army, led by Tokugawa Ieyasu, struggles to make way during the battle. At first it would seem Ishida Mitsunari’s Western Army is in the advantaged position until Kobayakawa Hideaki betrays him and turns his forces on the Western Army. Seeing no other option, Otani Yoshitsugu turns to the Amrita and turns himself into a Yokai, and begins to slaughter all that attack him. Originally uninterested in joining the battle, William rushes off at the news of Yokai hoping to find Edward Kelley.
After defeating the Justice Minister Yoshitsugu, William continues to fight his way across the field to find Kelley. Seeing the battle as lost, Shima Sakon goes off to hold the Eastern Army back while Mitsunari retreats. All who approach him are slaughtered by the great samurai, until William arrives. Both enter a gruelling duel, afterwards Shima Sakon offers William his spear and William spares his life. With the battle almost over things look good for the Eastern Army until Edward Kelley unleashes a powerful spell raising the dead, summoning Yokai, and a great demon that threatens the world is formed.
Boss Information:
Otani Yoshitsugu is fairly easy as far as bosses go. He focuses mainly on combos that have a poor turning radius allowing him to be easily sidestepped. When his Living Weapon activates he’s a bit dangerous. He can fire waves with his sword swings and do a spinning vertical slash from overhead that should be dodged instead of blocked. If he enters a superman flying pose get ready to dodge as he’ll zip through the air towards you, often doing it twice in a row. Weak to fire, resistant to water, Yoshitsugu presents little of a threat.
Of the two bosses in Sekigahara, Shima Sakon is definitely the tougher. He is quick moving with slow wind ups. His grapples and push attacks are very fast but either do no damage or little damage. Shima Sakon likes to control where you are. Watch out for his Living Weapon, as it is lightning and if you take a few hits you’ll get slowed down. If he leaps up into the air try to move as far away as possible. Don’t block his slam or his lightning explosions. Shima Sakon eats through stamina quickly but has a high guard. He is a decent target for grapple attacks.
1 Like
So our new spirit to start! Kara-jishi packs Increase Attack (Skill); Guard Ki Reduction -20%; Lightning Damage +12%; Ki +20; Skill Life Drain 15.
Kara-jishi
Hoo boy Kara-jishi, a contender for “Best Offensive Spirit” alongside Kato and one other we’ll see later. Increase Attack (Skill) hands you a damage boost whenever you deal damage with a Skill. It lasts a decent chunk of time, 5-7 seconds, and iirc stacks with consumables like Power Pill. Guard Ki Reduction is still a great defensive trait and unlike Fuse-ushi, Kara-jishi doesn’t really have situational passives like VS Poison and Recurrent Damage from Poison -25%. Lightning Damage +12% is lower bonus than other Spirits but still quite good. Ki +20 remains solid, especially paired with the Guard Reduction. Skill Life Drain heals you based on the amount of damage you deal with Skills, gives some sustain while slamming out Skills for that damage boost. Lighting Lion’s passives aren’t playing around.
So with an excellent passive line up the Living Weapon has to be kinda mediocre, right? Well, up front Kara-jishi has 22% damage and 42 Lightning, good Might, and a 18.8 second duration baseline. The other stats run into problems though, bad Gauge Rate and worst Recovery means you aren’t getting much extra time in Living Weapon and with average Action it’s comparatively short compared to the other usual Living Weapon-centric Spirits. But if your weapon has skills it can use in Living Weapon you have the Attack boost on top of everything. Really Kara-jishi’s weakness is having a bad summon attack, maybe worse than Kato’s used properly. The spirit lands in front of you, charges a moment, then lets out a beam of lightning directly in front of it for two seconds or so. The problem is how long it takes, against anything remotely aggressive it’s not hitting at all and the contact damage from Kara-jishi landing barely exists. It at least deals purely lightning damage with the beam fairly quickly if you somehow line it up. 13/10
And here’s some chat about the bosses featured in the video.
Boss Facts
Now that we’ve seen not one but two bosses who Living Weapon, let’s talk about how enemy Living Weapons work. Rather than entirely replace both Life and Ki, enemy Living Weapons replace the enemy’s Ki. Yokai LW animations drop a Yokai Realm while Human LW animations give them Hyper Armor that even canned animations like Body Flip or Spear Trip won’t interrupt, while also doing an area of damage that can stagger you. Importantly while the Living Weapon is ongoing, Human enemies cannot gain Ki and Yokai enemies don’t generate Yokai Realms (though they can still regain Ki from remaining pools.) This is important because when they run out of Ki their Living Weapon ends. There’s an exception to this but that boss is full of exceptions. So the big thing is just like you, human enemies get Super Armor in LW and the AI knows it and you can’t just trade blows like they can. If you can get them blocking you can unleash Skills like Spear Shove on them and rip chunks out of their Ki but strong attacks are the go to for smashing them out of the Living Weapon.
Yoshitsugu’s here is slightly unique because, it’s not elemental at all, similar to Kelly’s Yoki, but without the Discord and the red color. I think this shows Yoshitsugu’s magical stuff isn’t the same as Kelly’s, and likely Kelly came to him to offer his services to Ishida rather than to deal with his leprosy, which I feel is reinforced by no additional things being involved in Yoshitsugu’s transformation, other than him resolving to when the Western Army is betrayed by Hideaki.
Shima Sakon’s Living Weapon is fairly rough but that giant leap he does costs a ton of Ki and generally leaves him out of Ki so a quick bow or kunai can knock him down for a Grapple. The big thing is don’t retreat, as Kara-jishi’s summon can zone you out and get you laid up between him and it’s beam. And on top of his Grapple he’s also packing Spear Shove and Trip, so dodging is generally a better choice than blocking anyway.
1 Like
Update 15 - The Source of Evil
Edward Kelley has unleashed a spell turning the massive amounts of dead bodies at Sekigahara into Yokai. At the very center has spawned a giant skeleton known as a Gasha-dokuro. It threatens the whole of Japan with its might, as such William has no other choice but to fight it. Both Tenkai and Hattori Hanzo assist him in the battle. Hanzo far off fires cannons at the monster distracting it while Tenkai gives William a crystal that allows him to turn the large spirit stones around the battlefield from negative energy to positive. After altering the stones he leaPs down to fight the Gasha-dokuro. It is a terrible battle as William narrowly avoids death against the great Yokai. Tenkai assists him by pinning the Gasha-dokuro at times allowing WIlliam to attack it. When the fight ends Tenkai casts a spell banishing it, in all of the commotion Ishida Mitsunari and Edward Kelley have escaped. William chases after them though he deals with the retreating Shimazu first.
Boss Information:
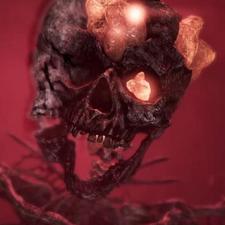
The Gasha-dokuro is more of a puzzle than a straight up fight. You need to damage its limbs to allow Tenkai to pin the Gasha-dokuro. When you see purple/pink beams hitting the boss run up the slopes and get ready to hit its head. Manage your stamina well and if you have your Living Weapon ready pop it early right before the skeleton’s head slams onto the raised ground. Each time you break a limb you’ll have an opportunity to do this. In between the boss will slam its tail, feet, and hands wherever you happen to be. In general dodge towards the boss to escape being crushed. After being pinned the Gasha-dokuro will clap its hands at the top of the slope, make sure to drop down before it does this or you’ll be one-shot. This boss is weak to all elemental types and resists poison and paralysis.
2 Likes
Update 16 - A Defiled Holy Mountain
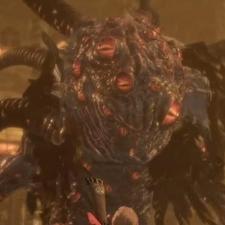
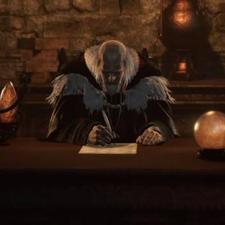
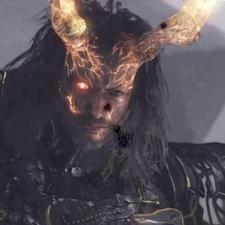
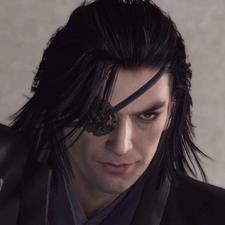
Ishida Mitsunari and Kelley have retreated to Mount Ibuki. On this holy mountain their forces are making a last ditch effort defense to protect their leader. While the Eastern Army focuses on Sawayama Castle William chases after where Mitsunari and Kelley truly are. Alone, he ascends the mountain on the hunt. Fighting his way through the Ishida forces, at the summit of Ibuki he discovers Mitsunari. There Kelley stabs a spike into him from behind transforming him into a Yokai similar to Derrick the Executioner. Both William and Mitsunari duel with William coming out the victor. Tenkai arrives and with holy water manages to save Mitsunari while purging him of the negative energy. Here it is revealed that Tenkai was secretly Akechi Mitsuhide all along. Kelley was supposed to resurrect Toyotomi Hideyoshi for Mitsunari, only in truth he plans to resurrect the Demon of Owari himself, Oda Nobunaga.
Boss Information:

Ishida Mitsunari is a boss that contains a very quick fight. He is fast himself but also has low health all things considered. Mitsunari is weak to lightning, resists wind, paralysis, and poison. His speed is his greatest advantage in the fight. Watch out for his quick attacks and try to circle around him mid combos. He doesn’t have a good turning radius and leaves himself open from behind. From time to time he’ll swing his sword and fire projectile waves from it, these can be dodged through or blocked. Blocking them is the worse option as they deal raw wind damage which will go through your guard. Try to keep near the top or bottom of the slope in the arena. At times he will charge up a flurry of wave attacks in all directions, these can be dodged or using the elevation difference they can merely go above or below you. When he leaps back up in the air dodge immediately as he’s going to swoop at you with a grapple attack. If he runs out of stamina feel free to dump damage on him but understand he will only be staggered for a bit before reactivating his Living Weapon. Almost the entire fight he will have it active.
Characters Introduced
Akechi Mitsuhide

3 Likes
Update 17 - The Samurai from Sawayama
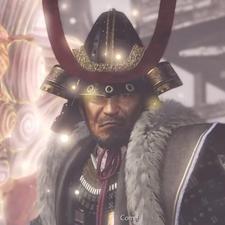
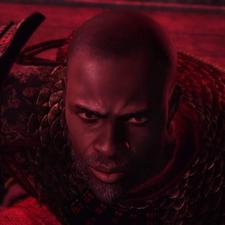
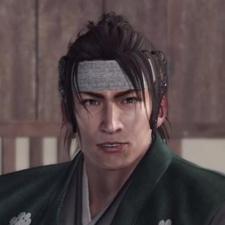
Sawayama Castle is under siege by Hideaki and Naomasa. As both armies fight against the remaining Ishida forces they have discovered a large number of Yokai within the castle. They call upon William for help, he is all too willing to go. Edward Kelley is believed to be in the castle working to resurrect lord Oda Nobunaga. William Adam ascends and descends then ascends again through the castle. Ultimately he finds Kelley only to be stopped by his bodyguard, the Obsidian Samurai, Yasuke. Yasuke puts up a good fight but he’s no match for William. After being defeated he relents about the death of Nobunaga and his place in the world. Edward Kelley manages to escape with Nobunaga’s body, leaving William to yet again chase after him for their final confrontation.
Boss Information:
Yasuke is a very simple fight. He uses an axe and a katana. When he has his axe out he is slower, even with his katana he is a bit slow. Circle around him when dodging and hit him from behind. You can repeat much of the tactics used on Honda. The Obsidian Samurai is weak to water and resists lightning, paralysis, and poison. Sometimes he will raise his weapon and buff himself. Rather than using a Living Weapon he’ll do a high leap and slam down with an electrical explosion. Fall back when you see him leap high. If he does a short jump instead he’ll be left wide open after. This fight is again, fairly easy. If you lose sloth it isn’t even a fight anymore he’ll just be a sitting duck.
Characters Introduced
Yasuke
2 Likes
I believe the second group of humans at play on Mount Ibuki are bandits, based on the amrita memory near the start and their armor. Also finally on screen Sloth, Sloth is good and breaks the back half of NG right over your knee and doesn’t let it back up until Way of the Strong or NG+. Importantly all three DLCs are balanced to be one difficulty higher than the base game, so Way of the Samurai (NG) DLCs run the spectrum of Way of the Strong’s difficulty, and with this comes every boss having dramatically higher Sloth resist.
I’m also behind on Spirits so lets dig in, starting with Yatagarasu.
It exists. Moving on! Slightly more seriously it brings Unlimited Ammo 10%, VS Wind +20, Long Range Attack Damage +10%, Sense Enemies, Life Recovery From Hit (Ranged Weapon) 30.
Yatagarasu
Don’t use this spirit. The passives make sniping slightly better with a chance to not use ammo and the life recovery is super low. While it’s unique what it’s doing just isn’t really that good. It’s Living Weapon is fine, 12% and 30 Wind with good Gauge Rate and Recovery, and it’s summon attack is difficult to line up. The Guardian swoops in front of you a fair distance and rises above the first target it hits. After a short delay it lets out two blasts of wind to either side of where the enemy was when it was hit by Yatagarasu. Contact damage is low and the blasts don’t do much more damage but inflict Bluster at a heightened rate. Even being a three eyed crow doesn’t save Yatagarasu. 10/10
Izuna brings Earn Amrita (Strong Attack) 25, Amrita Earned 8%, Close Combat Attack Ki Reduction 10%, Wind Damage +15%, Auto Life Recovery (Finished Using A Living Weapon)
Izuna
Izuna has a plan and that plan is build up Living Weapon with Strong Attacks and then Living Weapon to leverage that Wind Damage. A decent plan, offset a bit by the worst Gauge Rate and average recovery, but with 21 seconds duration baseline and best Action you can stay in a while to get that 42 Wind damage bonus. The 5% damage boost keeps Izuna from riding among the greats but it’s summon is interesting in that three versions of Izuna spiral out forward in random directions (forward and up is possible, making it a really weird and random angle) but at close range all three can hit a foe and after going forward a fair distance each spirit shoots up, knocking down foes they contact with during this time. Against bigger foes this is a lot of stagger and Bluster. 12/10
Atlas Bear brings Increase Damage (Low Ki), Life Recovery By Grapple 150, VS Lightning +20, Close Combat Damage +10%, and Shorten Recovery Time (Out of Ki)
Atlas Bear
Increase Damage (Low Ki) gives you a damage boost based on how low you ki is. It first kicks on a small boost at about half your Ki and maxes out below 15%, which if you’re using an Axe and its skills will be Often and Always. Since one of the Axes Mystic Arts dramatically increases the damage of attacks that reduce your Ki to 0 or less, this can do some damage. Life Recovery on Grapple is fine, getting healed for doing something you already want to do is ok. VS Element exists, at least Lightning is the worst element to face. Close Combat Damage is great since it’s ALL melee damage, and Out of Ki is the state your put into when your Ki is reduced to 0 or less by an enemy attack. With the shortened recovery time you come out of the state at 30% Ki instead of 50%. With A agility this basically makes you immune to Grapple attacks since you can recover and roll before the animation comes out, and with anything less this makes it easier to get out at the last second. While it’s better to not be in that position, if you’re keeping your Ki low to leverage the passives it’s a nice cover.
In terms of Living Weapon Atlas Bear is another of the big heavy bruiser types, packing 23% damage and 42 Lightning. What keeps it different from Kara-jishi is better Gauge Rate and Recovery though it’s action is noticeably worse. It’s summon attack has the bear appear in front of you, raise it’s paw and then smash it down. Anything hit by the smash takes BIG damage and if human is knocked to the ground for a Final Blow. Tricky to time but it’s Daiba-Washi with a BIG hit attached if you line it up. Give this good bear some honey. 12/10
2 Likes
Update 18 - The Demon King Revealed
This is it, it has all come down to this. A final confrontation with Edward Kelley at Azuchi Castle. Here he has unleashed the Amrita in full, twisting the castle into a great fortress in the sky. The very air churns with the miasma of evil. William, Okatsu, and Hanzo have joined together to assault the castle. Together they face a large amount of Yokai, there are seemingly no end to them.
But before they can reach the keep, the bridges break and William is left on his own. It’s up to him to bring down the wicked alchemist, as well he has to deal with a gauntlet of bosses before he can even ascend the tenshu. Higher up he finally faces the Demon King himself, the Demon of Owari, Oda Nobunaga. After being resurrected he is in a foul mood, and William needs to break him out of it. Their battle ends with Nobunaga shaking free of the control of Kelley. Seeing his plan falling apart the Kelley escapes further up. There William finally catches Kelley. After an exchange of blows the alchemist releases all of the stored up Amrita, and summons the great Yokai, Yamata-no-Orochi. This eight headed god-like serpent tears apart the castle.
As it crumbles, William stands atop the ruins and defeats the monster. On the beach of the lake he washes up and finds Divine Weapons in the remains of the beast. Edward Kelley is defeated, whispering to himself on the ground. His Guardian Spirit, Uroboros, takes one last go at William before both are finally killed by the Irish Samurai. Finally, peace comes to Japan, for now. Hanzo spares Williams life, Tokugawa Ieyasu rules Japan, Ishida Mitsunari is executed as well as many of the Western Army leaders.
Boss Information:
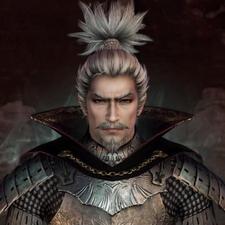
Nobunaga is a straight up fight with elemental elements. Yes I just typed that. Nobunaga is very fast but leaves you openings to get him. Dodge towards him and get behind him, he doesn’t have a great turning radius. Watch out as he summons his Living Weapons and Guardian Spirit. It will have a random element and effect. Fire he slams down from above. Lightning will cause bolts to track you similar to Nue. Wind will give him Mitsunari’s sword blasts. Earth will have big AoE’s of blindness. Water will have spots of water AoE and crystal shards. He is very weak to the sloth talisman and will end the fight at 25% health.
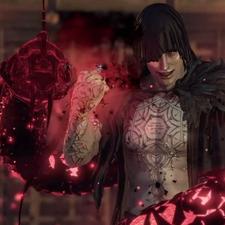
Edward Kelley is a tricky jerk who likes his spells. Watch out for his Guardian Spirit, he is fond of using it for spacing. He can send it chasing you, run away to the sides. He can send it under, keep moving till it surfaces. It can release in an AoE around him so get ready at any moment to leap back. From time to time he’ll throw spikes underhand really quickly, watch out. If he is running towards you dodge to the side.
He’ll either stab or grab you. Kelley can also teleport and will do so to make you lose focus, get ready to find him and dodge immediately. His guard is weak so its easy to grapple him.
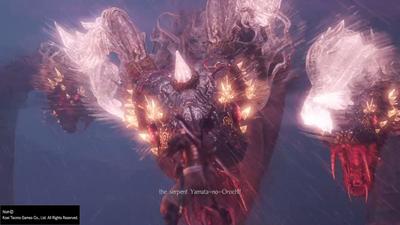
This eight headed serpent is a battle of attrition. Each head is resistant to its corresponding element and weak to all others except for the final head. The heads will have common attacks for all of them. They can spray an element, they can fire a projectile, they can swipe, lunge, and slam. Dodging them is a bit deceptive as you need to dodge a bit late for many of their attacks. It’s easy to get hit from behind when fighting a head so dodge often and back off after a few hits. After each attack the body of the serpent will come closer. After leaving one head behind it will gain all elements and have abilities similar to Nobunaga.
At zero health the head will flop down and its time to grapple attack it for the finishing move.
Characters Introduced
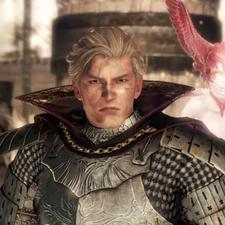
Oda Nobunaga
1 Like
The only difference between Honda Tadakatsu here and in the Possessed fight is I don’t think he uses his Guardian Spirit while possessed, which is good since it gives him a defense boost and a hefty heal over time effect. If you take the duel early on you might find yourself unable to out damage that self healing, so you need to deal with him quickly. I also love the continuing show where Kelley maintains a Western name structure for everyone.
Boss Chat
The big cheese himself, Oda Nobunaga. Despite the intro cinematic showing Kelley transforming into Nobunaga we instead fight his corpse raised by the power of ALL the Amrita. Wonder if Kelley’s shape changing powers were more of a front and center plot thing in earlier versions of the story. Either way I’ve mentioned in a few places one boss being an exception to a few rules, notably in regards to enemy Living weapons, and Nobunaga is that Boss. The big example is Nobunaga is the only enemy that can end their Living Weapon without their Ki hitting zero, as using the unique attack for each of the five elements ends his Living Weapon regardless of his Ki. His resistances are a bit weird, being they actually drop while he’s in Living Weapon except for the Element he’s using, which spikes even higher. On paper Nobunaga is complex and has a lot going on. In execution, if you know what his finisher is for each element and adjust to it and are remotely aggressive he’s no big deal in the Main Mission. For one of the uniters of Japan he’s eminently cheese-able.
As for Kelley, he’s a nerd wizard. Outside of his weird tricks like teleporting behind you he’s easy. With any kind of guard break skills (Spear Shove) you can heavily punish how block happy he is by ripping out damn near a third of his Ki bar each time he blocks. Kelley by himself is a weak nerd, stuff him in a locker.
And the important detail about Yamata-no-Orochi is the heads take back attack damage while stunned from the Spirit Stone Clusters overload effect, which as a hearty boss is a notable boost to damage, but on top of not getting knocked out in the last phase by them, it even gets a buff. Still, final head is one of the easier parts of the fight just because you don’t have five jerks launching crap at you while trying to dodge the sixth’s attacks and hit him.
Shin-roku, or as they were named before the 1.06 patch, Shinka brings Strong Attack Life Drain 10, Life +100, Kodama Sense, Earth Damage +15%, and Ki Recovery & Defense (Finished Using A Living Weapon)
Shin-roku
Life Drain is deceptively useful since it’s based on damage dealt, and since Strong Attacks hit harder and you can make them hit harder in a variety of ways this can keep up pretty well. Life +100 at this point is mediocre but still potentially useful. Kodama Sense puts Kodama on the compass as it do. Earth Damage, syncs with the Spirit’s element, the only weakness is not much is weak to Earth in the game but also not too much resists it. KI & Defense (Finished) gives you increased Ki Regen and Reduces damage taken after a Living Weapon. The buffs last about 20 seconds and is comparable to the Onmyo talismans that do similar effects.
As a Living Weapon Shin-roku packs 14% damage and 42 Earth, nearly 2000 Might and B+ Action and best Recovery, with average Gauge Rate. The damage boost is lower than the big pitch hitter Living Weapon spirits but it’s overall solid, which is what Shin-roku generally is, overall okay. The summon attack has the spirit appear and then rear back, causing an explosion of earth in front of it, dealing moderate damage in a sizable area immediately in front of you. It also gives you a thirty second buff that gives you Super Armor, the only way you can get staggered by attacks is if they put you into an animation (like having your Ki broken, getting hit by a grab attack, Body Flip from a spear user, etc) Pairs well with getting more Defense at the end of your Living Weapon. Overall solid Earth Spirit. 12/10
Genbu! The only Guardian Spirit with a 100% no bones about it drawback passive attached. Genbu packs better spirit protection than every other spirit, its baseline is 30% instead of 20% like literally every other Spirit in the entire game DLC included. It’s other passives are Dash Speed Reduction 30%, No Guard Break (During Onmyo Magic), Change to Defense (Magic) B+, Received Elemental Attack Damage 7.5%, Onmyo Magic Power +75.
Genbu
Dash Speed Reduction is what it sounds like, you sprint 30% slower while Genbu’s your Guardian in exchange for 10% more spirit protection. It basically makes your sprint not any faster than just walking. No Guard Break is an ability that comes up from time to time and what it really means is you have Super Armor during the described action, here it’s while casting Onmyo Magic. Good against packs if you’re trying to get an AoE effect out. Change to Defense (Magic) gives you additional Defense based on your Magic stat. By itself, eh, but Onmyo Mage gear has this stat on it already and guess what, they stack. Received Elemental Attack Damage is less damage from elemental attacks. 7.5% isn’t much but elemental damage tends to be a bit lower anyway. Onmyo Magic Power is there to make your magic attacks stronger.
Genbu’s summon isn’t spectacular, 5% damage and 42 Water, with it’s good stats being 3000 Might baseline (highest in the game) and Good Action and Recovery. Worst Gauge rate however. Genbu’s summon attack has the snake turtle crash in front of you dealing moderate contact damage, and then calls forth three geysers of water in a triangle pattern in front of it, one point starting roughly where it landed. The geysers do okay damage and physically knock most enemies hit by it into the air. Yokai take big Ki damage, while Humans land face first ripe for a Final Blow. They geysers hitbox is a bit small so Mizuchi’s more reliable summon for knocking down humans but better against Yokai, if you can get them hit by one of the geysers. Just alone in the world it’s a little SnakeTurtle. 12/10
And the star of the show, the final spirit in the running for “Best Offensive Elemental Spirit”, Tengen Kujaku! Bringing Bonus From Amrita Absorption (Stance Based), Yokai Damage Reduction 13%, Extend Elemental Effect +50%, Elemental Attack Damage +10%, and Enemy/Treasure/Amrita/Kodama Sense.
Tengen Kujaku
Bonus From Amrita Absorption gives you a buff based on what stance you’re in when you gain Amrita for any reason. High Stance gives a damage buff on par with Kara-jishi’s, Mid Stance gives a defense buff, and Low Stance give a Ki Regen Speed buff. In conjunction with an Extraction Talisman, an Onmyo buff that makes you gain Amrita when you hit an enemy, you can pretty easily get each buff rolling but the star is naturally the damage buff. Don’t need Ki and can’t get hit if your enemy is dead after all. Taking 13% less damage from the less cheese-able enemy type in the game is Good. Extend Elemental Effect increases the duration of any Elemental Weapon buff you bring. Poison/Paralysis no, Five Elements yes. From your own items or killing an Oni-bi (elemental heads). To pair with that, Elemental Attack damage boost. And because you needed more reasons to pack the peacock, why not every Sense skill in the game to cap it off.
Statistically Tengen Kujaku’s Living Weapon is fairly average, 10% damage and 30 Wind (it’s affected by the elemental attack boost) Good Action, Best Recovery, Good Tenacity, just one step above Worst Gauge Rate. Ho-hum? Nah actually Tengen Kujaku keeps its gimmick from the Nobunaga fight. When you activate the Living Weapon you get a random Element and that’s the element of the living weapon. You can change to one of the other four elements by activating the Summon attack during the living weapon, either by summoning it or by using a Talisman. This makes it hilariously easy to Discord enemies, which pairs well with the Oda clan’s passive benefits, a 10% chance to negate damage received in Living Weapon and increased duration on Discord. To balance this, outside of Living Weapon Tengen Kujaku’s summon does practically nothing, the only thing it does is the peacock does incredibly minor contact damage while summoned. Don’t bother summoning it outside of Living Weapon. It takes some micromanagement but Tengen Kujaku’s incredibly potent if you know what you’re doing. Falls off in later difficulties as a Living Weapon Spirit just due to how high enemy resistance gets but that Damage Buff is still a threat. 13/10
Also the last base game Spirit Saoirse is here! Bringing Amrita Sense, Sense Enemies, Amrita Earned +12.5%, Special Effects (Critical) +20%, Retrieve Lost Amrita 75%
Last Base Game Spirit
Let’s start with talking about Saoirse’s actual primary ability real quick before explaining her passives. She’s why William can’t die. Honda Tadakatsu mentions it and it’s hinted at in the game early and outright stated at the end. As long as William believes in Saoirse he will be returned to life after dying. This is played with in fluff text for The Abyss, a randomly generated “dungeon” of sorts released with DLC where the conceit is you can’t recall your spirit after dying and if you die while your spirit is guarding your grave you’re kicked out of the dungeon, which costs an item to enter at all. So keep that in mind, she’s the reason you can get knocked down and get up again. Fun facts is that she speaks entirely in Irish gaelic, and Team Ninja went out of their way not only to hire voice actors from Ireland to get the accents for William and Saoirse right they even went all in on making sure Saoirse’s gaelic was spot on.
Anyway her passives are mediocre. Amrita and Enemy Sense have shown up before, Amrita Earned is spot on with Mizuchi. Special Effects (Critical) boosts the effects of all of your (Critical) abilities so there’s that. Finishing out her passives is better Retrieve Lost Amrita. As for her Living Weapon stats, it’s basically Aya-komori, water edition. While the Amrita Earned means it charges even faster, it’s 5% damage and 30 Water, with a 10 second duration and 500 Might culminates in just a mediocre Living Weapon. It’s there’s often and has best Recovery and that’s about it. For her summon attack, she drifts forward a ways, turns to face you, then drops a big water explosion below her. It does big water damage but is slow to come out. There’s worse Summons.
The saving grace to Saoirse is DLC added the ability to equip a secondary spirit. You can swap between your secondary and primary with L2 while holding R1, swapping puts the spirit on Cooldown like you’ve come out of a Living Weapon (meaning you don’t get their passive benefits and can’t activate Living Weapon) and you can swap during living weapon at the cost of half the gauge. While the secondary spirit you get half the effect of one of that spirit’s passives, based entirely on what that Spirit is. (E.G. Kato gives Ki as a secondary, Saoirse gives Amrita Earned) and further based on what spirits are equipped you get a small passive bonus. There’s generic bonuses, like Fire and Wind paired together give Ki Recovery Speed (to the tune of 1.5% baseline) but some spirit combos have unique bonuses, like Tengen Kujaku paired with Usura-hicho has a unique passive. Saoirse does something unique for each Spirit she’s paired with, giving more of one of the passives that Spirit has. Basically the Secondary Spirit system goes to great lengths to make Saoirse usable, since she can build and activate Living Weapon incredibly quickly, then you swap over to something like Kato and leverage the good damage boost and Recovery to recoup the lost gauge.
2 Likes
Splendid info like always, and a lot of stuff I never knew!
So for today’s episode when I upload it we’ll be looking at the true ending of the base game, then I’ll get on to doing Yokai realm challenge missions, showing off the dojo masters, and a few more things before we get onto the DLC and head for Dragon of the North to deal with the Date clan and Date Masamune’s stuff.
Oh yeah I also have updated the information section again. I still need to get to adding the info for the Guardian Spirits though. Everything else should be up to date. I also am about to edit the first update to add the boss information I forgot to put in.
Update 19 - The Queen’s Eyes
Three years have passed since the battle of Sekigahara, and the defeat of Edward Kelley. Queen Elizabeth I has died. She has left behind an England in turmoil. William now travels back to the Tower of London, as his compass of Amrita still points him here. It is time to deal with John Dee, the mastermind behind the work of Edward Kelley. Searching the tower, William finds mementos from both Dee and the dead queen. Our Irish samurai discovers the secrets of John Dee and Edward Kelley before having one last battle against the creature Hundred Eyes.
Boss Information:
Hundred Eyes is mostly a simple fight. He swings his staff wide and slams it in front of himself. If you stand at his back he’ll slam his back tendrils down to try and hit you. But it is still mostly safe behind him and you can stay there nearly the entire fight. In front of himself he can do a crossfire with beams that cause discord but its a bit hard to get hit by. When his health gets low enough he’ll stomp his butt down knocking you back if you’re right next to him. He’ll gain a shield and summon floating eyes. Run in circles to bunch them up then kill them with ease. They can drop medicine which is handy. After he’ll get back up and continue the fight. In his new phase he can summon crystals in the air, run to the side until they are all fired. If these hit you they can often be instant death. He’ll also summon the eyes but will continue to fight alongside them.
Characters Introduced
John Dee
The Glamurai
2 Likes
Spirit Talk Time, today we have Ouroboros, Edward Kelley’s Guardian Spirit. Bringing no passives to the table, and not even equippable, in fact the only reason you really know William has Ouroboros is because an entry in the Character Directory unlocks after completing The Queen’s Eyes that mentions William slips into the Tower of London using Ouroboros’ power. Frankly it’d have been better if Ouroboros got used again, or left William to the Kelley clones. Maybe Saoirse was against keeping Ouroboros around for kidnapping related reasons?
1 Like
Update 20 - Wrapping Up Base Game
In today’s episode we wrap up the base game, showing off some of the final missions that were added post-game before going on to NG+ and the DLC. This episode has little commentary other than a few parts of it due to it mostly being battles with bosses we’ve already seen. We get a look at co-op as well.
2 Likes
Update 21 - Yokai Country, The Dragon of the North
[Content Warning for Centipedes]
Thirteen years have passed since the battle of Sekigahara, and ten years have gone by since William’s defeat of John Dee. Japan has enjoyed a time of peace under the Tokugawa Shogunate. However, William is still haunted by the images he saw of Japan once again at war, of a One Eyed Samurai, Crimson Armored Soldiers, and Hattori Hanzo’s defeat. Nekomata has returned and finds William on the sea where he informs him of Hanzo’s disappearance. Wishing to help his friend and Japan once again, William return despite his alleged death. He heads to the north of Japan to find Hanzo who was investigating rumors of Yokai in the Date clan. Right away William finds there is truth in the rumors, he travels through Yokai Country and finds Date Shigezane, Masamune’s cousin. Now a Yokai, he is a creature fused with his Guardian Spirit. A centipede man, he attacks William. Date Shigezane is one of the fiercest warriors of the lands and is possibly the toughest one William has ever fought. After defeating the Yokai Shigezane Hanzo is found, having been injured and defeated by Shigezane himself. William then goes on to leave Shigezane to Hanzo as he seeks out the One Eyed Dragon of the North, Date Masamune, to prevent all out war.
Boss Information:
Date Shigezane is brutal. This is one of the toughest fights in all of Nioh, even the later DLC. A complete jerk, he is very fast and agile despite his size. With his centipede limbs he hits incredibly hard and blocking is a last resort, this is a boss you must dodge. Shiezane’s odachi is relatively weak by comparison, it can be blocked. When at a range from him he’ll either rush towards you or throw two odachis. One will be spinning horizontally then soon after he’ll throw one rather quickly at you like a javelin. Running to the side or dodging to the sides are the only way to avoid them, as they’ll break your guard if you block them. He also has a grapple attack that often one-shots. It does have poor tracking and is easy to dodge. If you see him starting up a flurry run like hell, make as much distance as possible and wait it out. He is most vulnerable after he does a sort of pole vault with his sword or centipede arm. Shigezane is resistant to a lot of onmyo magic but they still effect him. Being of earth element, he is weak to wind and resists poison, earth, and paralysis.
Characters Introduced
Date Masamune
Katakura Shigenaga
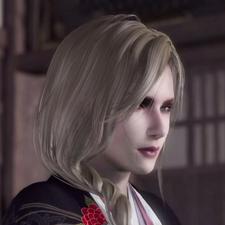
Maria
Guardian Spirits Introduced
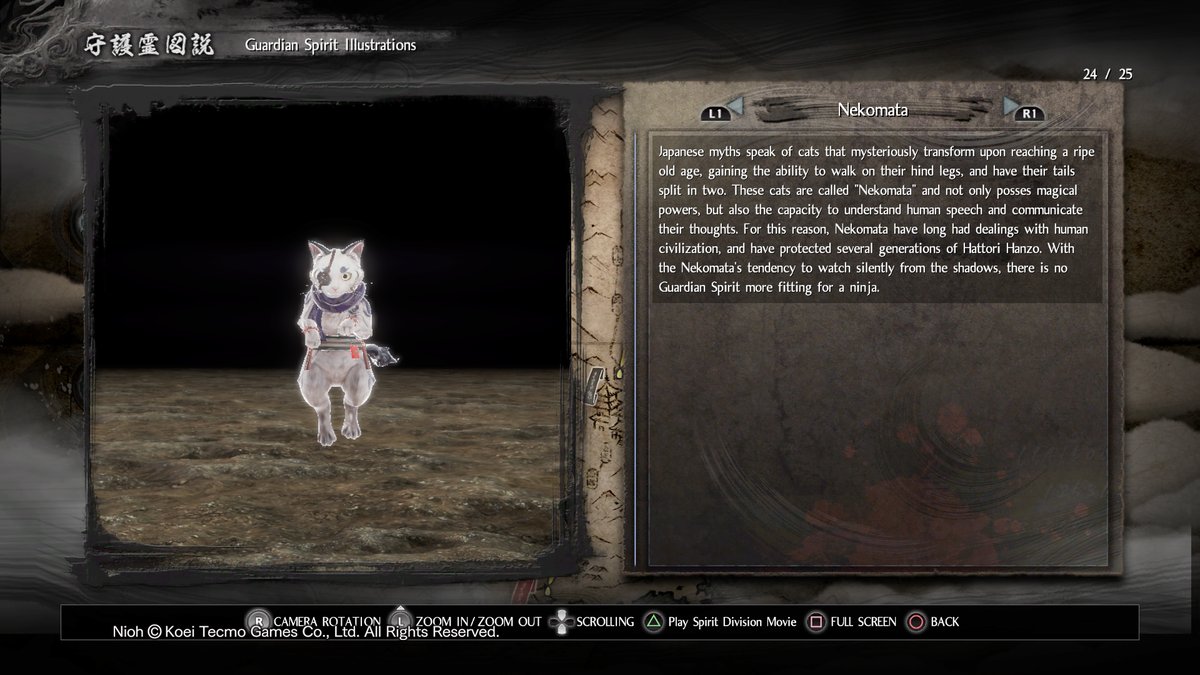
Nekomata
Bisha’s Centipede
#Characters in Dragon of the North
Guardian Spirits in Dragon of the North

Yokai in Dragon of the North
2 Likes
Hark, the Date Clan. Drat them. Double drat them! Confound the Date clan, oh how I hate them! I hate Shigezane, I hate Shigenaga, and I hate Masamune! They drive me to drink! And Shigezane is the capital offender, managing to hold the title of “Killed ArkInBlack The Most” out of all enemies in the entire game. The DLCs feel like they were balanced around the concept of people having at least done a bit of Way of the Strong and paid attention to making a cohesive build. Once you surmount Shigezane you either have every single one of his tells and movements hard wired into your reflexes or a competent WotStrong setup. Or summoned a Vistor to eviscerate him for you, which after twenty five deaths became my first kill on him. Anyway, Spirit Talk time.
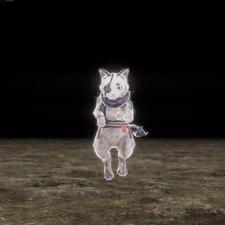
Once more ditching the guy he supposedly protects to join us, Nekomata brings Thrown Weapon Damage +10%, Sense Enemies, VS Yokai Realm +300, Close Combat Ki Damage +10%, Recurrent Damage Dealt +12%
Nekomata
If you’re traveling the path of a throwing weapon Ninja, Nekomata brings a nice boost for players after an early patch dropped the scaling of Shuriken/Kunai/Storm Kunai and increasing the spread on Storm Kunai. Sense Enemies is still good for foiling ambushes. VS Yokai Realm’s still a pretty weak passive. Close Combat Ki Damage affects only non-blocked damage, fairly good against Yokai. Recurrent Damage Dealt affects poison and fire, the two Damage over time effects, both of which Ninjutsu can apply, although poison remains fairly weak, at least the fire damage from Ninjutsu comes from explosives that apply damage up front.
Living Weapon stats are similar to Aki-komori, 5% damage and 30 Lightning, the breadwinner here is the 22 second base duration and great Gauge Rate and Recovery. If you don’t get hit it’ll last a good long while and deals Lightning damage. And the Summon is solid, Nekomata floats forward a ways before stopping, dealing contact damage that builds Electrified quickly. He’ll then gesture and blast an area in front of him with lightning which deals multiple hits of good damage, better than Saoirse’s water bomb. (which recent testing has shown gives you a buff that increases Amrita earned.) Since the contact damage will push back hit enemies Nekomata can push back aggressive opponents and drop the thunder on 'em. 13/10
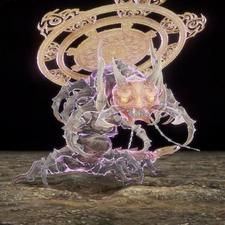
And Bisha’s Centipede, with Pierce Guard (Close Combat) +20%, Poison +30, Money Earned From Enemies +40%, Strong Attack Ki Reduction -8%, and Close Combat Damage (No Rear Damage Bonus) +12%
Bisha's Centipede
Shigezane, I’m sorry, but… Your spirit has Garbage Passives Syndrome. It’s incurable. Pierce Guard means a percentage of your damage gets through a blocking opponent’s guard. 20% with something like an Axe or Odachi (and maybe more from weapon/armor passives) can do some neat things but there’s better ways to punish block happy opponents. Poison is like Itokuri’s Paralysis, unnoticeable. Money Earned From Enemies is like Gold earned, but only from actual enemies you fight in missions. Strong Attack Ki Reduction is still solid if you Strong Attack a lot, and CCD (No Rear Damage Bonus) is still taking way more damage potential away than it adds. It at least has some synergy with one of the Odachi’s Mystic Arts.
The Living Weapon is fairly average, in fact is largely similar to Fuse-ushi with a stat or two moved around. Not good enough to make a Living Weapon build’s consideration with the worst Gauge Rate and Recovery. The summon attack is quite good for people doing what the Spirit is trying to encourage however. The spirit crawls forward from your right, looping around in a fairly wide arc until it reaches roughly where it started but on your left. It won’t hit enemies immediately in front of you but will stagger enemies closing. Then after a short delay, it bursts out of the ground from where it burrowed, crossing directly in front of you to the right. It repeats this three more times, alternating which side it pops out of based on where it burrowed, always crossing in front of you when it surfaces. The contact damage is quite low but staggers without pushing enemies back, leaving enemies vulnerable, and since where the centipede pops out from is based on where you standing you can push them back without fear of losing the layup from the centipede. Still not enough to save this spirit from the low end of useable. 11/10
2 Likes
Ah is pierce guard not that good? When looking up Odachi builds I was seeing to use Bisha a lot, though personally I ended up with Kato more often than Bisha. Seriously Shigezane you’re such a pain to beat and you don’t even give amazing rewards? Not a fan of his armor much either.
It’s better with Axe/Odachi since they’re generally more damage in fewer hits but Axes have the highest Break in the game short of cannons, skills like Tri-Spark and Titanic Might shred blocking opponents Ki, while Odachi has Groundquake and Tiger’s Blade which perform the same job if not quite as well. It’s not a bad passive, but that it’s maybe the best Passive on Bisha’s Centipede speaks to why you want to look elsewhere for an offense oriented Spirit while Mizuchi brings Gold and Amrita Earned for farming.
And yeah He Who Never Retreats isn’t a top tier set, though the (When Surrounded) passives are in effect when three or more enemies are ‘focused’ on you, so archers will trigger it, and at least the other sets from Dragon Of The North make up for the lackluster heavy armor set.
That does make sense, I never really found Shigezane’s unrivaled armor too great for its weight. Unlike other sets that are heavy like Tatenashi or Armor of the Exceptional. In general it seems like medium armor has better set bonuses than a lot of the heavy sets. Might just be that there’s more of them too.