Eurojank Incarnate: Let's Play Risen

My last LP died due to the game breaking itself, so instead of trying to salvage it, I’m going to do a game that’s almost as broken, but in a much better way.

Risen is the fourth game released by Piranha Bytes, a German studio whose prior portfolio consisted of such titles as Gothic and Gothic 2, both of which were extremely janky but also pretty good. There are LPs of both of those games on the archive, but I’ve played both and probably wouldn’t go back to LP them.

In a lot of ways, Risen is just a reboot of Gothic. Like Gothic, it stars a nameless protagonist stranded in an area he can’t leave who has the option of working for the local mafia. Also like Gothic, it’s pretty low on the fantasy scale: magic does exist in the world of Risen, but you can go almost the entire game without ever seeing anyone use it unless you purposely choose to.

This game is also VERY broken (in a design sense, not in a “game blackscreens when I try to launch it” sense like my last LP) and kinda poorly designed. This was Piranha Bytes’s first real attempt at making a game with multiple possible character builds. In theory, all three of them are viable. In practice, there’s a correct way to do things and several VERY incorrect ways. That isn’t to say it’s not fun - this game is definitely fun, especially if you know how to break it.

As for how much we’ll be breaking it… well, that’ll be up to you, the reader. You’ll understand more by the end of the first update.

Update%201
Update%202
Update%203
Side%20Update%201
Update%204
Update%205
Update%206
Update%207

1 Like

9_2iVBrO_400x400 Welcome to Risen. There’s a very brief intro cutscene I’ll probably record later, but really this game doesn’t have much of a plot, and what little it has is mostly retconned by its sequels.

9_2iVBrO_400x400: We wake up on a mysterious island as a random bald asshole who is ultimately going to turn into the island’s greatest weedlord. Maybe. And no, I’m not mis-using that term. Most of the people on this beach are dead, except for that one lady.

9_2iVBrO_400x400: The two men in front of us are dead. Each of them have a couple of items: this guy has a few gold pieces, a ring (worth ~20 gold) and a bottle of wine. Unlike Risen 2, where alcohol serves as a health potion, in Risen 1 it only increases mana. We won’t be able to actually use mana for a long time.

9_2iVBrO_400x400: There’s a trail of gold coins near the bodies, as well as a couple of healing potions. The coin trail leads out into the water, where…

9_2iVBrO_400x400: We promptly get grabbed by a sea monster that tosses us back onto land. The game has a name for this thing, but I forget what it is. The sea monster is useful for one reason: if anything had been aggroed onto us, getting grabbed by the sea monster resets aggro.

9_2iVBrO_400x400: There’s also a bunch of mussels down by the shoreline. Some of them have pearls in them, which sell for around 15 gold each. They’re pre-programmed, as is pretty much everything in this game, so the same mussels will always have pearls in them.

9_2iVBrO_400x400: Right near Sara is a big tree branch that has limbs we can break off and use as a simple club. Risen has three weapon types: sword, axe, and staff. Swords are the fastest and usually the most damaging, axes are slow and shitty, and staves have an extremely janky attack animation and usually do less damage than swords.

9_2iVBrO_400x400: What we really want is on a body going east down the coast from where Sara is. This corpse has a hunting knife, which has an attack rating of 12 compared to the club’s 8. You’ll also notice the strength requirement. The only stat requirement weapons in Risen have is strength, and pretty much every build is going to need at least some investment in it.

9_2iVBrO_400x400: To the west of Sara is a pair of killer seagulls. These seagulls are actually fairly deadly.

9_2iVBrO_400x400: This is one hit from a seagull. Seagulls have a pretty simple attack pattern: they come in to hit you anywhere from one to five times, and then jump backward to avoid a counterattack. The working strategy for killing them is to back them into a wall and slash until they die. The tip the game gives us is outright wrong, by the way. Parrying only works with enemies that are wielding weapons.

9_2iVBrO_400x400: Here, I took maybe three hits from the seagull before killing it. The way our protagonist’s attack works, we get two horizontal slashes followed by a vertical slash which has a huge damage multiplier on it.

9_2iVBrO_400x400: Now, here’s a little secret I didn’t find until… probably the third time I played through this intro sequence. If you go straight behind where the seagull was, there’s a rusty sword (10 attack) and a shield sitting against this tree. We want that shield.

9_2iVBrO_400x400: The shield adds two points to blade and blunt resistance, and also allows us to block attacks. Blocking completely negates damage, and makes our guard much harder to break. Unfortunately, you can only use a shield with a sword - staves and axes are two-handed weapons.

9_2iVBrO_400x400: This conversation goes a bit differently if you have a weapon already, but the difference is negligible.

9_2iVBrO_400x400: First quest done, 25 EXP gained. Risen is a little weird with EXP - enemies don’t respawn, but they usually give way more experience than finishing a quest. The seagull we killed gave us twice as much EXP as finishing this.

9_2iVBrO_400x400: If we hadn’t found a weapon before talking to her, Sara would send us to find one before we continue on. I thought at first that doing that got you more experience, but I tested it and it doesn’t.

9_2iVBrO_400x400: Sara is now following us. The way NPCs in this game work is… really weird. I’ll get into that later, but the important thing is that Sara is completely invincible. She has a health bar, but can’t take damage. Most important NPCs are like this.

9_2iVBrO_400x400: Just up the path from where we found Sara, we find a wolf munching on a dead guy. This is a standard thing pretty much every animal enemy in the game will do if they come across a corpse.

9_2iVBrO_400x400: Wolves are particularly annoying because they have a side-dash thing that might as well be a teleport. The best strategy is to keep your shield up, wait for them to attack, and then combo them to death - even at base stats, our character can kill them in one combo provided all three strikes hit.

9_2iVBrO_400x400: I like how her first reaction is “At least we have meat!” and then calls the wolf a rat. Also, wolves don’t drop meat.

9_2iVBrO_400x400: What she’s probably confusing it for is this thing, which is on a slightly different path from the wolf. There’s two paths you can take to leave this area, and this is the other one from where the wolf was.

9_2iVBrO_400x400: Stingrats are kind of a kick in the dick. They usually come in packs of three or four, and are low enough to the ground that they can “dodge” some attacks which hit too high. You can’t aim your melee attacks to compensate for this, either.

9_2iVBrO_400x400: The stingrat is guarding a particularly valuable item. Druid’s hemlocks are mushrooms that increase your maximum health by 1 when eaten. You can turn them into potions if you build yourself to do that which increase your health by 10, but… it’s not worth it. Just eat them and get the 1HP.

9_2iVBrO_400x400: If we go up this way, there’s a cave full of gnolls. We could fight them, but we’re at really low health and gnolls are a pain in the ass to fight. Also…

9_2iVBrO_400x400: The “different way” is back where we came from, which leads uphill. There’s a back entrance to the gnoll cave on the left, but we don’t want to go in there quite yet as we currently lack any means of healing outside of some rather expensive potions.

9_2iVBrO_400x400: The game just keeps tossing wolves and stingrats at us, but eventually…

9_2iVBrO_400x400: If you’re wondering about the weird lighting, by the way… the game does this thing in the tutorial zone (which is basically the beach up to this house) where it has a thunderstorm overlaid across the standard daylight weather.

9_2iVBrO_400x400: This house has something special behind it - a water barrel. Like Prince of Persia, drinking water from a barrel will heal us. Strangely enough, you can find water as a generic healing item, but it heals mana instead of health. Early on, water barrels are a godsend - but once you start increasing your max HP, it can take like 5 straight minutes of drinking from one to fully restore your health bar.

9_2iVBrO_400x400: Inside the house is a bunch of junk. Risen has no carry limits and merchants will pay gold for absolutely everything, so there’s no reason not to pick up stuff and sell it. What we’re looking for though is this key.

9_2iVBrO_400x400: The key allows us to open this locked chest on the second floor. We also level up in the process. Levelling in Risen is kind of shit. For now, all it does is give us some extra HP.

9_2iVBrO_400x400: There’s not much of note inside the chest except for that last item, which is a frying pan. Risen has a couple of tools you can pick up - most of them are only good if you have a specific skill to use them with. The frying pan is one that doesn’t need a skill. As long as we have one, we can cook meat on a fire. We have five raw steaks and four raw chicken: stingrats drop steaks and seagulls drop chicken for some reason.

9_2iVBrO_400x400: Here’s the cooking menu. At first, all we can do is cook meat or fish on a fire. There’s a separate type of cooking later on that involves finding recipes and that I’ve never really bothered with. Right now we want to fry up exactly one piece of meat. This is important for a sidequest coming up.

9_2iVBrO_400x400: While the logical thing to do would be to stick together, Sara is an immortal demigod who cares not for the plight of mortals. I’m not even making this shit up.

9_2iVBrO_400x400: Welcome to Chapter 1. You’d think, given the fact that this game has chapters, that it would have several of them. In fact, this is the first chapter of three and covers probably half the story by itself.

9_2iVBrO_400x400: The path to continue onward is just behind the house. Hilariously, there’s a line somewhere between where the house is and here where the storm stops, but if you go back over the line the storm starts back up again.

9_2iVBrO_400x400: At the top of that path is a little ruin, which has a new enemy type outside. Grave moths are probably the least annoying of the non-human enemy types. They fly at roughly sword height, and tend to bunch up so that you can hit several of them at once. The only annoying thing is that they sometimes try to flank you. With our current stats, it takes four hits to kill them: one combo and a single extra hit. I’m going to skip going into the ruin because there’s not much interesting inside. This area has a second shield in it if you missed the first one.

9_2iVBrO_400x400: Up the hill from the ruin is a second house, which you might think is the first house but absolutely isn’t. This house is a useful landmark when navigating the main game area, because it’s more or less right in the middle of the map.

9_2iVBrO_400x400: It also has a water barrel. Let’s just go into the house and see what we can loot.

9_2iVBrO_400x400: Great. We’ve got a guy holding us up with a hunting knife. This is by far one of the weirdest cutscenes in this game - Jan here is just pressed against the wall until someone walks in. There’s a dialog option, but two of the options loop and only one allows progress.

9_2iVBrO_400x400: Here we get reintroduced to what was in the opening cutscene.

9_2iVBrO_400x400: The key we need is in the cupboard on the opposite wall from where Jan was standing. Why the developers thought it was a good idea to repeat the same “puzzle” twice, I have no idea. My guess is that this was probably meant to be the tutorial house, but then they re-designed it and just moved it instead of throwing it out.

9_2iVBrO_400x400: Upstairs is a locked chest with a sword, some ammo, a lockpick, and a partial map of the island. What’s weird to me is that Jan, and most of the people belonging to the faction he’s a part of, all use rusty swords rather than just… regular ones.

9_2iVBrO_400x400: If you know what you’re doing, this sword will last you exactly five minutes until you find something better. I had a run of this where I kept it for the entirety of Chapter 1.

9_2iVBrO_400x400: We have two choices, but the bottom one only gets us a “I’ll go check on her at some point when I have time” and a bit of EXP. Plus, you’ll need to know more about the island to understand the upcoming vote.

9_2iVBrO_400x400: So, without spoiling anything, let me sort of explain how the factions in this game work. Jan won’t tell us too much about them right now, but this game actually has three factions… sort of. He also doesn’t do a great job at presenting the fact that the Swamp and Harbor Town are not a binary choice. To fully understand them, I’ll also have to show you our stat chart.

9_2iVBrO_400x400: This is from the beginning of the game. You’ll notice that we start with one point in each of the weapon skills - this is because you need one point to use a given weapon type - we couldn’t use crystal magic, as an example, even if we had the item for it.

9_2iVBrO_400x400: As I said, Risen has three factions: the Don’s Men, the Inquisition, and the Mages (the latter two are usually collectively referred to as “The White Cloaks”). The Don’s Men are for people who want to play Risen like Gothic: they focus on weapons and only weapons - specifically swords and axes. The White Cloaks, on the other hand, focus on staves and magic. Each faction has certain skills that are exclusive to them.

9_2iVBrO_400x400: With that, there’s two ways we can go. Our character can either become the Supreme Weedlord of the Swamp (and use plenty of cheesy glitches and exploits doing it) or join the White Cloaks and study ancient runes to become a wizard. I’ll let you, the reader, pick. Voting for this will close the moment we hit Harbor Town, which will be several updates from now. Vote for either Weedlord or Wizard.

I mean I feel like I have enough info right off the bat to go with Weedlord.

9_2iVBrO_400x400
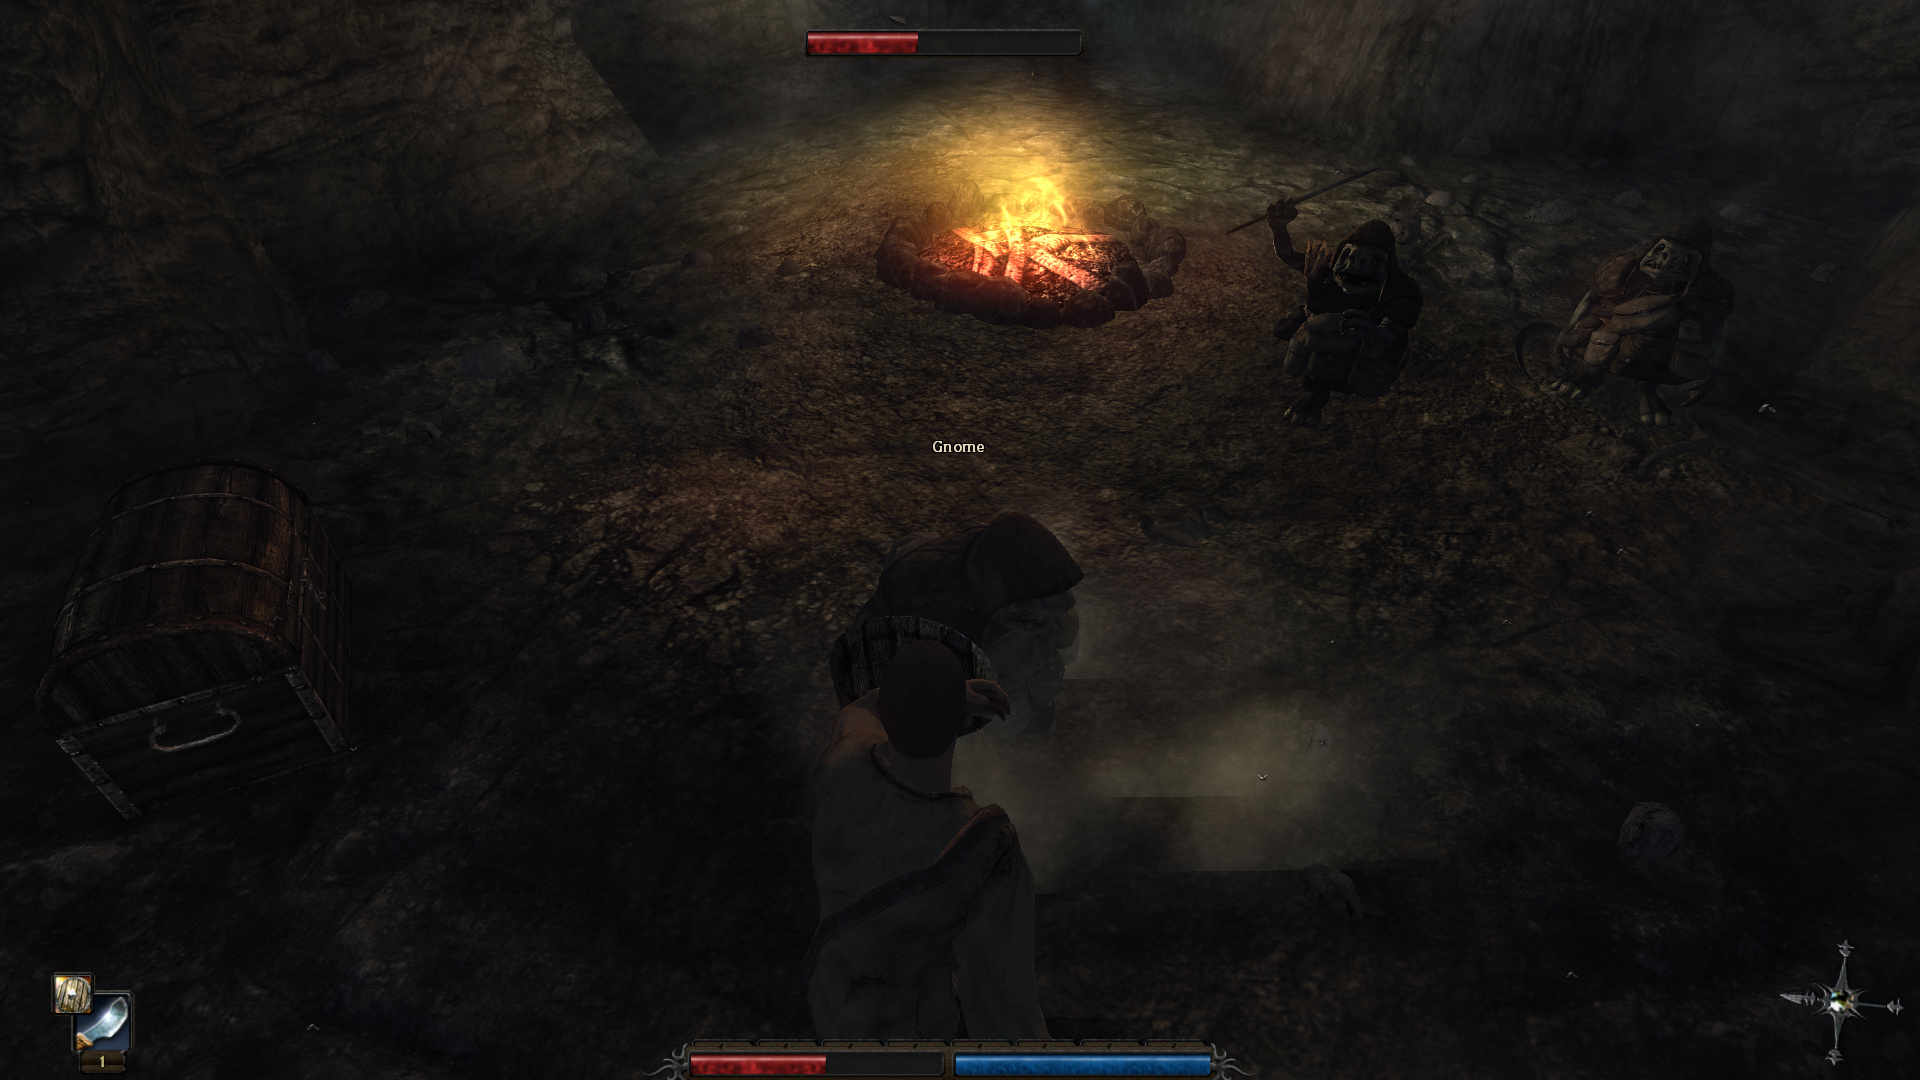
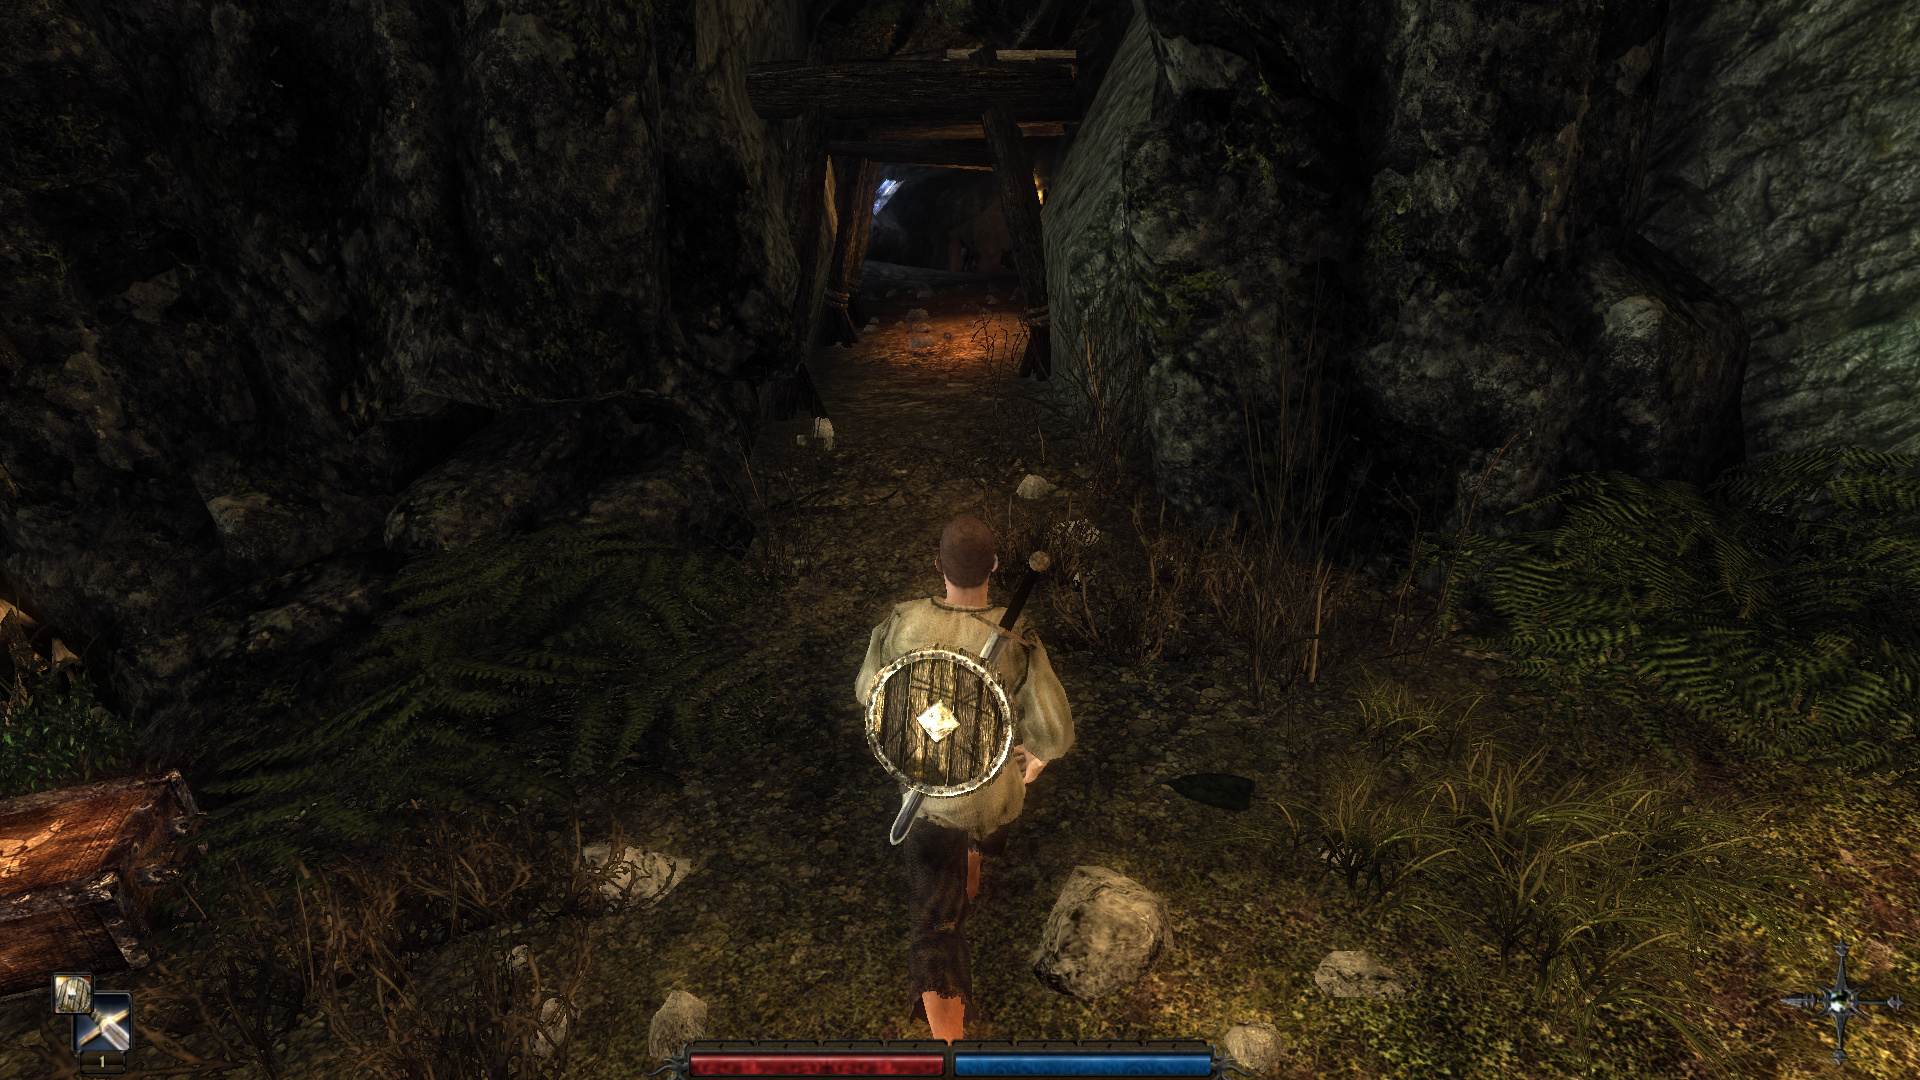
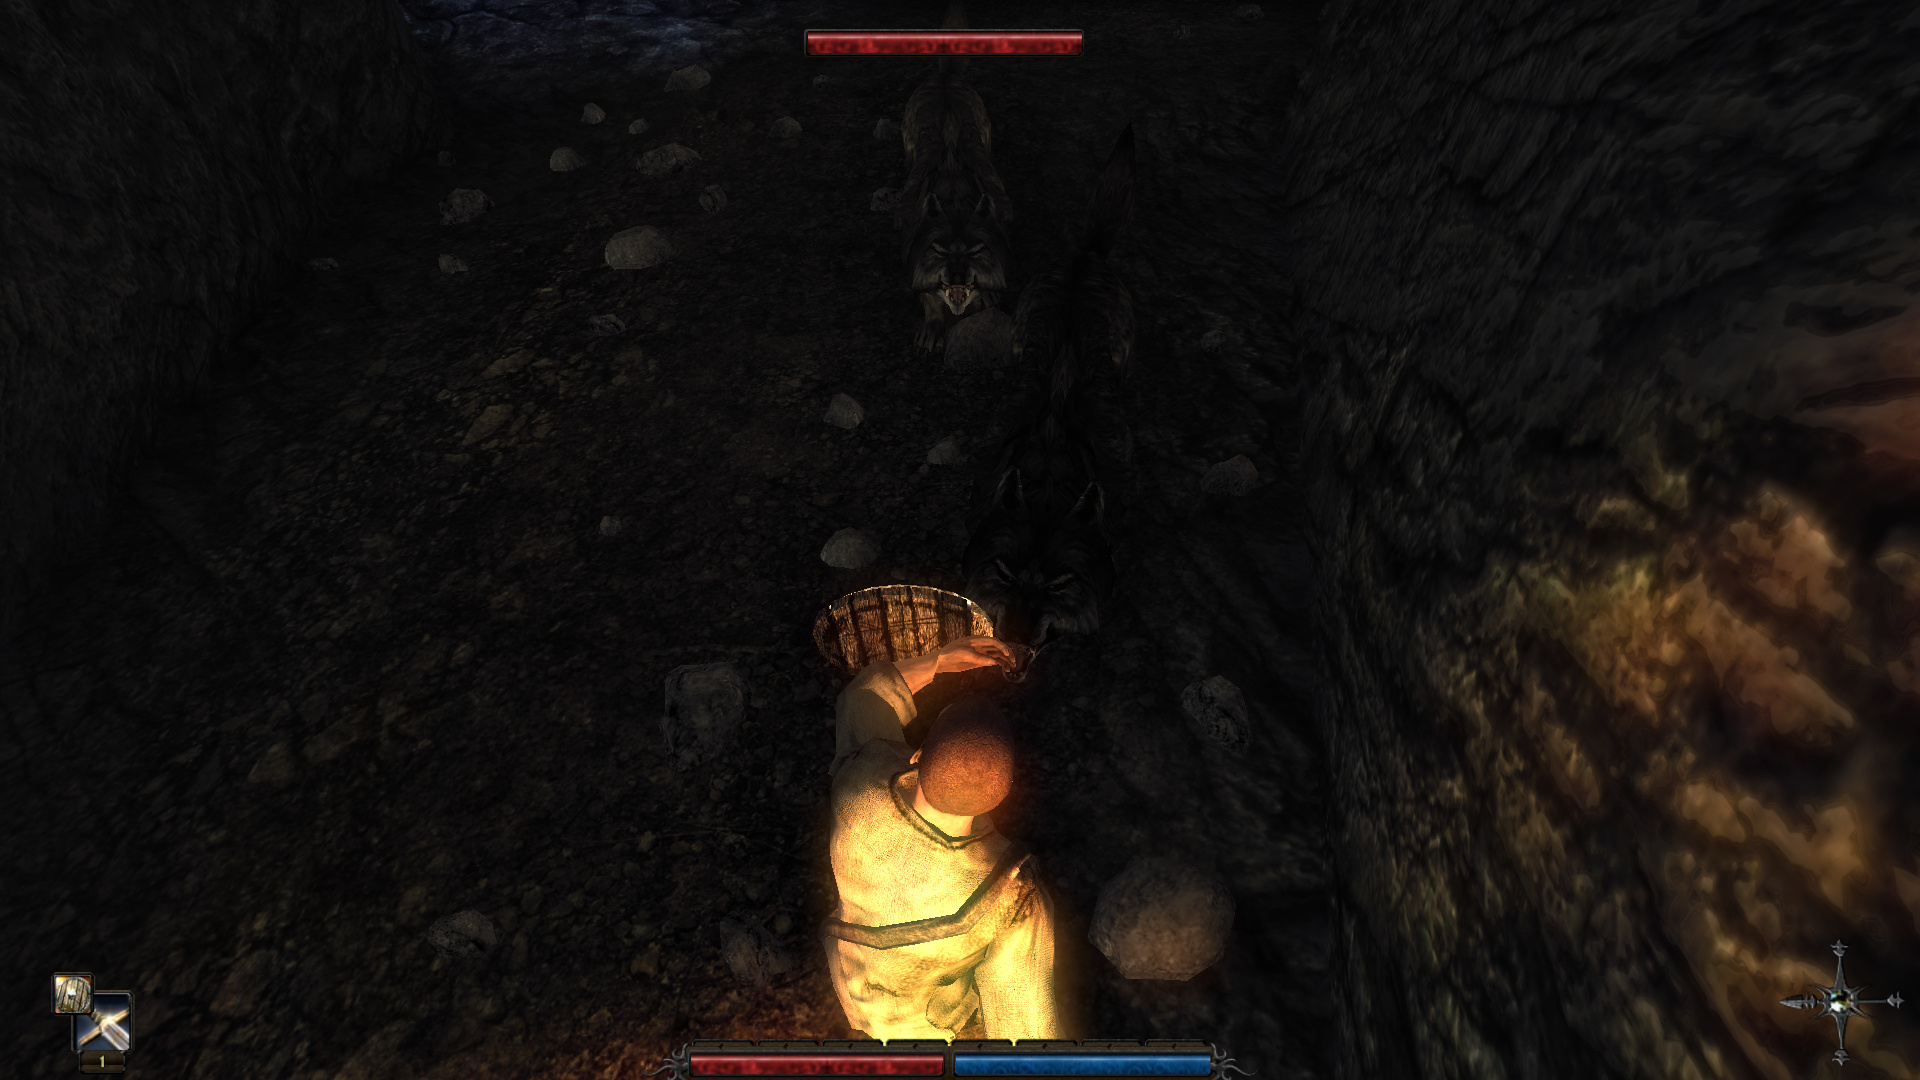
: One thing I wanted to go back and do quickly was clear out the gnome cave. They’re gnomes, not gnolls - I don’t know why I said gnolls earlier. Gnomes are annoying bastards for two reasons. First, they use the same AI that human enemies do - they use weapons and can block your attacks. Second, they’re low to the ground, meaning that if there’s a height difference between the terrain you’re on versus the terrain they’re on, it can cause your attacks to miss.

9_2iVBrO_400x400: There’s really nothing worthwhile in here - this is from an earlier save where I didn’t have the sword yet, so that’s why we don’t have it in this shot. We do want all the gold we can pick up though, and you’ll see why once we hit the swamp. The main reason we came back here is for EXP, which is a precious commodity in Risen. Unlike Oblivion (which this game was clearly modelled after in a lot of ways) there are no randomly-generated enemies, meaning there’s a set amount of EXP we can actually obtain.

9_2iVBrO_400x400: One thing you’ll also want to watch out for is this fun bug, which occurred when I tried to go back to Jan’s house after going back into the gnome cave. If the game ever goes above 60 FPS, it can randomly softlock when going up slopes. This is because vertical momentum is tied to the framerate of DANK WEED MAGIC. If you’re playing this game on any kind of modern PC, you’ll want to manually limit it to 60 FPS.

9_2iVBrO_400x400
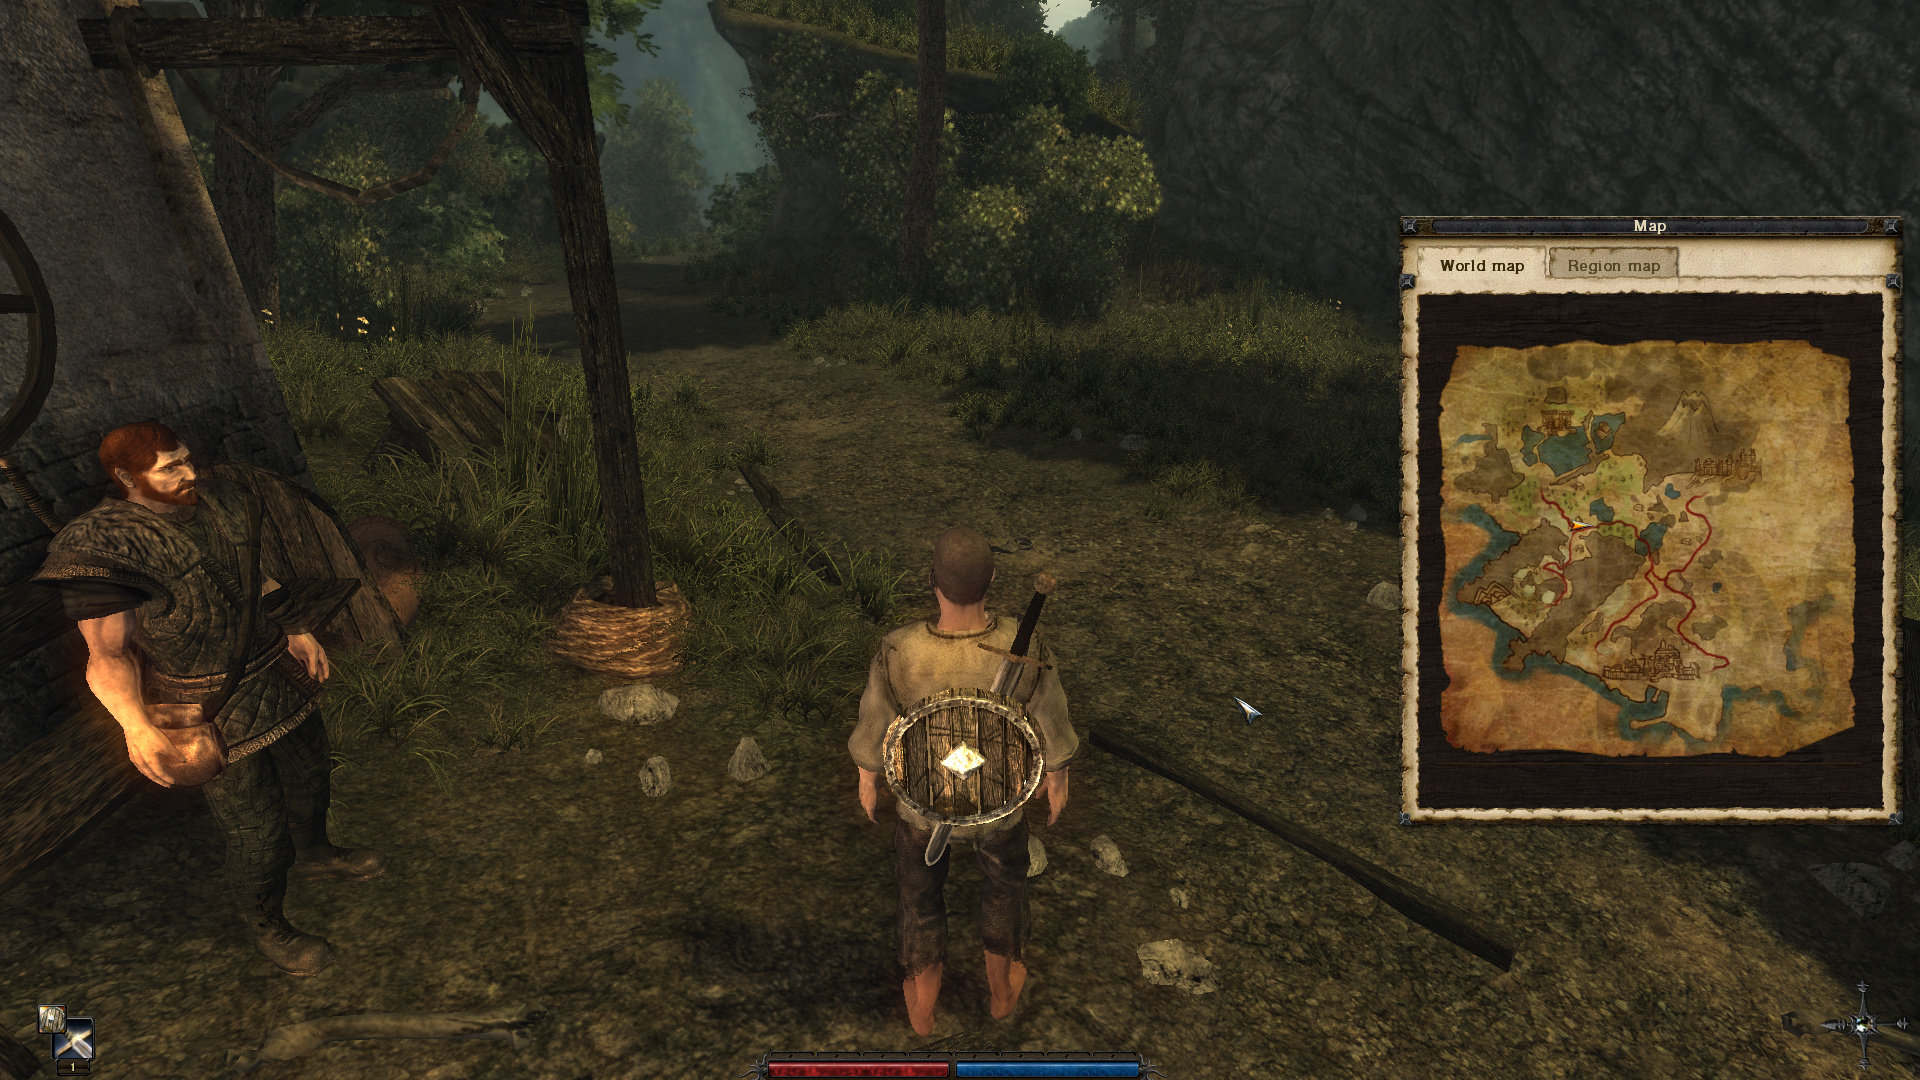
: This is the map of the island we have, which covers about half of it. It’s a bit hard to see, but there’s three major zones here: the Don’s swamp in the top-left, Harbor Town in the bottom-center, and the Monastery in the top-right.

9_2iVBrO_400x400
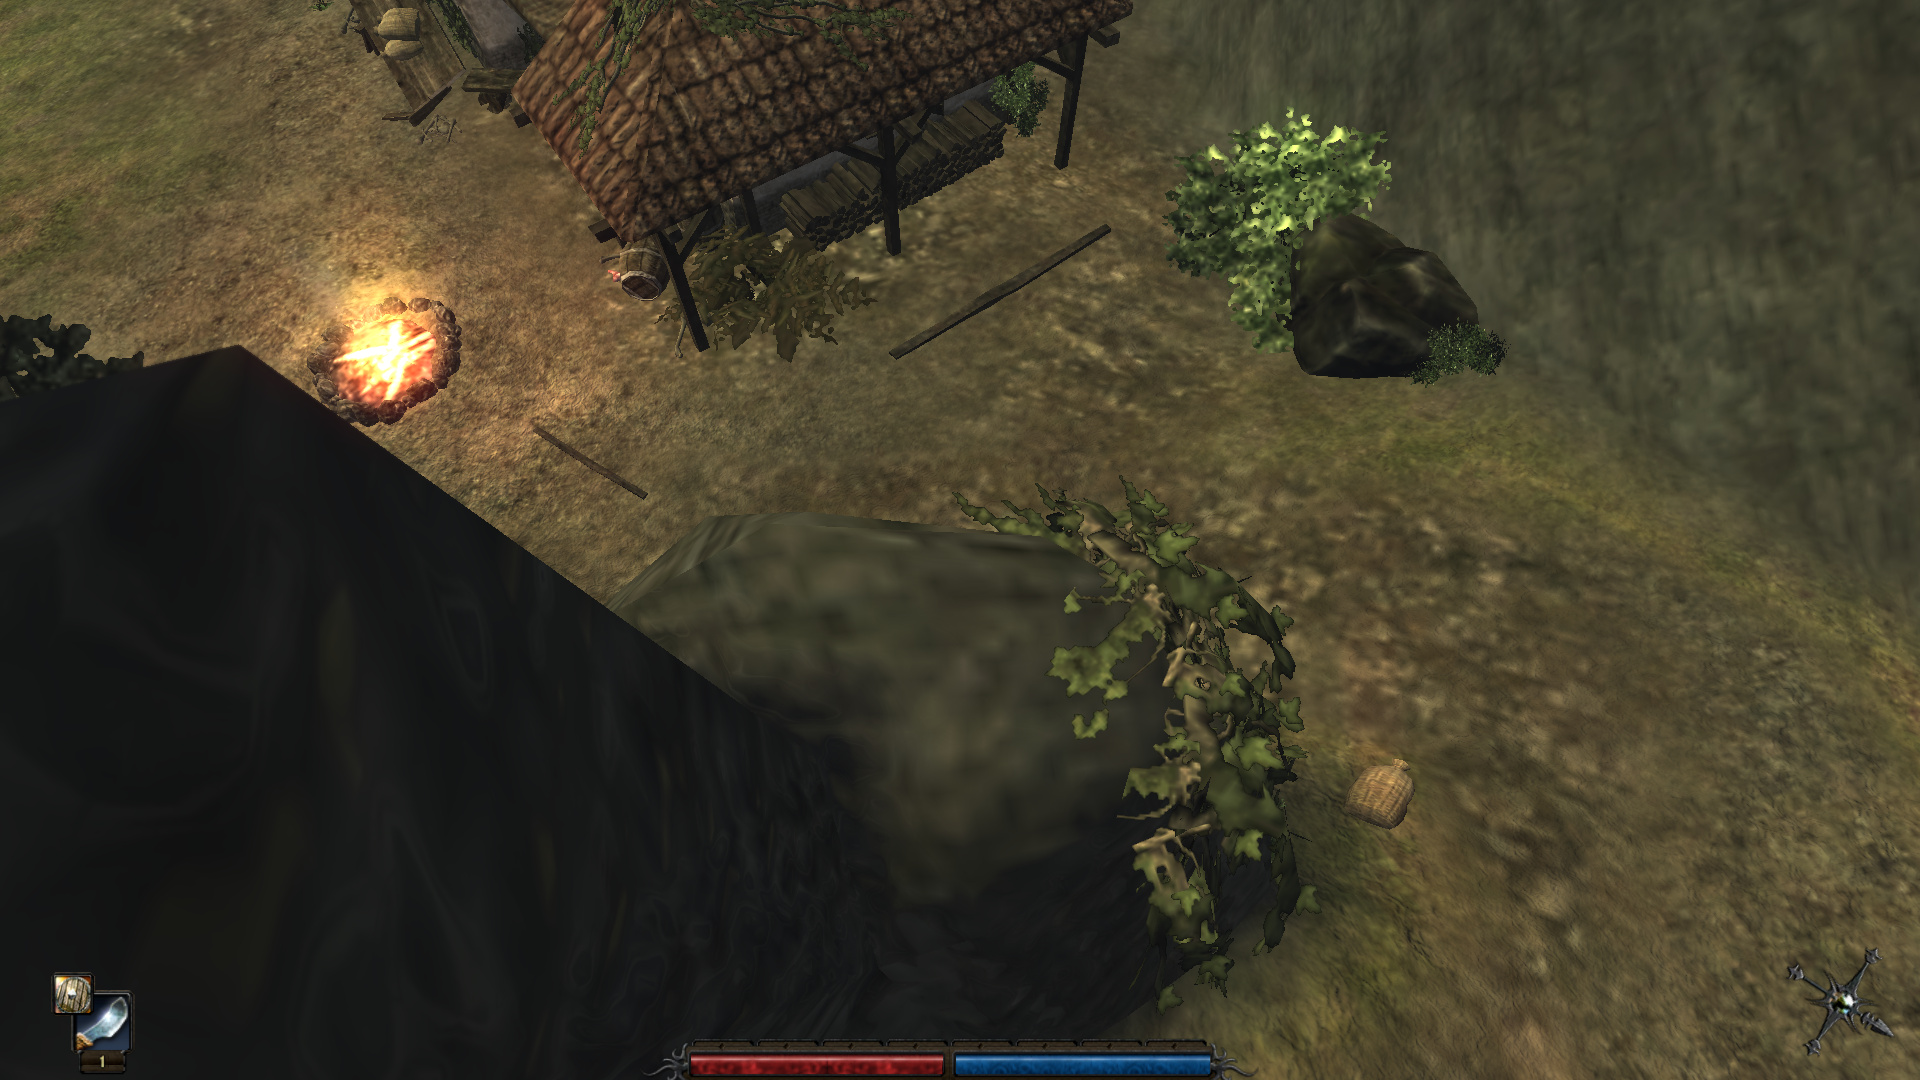
: I didn’t find out this out until this recording run, but there’s a weird plateau thing outside of Jan’s house that you can climb.

9_2iVBrO_400x400: This gets us a short bow and some arrows. Bows in this game are basically worthless, except for one specific use we might see at some point: that being hitting switches that are on the other side of death traps.

9_2iVBrO_400x400
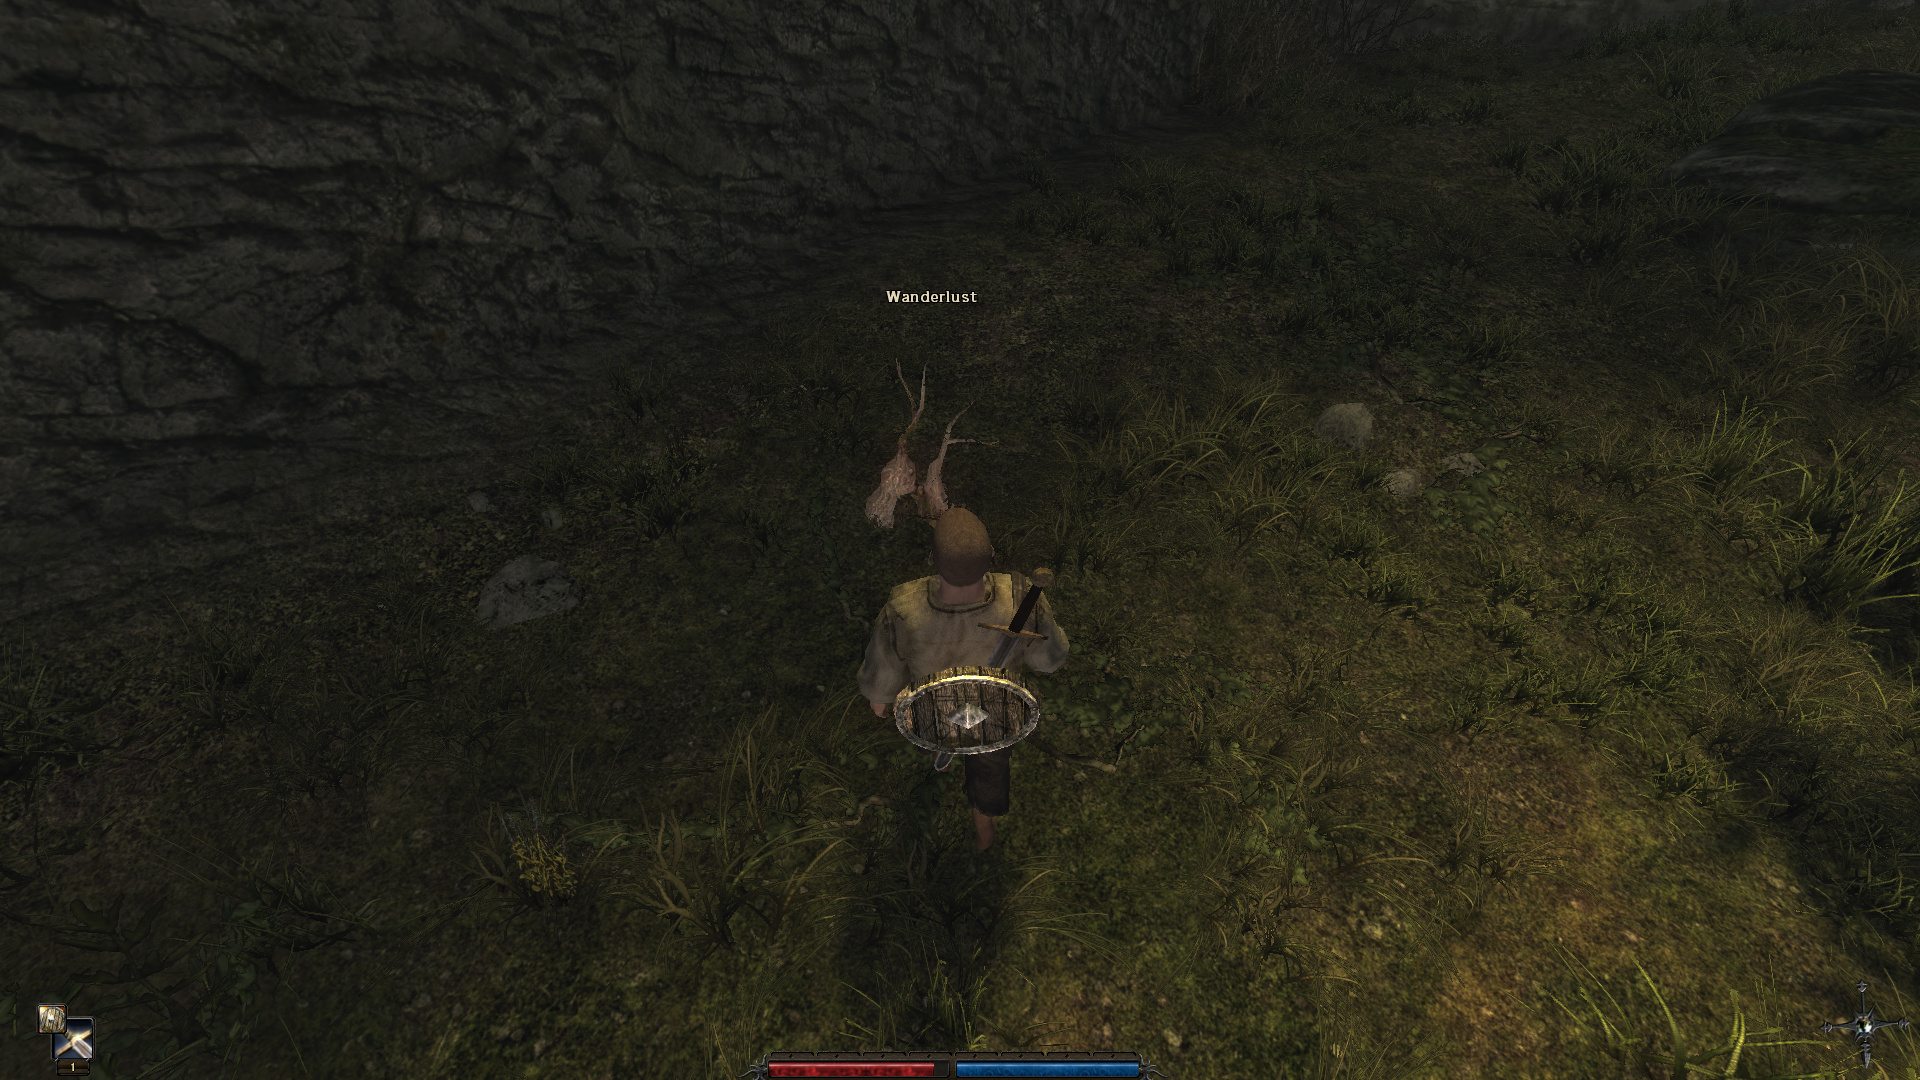
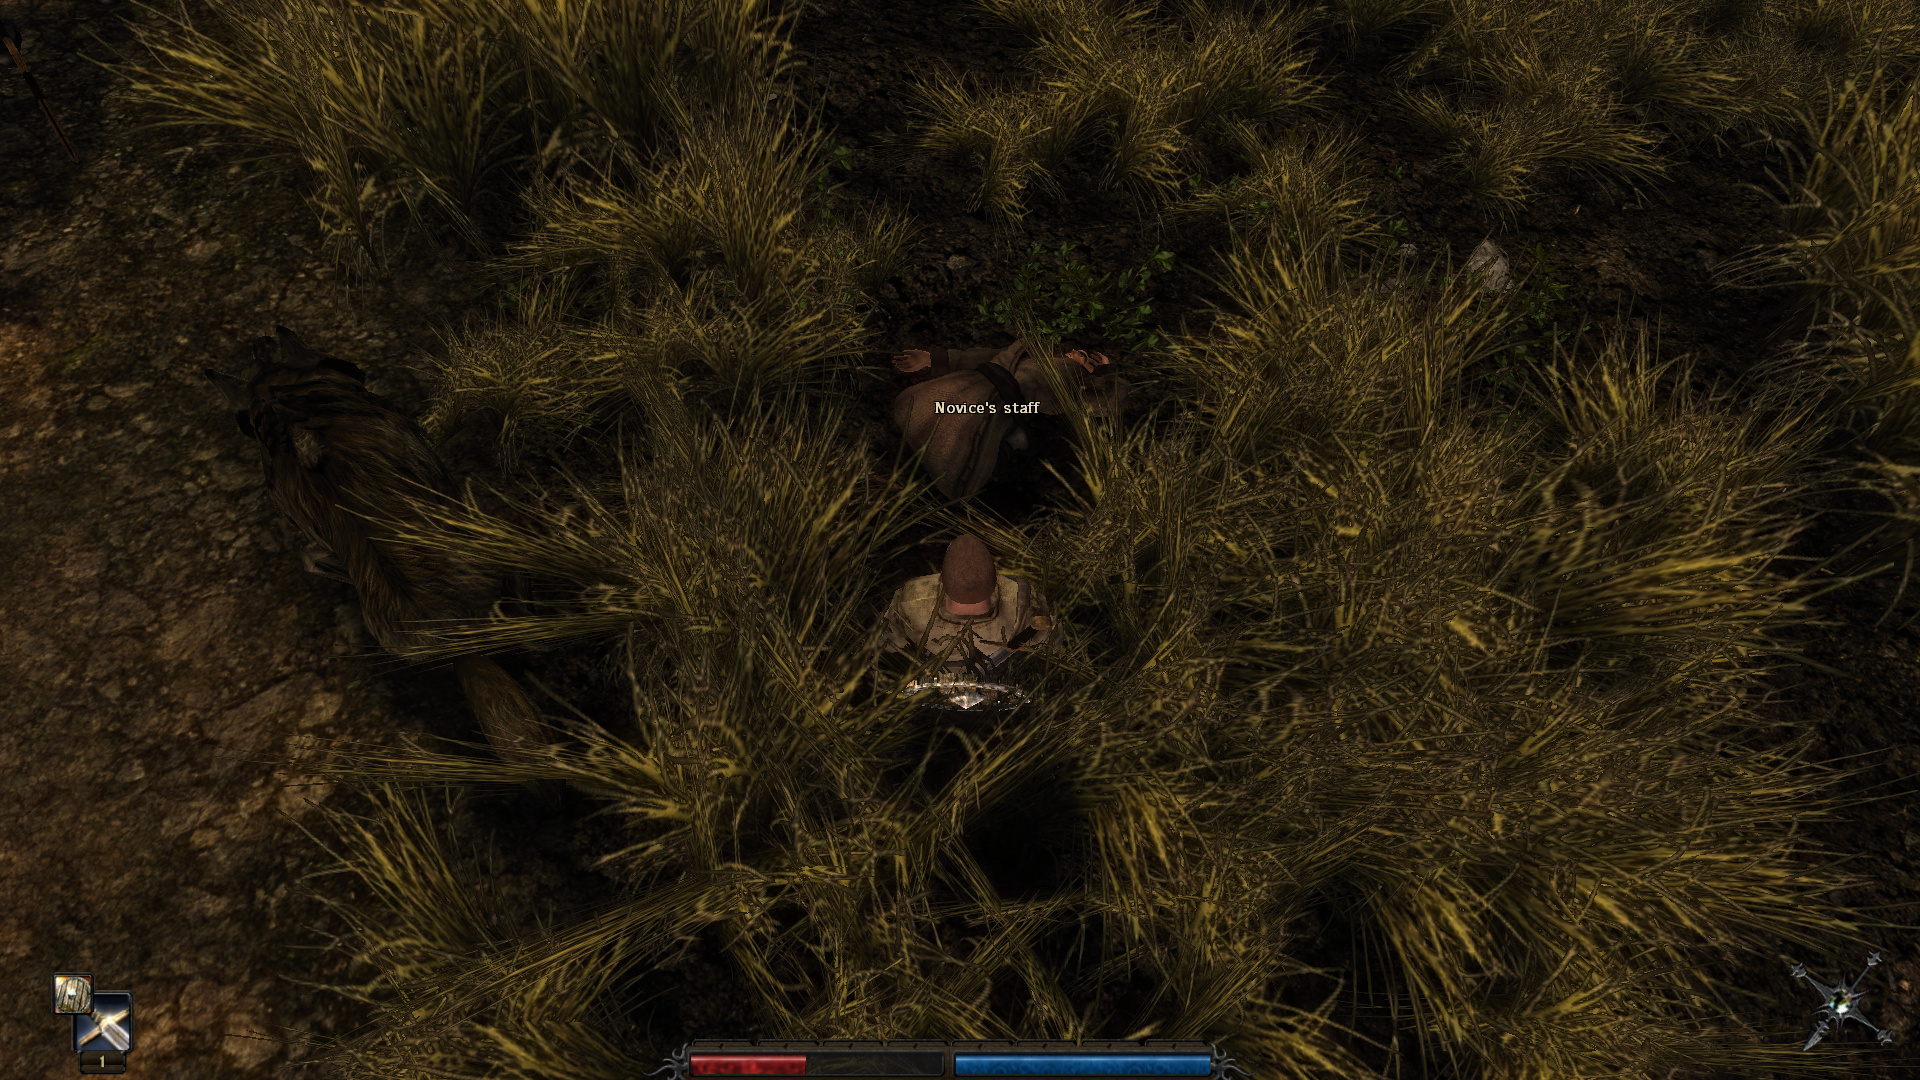
: At the bottom of the plateau is a Wanderlust. Wanderlusts are one of four special plant types. They give you 10 EXP if you eat them, and while you can technically turn them into a potion that gives you 100 EXP, you need a bunch of them and won’t pick up that recipe until the end of the game.

9_2iVBrO_400x400
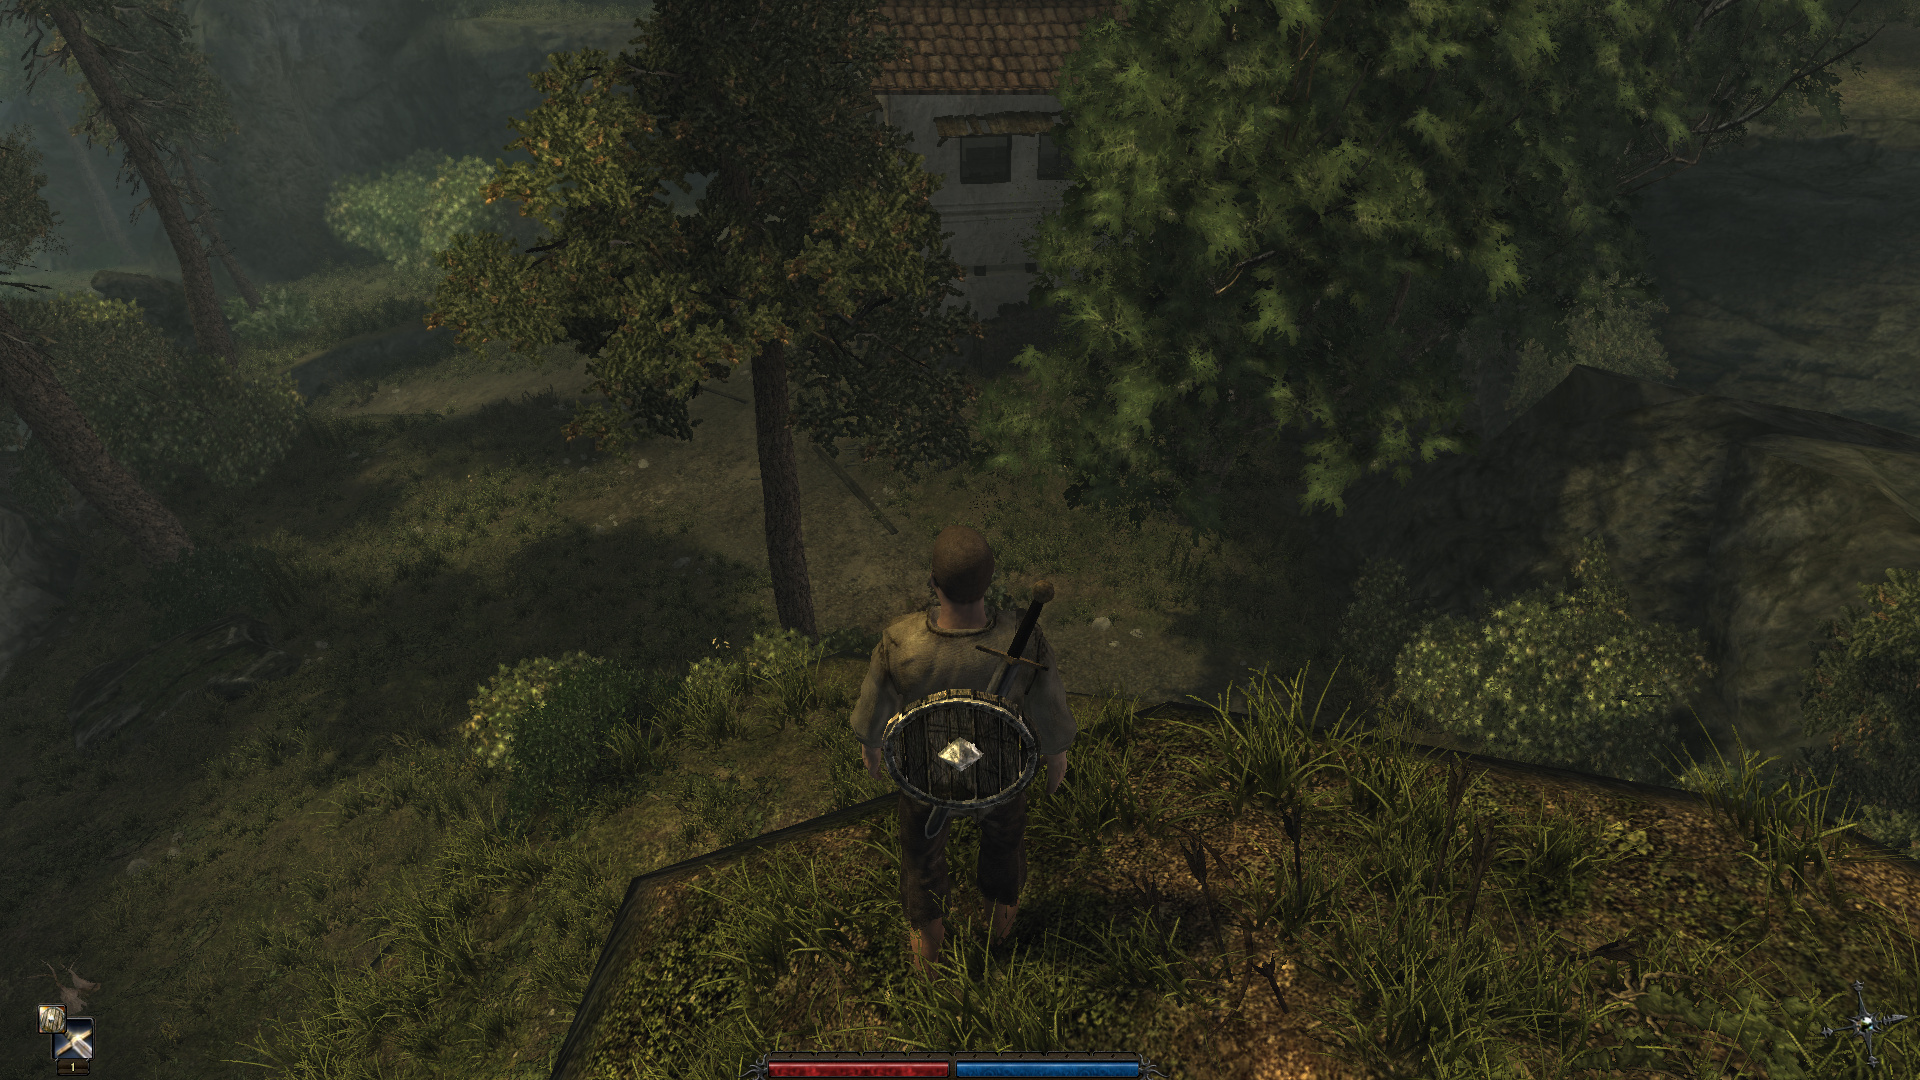
: To the east of Jan’s house is a sign for Harbor Town. We’re going to head this way, but we’re not actually going to Harbor Town just yet.

9_2iVBrO_400x400: You see, there’s a farm on the way to Harbor Town that has a few sidequests. This area is relatively safe, except for a small swamp which is located to the left off where this pic is.

9_2iVBrO_400x400
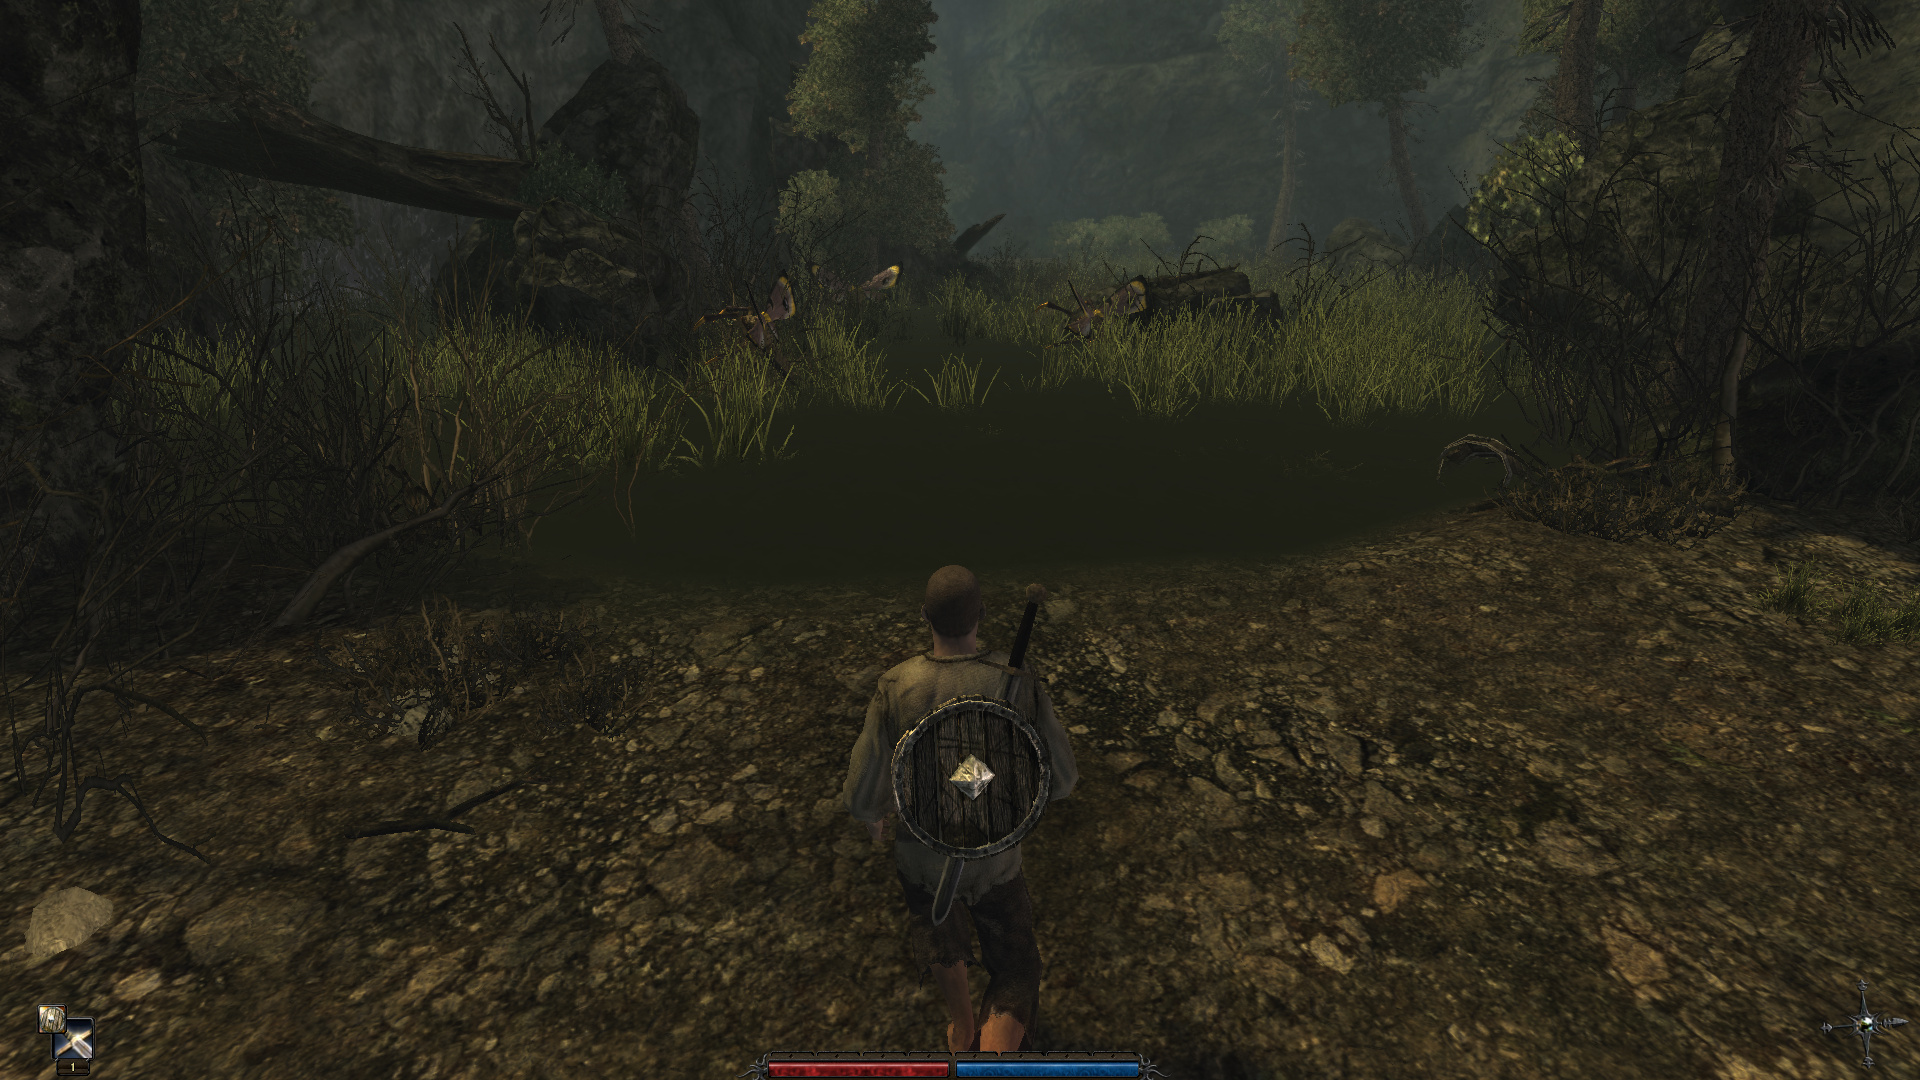
: The swamp is full of upgraded grave moths that have… I want to say something like five times the HP the ones we fought near that ruin did. We don’t want to fuck with these until we’ve properly levelled up. However…

9_2iVBrO_400x400
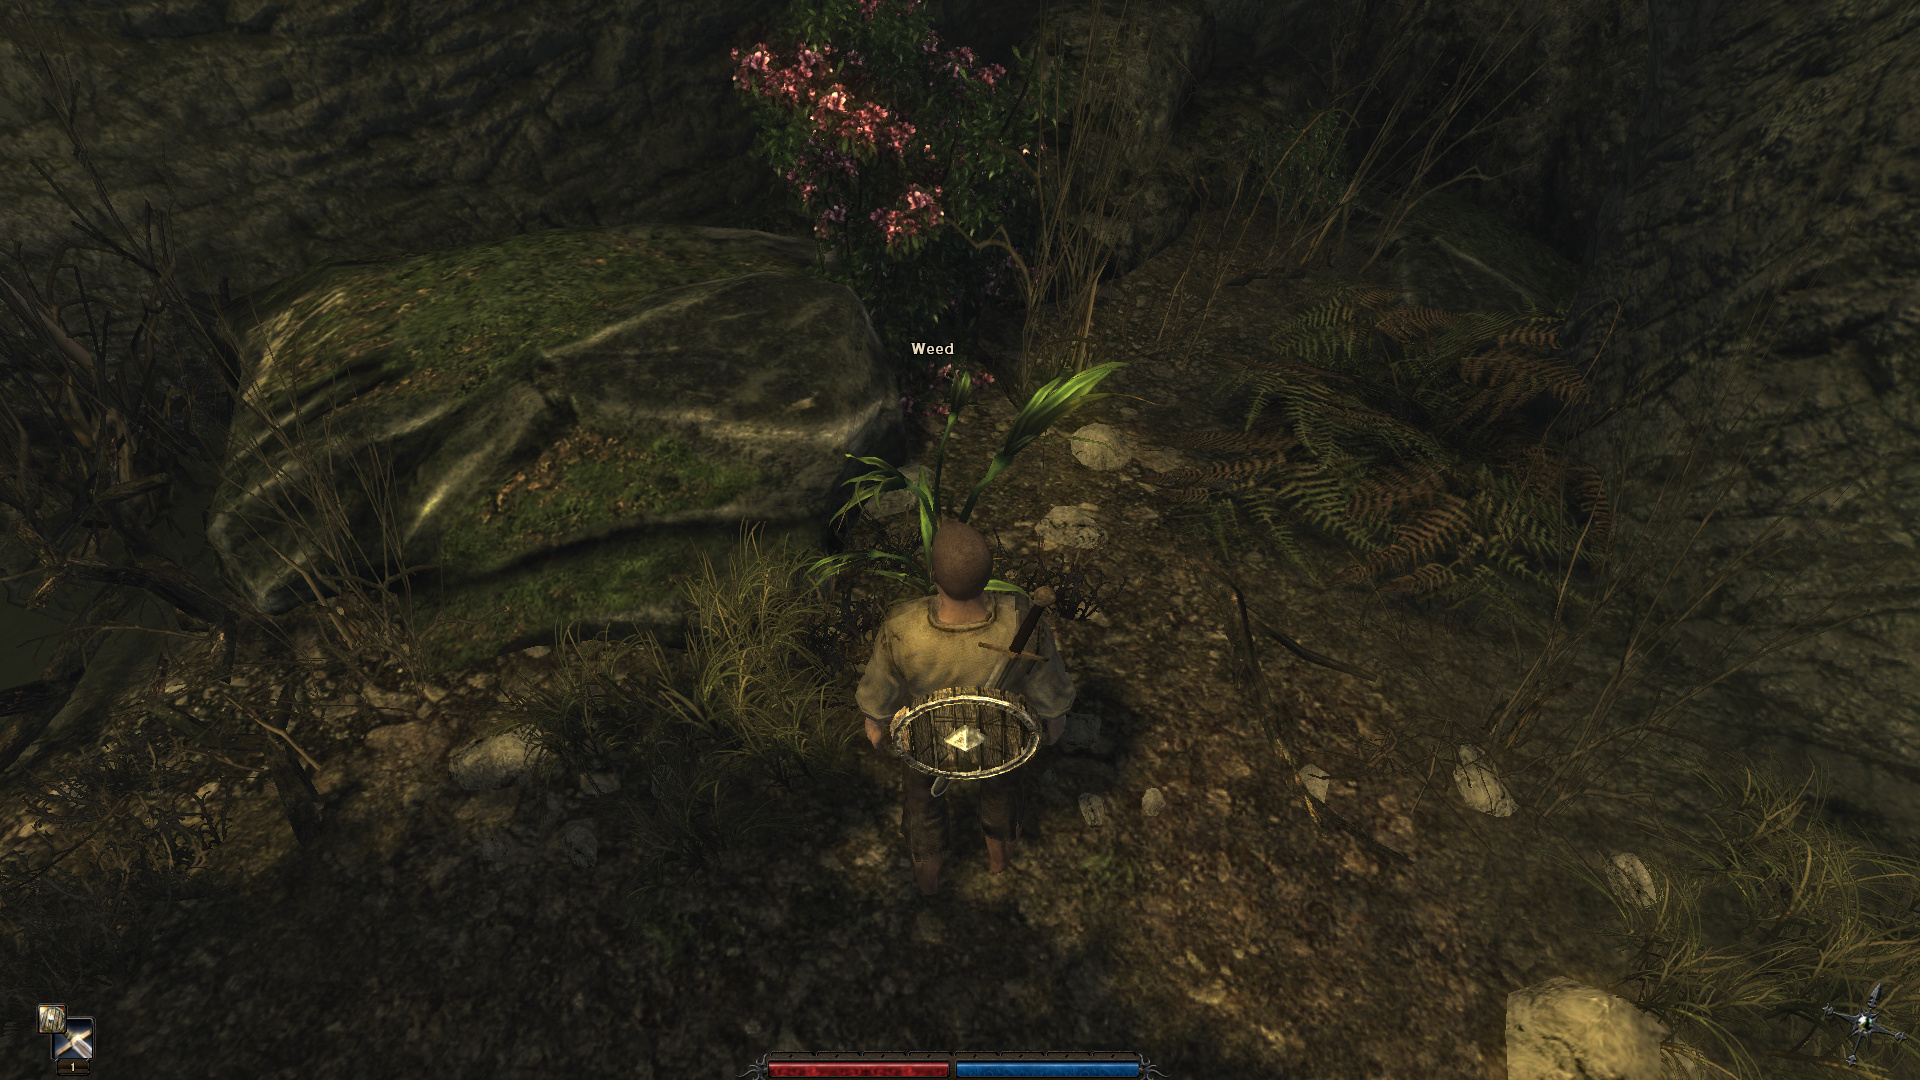
: Where there’s swamp, there’s dank swamp weed. Even if we’re not going the Weedlord route, we definitely want to pick up all the weed that we can. There’s two weed plants here, and I think one or two more behind the death moths but I’m not going in there to grab them.

9_2iVBrO_400x400
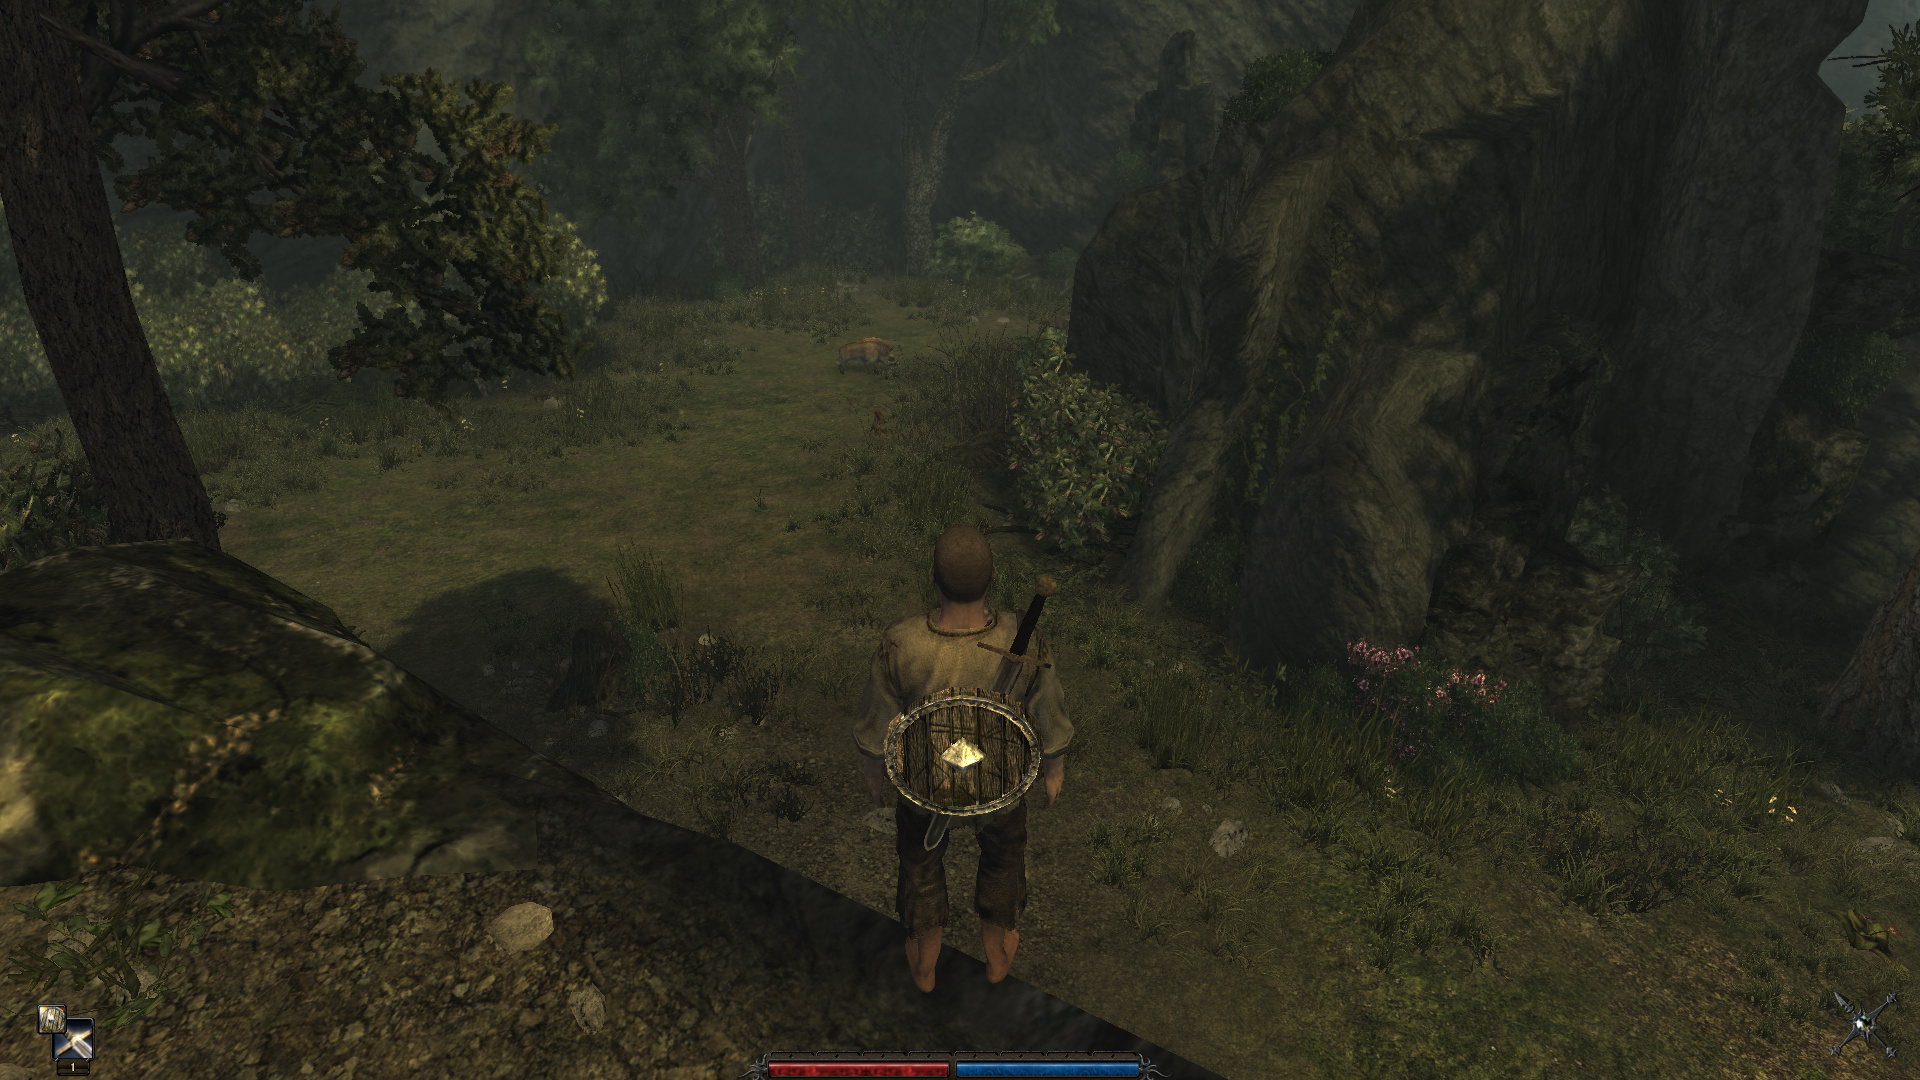
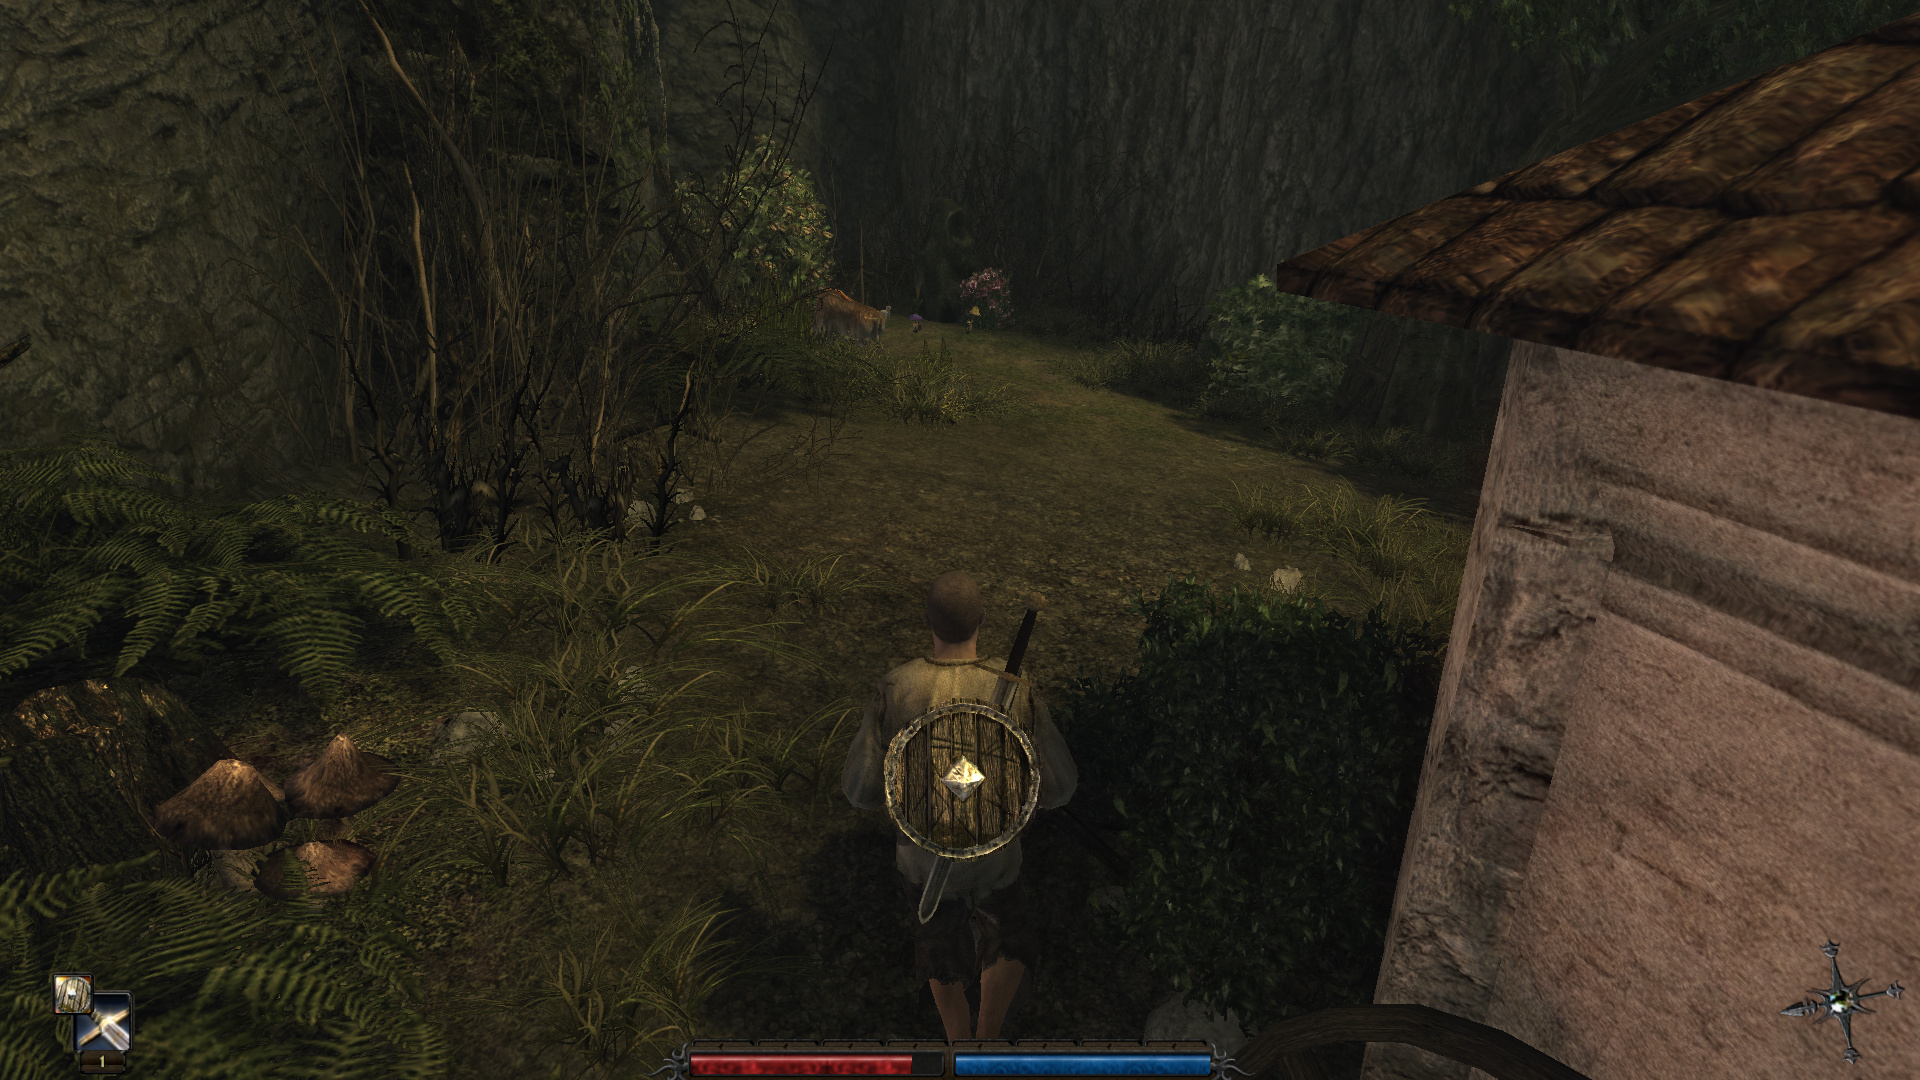
: Near the small swamp is a hill that would actually take us to the Don’s area… but it’s covered in enemies that are way too tough for us to take. From up here, we can see another new enemy type: boars. As in NieR, boars will fuck you up. They can break through your shield, something almost no human enemies in this game can do. That’s how bullshit they are. They also hit real hard (for how we are now, anyway) and have a ton of HP.

9_2iVBrO_400x400: The farm itself is really small. There’s two guys in robes working out in the fields…

9_2iVBrO_400x400
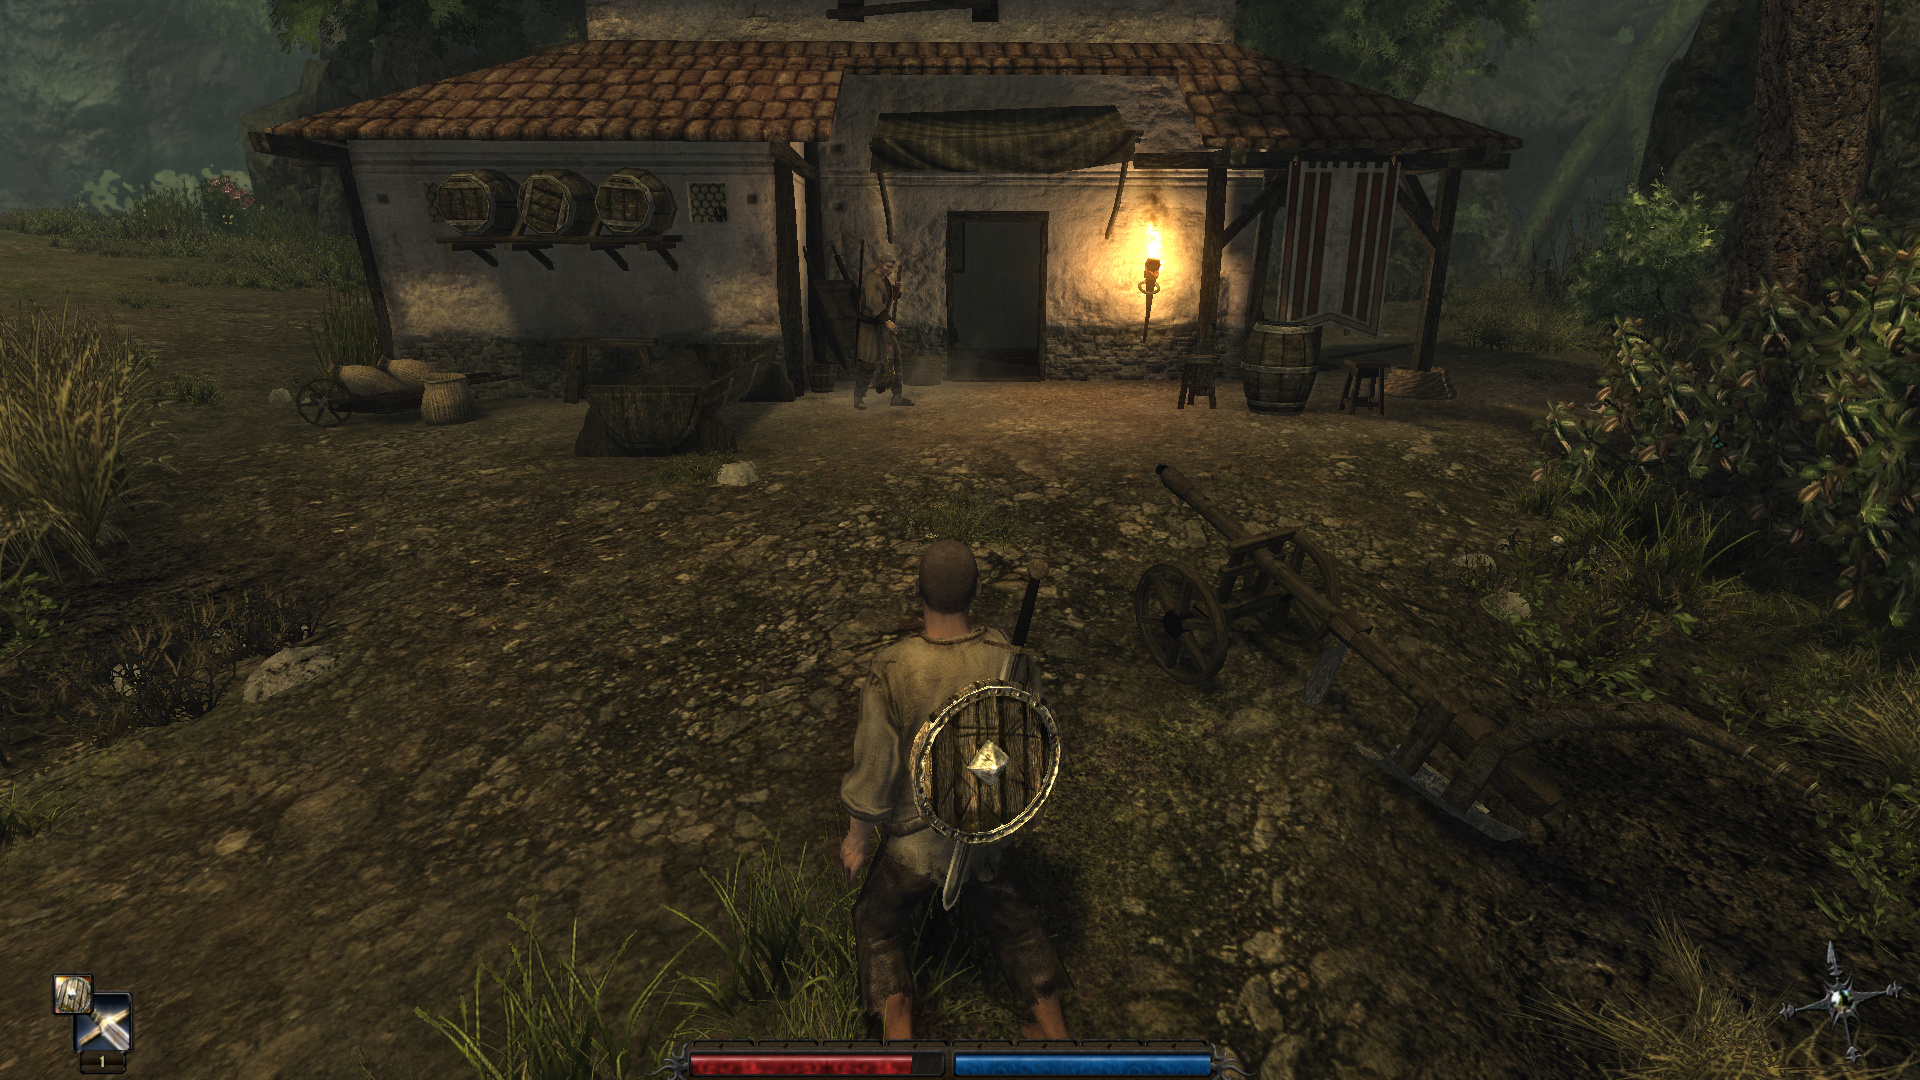
: And then two more near the buildings. We’re going to want to talk to the guy with the broom first. One thing Risen does not do very well is having a solid game sequence. In fact, there was one design decision that had me real confused the first time I played this game.

PC: “The tide. I’m a shipwreck survivor.”

Tristan: “Well, it’s a strange kind of luck that you washed up onto these shores! But I must warn you… you cannot wander freely around here. I don’t mind, but the Warriors of the Order are less forgiving.”

9_2iVBrO_400x400: One other thing I’m going to put to a vote is what we’ll do with Sara. We could send Jan to pick her up, or we could send her here. Alternatively, we could do nothing and maybe go back for Sara ourselves? I’ll let you guys decide. That vote will also have until we reach Harbor Town.
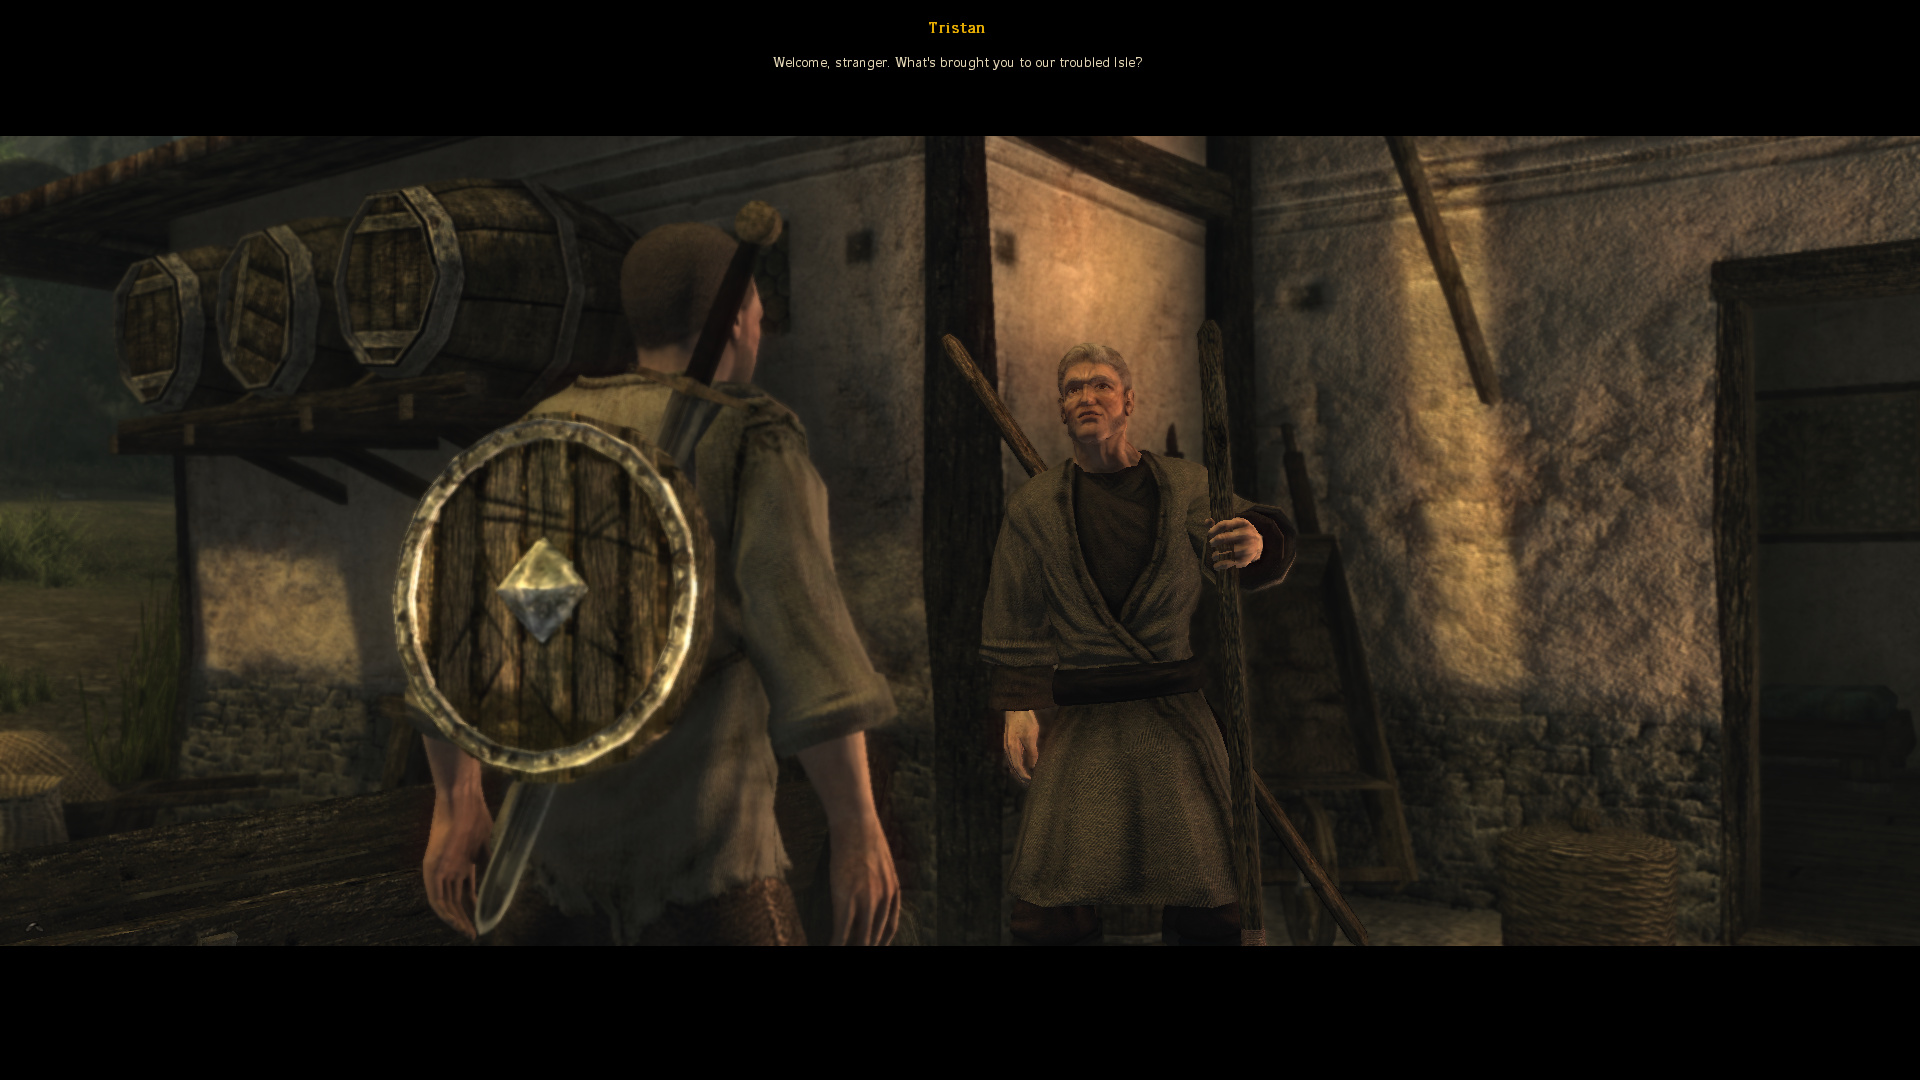
PC: “Who are you?”

Tristan: “My name is Tristan, a novice of magic. I’m looking after this place on the orders of the Convocation of Mages.”

PC
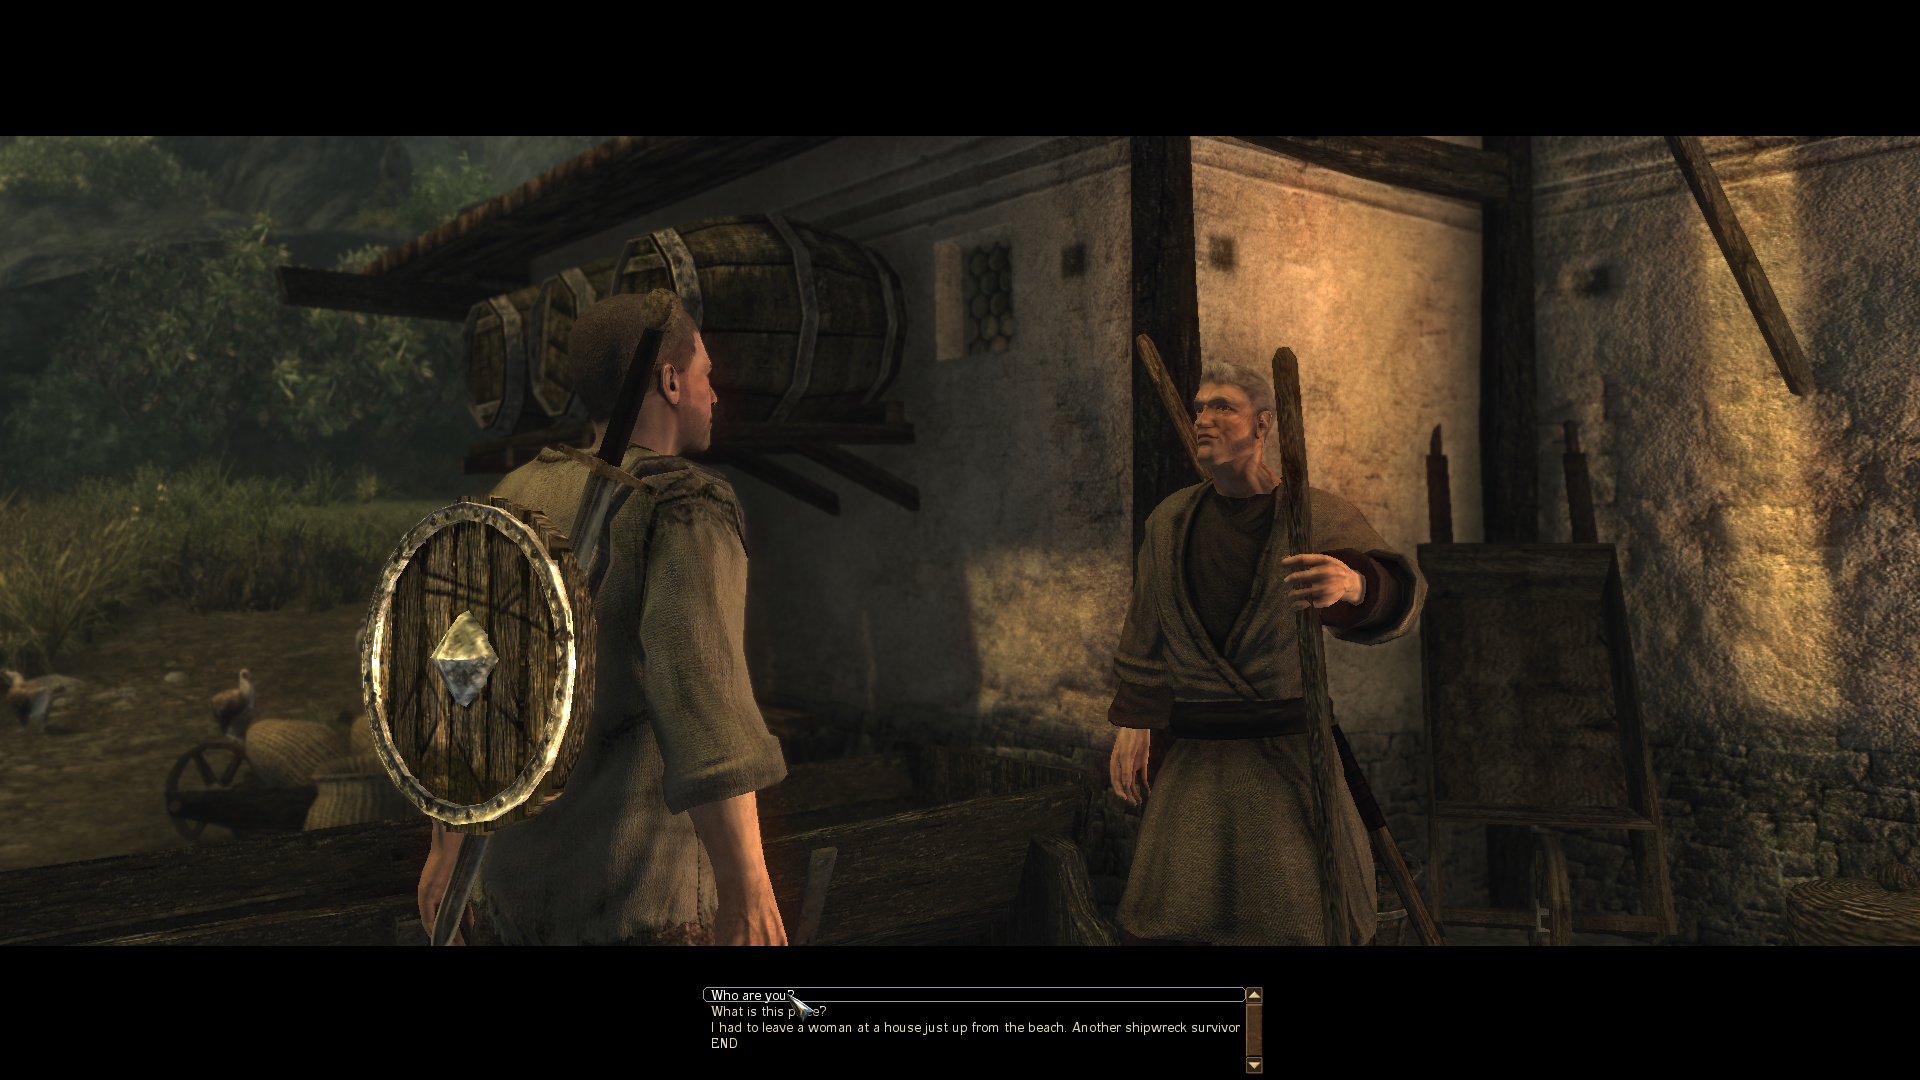
: “What is this place?”

Tristan: “Just a simple farm. It’s under the control of the Inquisition now. We cultivate the land and take care of the animals. Our work ensures the wellbeing of the order and Inquisitor Mendoza’s men.”

Tristan
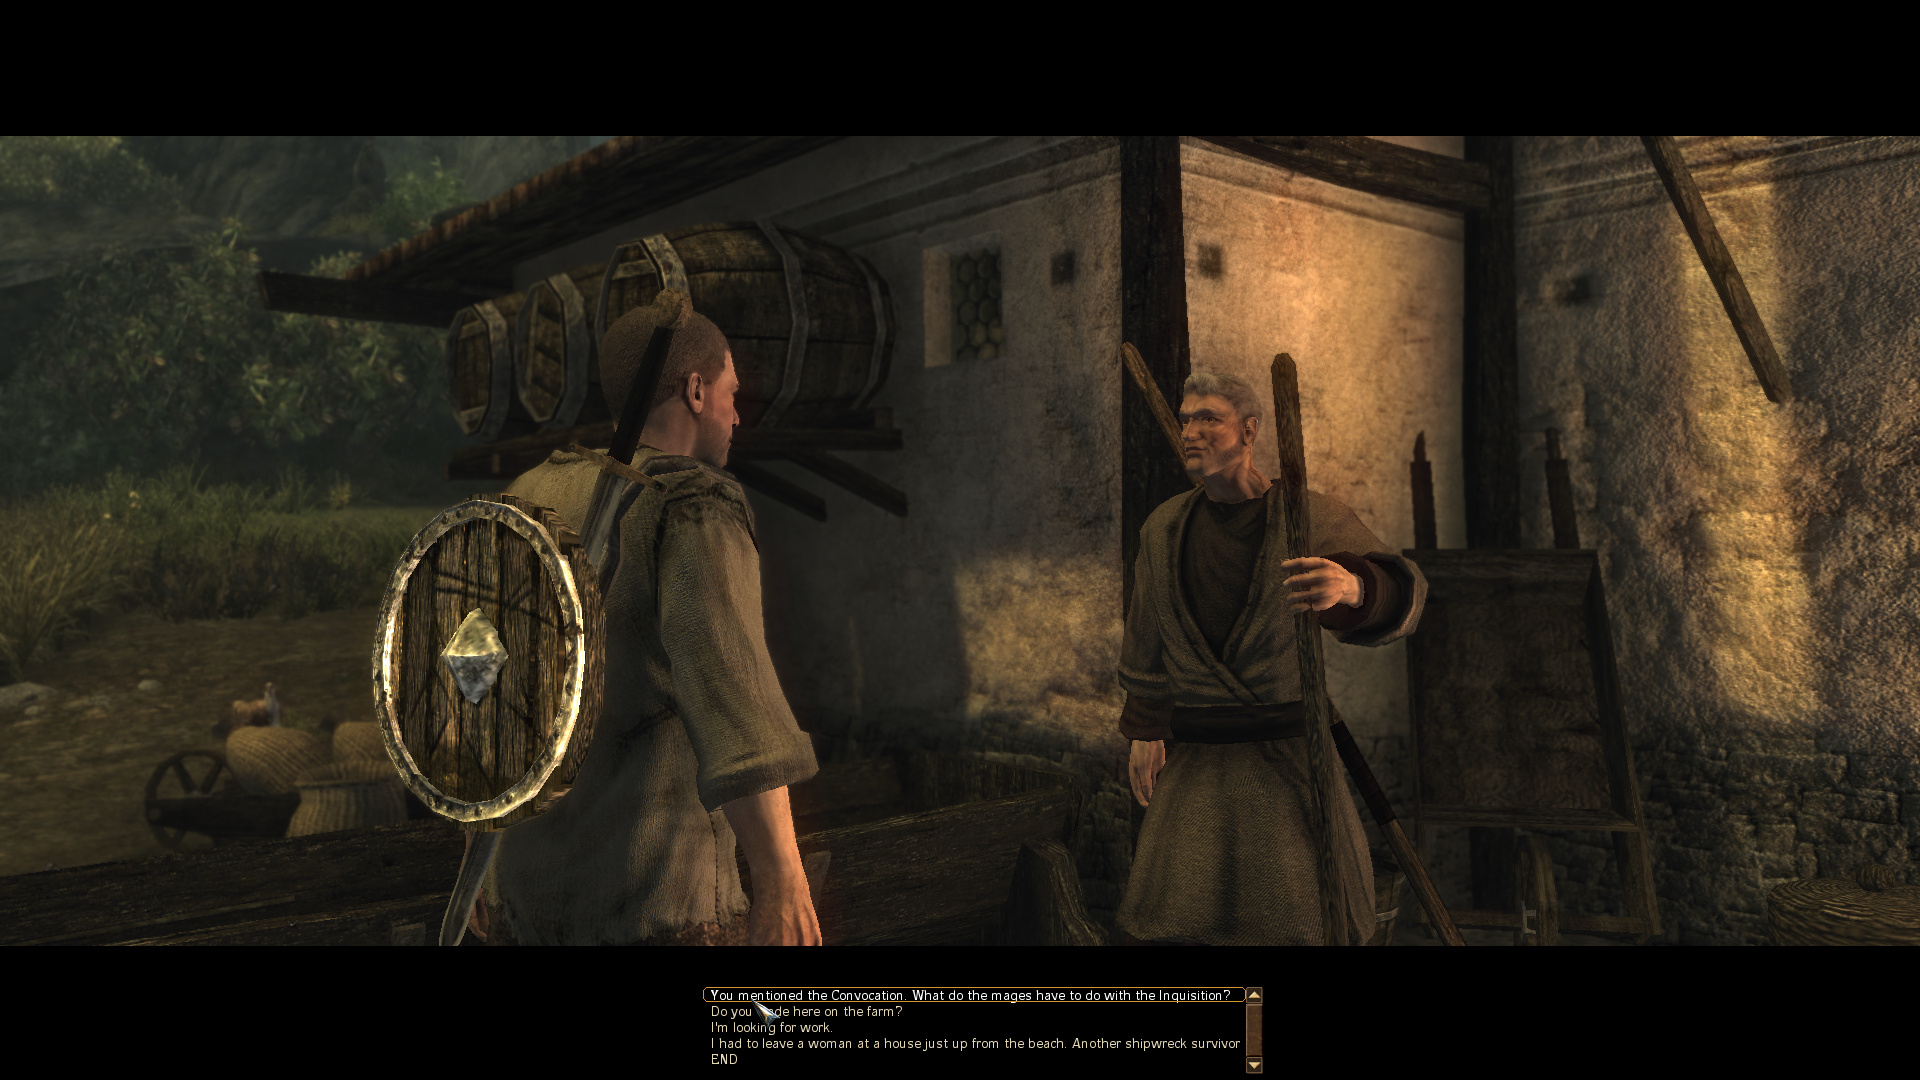
: “The Convocation of Mages has long had their seat here in the Monastery at the foot of the great volcano. It was a place of study and faith before the dark wave covered the land and those temple ruins had risen from the ground.”

Tristan: “And now the Inquisitor is looking to push back that darkness. We’re very lucky he found us in our hour of need. Now the Monastery not only serves as the mage’s home, but also as a training camp for recruits of the Inquisition.”

9_2iVBrO_400x400: Tristan doesn’t explain it very well, but basically, the Inquisition has a law against being outside of Harbor Town. This means that if we run into any White Cloaks, they’ll be hostile. The punishment for breaking the law is being conscripted into the Inquisition. If you don’t know this, it is real easy to accidentally wander into an Inquisition-held area and get forced onto the wizard route.

9_2iVBrO_400x400
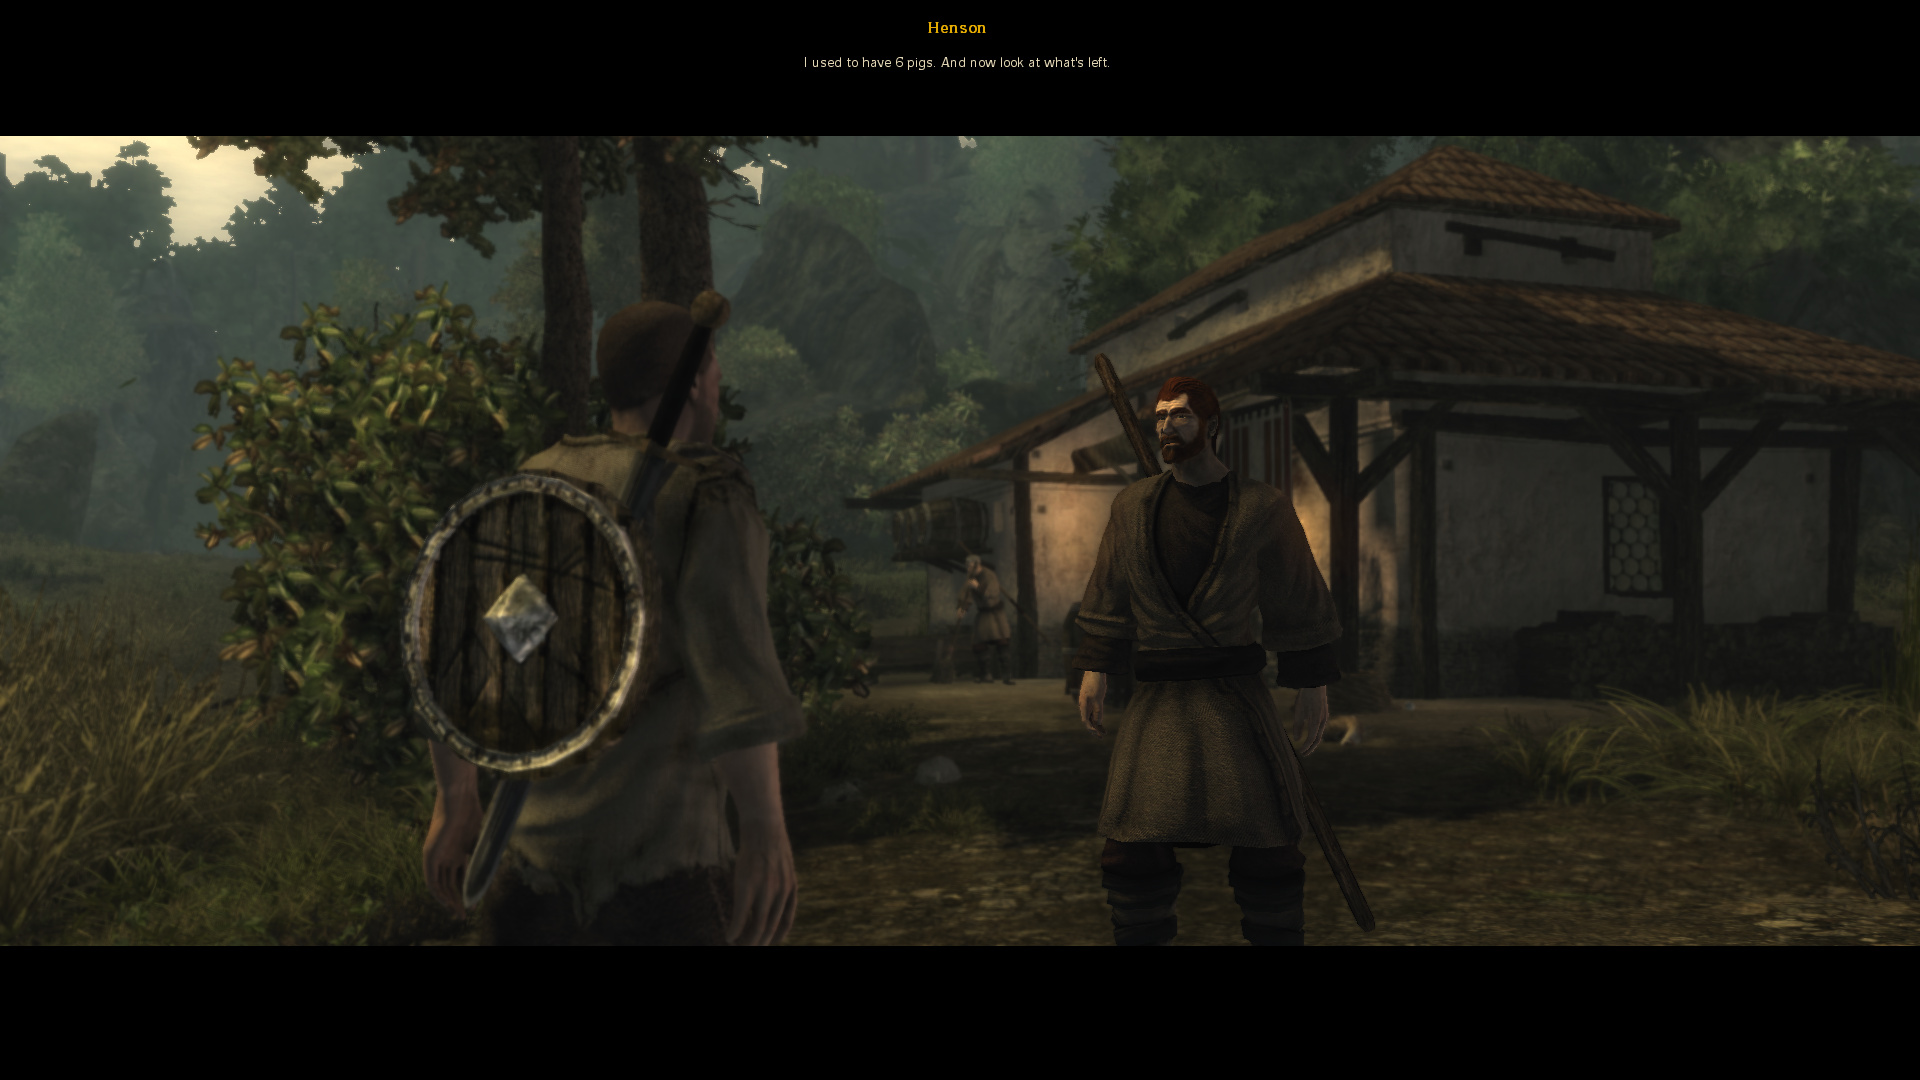
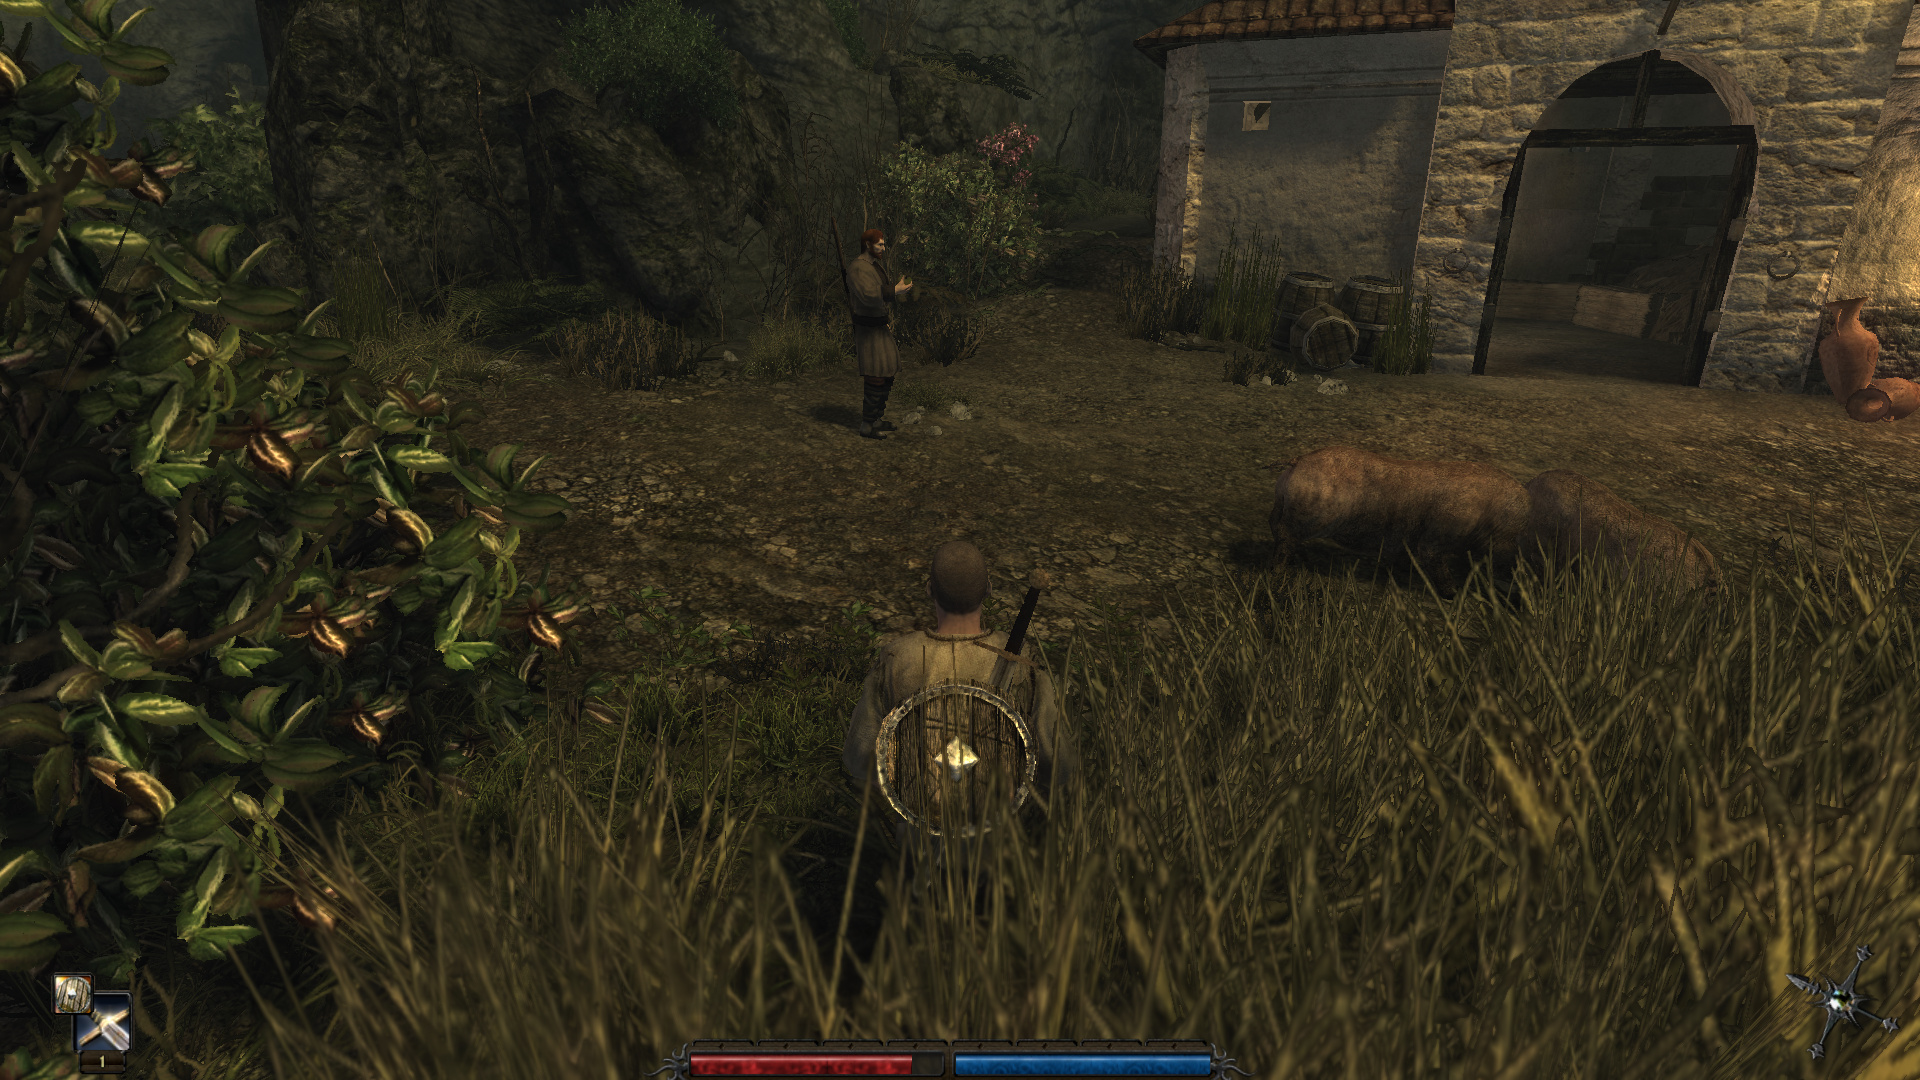
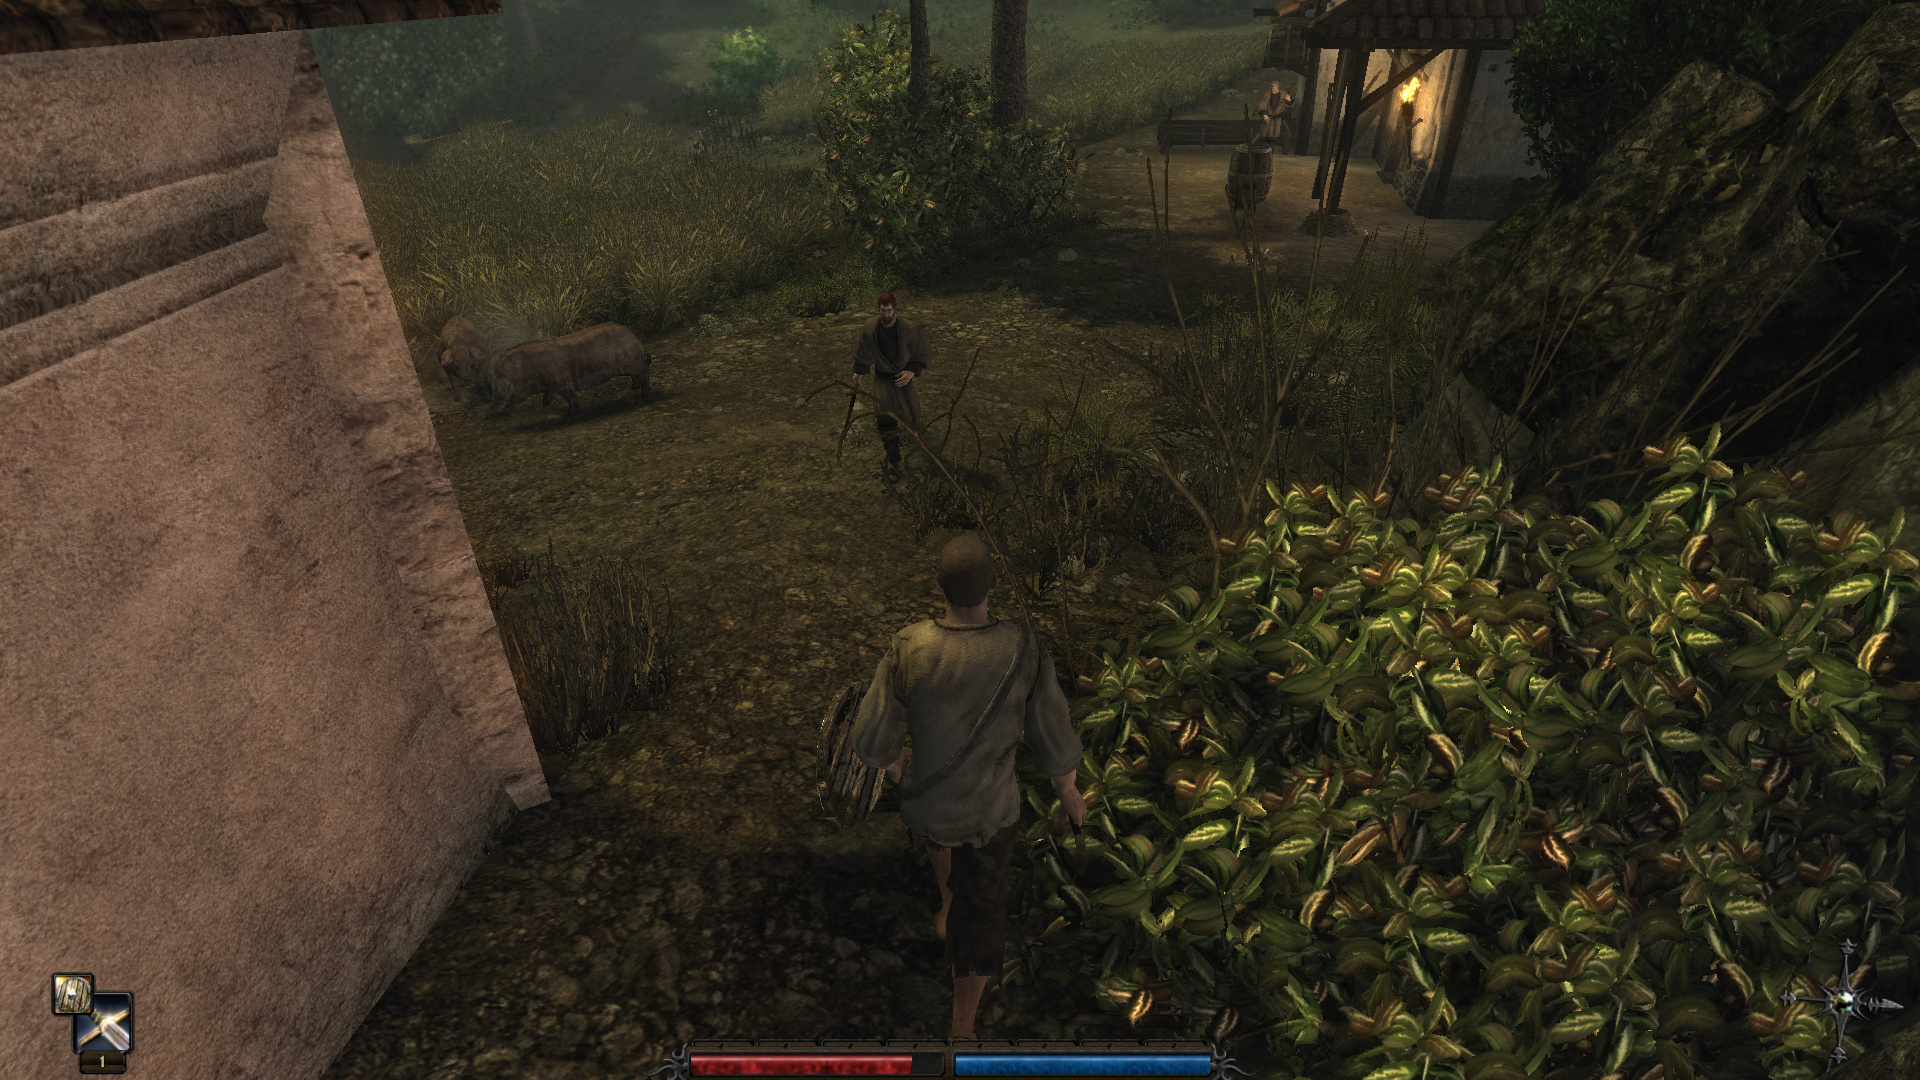
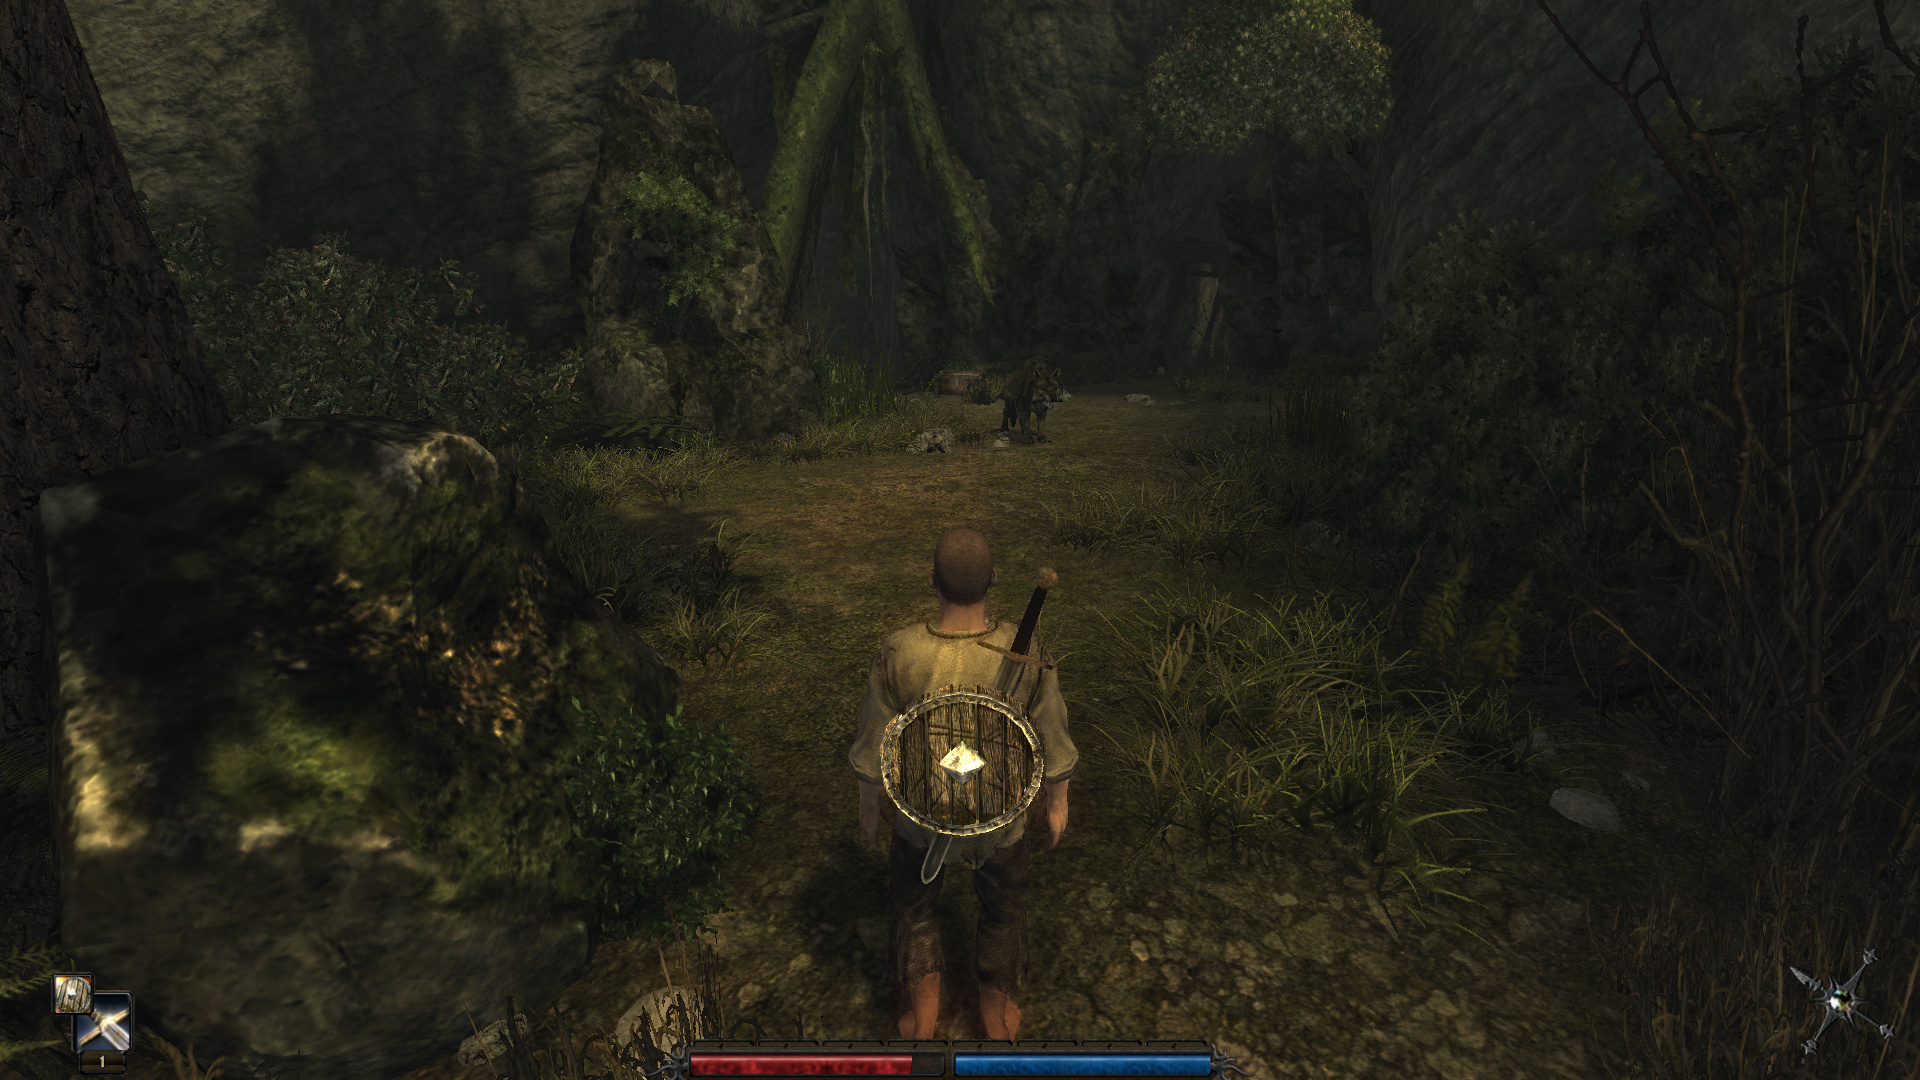
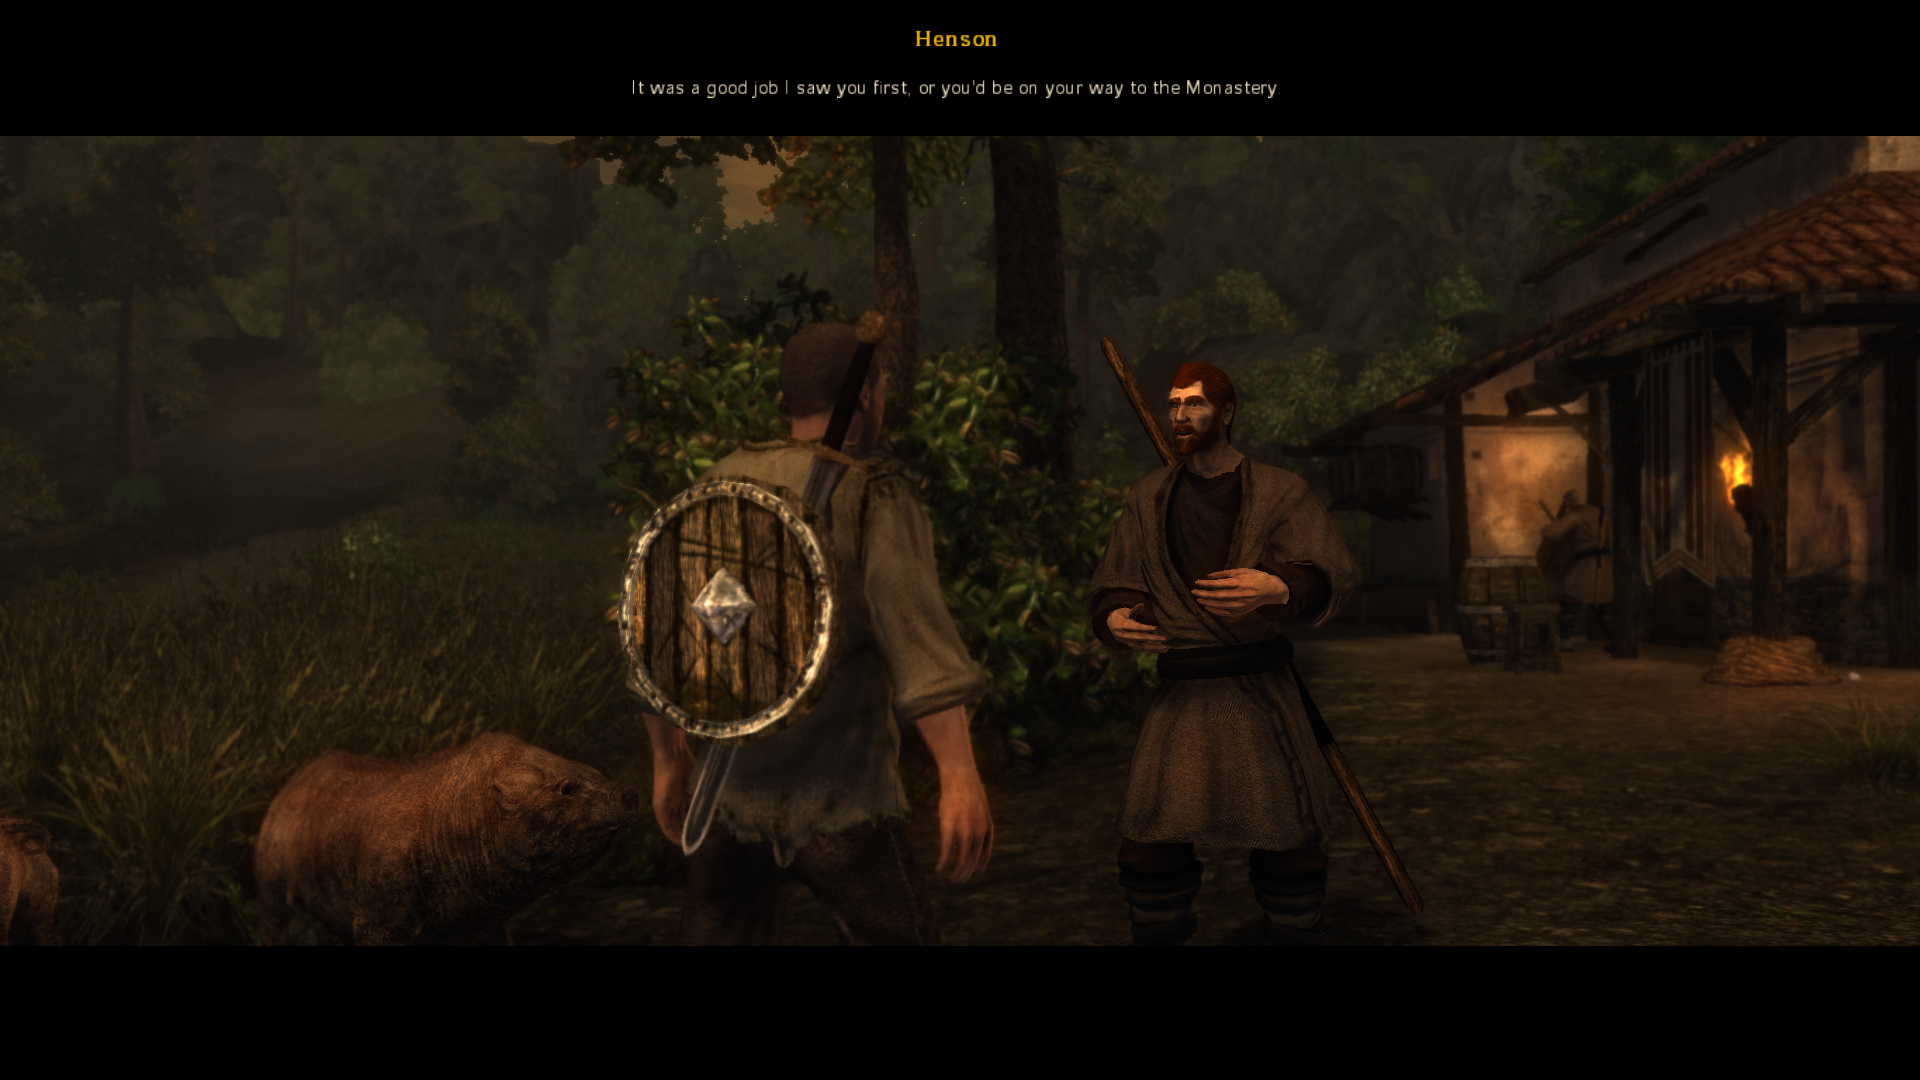
: Henson here wants us to go kill some wolves that have been eating his pigs, so we’ll go ahead and do that. But first, a lesson in how NPCs work in this game - because I figured now would be as good a time as any to show it.

9_2iVBrO_400x400
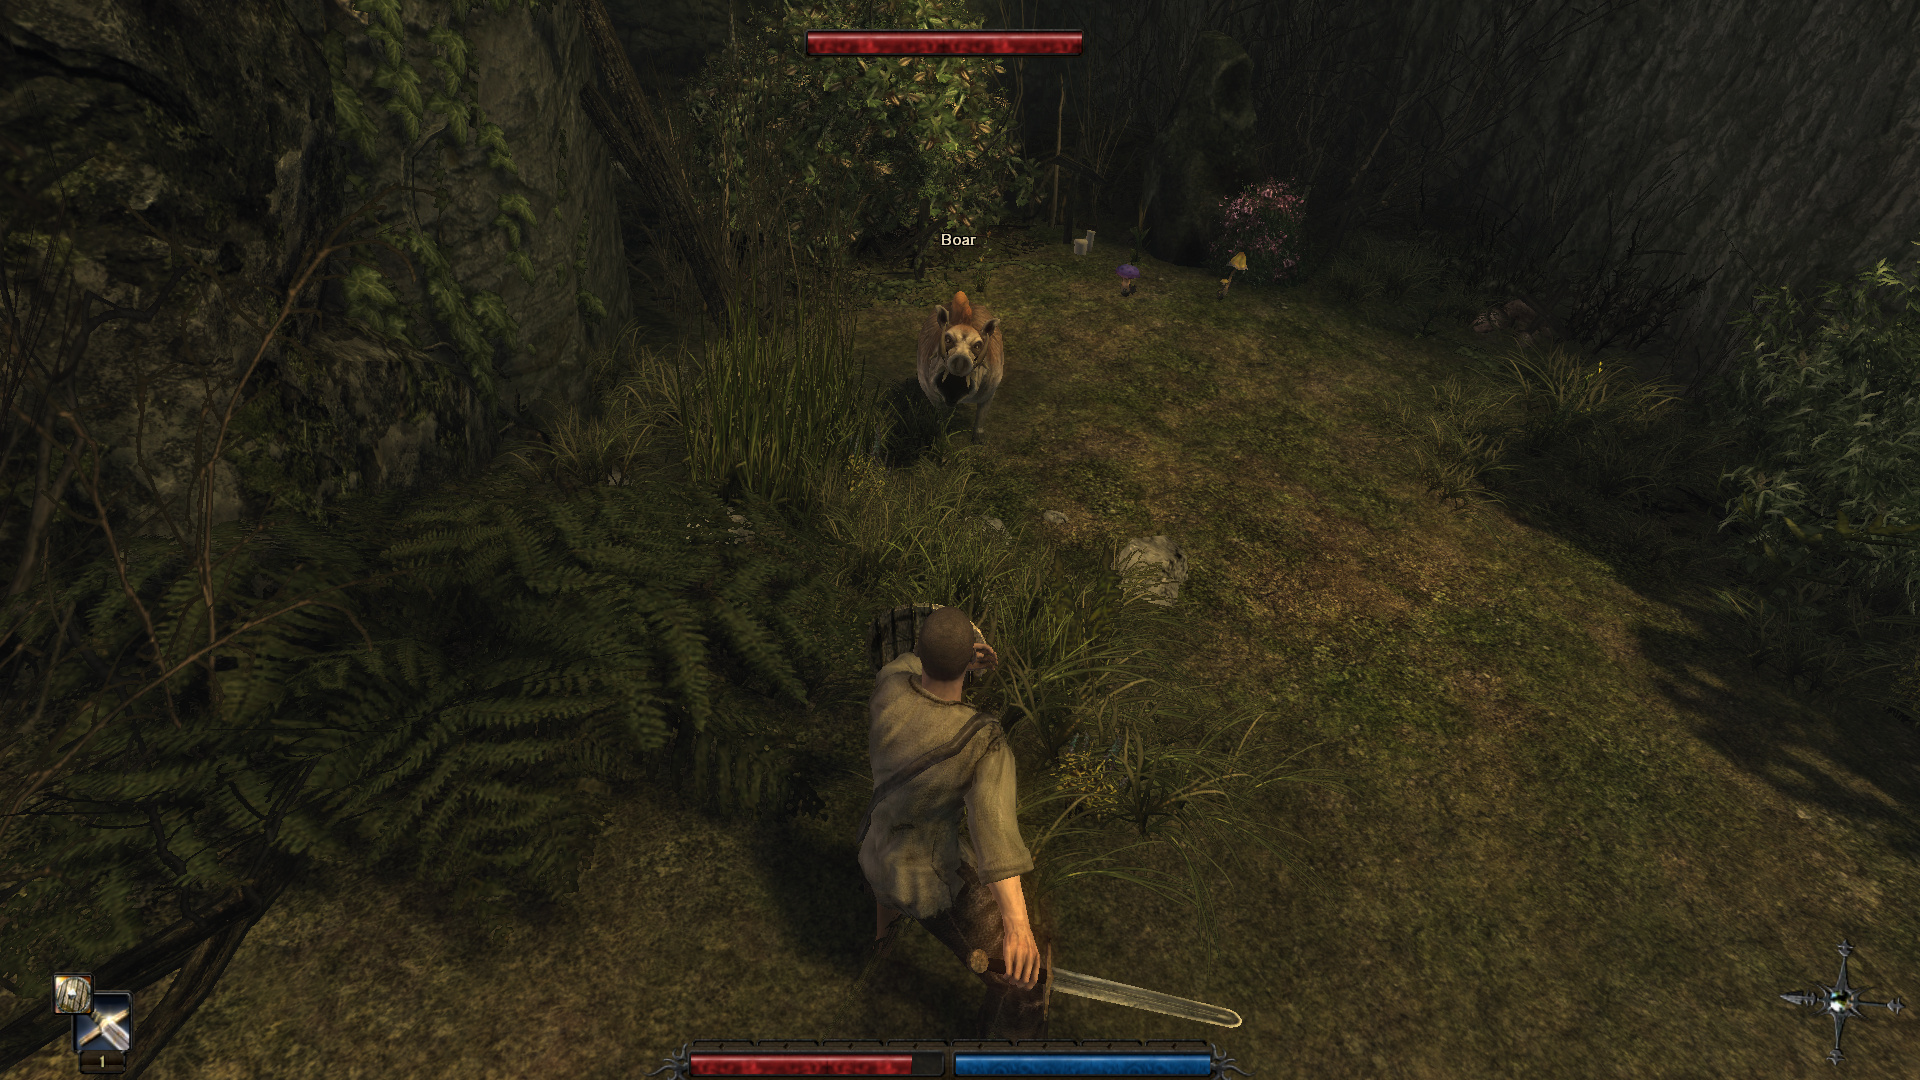
: Right behind Henson’s pig shack is a boar. Animals in this game typically give you a warning before attacking you, provided you don’t run right up into their faces. Wolves are an exception to this. We MIGHT be able to kill the boar with a bit of finagling, but there’s a better way. This is something you’ll see me doing a lot if we choose to go the wizard route.

9_2iVBrO_400x400
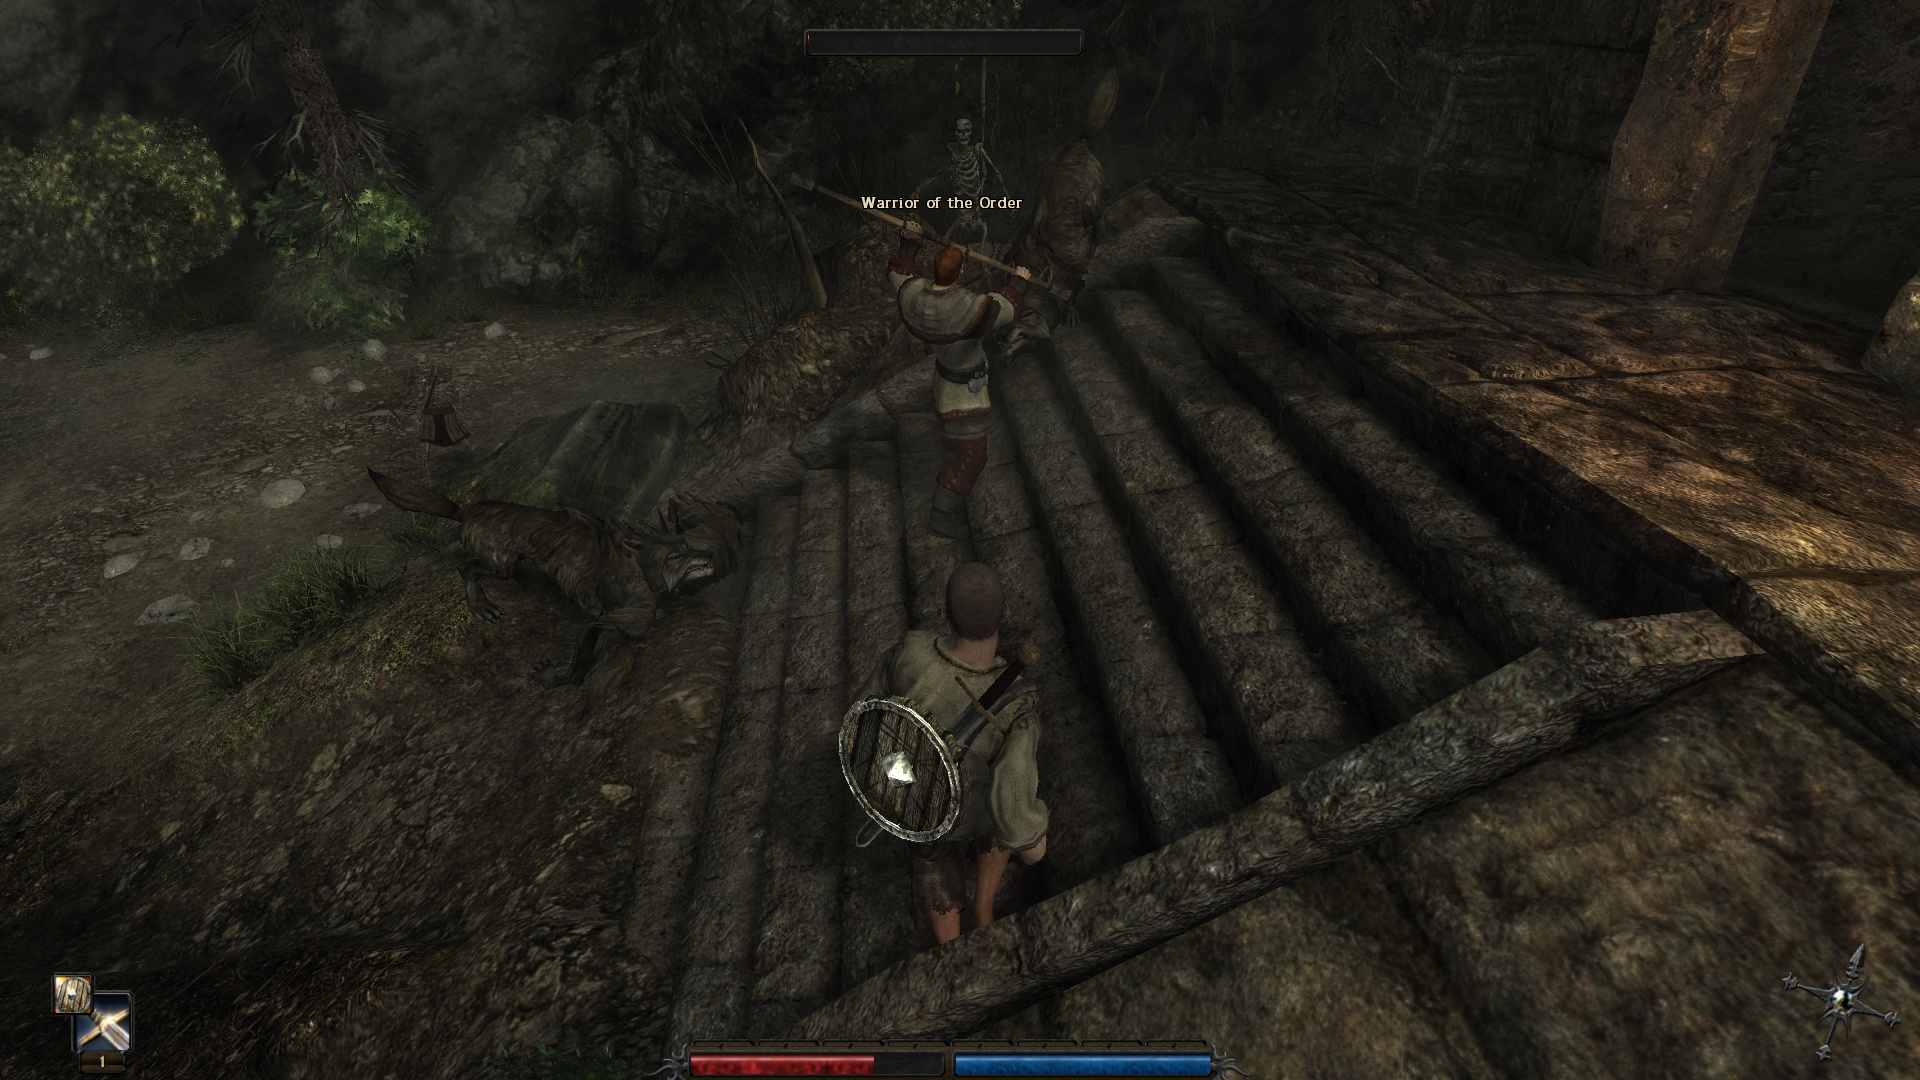
: Just like in most older MMOs, enemies will follow you once they’re aggroed on. Unlike most MMOs, Piranha Bytes kind of forgot to design a “leashing” mechanic - or at least, the one they put in the game doesn’t work very well. It is ENTIRELY possible to have a wolf follow you the entire way across the world. Most NPCs that have weapons will come to your aid if they see that there’s an enemy attacking you. In this case, Henson is already here and ready to whack the boar with his staff.

9_2iVBrO_400x400
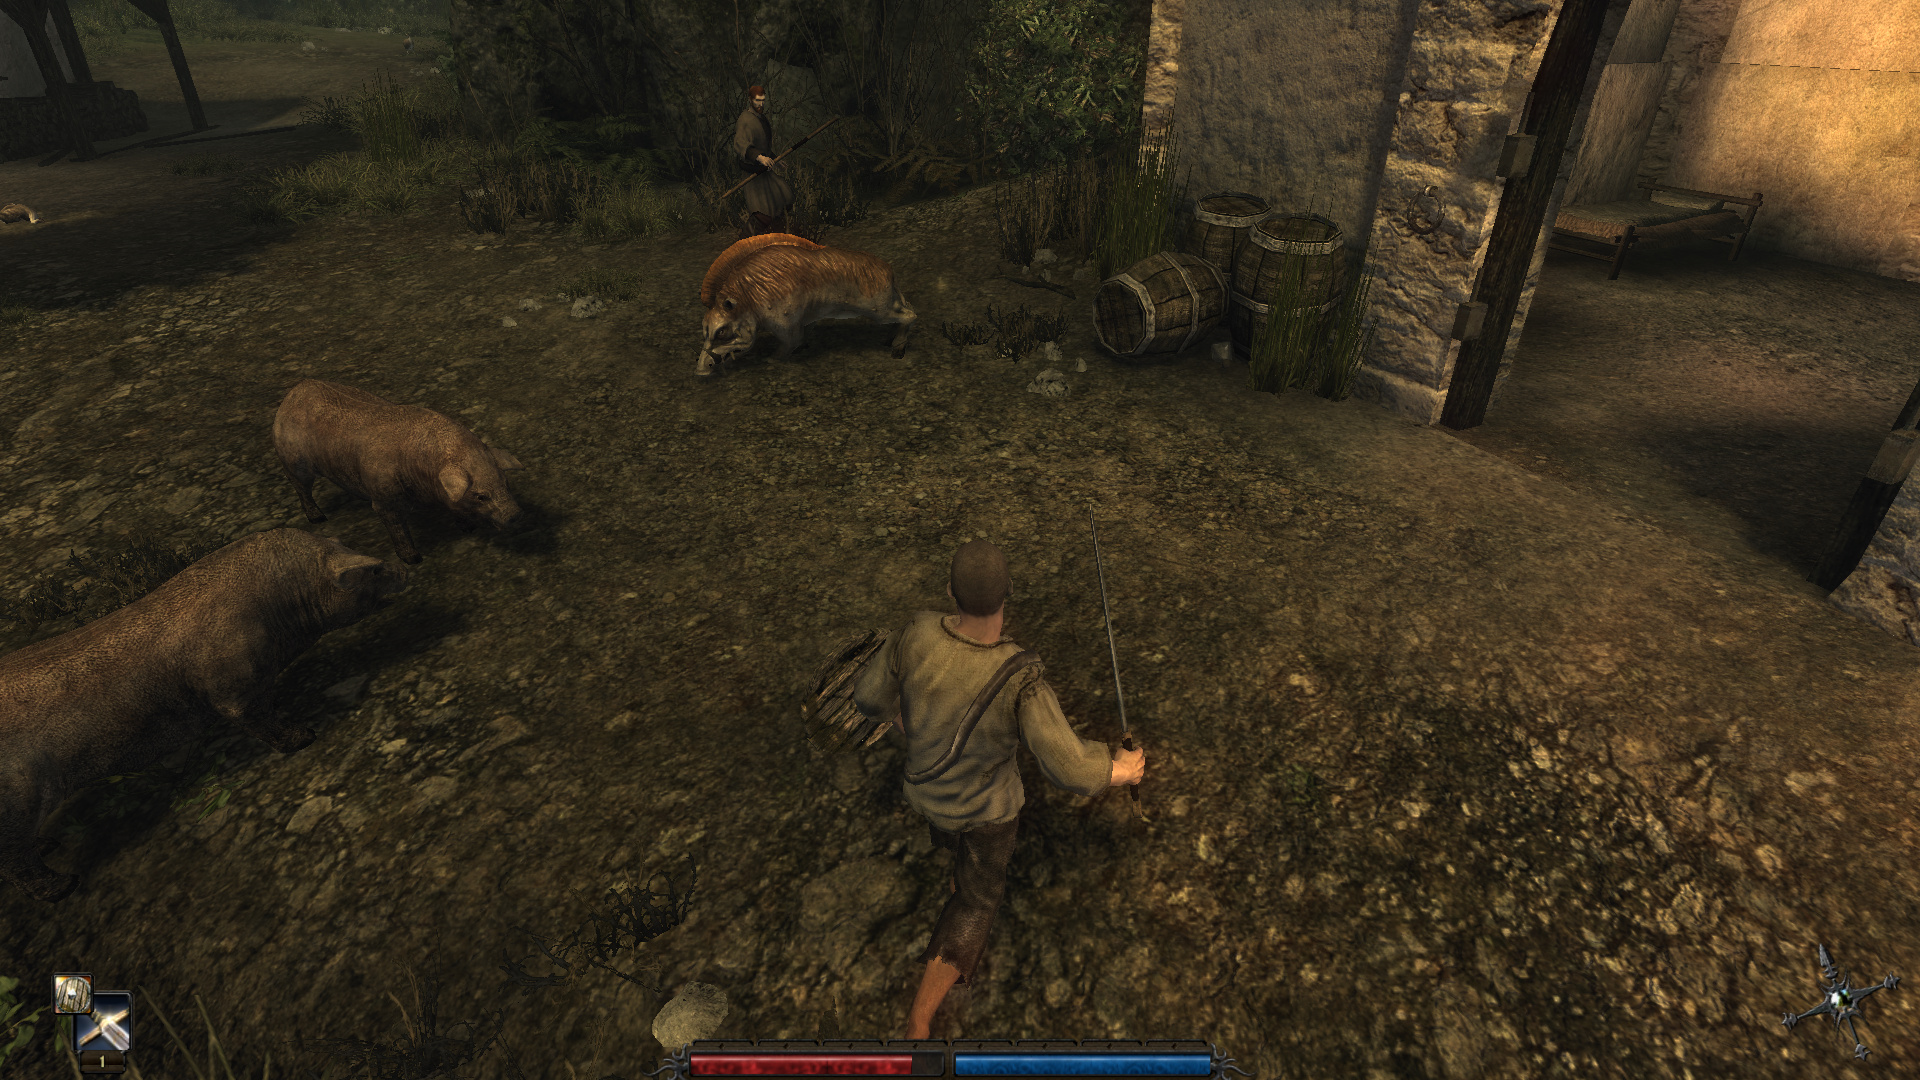
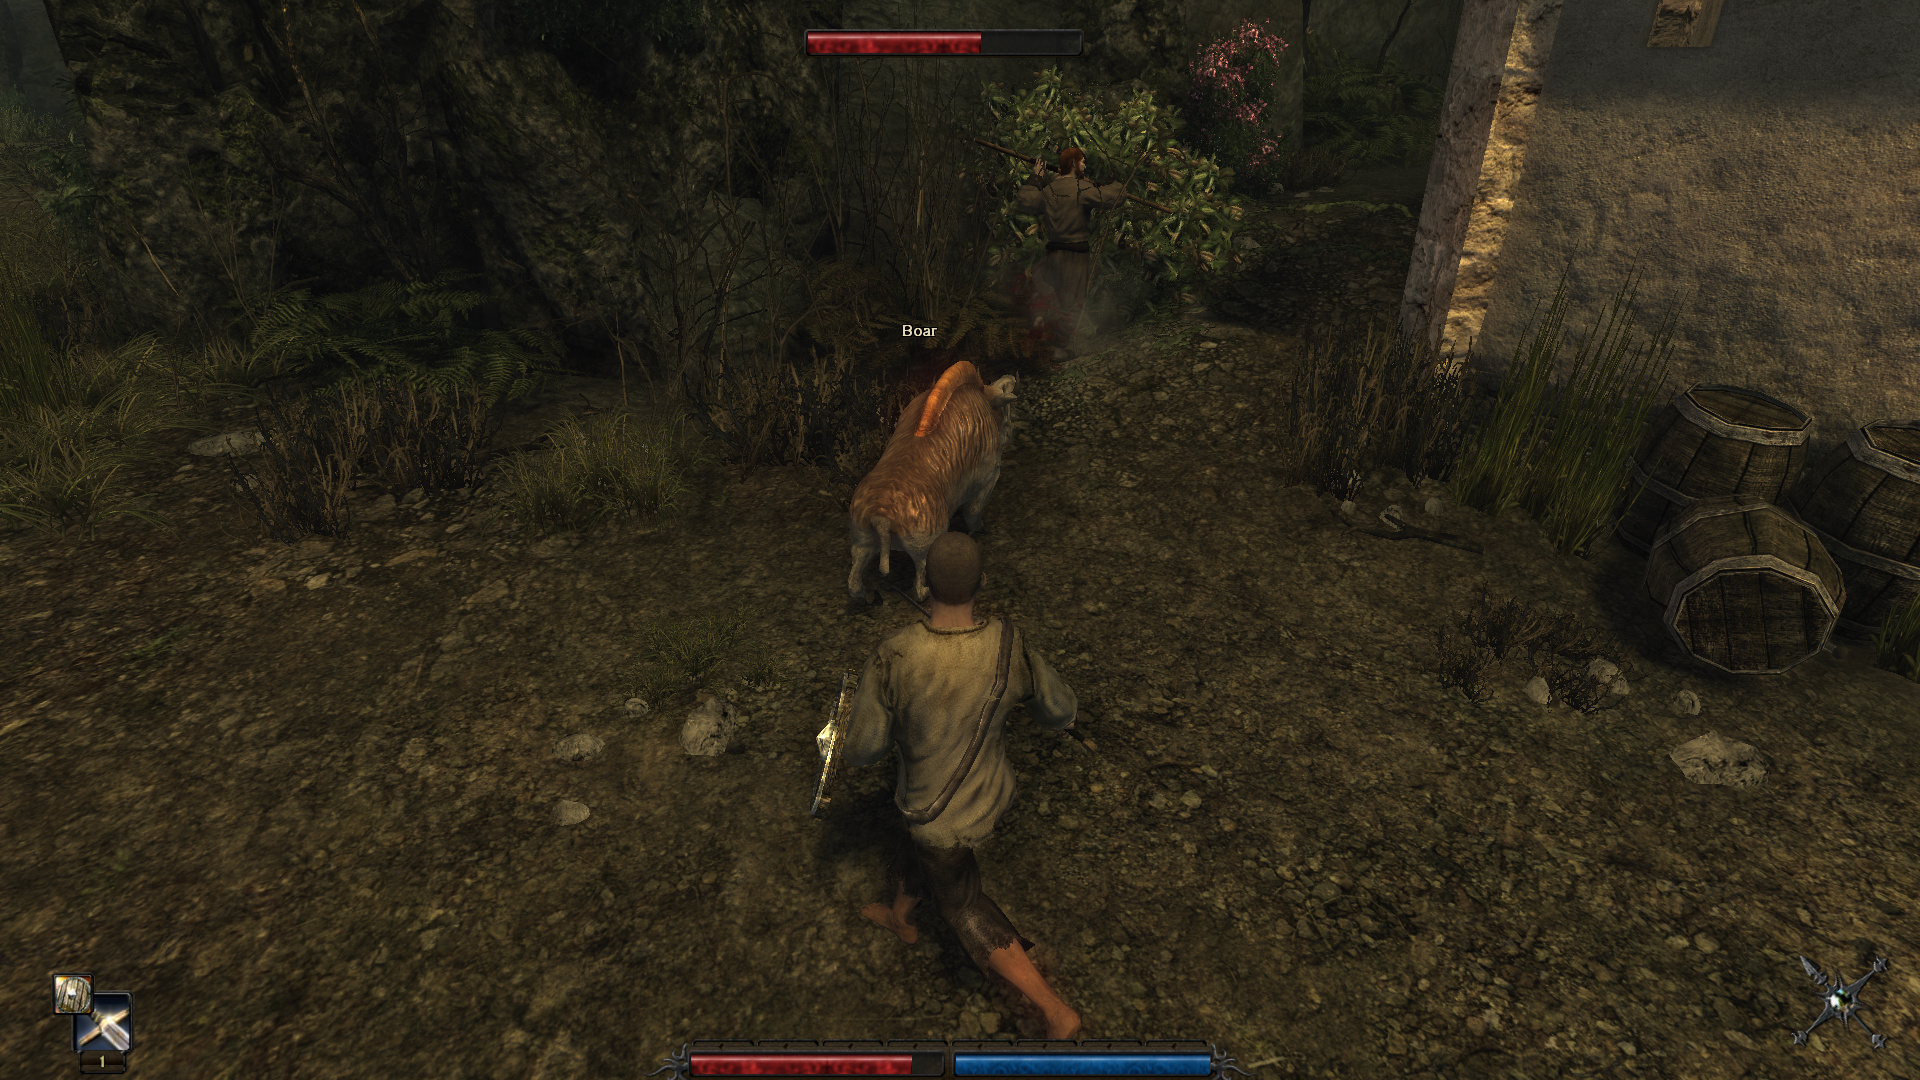
: Once Henson attacks it, the boar pretty much immediately switches aggro onto him. At this point in the game, pretty much every NPC is stronger than us. Henson did this much damage with two hits of his staff, and then leaves the boar open for an attack from the back.

9_2iVBrO_400x400: There’s two dangerous parts to doing this. The first part is that if we hadn’t gotten the killing blow (which is common if more than one NPC decides to join the fight) we’d get zero experience from this. The second is that animal-type enemies can permanently kill NPCs.

9_2iVBrO_400x400
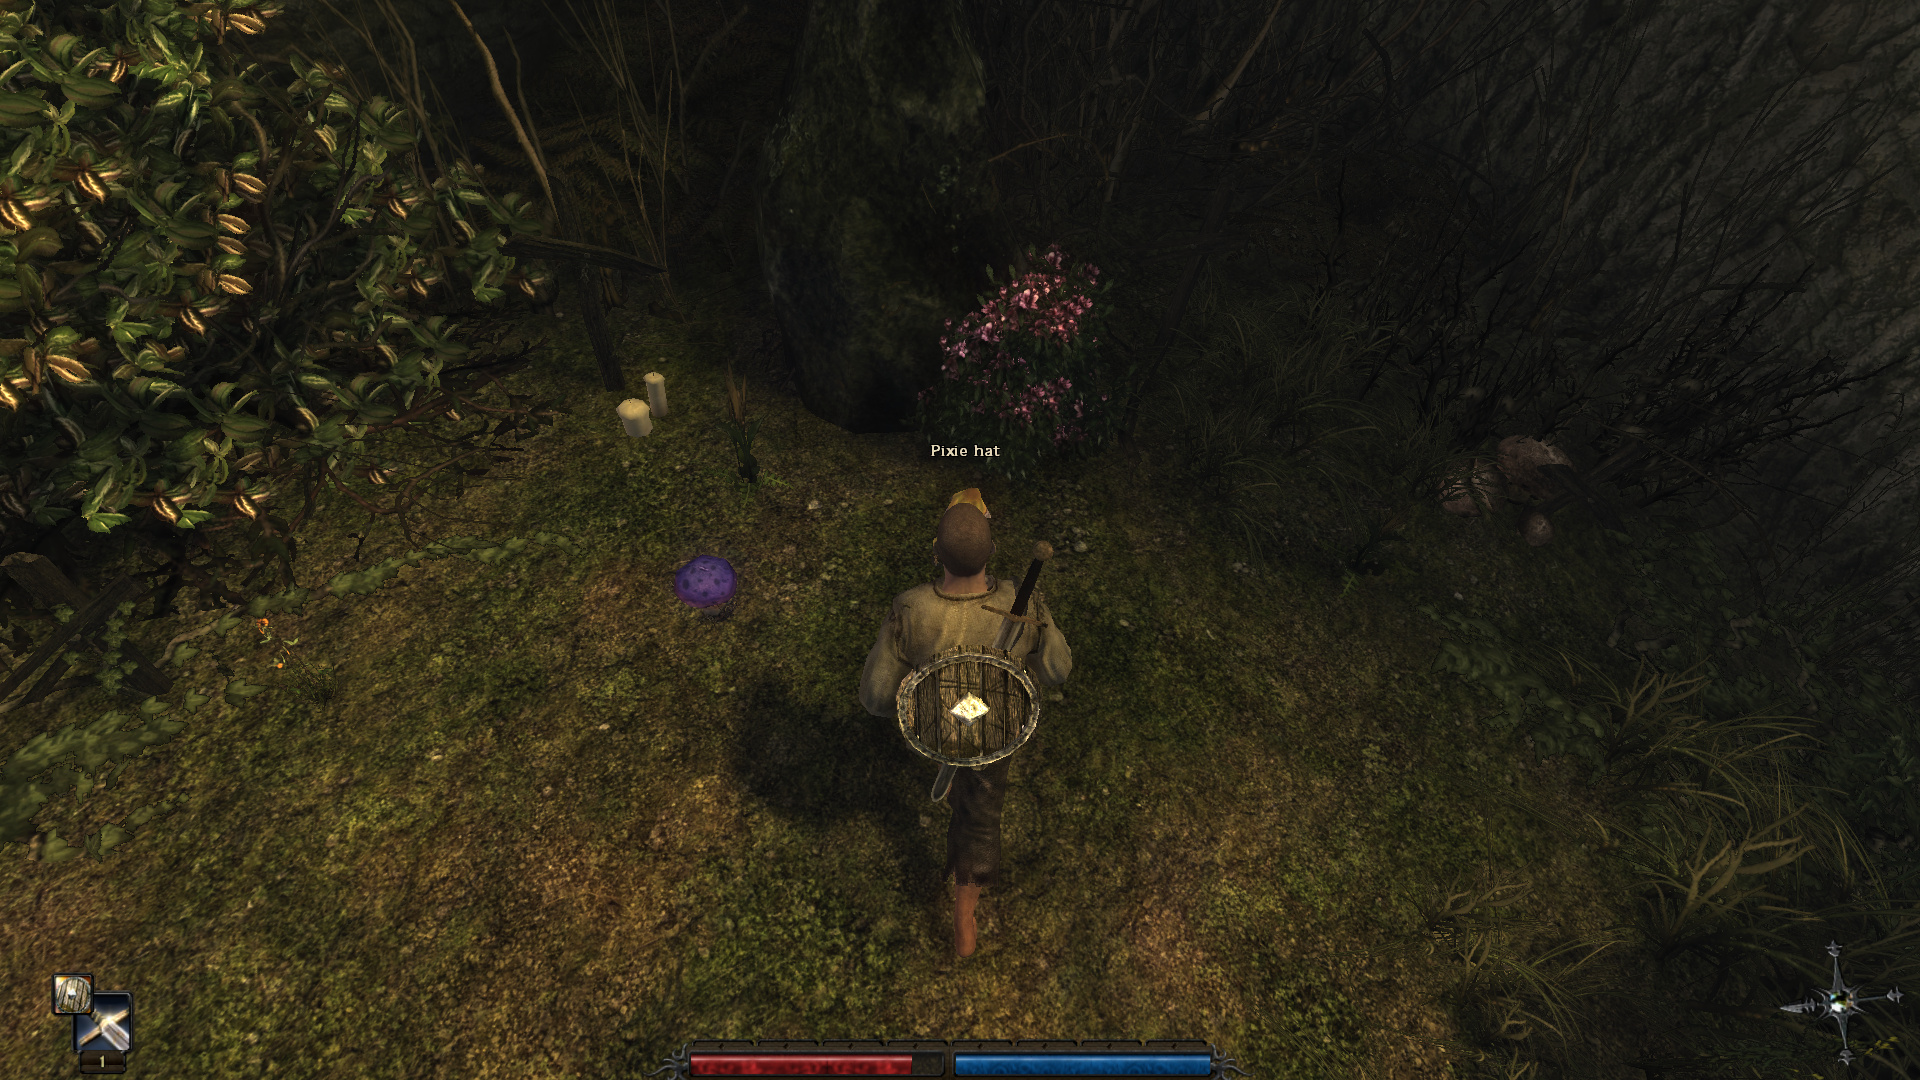
: The reason I wanted to kill this particular boar is because it’s blocking a Pixie Hat, which is the third of four special plants. Pixie Hats raise dexterity by 1, and can be put into a potion to raise it by 5… but the number of these potions you can actually make is far less than the number of Pixie Hats you’re going to find. Dexterity is kind of a useless stat anyway.

9_2iVBrO_400x400
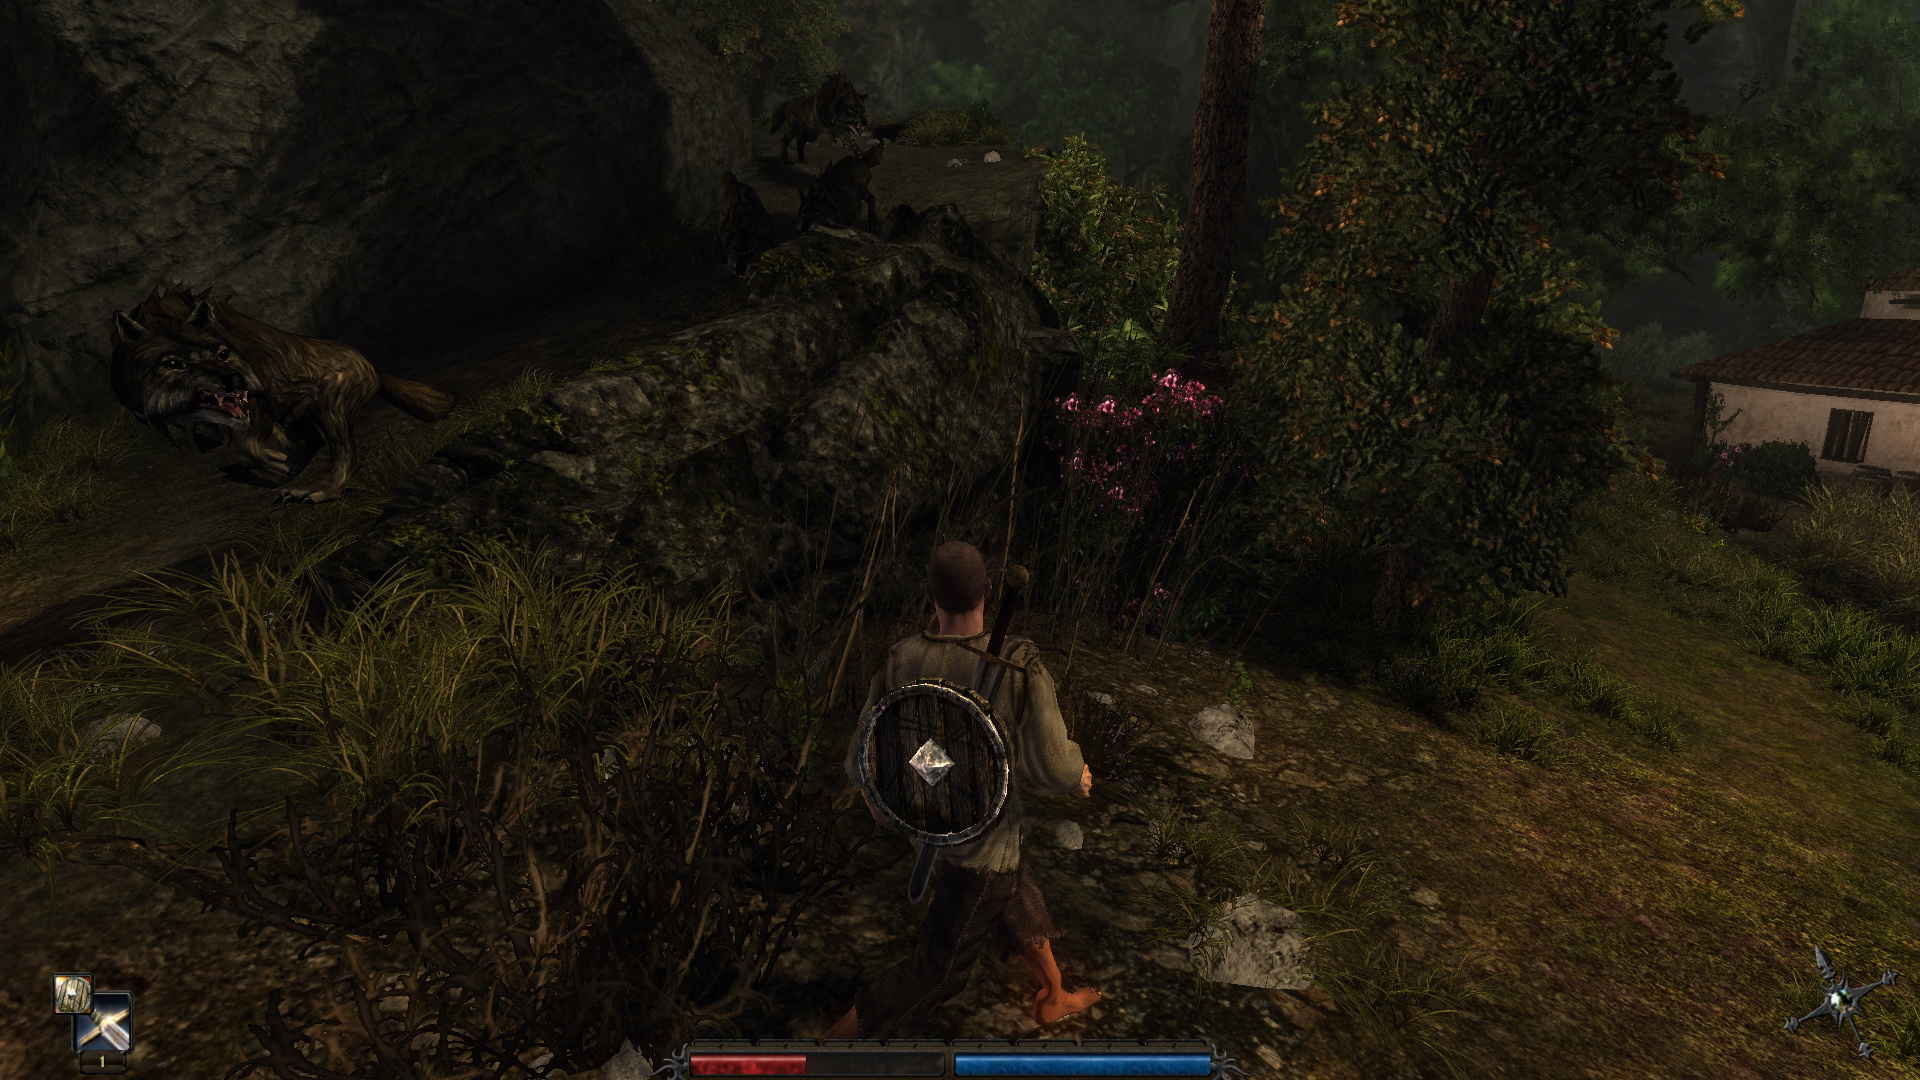
: The wolves that Henson sent us after are behind the main house where Tristan is.

9_2iVBrO_400x400
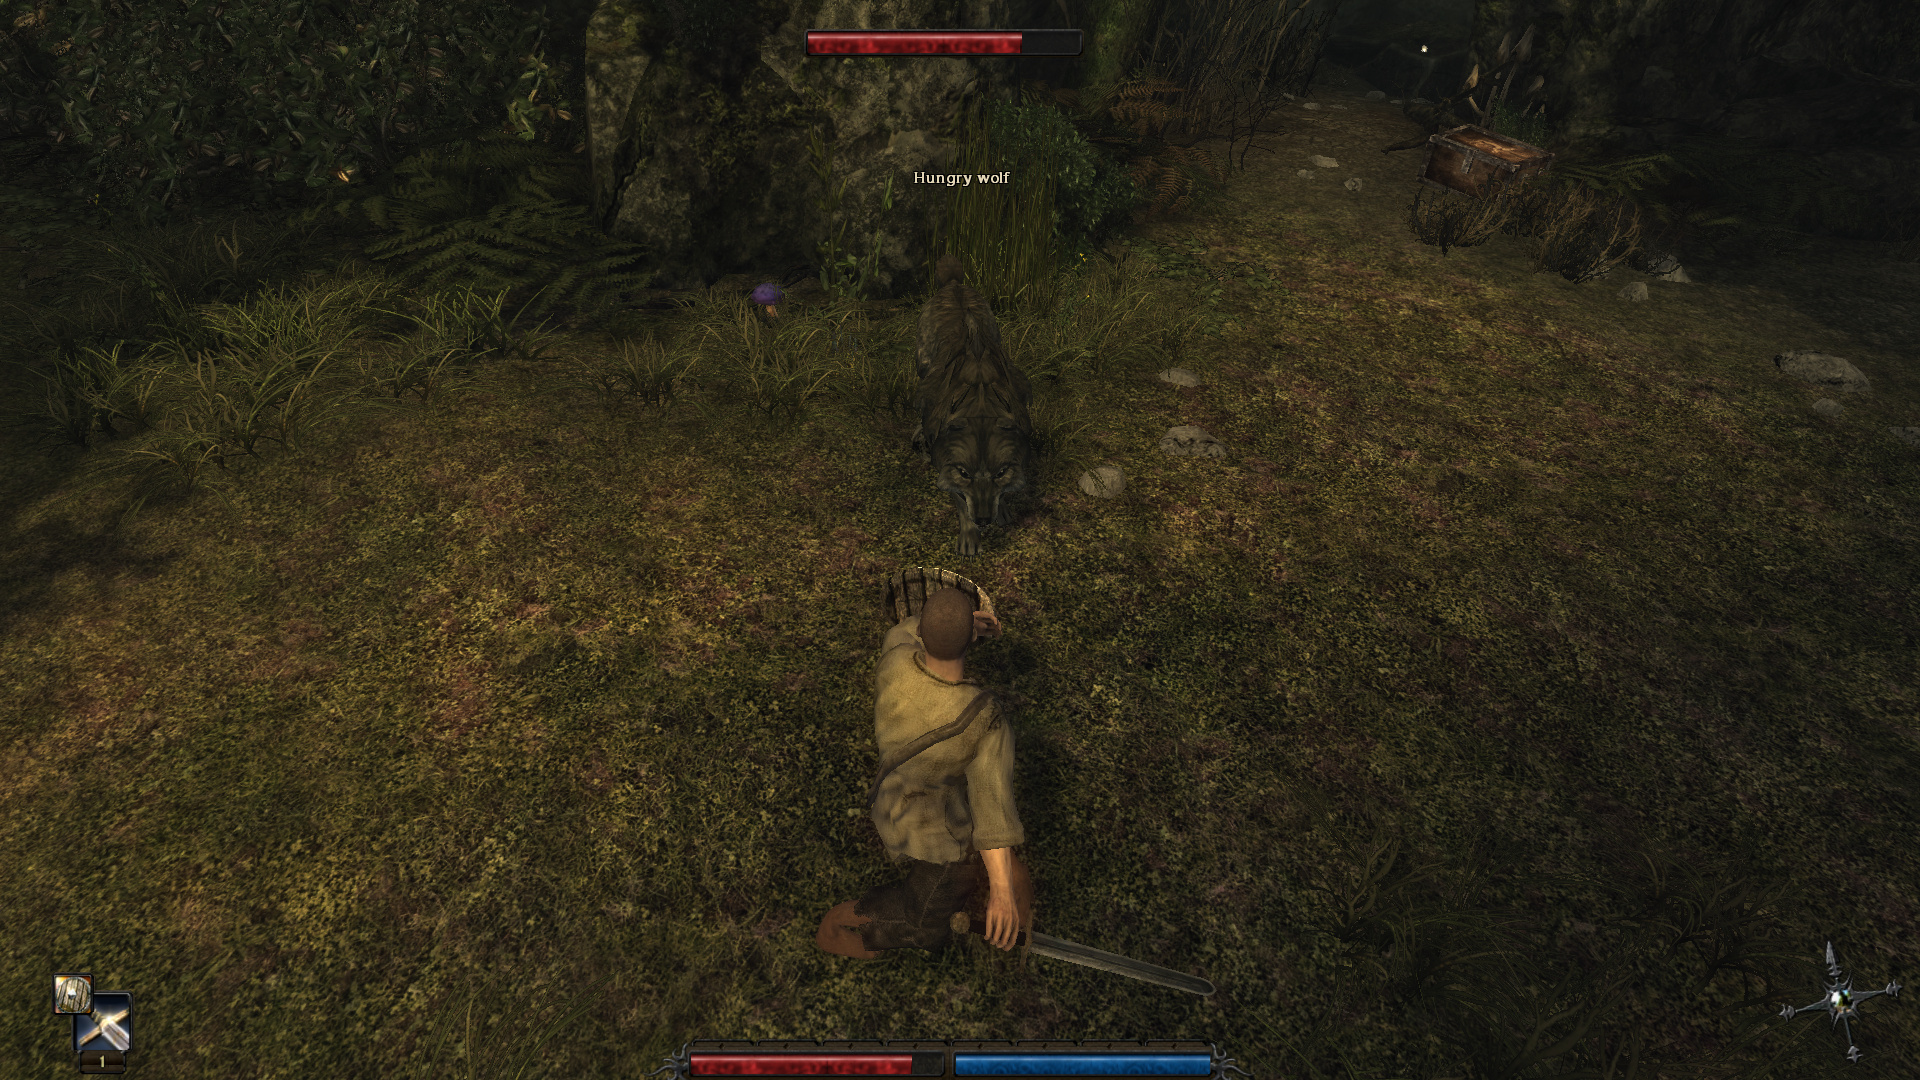
: They’re significantly stronger than the ones in the tutorial area. If I had to estimate, I’d say they have around three times the HP. This first one kinda fucked me up so I had to go back to Jan’s to heal.

9_2iVBrO_400x400
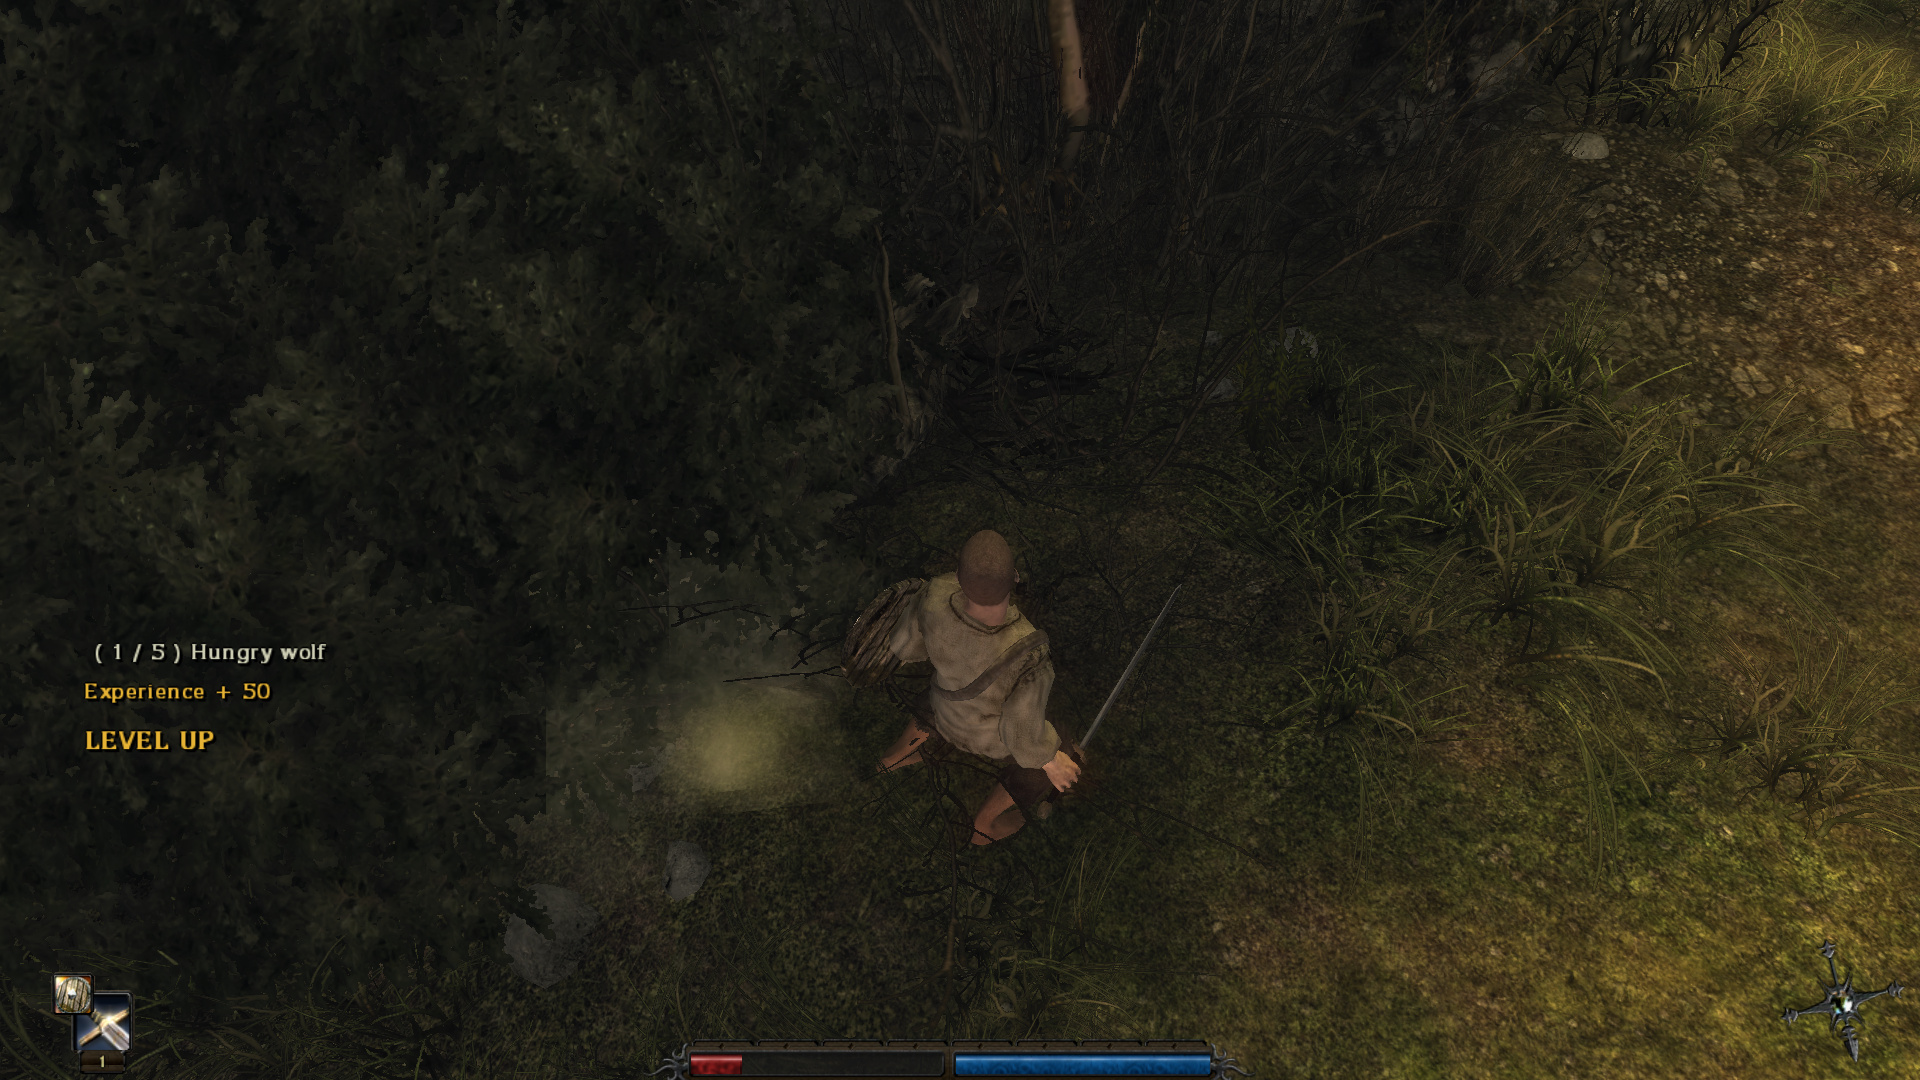
: You’ll also notice that there’s a quest progress indicator in the bottom-left. This is important because in some cases, it’s possible to get items or kill enemies for a quest without even being aware of the quest. This lets you know that yes, these are quest mobs, and so there’s somewhere you can turn them in once you’ve killed them all.

9_2iVBrO_400x400
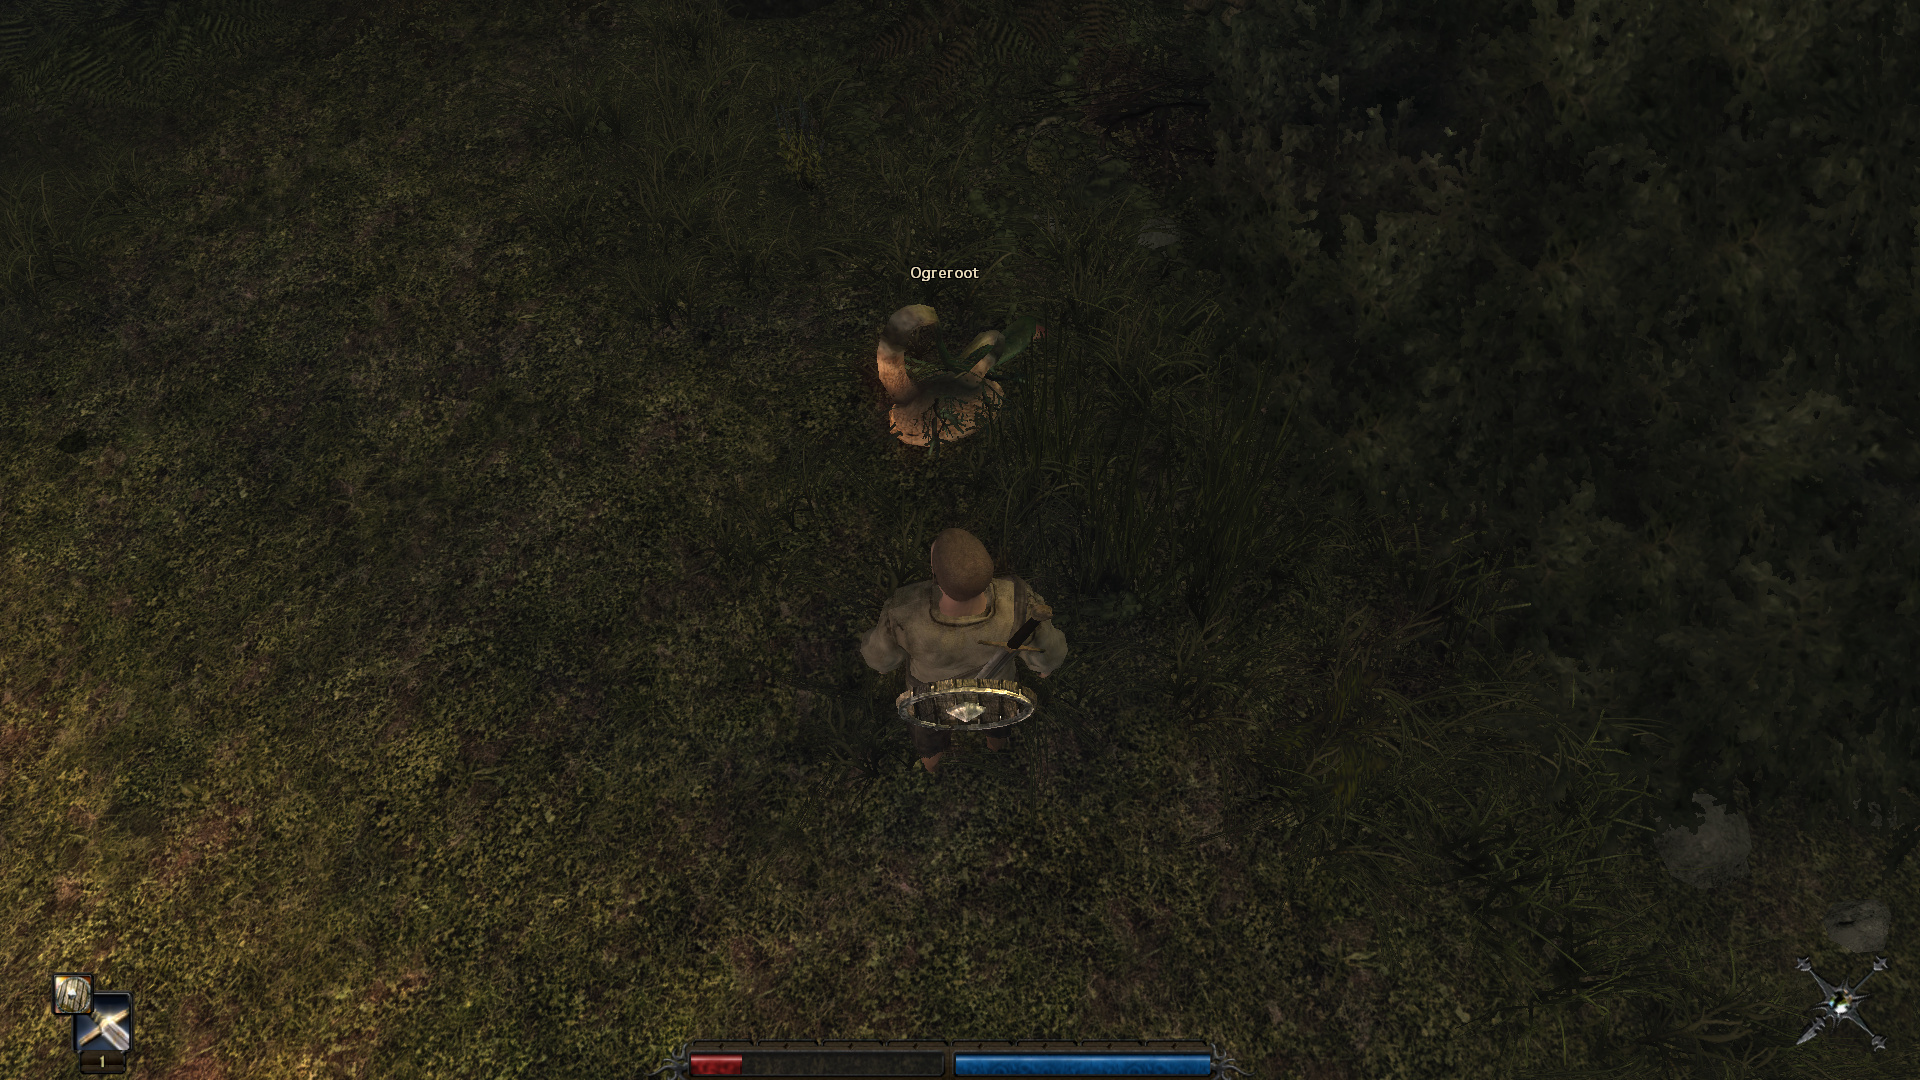
: The wolf happens to be guarding the final type of special plant: Ogreroot. Ogreroots raise strength by 1, or by 5 if put into a potion.

9_2iVBrO_400x400
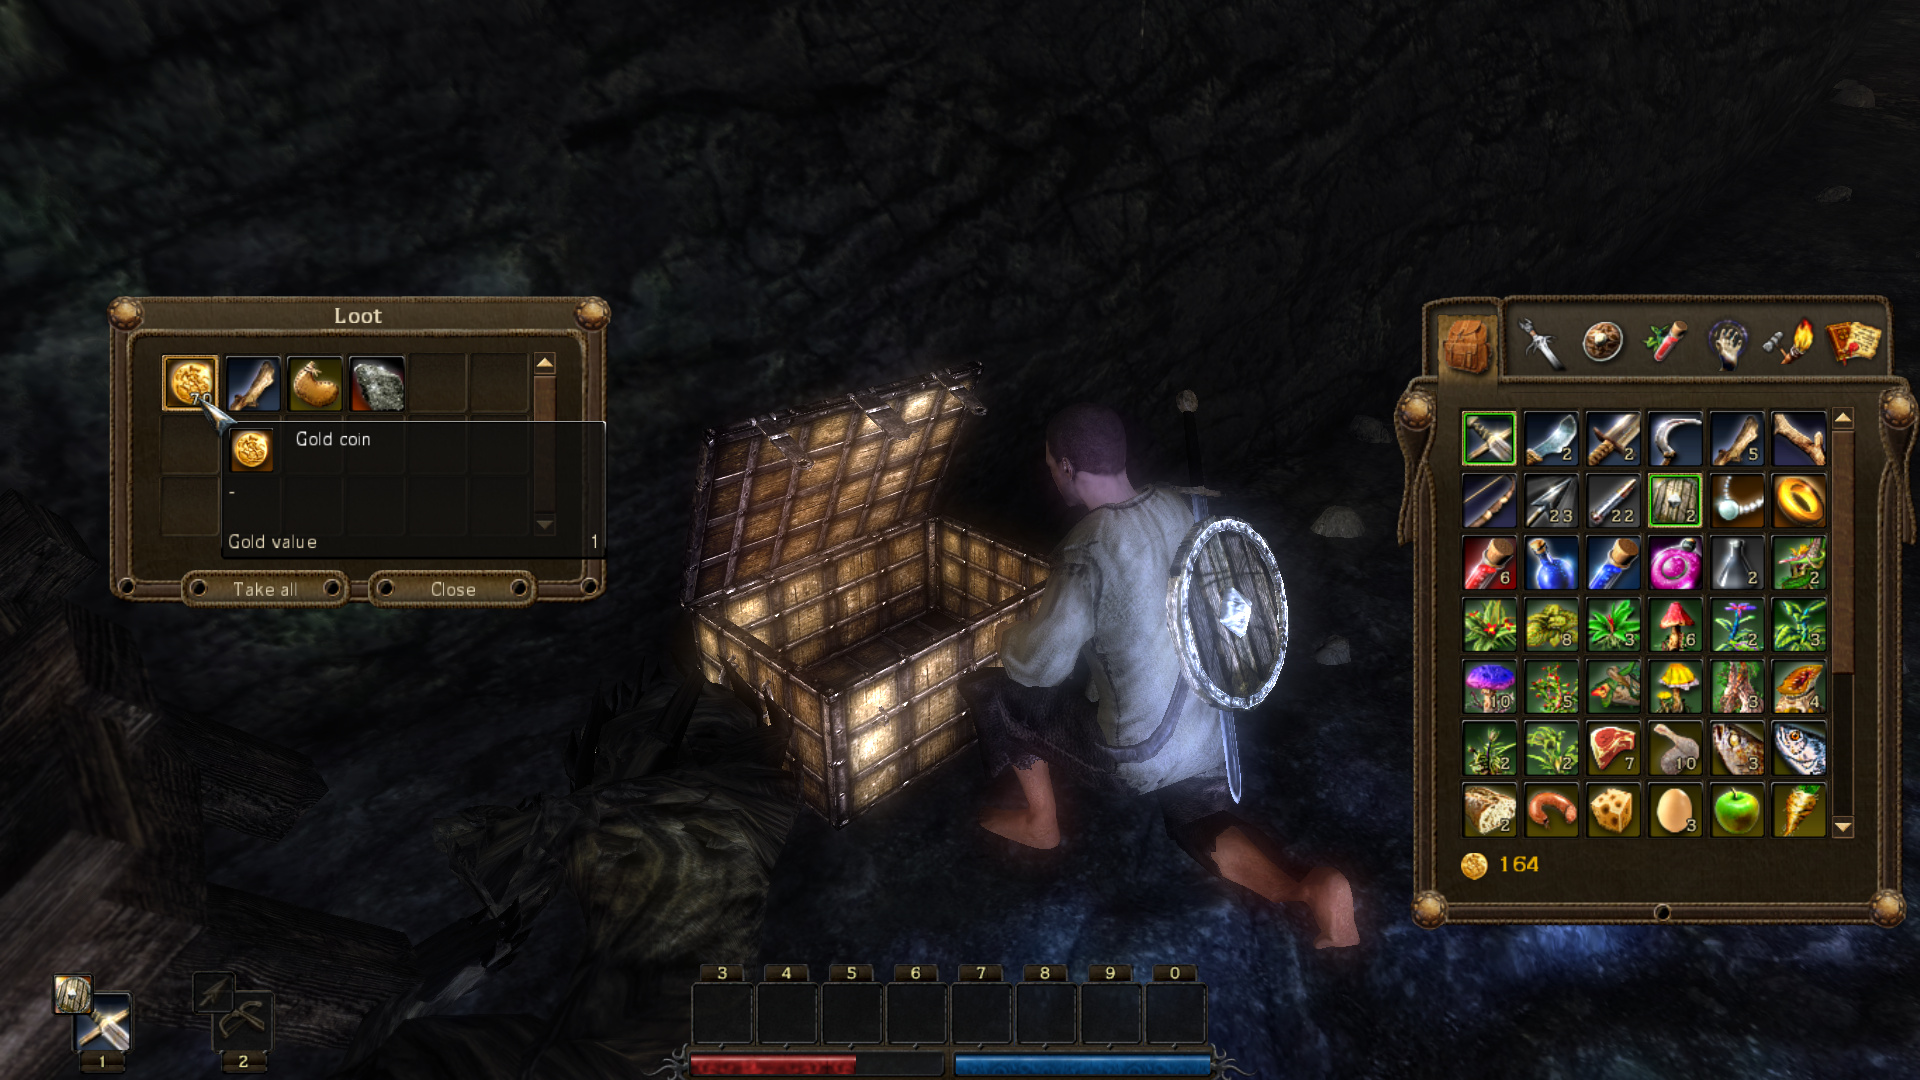
: The wolf was also guarding a chest, which… is that a blunt? Yes, it’s absolutely a blunt. There’s also a beer in here, which we’ll want for when we reach the swamp. We’ll save the blunt for if Weedlord wins the vote. One thing I should make clear though is that I went through some speedruns, and Wizard is actually just as broken as Weedlord is, just in a different way.

9_2iVBrO_400x400: Another thing I should mention is that the gold value displayed for items is completely wrong. Merchants will pay you… I want to say about 20% of the listed price.

9_2iVBrO_400x400: The rest of the quest is fairly straightforward - it leads us into this little mine shaft where the rest of the wolves are. This mineshaft actually leads right to the monastery. The farm here is basically a shortcut between the swamp and the monastery.

9_2iVBrO_400x400
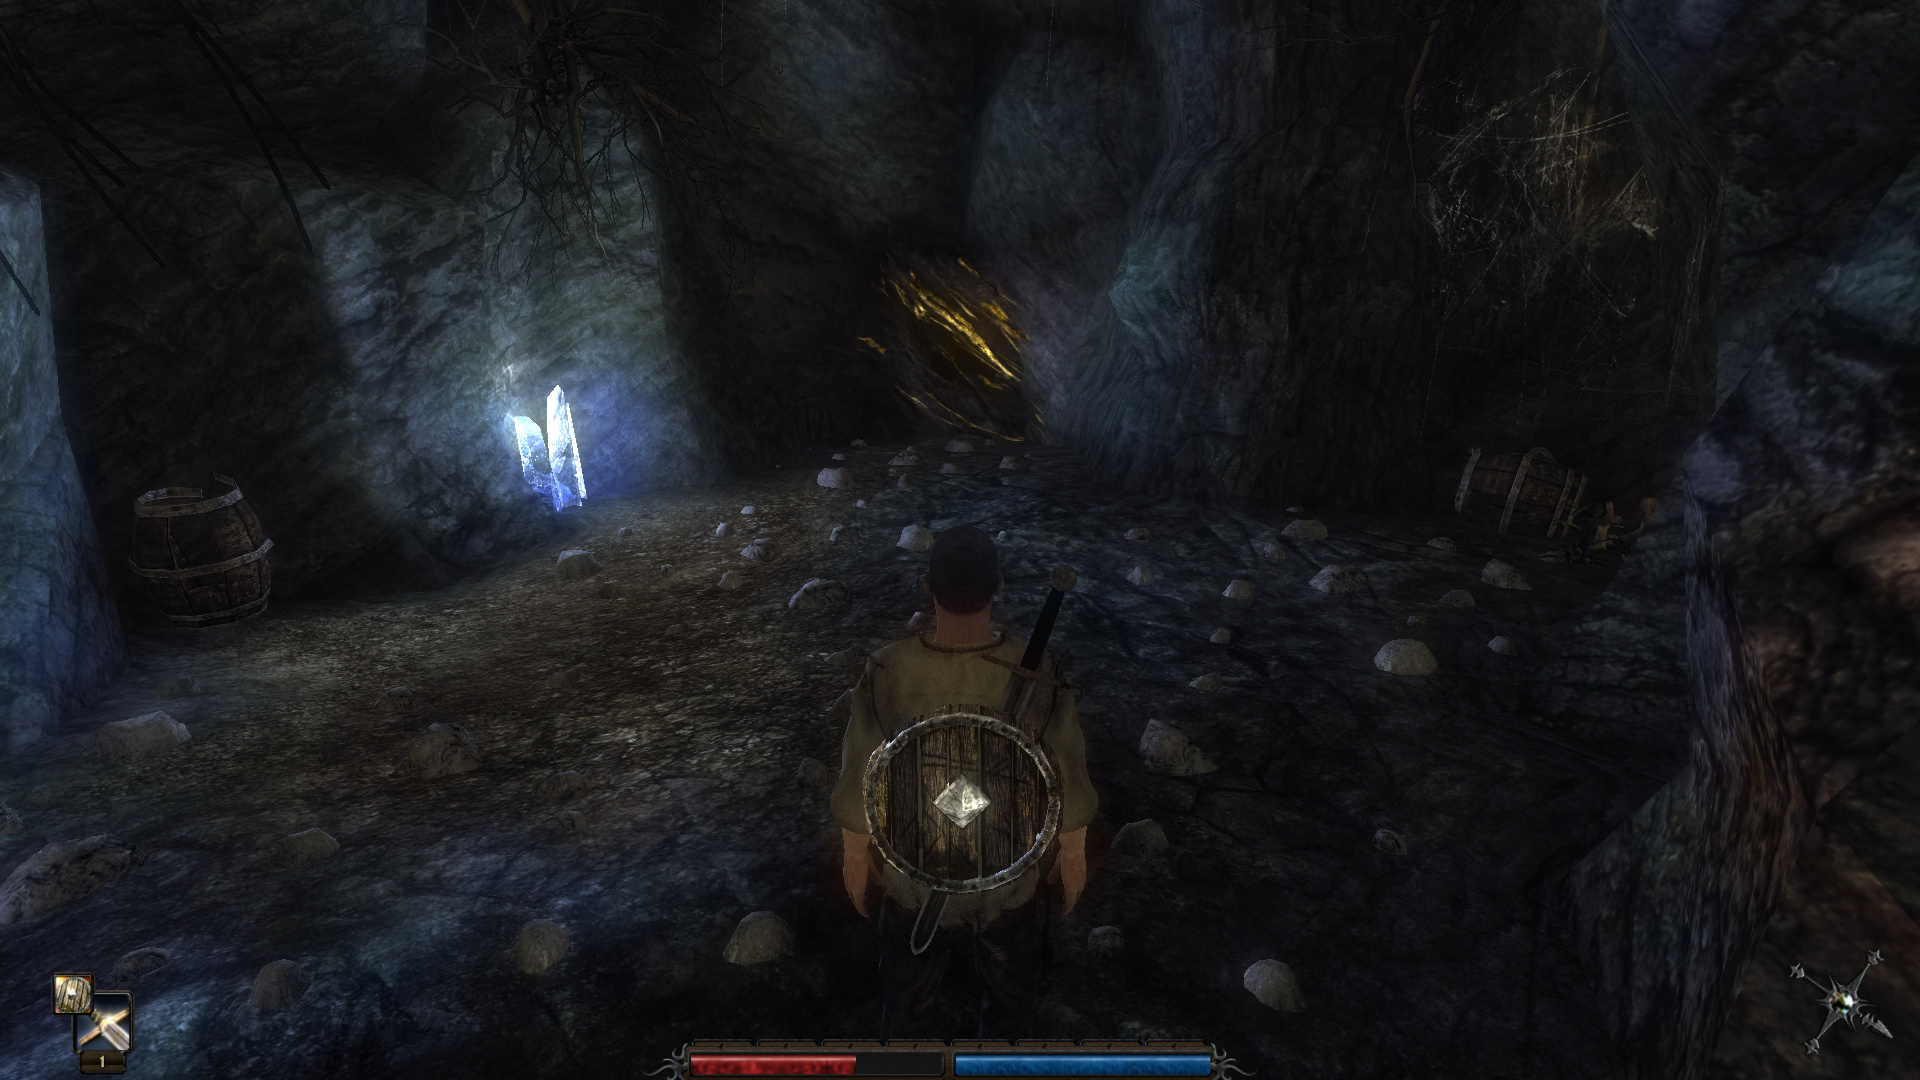
: We also find a chest with some gold in it, and a vein of gold ore. Unfortunately, we don’t have the skill we’d need to extract gold from the vein. That would require prospecting, which unless you’re using the fan-made patch (i’m not) you can only learn from one specific NPC in Chapter 1, after which you’re forever locked out of it. I’m personally not a fan of prospecting, because to do anything with the ore you need three levels of smithing and it doesn’t do a whole lot for you.

9_2iVBrO_400x400
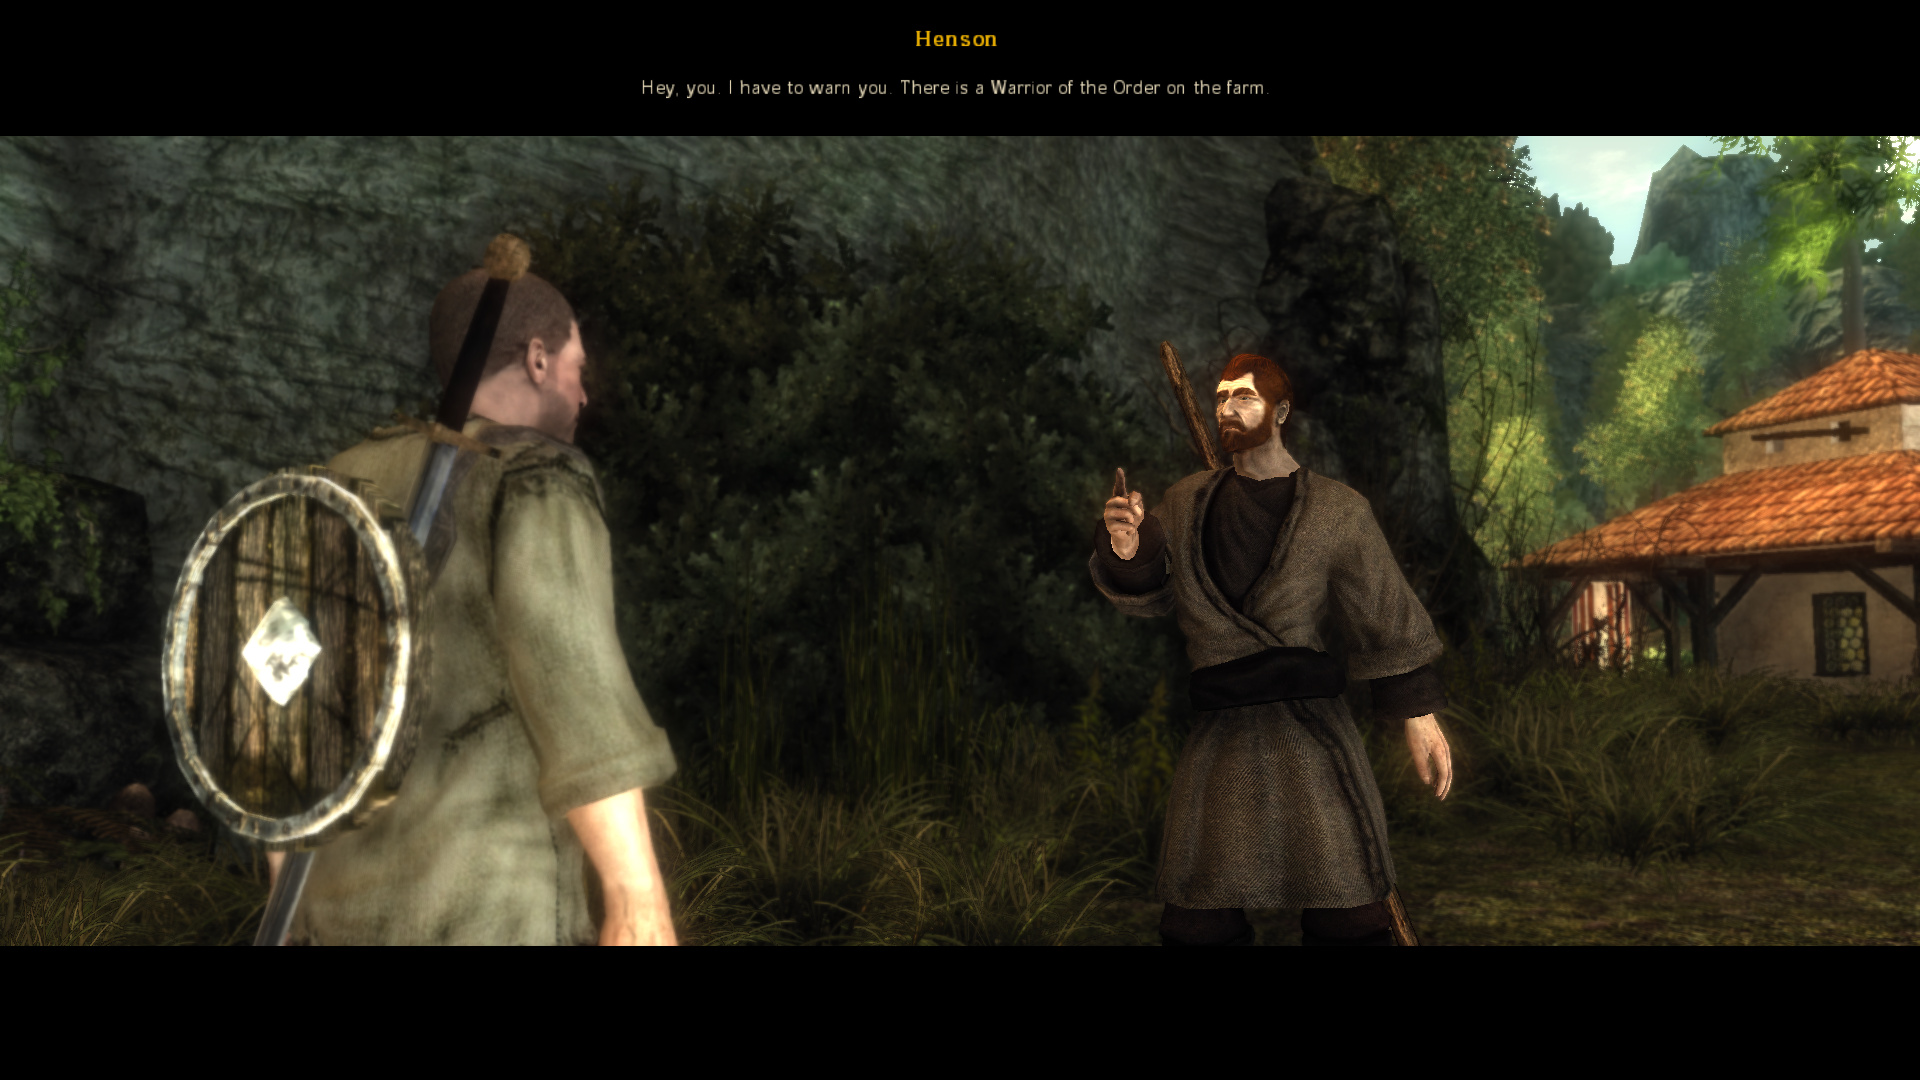
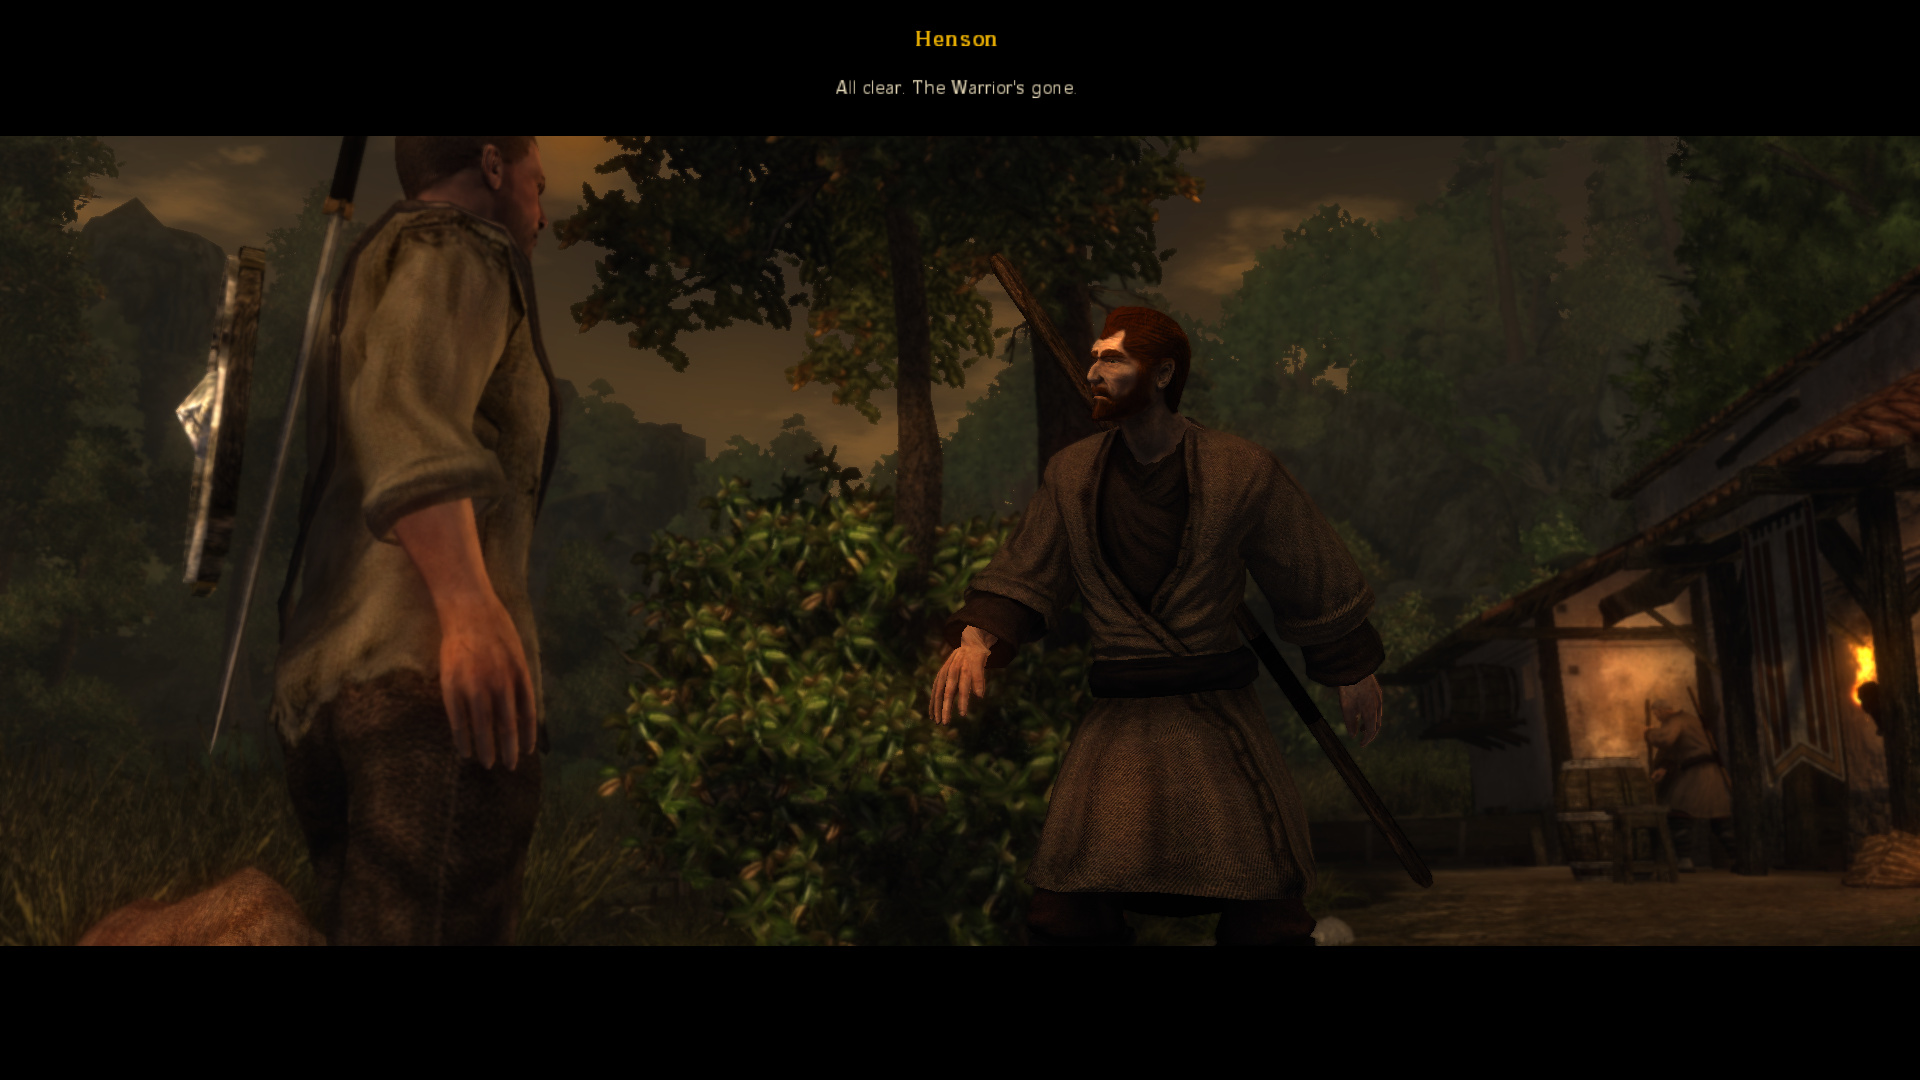
: Once we go back to report the quest to Henson, he’ll alert us to the fact that there’s currently someone from the Inquisition on the farm. If they spot us, they’ll attack.

9_2iVBrO_400x400
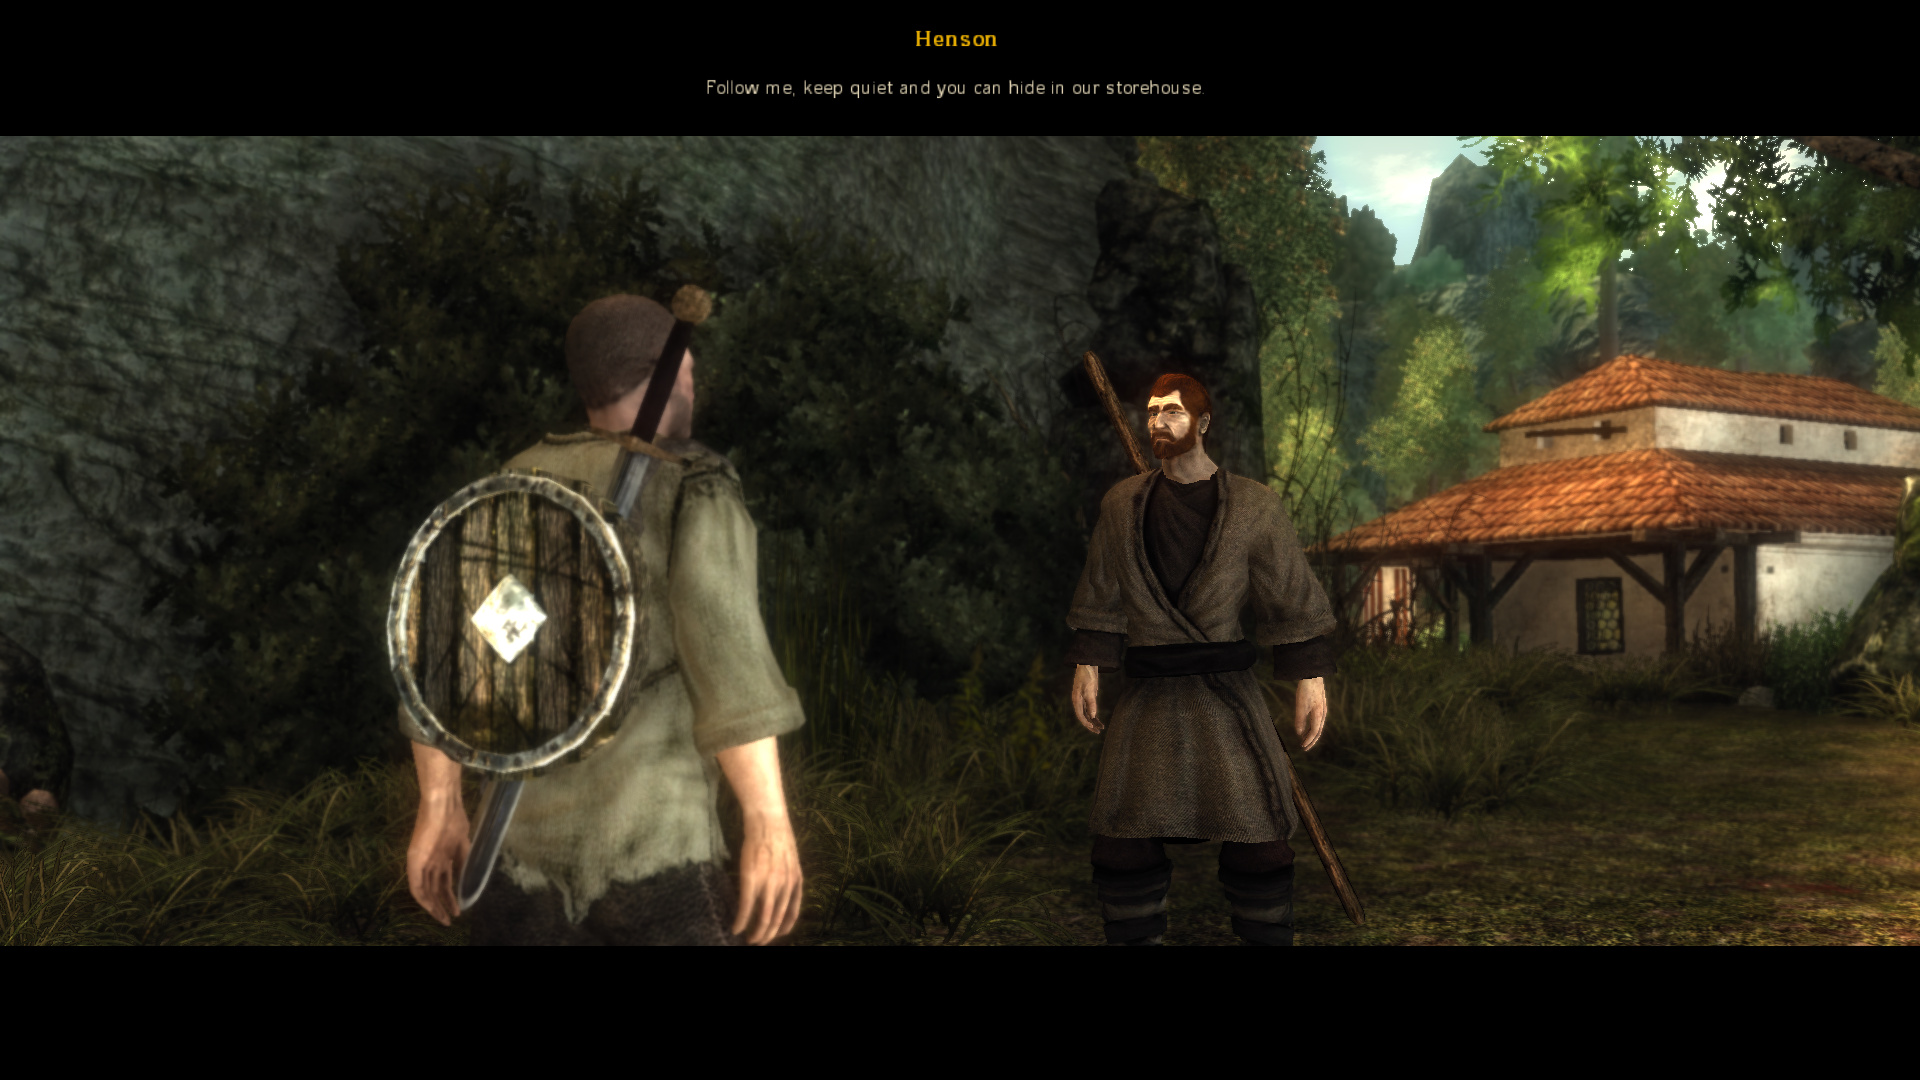
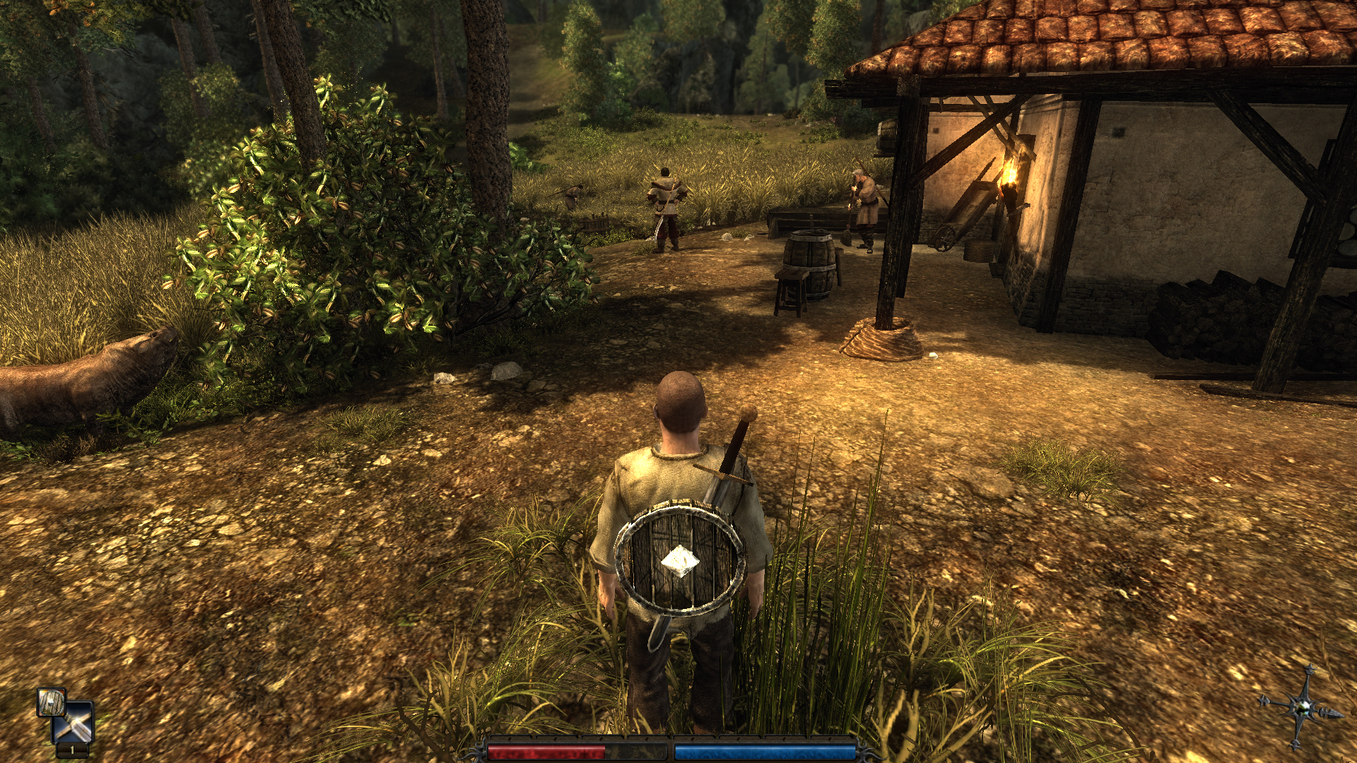
: We don’t need to follow him. As long as we stick to the area behind the buildings, he won’t see us. In fact, that’s a pretty good rule for stealth in this game: as long as their back is turned to you, they probably won’t notice you.

9_2iVBrO_400x400: The storehouse has a chest in it that we’re free to take, which contains a pearl necklace we might need for a quest later on, depending on if we’re a Weedlord or not.

9_2iVBrO_400x400
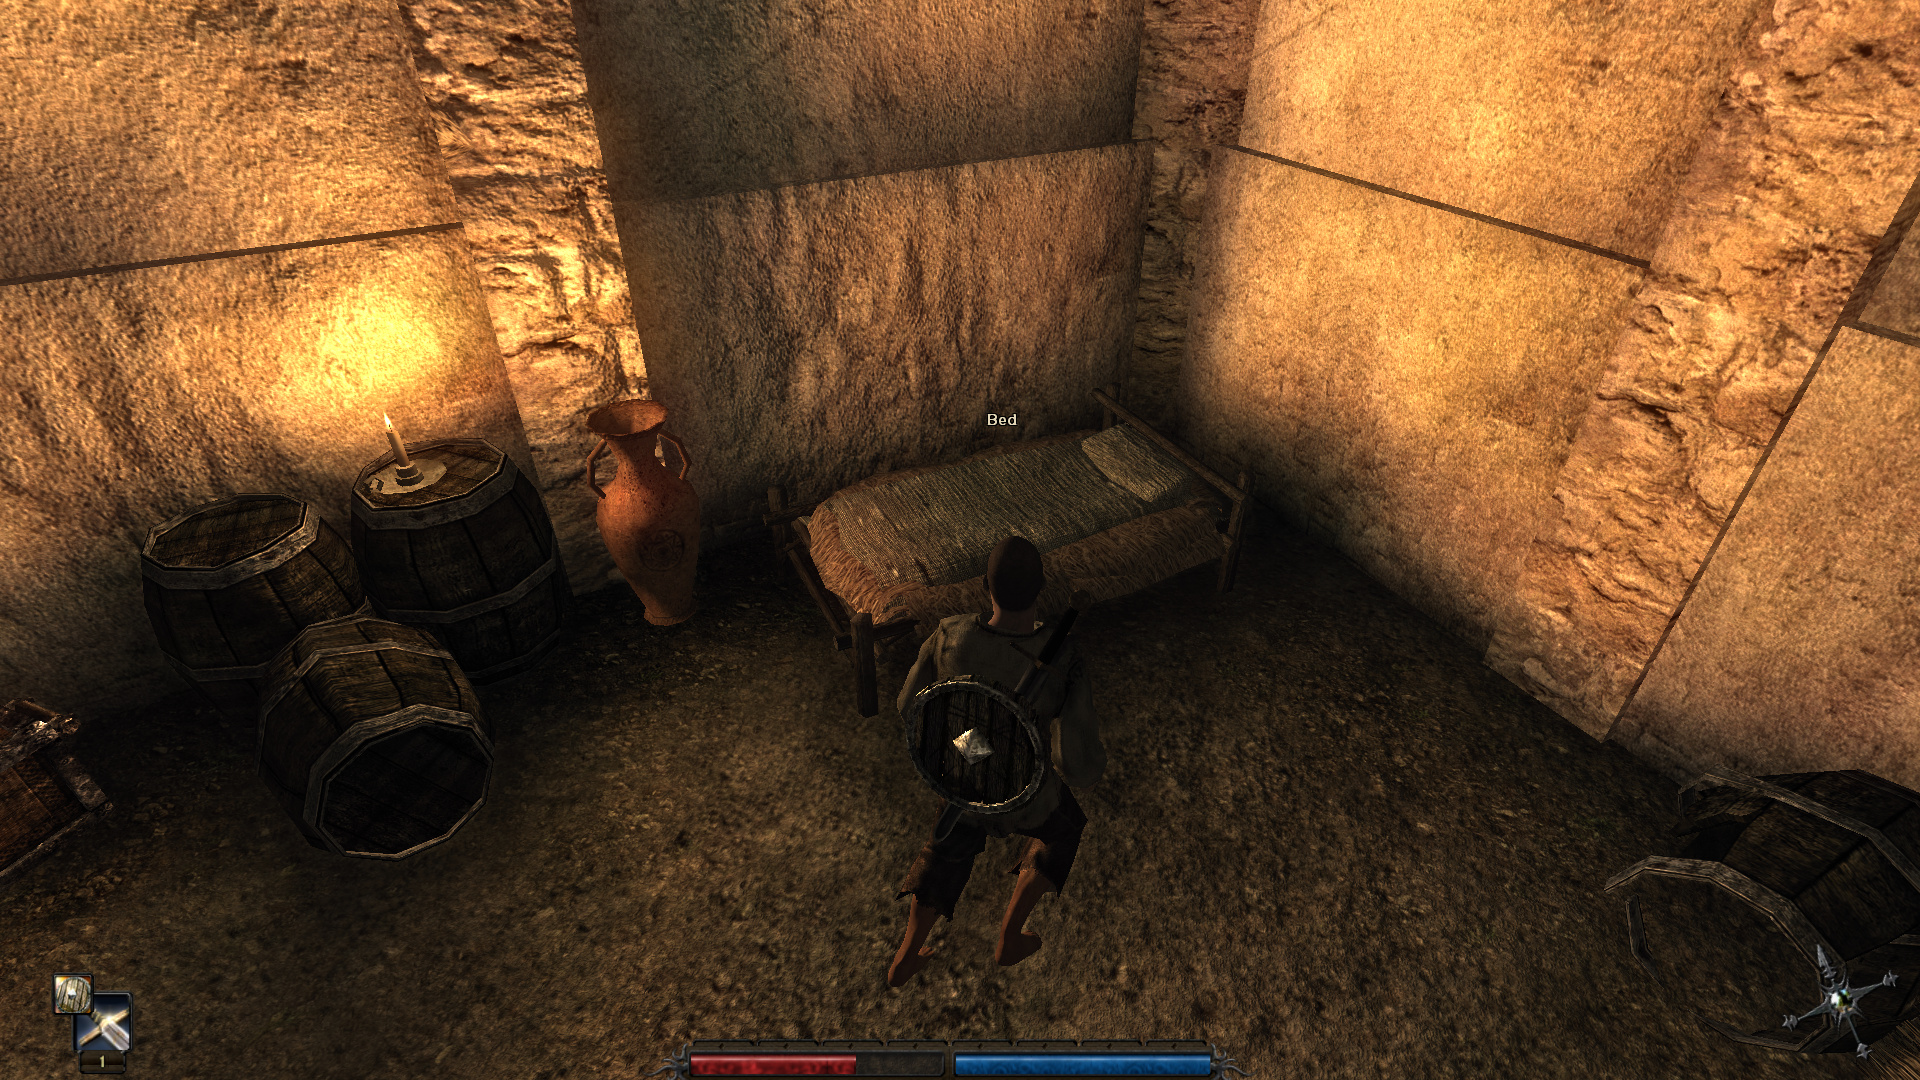
: We can then use the bed to sleep until the inquisitor leaves. Beds are better than water barrels in that they’re much faster to use and also restore your MP.

9_2iVBrO_400x400
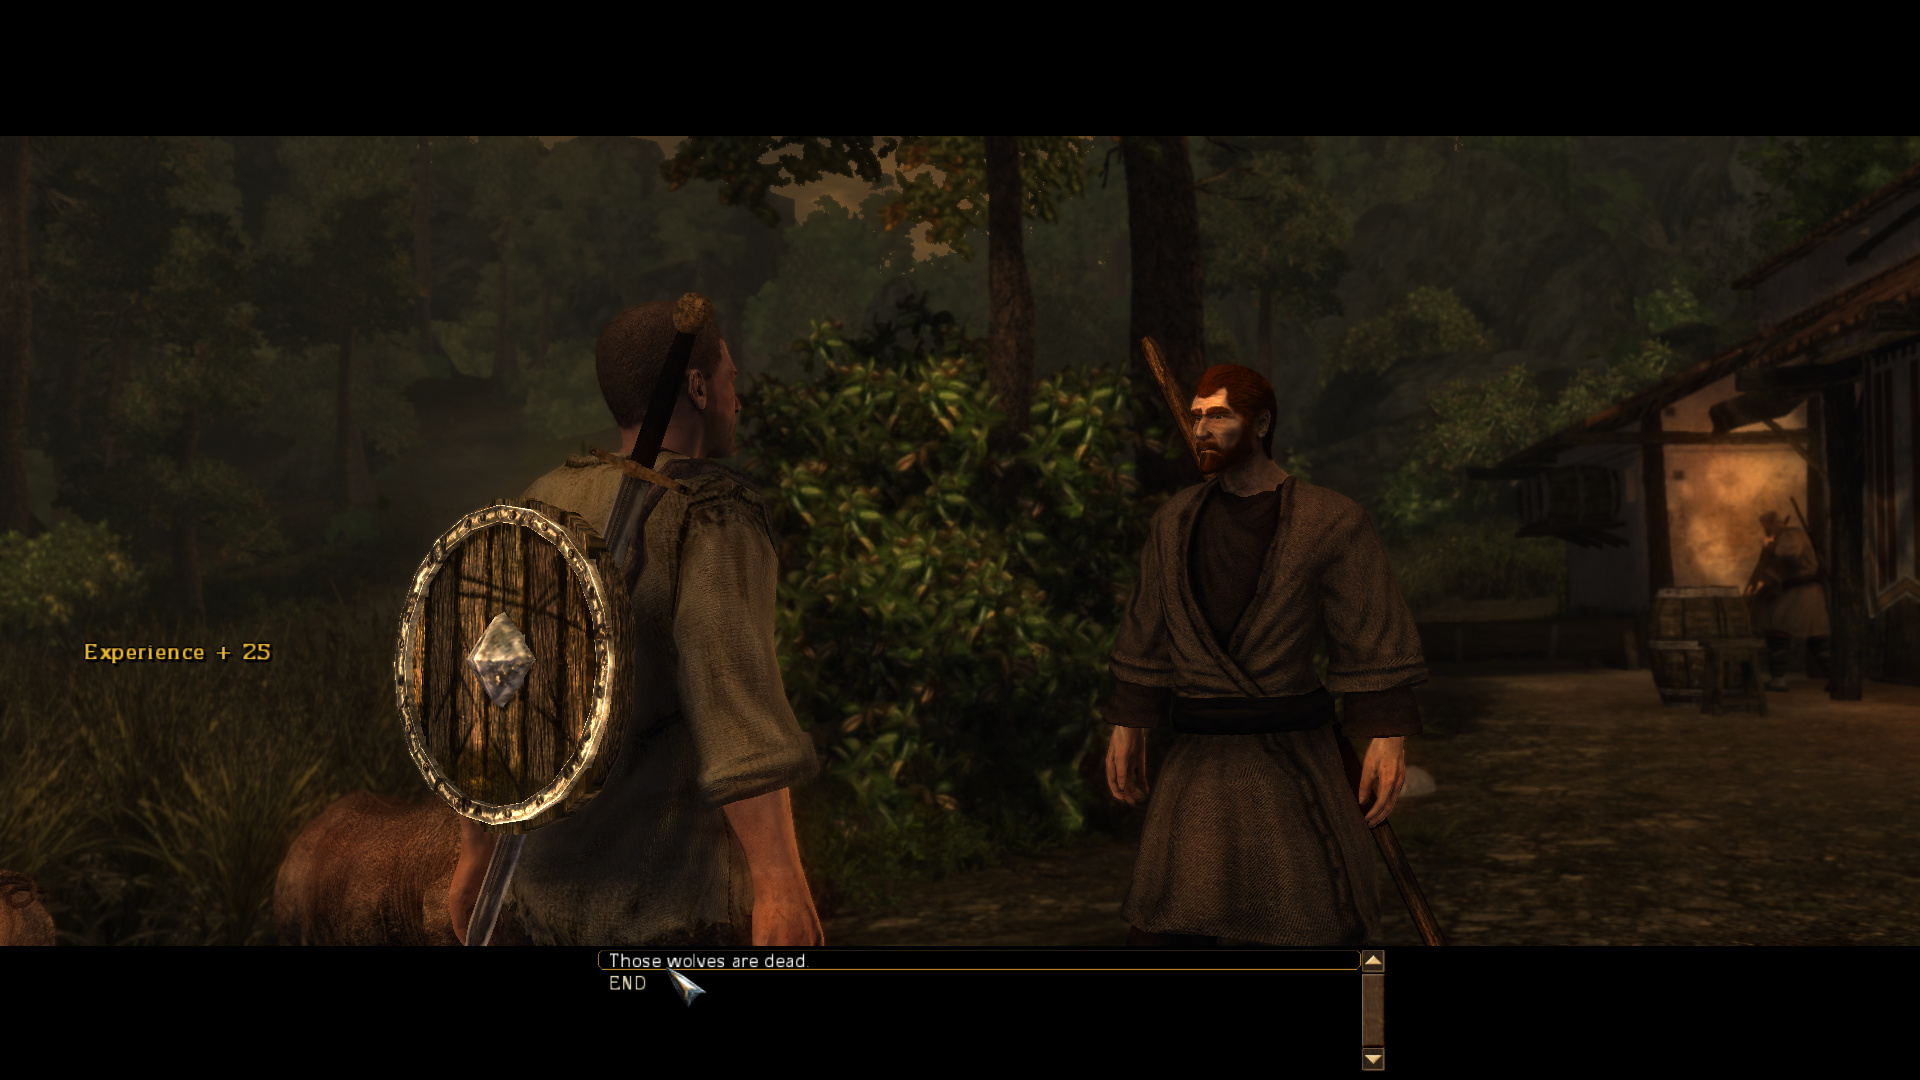
: Doing the quest this way gets us an extra bit of EXP.

9_2iVBrO_400x400: While we’re at it, there’s also this guy, who wants us to harvest grain for him. This quest is boring as shit so I just did it offscreen. I then decided to use Thomas here as an experiment to show what happens when you train too many enemies onto an NPC.

9_2iVBrO_400x400: I went up the hill and grabbed four wolves. See how the health bar is at half? That was two hits.

9_2iVBrO_400x400: The wolves promptly murder Thomas, who dies without even hitting them. If we wanted to, we could in fact kill everyone on the farm except Tristan (who cannot take damage) with these.

9_2iVBrO_400x400: With that done, let’s talk about the areas west of Jan’s house, where I’m going to end this update. There’s kind of a weird fork in the road - one leads to the swamp, while another leads here, to an inquisition camp.

9_2iVBrO_400x400
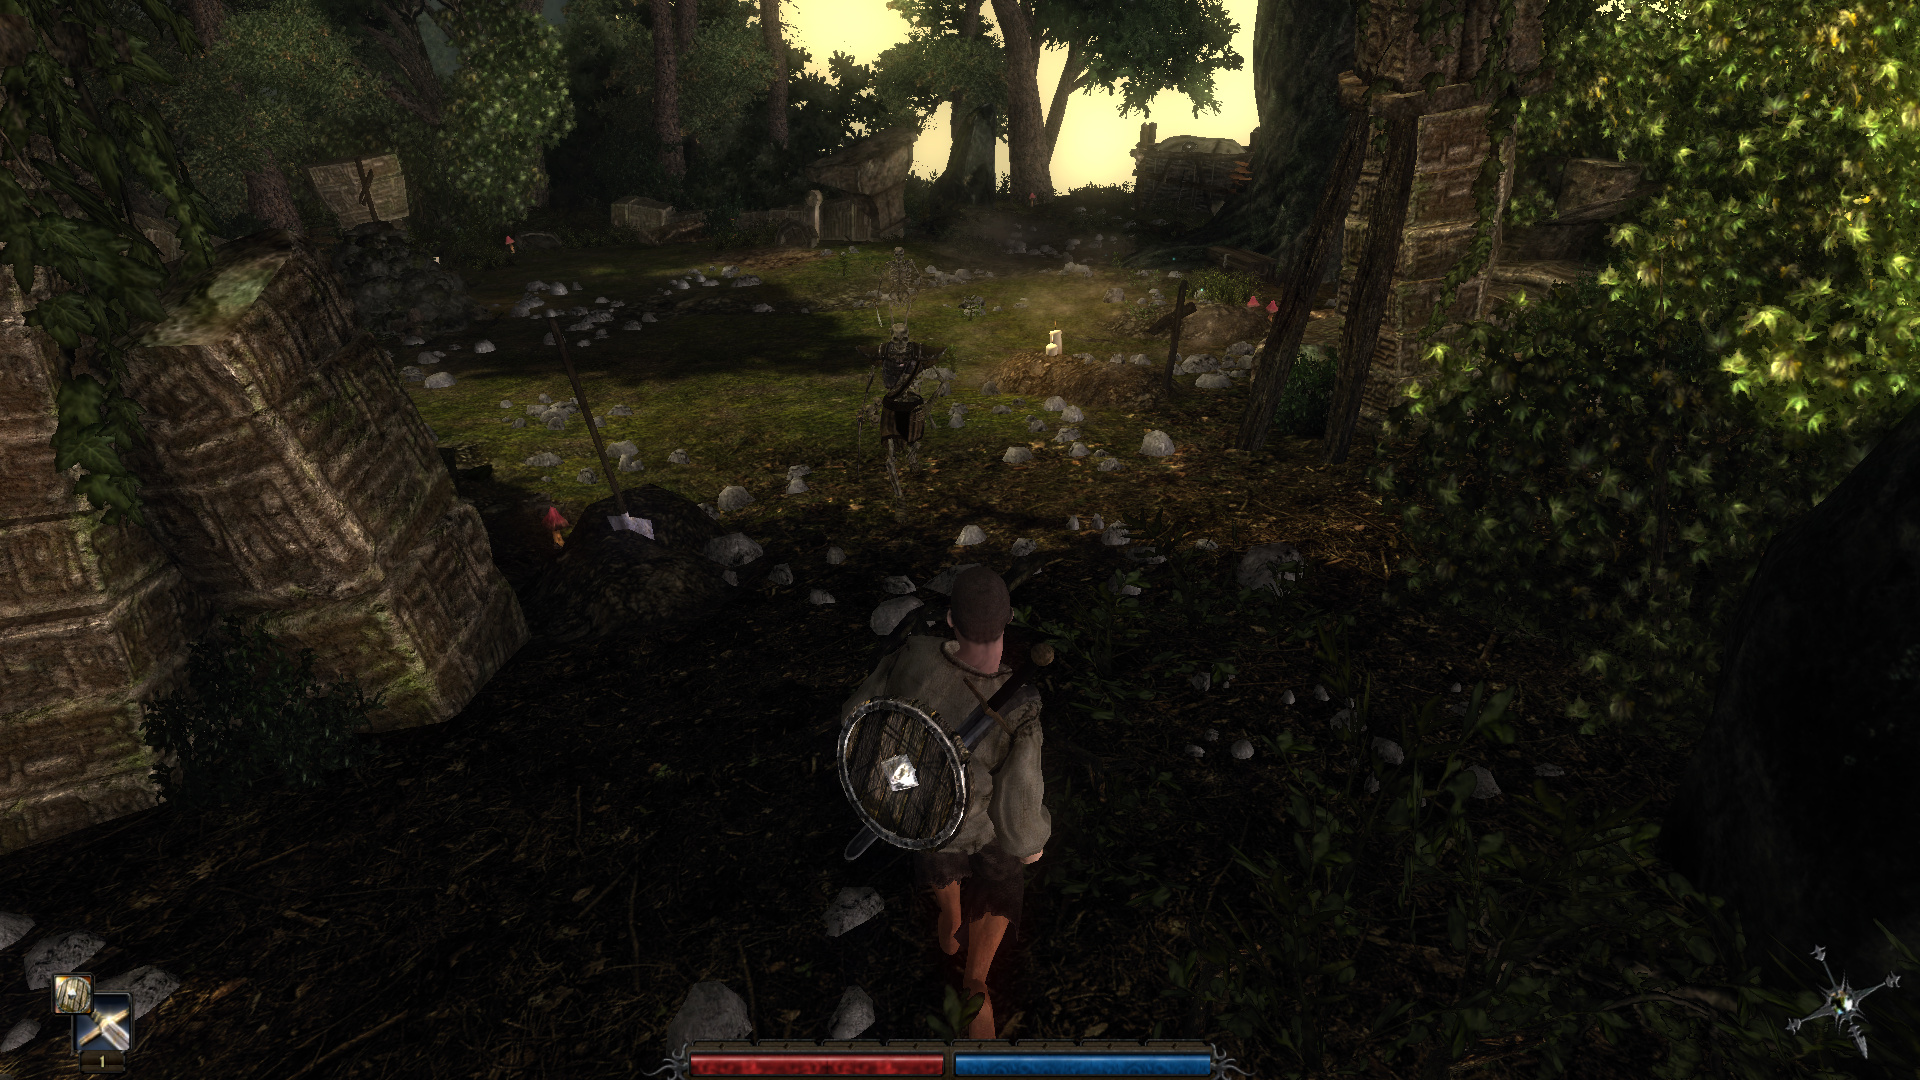
: A third leads to a little ruin with two skeletons in it. Skeletons are extremely powerful enemies - these ones do enough damage to oneshot us. And yes, it is ENTIRELY possible to put two and two together. In fact, the inquisition camp has two incredibly high-level wolves behind it that can be used to wipe out most of the lower-level NPCs.

Next time, we’ll investigate the swamp and get some dank swamp weed. We’ll also maybe become a weedlord. Who knows?

1 Like

9_2iVBrO_400x400: Now that we’ve cleared out all the sidequests in that farm, it’s time to head for the swamp.

9_2iVBrO_400x400: Risen does this really weird thing where instead of just giving you the map for an area, or having you fill it out as you discover it, they have an NPC outside each major area who gives you a map of that area. This is Doug, and he’ll automatically approach you when you walk by. It’s possible to avoid him, but most of the stuff in the swamp will destroy us at this point.

PC: “I’m just taking a look around.”

Doug: “Ha ha. Just messin’. Have to make my own entertainment. Gets a bit boring around here, apart from the Rotworms eating people.”

9_2iVBrO_400x400: While there are in fact Rotworms in the swamp, there’s only four of them in the entire area. Two of them are extremely easy to avoid entirely, while the other two can be avoided if we chose not to do any of the sidequests here. Even if we weren’t going Weedlord, we want to get as much EXP as possible, so we’ll do everything. I’m playing this assuming that Weedlord is going to win.

Doug: “Believe me, beaten eaten by those creatures is not the way a man should go. Hang on, I think I’ve got a map somewhere you can have.”

9_2iVBrO_400x400: Doug does sell some weapons, but he’s a bow user.

9_2iVBrO_400x400: One thing I think Risen does very poorly is showing you which NPCs have actual things we need. Doug has a sidequest, but you have to dig through a large amount of dialog to get to it. This will become relevant a bit later in this update.

PC: “What do you hunt in the swamp?”

Doug: “Less and less. There are only a few beasties. They may look unappetizing, but you’d be surprised what our cook can do. About the only thing left big enough to feed us all is this large worm over to the west.”

9_2iVBrO_400x400: The worm is less than twenty steps from Doug’s position. In fact, if I turned the foliage detail down I’m pretty sure we could see it from here.

Doug: “He’s a big fella. I really need help to take him down. Probably a bit of help to keep him down after I’ve eaten him too.”

9_2iVBrO_400x400: This sidequest is something we can do right now. It’s worth a fair bit of EXP, and if we play our cards right we get even more.

9_2iVBrO_400x400: The sidequest is kind of a farce. Doug is extremely well-armored compared to us, and even though his weapon sucks (he’s using a hunting knife) he can still easily kill this worm by himself.

9_2iVBrO_400x400: Rotworms hit like a truck and also have an unblockable puke attack that takes off half our health. What we basically want to do is watch Doug fight the thing, and then step in at the last second…

9_2iVBrO_400x400: And kill it. This gets us 250 EXP we would not have gotten if we had let Doug kill it. The way this works is that most enemies that have a quest somewhere to kill them have a sort of “generic quest” attached to them in case you kill them without knowing where the quest is.

9_2iVBrO_400x400: We can then talk to Doug and get another 200 EXP for doing the hunt with him, plus another 25 for some reason. This is over half a level at this point in the game.

9_2iVBrO_400x400: Remember how I said last update that we didn’t want to cook any of our raw meat apart from the one we had to give to Sara? This is why. Doug gives us 5 raw meat, and the worm had 2 more on it. The quest where we turn this in wants 10 meat. Meat isn’t that hard to find, but by the time we get 10 more we’ll be in Harbor Town.

9_2iVBrO_400x400: I also wanted to show Doug’s shop inventory, because his inventory is a colossal trap. See this jaw chisel? There are only a handful of rotworms in the game, and they each drop one tooth - provided we have this tool AND the “gut animals” skill, which costs another 100 gold to learn. We would never break even on that deal. The other item he sells, the wing shears, can be useful for wizards… but gut animal is such a shit skill that it’s never worth taking.

9_2iVBrO_400x400: We can also ask Doug about the swamp and the Don, but I’ll just summarize it here: the bandits used to be in Harbor Town until the Inquisition came in and kicked them out.

9_2iVBrO_400x400: Just down the path is the front door to bandit town. These guys up front are largely unimportant.

9_2iVBrO_400x400: Brogar, the head fighter, sits behind them. He spends his entire day sitting here smoking weed and drinking beer.

9_2iVBrO_400x400: Just behind him, we have this area with the blacksmith. Rachel the cook is also up here. What we’re really here for though is the red-haired guy next to us. He is one of the two most important people in the bandit camp, and we should talk to him right now.

Craig: “Don’t you worry about it, I’ll take care of you.”

PC: “Who are you?”

Craig: “I’m Craig. And if you want a fortune in gold, I’m your man.”

9_2iVBrO_400x400: Craig has a lot of very unimportant dialog: some 15 lines, to be precise. In essence, he’s the camp’s bookie for people betting on fights in the arena, because there is always an arena in every RPG. It’s the law.

9_2iVBrO_400x400: After all that bullshit, we get to this question. This is the important one, because it opens Craig as a trainer.

9_2iVBrO_400x400: If you’ll remember, I said level-ups in Risen don’t do a whole lot, and they don’t. Levelling up gets you a few extra HP and 10 “learning points”. To use those, you have to find a trainer and pay them gold. Craig gives us three options: he can train us in strength or in swords. Strength is ALWAYS the best option to the point where we’d probably put a few points in even for a wizard run. In this case, we had 20 points sitting around so I blew them all on strength.

9_2iVBrO_400x400: I should also explain how the stats work. Strength is the best stat in that it increases all melee damage, regardless of what weapon type you’re using. The reason you wouldn’t typically just keep upgrading strength is that it gets progressively more expensive to do so each time you do. Dexterity increases all ranged weapon damage.

9_2iVBrO_400x400: Wisdom is different, though. You can’t increase Wisdom at a trainer and it doesn’t do anything by itself. The only ways to increase Wisdom are by reading books or by finding a special item.

9_2iVBrO_400x400: If we go to the right instead of going up to where the blacksmith is, we find Hawkins. He’s another important NPC in the camp, in that he gives us one of the two major sidequest lines for this area.

Hawkins: “Me? I’m the one the rest of them treats like dirt. Day in, day out me and my workers try our best. And they need us, the bosses. But do they realize that?”

Hawkins: “I wish they’d come out and see what it’s like. See if they like being eaten by swamp worms.”

PC: “Why is it so bad here?”

Hawkins: “We keep losing men to the worms. And there are even worse fates, too. I’d rather be anywhere else. But we have to collect anything made of gold and take it to Beppo.”

Hawkins: “We didn’t expect to have to fight the monsters here. We’re not trained for it. And that bastard Brogar should be protecting us. But do his fighters ever come and help? Do they help. Too drunk, most of them.”

PC: “Are you in charge of the workers here?”

Hawkins: “Yeah. I’m supposed to oversee the workers at the excavations. But morale is so low that the men don’t care anymore.”

9_2iVBrO_400x400: This is kind of a recurring theme in the camp. No one likes Brogar, but they can’t oust him because he’s the head of the fighters. Anyway, now we’ve got a quest to do Brogar’s job for him.

9_2iVBrO_400x400: Most of the workers gather around here, by the fire. The ones we need to talk to for the quest are elsewhere in the swamp. There IS something we want to do here, though.

9_2iVBrO_400x400: See this weird patch of dirt with tools all around it? We want to grab those tools first. Two of them are shovels, and the third is a pickaxe.

9_2iVBrO_400x400: If you have a shovel and left-click near one of these piles of dirt, our budding weedlord here will try to dig for treasure. I think I read somewhere that there’s 17 of these spots in the game, and three of them are in the swamp.

9_2iVBrO_400x400: The chest has a scroll in it. Scrolls can be cast by anyone, and contain various utility spells that range in usefulness from utter trash to gamebreaking. This one is pretty useless.

9_2iVBrO_400x400: Behind the treasure spot is a beer, which we will need at least four of if we want to finish all the sidequests here. The chest has a joint in it, which we immediately take.

9_2iVBrO_400x400: Before I progressed on with Hawkins’s quest, I went hunting for some dank swamp weed. There’s roughly 28 in the swamp, and we’re going to want all of them because we’re going to be a weedlord.

9_2iVBrO_400x400: On the way, I ran into a Bog Body. Bog Bodies are super rare, I think there’s a grand total of four of them in the entire game. If you’re having trouble seeing it, it’s that way in the game: they’re basically green guys made of muck who use staves or one-handed swords. Normally, Bog Bodies are something we’d have to train to an NPC for help, but because we have 30 strength we can kill it fairly easily.

9_2iVBrO_400x400: If you’re doing a wizard run, you absolutely want to kill one of these even if it means dragging it to the NPCs. The item they drop is called a Cold Heart and is used for a quest on the wizard path. We won’t be seeing that quest as a weedlord.

9_2iVBrO_400x400: Right near where the Bog Body was is a second treasure spot with some vendor trash and a potion in it.

9_2iVBrO_400x400: On the far west side of the bandit camp is the arena. We’re not so much interested in it as we are that fenced-off area up above.

9_2iVBrO_400x400: Branon, the guy sitting by the fire, wants us to go clear a bunch of grave moths out of his work area, and also talk to one of the fighters to see if we can get him some protection.

9_2iVBrO_400x400: For the latter part, we can talk to Ricardo by the entrance of the camp, who refuses to do anything. We somehow get 150 EXP for this and don’t even have to do anything.

9_2iVBrO_400x400: Right across from where Hawkins is (you can see his fire in the top-left) are a bunch of grave moths.

9_2iVBrO_400x400: At 30 strength, the moths go down in two hits each even with our basic sword. I happen to know that if you’re at base strength, it can take several combos to kill one.

9_2iVBrO_400x400: The third and final dig point in the swamp is on the worksite the bugs were guarding. It contains the only unique drop out of all of the treasure spots here: the Ring of the Axe Fighter. Unlike strength, boosting your weapon skill only really changes how your combo works - up until the very high levels where you get things like the ability to equip two handed swords in one hand. Even with that kind of boost, upgrading strength is still usually better.

9_2iVBrO_400x400: There’s also two chests with items we are absolutely going to need going forward. One is the Fragment of a Sword, which is a quest item. The second is the Useless Amulet, which is also a quest item.

9_2iVBrO_400x400: We can get Branon to go back to work after clearing out the bugs and talking to Ricardo, which gets us even more experience. You might be noticing a pattern here - namely that a lot of the quests here are worth a fuckload of EXP. We actually levelled twice just in the recording I did for this update. If you were to go right to Harbor Town (or get captured by the Inquisition) you would lose out on quite a bit.

9_2iVBrO_400x400: Before we go find the other worker, we want to talk to Brogar. The reason for this is that the second worker we need to find is near some quest enemies that might aggro us if we try to talk to him, and Brogar gives the quest for those enemies.

PC: “Whoa there. Someone shoot your dog?”

Brogar: “Stupid and mouthy don’t wash well around here. 'specially not from workers.”

PC: “So, you’re in charge here?”

Brogar: “I’m in charge of the fighters! They’re the ones that beat the shit out of lazy workers. Now enough questions. I’m hungry. Bring me a haunch of fried meat from Rachel, the cook up by the smithy.”

Brogar: “Bit snooty, but a looker. The Don’s a lucky man. Course, with him in that temple all the time, she might need a bit of… company.”

9_2iVBrO_400x400: Naturally, Brogar is into NTR, because of course he is.

9_2iVBrO_400x400: As Brogar kind of insinuated, Rachel is the Don’s wife.

PC: “Are you the cook around here?”

Rachel: “One day you’ve a sword in your hand. The next, a ladle. And the cooking relaxes me. If you call stirring wild boar and Brugleweed cooking.”

9_2iVBrO_400x400: Brugleweed is Risen’s version of pot which confirms that yes, not only does everyone at the bandit camp smoke weed every day, they also eat it (and drink it, as we’ll see later). The Don is raising an army of soldiers powered entirely by weed.

Rachel: “Sorry, forgotten my manners. I’m Rachel. Here, new mouth, take this meat. Freshly cooked.”

9_2iVBrO_400x400: Rachel has a quest line, but it’s the very last thing we’re going to do while we’re in the swamp.

9_2iVBrO_400x400: We now get a quest to find a replacement guard for Phil, who is the second most useful NPC in the camp. We’ll see him probably at the end of this update when we go to see the farm Brogar is talking about. That farm will be where we become a weedlord.

9_2iVBrO_400x400: Before we go talk to Clay, we’re going to want to upgrade our sword. Using all the vendor trash treasures we found (minus the pearl necklace) we can buy a Skullsplitter, which has almost double the base damage of our sword. We’re also going to want this for… weedlord-related reasons. You’ll see. Oscar also sells a slightly better shield, but we can get one free from a quest here.

9_2iVBrO_400x400: With our mace equipped, we can find Clay by the fire like Brogar said.

9_2iVBrO_400x400: Clay doesn’t have much dialog, but we can either fight him or pay him 10 gold to do his job. Fuck that, let’s get into our first fight against a human opponent.

9_2iVBrO_400x400: Human opponents are pretty janky to fight. They spend most of their time blocking, though on occasion you can slip an attack through their block.

9_2iVBrO_400x400: It’s hard to show in a screenshot, but the way you typically want to fight human enemies is either getting them on higher ground so that you can hack away at their unprotected legs… or stepping to the right while blocking their attacks, which leaves them open for a combo.

9_2iVBrO_400x400: There’s a difference between us killing an NPC and mobs doing it - namely that we can’t permanently kill NPCs. When you reduce an NPC’s HP to zero, they fall unconcious for about two minutes. They also drop their weapon and shield if they have one. During this time, you can loot them and also freely steal anything in their house without them noticing. There are ZERO consequences for this - they’ll get back up and just act like it never happened.

:

9_2iVBrO_400x400: One important thing to note is that NPCs will magically generate a new weapon if you take theirs… though sometimes they won’t bother to pick their weapon up even if you don’t touch it. This weapon is usually garbage: it’ll normally be a club or a wooden branch staff. With bandit NPCs, they usually have woodsman axes, which do a bit more damage than our sword did but are two-handed and much slower.

9_2iVBrO_400x400: Beating up Clay gets us 200 EXP. We can also talk to Phil on his way down from the weed farm.

9_2iVBrO_400x400: That’s what the swamp farm is, by the way. It’s a weed farm. Phil is important because he can teach us how to pick locks. I would’ve learned it right here, but didn’t have the money to do so. Phil gives us a quick 25 gold and 25 EXP but none of his dialog is important. Let’s go report back to Brogar, and get the quest I was actually after.

Brogar: “Most of 'em owe their lives to me, one way or another.”

PC: “So you know where they are at all times?”

Brogar: “Course. Well… usually. One of them has gone missing. The pillock’s probably got himself lost. Or eaten.”

9_2iVBrO_400x400: This gives us a new quest to go find the missing fighter. As it turns out, I didn’t NEED to pick this up because you don’t get any extra EXP, but it’s something we have to do anyway.

9_2iVBrO_400x400: On the way down to where the missing fighter is, we run into Luis, the other hunter. Luis is a pain in the ass because he’s a drunk and demands a beer every time you talk to him. I had him tank a rotworm for some free EXP.

9_2iVBrO_400x400: There’s also these quest stingrats outside of where the missing fighter is. Luis will point you to this area if you give him several beers, but we only have so many of them and we need at least four to clear all the quests. I should mention that Luis can teach you bow skills and gut animal, but all of those are useless.

9_2iVBrO_400x400: Once we clear those out, we can go from Luis to the other corner of the swamp (south-west) to meet the other missing worker.

9_2iVBrO_400x400: This quest is real dumb. Enrico keeps talking about hearing voices, and what you’re supposed to do is go back to Hawkins who tells you to give him something to “protect him” so he’ll go back to work. It’s implied that Enrico is either insane or just really stupid.

9_2iVBrO_400x400: Seriously, the devs cared about this part of the quest so little that there are camera angles during the conversation with him that are just shots of foliage.

9_2iVBrO_400x400: We get Enrico to go back to work by handing him the “useless amulet” we found in one of these chests in the swamp.

9_2iVBrO_400x400: To finish the missing workers quest, we have to talk to Beppo here. Beppo’s dialog is also mostly unimportant, other than that he tells us the Don is very interested in gold and artifacts and all of the crates at the dig sites are full of them.

9_2iVBrO_400x400: All we have to do to finish it is talk to Dwight, who is by the same fire Clay was, and threaten to murder him unless he goes back to work. Unlike Clay, Dwight just caves in to our demands. Now, we could go do the rest of the “find the missing fighter” quest, but that involves a fight that can be pretty tough. Hawkins will now sell us some low-quality armor, but it costs 500 gold and we have a grand total of maybe 100. It’s time to take our first foray into being a weedlord.

9_2iVBrO_400x400: To do this, we want to go to the weed farm. If you pick every weed plant in the swamp, plus the two near the farm, you wind up with 25 weed.

9_2iVBrO_400x400: Obel here is a useless NPC who works on the weed farm. The only time he’s ever borderline useful is if you have the fan-made patch installed for this game, which turns him into a second source of the prospecting skill. He sells weed and blunts, and we’re going to buy it all with the last of our money. I know, this sounds crazy. Bear with me.

9_2iVBrO_400x400: Up on the platform behind Obel is Rhobart, the owner of the weed farm. If you are playing this game on the last official patch instead of the fan one, Rhobart is both the most powerful weedlord in the swamp and also probably some kind of demigod. He’s also the single most important NPC here that isn’t a trainer, even though he is a trainer (he teaches Alchemy).

PC: “Protection money?”

9_2iVBrO_400x400: Apart from sounding like Metal Gear, this alludes to a quest we’re going to be picking up in the next update.

PC: “Is this your land?”

9_2iVBrO_400x400: I forgot a screenshot, but this confirms that all the alcohol in the game is ALSO made of weed.

9_2iVBrO_400x400: Rhobart then gives us a quest, aptly titled “Rhobart Needs Weed”. He’ll give us 70 gold and 50 experience if we bring him 10 units of weed.

9_2iVBrO_400x400: Now, if you’re playing with the fan patch, Rhobart will not give you experience again once you turn in the weed the first time. He’ll still give you 70 gold. You can’t see it, but I paid 10 gold per weed from Obel, so technically we lost money on that… or did we?

9_2iVBrO_400x400: On the official patch, however, Rhobart will continue to give you 50 experience in addition to the 70 gold every time you turn in 10 units of weed. Within a few seconds, we’ve traded 30 of our weed for 150 EXP and 210 gold. Not great, but not bad either.

9_2iVBrO_400x400: It’s raining in the swamp, and it’s a shitty day outside. We’ve been working our asses off. Let’s just have a joint. I mean, everyone else is doing it… right?

PC:"Shit! Rhobart! Hey, Rhobart! This shit’s real fucking dank man, you gotta try some… Rhobart?

PC: “Looks like he hit the ganja a bit too hard. Some weedlord he is. I wonder how dank his shit is if it fucked him up that bad. Let’s take a look…”

9_2iVBrO_400x400: It was then that our hero, still high on weed, got a brilliant idea.

PC: “Whoa, dude. I think this weed might be a little too dank. It’s like, every time I give it to Rhobart, he… tries to smoke some and then passes out… and then I can take it back… and sell it back to him…”

9_2iVBrO_400x400: Eventually, our budding weedlord managed to farm over 1,000 gold from Rhobart, who for some reason seemed to have more money than even the Don did.

9_2iVBrO_400x400: With this, he went to Phil and learned how to pick locks. He also upgraded his strength to 40 and bought an upgraded shield because why not? It wasn’t like Rhobart was running out of money anytime soon.

9_2iVBrO_400x400: He also, of course, bought the Worker’s Clothes.

9_2iVBrO_400x400: If we continue down the weedlord route, I’ll need some input. There’s two ways we can go: we can either keep pumping strength forever, funded by our good friend Rhobart. Alternatively, we can pump the sword fighting skill (or axe fighting if you’d prefer) and learn the Immortal Sword Technique that can kill even the mightiest of warriors without a scratch. Let me know what you’d like to see. The Wizard/Weedlord vote is still open, because technically we aren’t an official weedlord yet and I could always do a second run if we want to go the Wizard route. Most of the quests wouldn’t change apart from me having to kite things more. Next time, we’ll finish up with the swamp, at which point the Wizard/Weedlord vote will close.

9_2iVBrO_400x400: Also, in case you’re wondering how the Rhobart thing actually works. In the last official patch for Risen, the devs made it so that NPCs who ask for items for a quest put them in their personal inventory when you hand them over… where they can be robbed. In this case, it’s super easy because Rhobart sucks at fighting and also because Rhobart is completely alone and no NPCs will come to help him.

1 Like

9_2iVBrO_400x400: Welcome to our first side update for Risen. This update, we’re going after the most pointless piece of equipment in the game. I got a little lost trying to find the place I was looking for, so we do a little bit of weed hunting near Harbor Town and the Monastery in the process, and complete two sidequests that normally only a wizard would.

9_2iVBrO_400x400: Just beyond the farm that we went to for some sidequests before going into the swamp is a small, marshy area. It has two weed plants growing near it that we pick up. It is also full of higher-level grave moth palette swaps that are a total pain in the ass to kill. You might notice I’m using a different weapon. This is the bastard sword, which Oscar sells for 400 gold. I bought it to test some stuff, but it’s actually not any better than the Skull Crusher is despite having higher stats.

9_2iVBrO_400x400: The improved moths take about six hits to kill with the bastard sword… which is the same amount they’d take with the skull crusher. If we were one level’s worth of strength higher, the bastard sword would probably kill them in five.

9_2iVBrO_400x400: Moving past that is this crossroads. One of these paths leads up to the monastery, which is where we’re going to go. I did some combat to get some quick EXP and also to make our lives easier when we go to Harbor Town.

9_2iVBrO_400x400: The monastery road is blocked by another Inquisition dig site. We could stealth by most of it by going to the far left of the ruin, but there’s some quest monsters up there we don’t want to disturb. The right side has more enemies that are likely to aggro, but we can deal with those.

9_2iVBrO_400x400: The right side is mostly uninteresting, but there’s some weed here.

9_2iVBrO_400x400: If we had tried to go right through, there’s about ten inquisition guys in there who will come out and attack. The guy with the armor near that fire is immortal.

9_2iVBrO_400x400: We’re almost to the Monastery, but the area is FULL of wolves and stingrats. These aren’t too bad with our strength score, but if you’re doing a wizard run this area can be a pain in the ass because you’re usually not pumping strength like we are.

9_2iVBrO_400x400: At the top, just before the monastery are two side areas. I cleared one out, but left the one with the gnomes alone as they are quest mobs.

9_2iVBrO_400x400: Finally, we reach the monastery itself. This is as far as we can go - if we tried to go up into the monastery itself, we’d get stuck in dialog with an NPC and be forced into the game’s third route, which we don’t want. This guard is someone we can talk to, though.

9_2iVBrO_400x400: His first sidequest is to give him a beer. I believe we have two more than we need to finish the swamp, so let’s give him a beer.

9_2iVBrO_400x400: Hopefully, we’ve turned him to the Dank Side. He also has a second sidequest to deal with those gnomes.

9_2iVBrO_400x400: Before we go down there though, there’s a very important plant near him - a Hero’s Crown. These are used in alchemy to make stat potions. There are only a handful of them in the game: I found three during this update and I can only think of one more. Four of these would make it worth our while to learn Alchemy near the end of the game as we’d get more strength from potions than we would from spending the 15 learning points on strength directly.

9_2iVBrO_400x400: We then go wipe out the gnomes for EXP, and cross the threshold to a new level.

9_2iVBrO_400x400: There’s a chest behind them that has a ring in it, but we’re not going to use it because we’re not a wizard… or are we? The reason wizards suck in this game, by the way, is that mana doesn’t naturally regenerate. You have to either use a potion or sleep.

9_2iVBrO_400x400: With that, we want to run all the way back down the mountain and go to the east coast of the island. The east coast is a fucking death zone for several reasons.

9_2iVBrO_400x400: Right near the entrance to the coast, I found this side area I somehow missed on my pre-LP playthrough of this. This is a gnome chieftain: just like regular gnomes only with more health and the ability to do slightly more damage.

9_2iVBrO_400x400: Chieftains are important because they carry a quest item. I don’t think I ever found the quest for these on my own, but we’ll find it for the LP. I think it’s in Chapter 2.

9_2iVBrO_400x400: More importantly, there’s a couple of dead guys behind the gnomes that have an item on them that is going to let us use Advanced Weed Sorcery to break the game in two.

9_2iVBrO_400x400: No, not this guy, though we’ll be sure to pour one out for him.

9_2iVBrO_400x400: It’s this guy. Levitation is an absolutely gamebreaking spell if used correctly. We won’t need this for a while, but it’s good to have. These guys also have probably two to three hundred gold in treasures on or near them, but we have Rhobart and weed magic.

9_2iVBrO_400x400: I then got turned around and went back to outside of Harbor Town, where I found some more weed.

9_2iVBrO_400x400: Also some boars that got slaughtered so I could get a second Hero’s Crown.

9_2iVBrO_400x400: Finally, I found the goddamn east coast. Finding the correct path takes a while when you don’t have the island’s layout memorized. We’re now on our way to picking up the most useless item in the game.

9_2iVBrO_400x400: This is the start of the east coast, and it is a goddamn death trap. Even with the worker’s clothes, there are enemies around here capable of oneshotting us.

9_2iVBrO_400x400: There’s some corpses over by the giant thing that we can loot, as well as our first locked chest… other than the one in Rhobart’s house I looted without taking screenshots. Whoops.

9_2iVBrO_400x400: Lockpicking is a very simple minigame: the game will give you a number of lock icons, and each one is either a left or a right. The combinations are always the same, so you can pick the lock and reload if you break your lockpick.

9_2iVBrO_400x400: By the end of this side update, we have a total of 39 weed. I know that in my previous file, I had around 70 weed by the beginning of chapter 2.

9_2iVBrO_400x400: I also finally found the spot I was looking for. This farmhouse is surrounded by gnomes. These gnomes are not like the ones we’ve fought so far, and let me explain why.

9_2iVBrO_400x400: For one thing, aggroing one tends to aggro all of them. At the same time, these gnomes will stand in place and throw stuff at you if you’re too far away for them to melee rather than running up to engage you. Worse, two of these gnomes are wielding the same sword we found in Jan’s house, which makes them do significantly more damage.

9_2iVBrO_400x400: I had to blow a couple of healing potions, but we’ll have a bunch of them later on.

9_2iVBrO_400x400: There’s another chieftain here with a bag of tools on him. You want to make sure to loot these, because if the corpse despawns I believe you get locked out of the sidequest.

9_2iVBrO_400x400: More stingrats on the other end of the farm. Compared to fighting five or six gnomes at once, these are nothing. We are going to want to use this water barrel by the house because our final fight for the useless item is coming up.

9_2iVBrO_400x400: Unfortunately, before we can get there, a Black Wolf gets in our way. Black Wolves are Chapter 2 enemies, but a few of them spawn in Chapter 1. They are several times stronger than regular wolves to the point where two of these can wipe out that inquisition camp by the swamp unless the immortal NPC steps in.

9_2iVBrO_400x400: This was after I hit the wolf with four full attack combos, and I got hit all of once. Black Wolves are nothing to fuck with.

9_2iVBrO_400x400: The item we’re looking for is in a chest in this ruined tower… right by a bunch of skeletons. I have seen two skeletons take out half an inquistion camp by themselves. Even with our armor, the weaker skeletons can still two-shot us.

9_2iVBrO_400x400: With skeletons, you want to be very patient. The only real way to fight them is to have your shield up, and then sneak an attack in while they’re recovering from their combo animation.

9_2iVBrO_400x400: One of them had the upgraded wooden shield on them, which is why I’m glad that on this save file I hadn’t bought it from Oscar yet.

9_2iVBrO_400x400: For the rest of the skeletons, I got a little ballsy and decided to try and glitch them out. You see, our melee attacks can hit more than one enemy at a time, so long as they’re all within range. Enemy AI tends to glitch out in tight spaces like this, so what I did was lined the skeletons up and then comboed them to death while the game tried to figure out what to do with the skeleton in front.

9_2iVBrO_400x400: The skeletons have some pretty serious weapons on them. One of them has a Cutlass, which is the halfway point between our old sword and the skull crusher. Another has this spear, which would have instakilled us if it hit.

9_2iVBrO_400x400: As for our reward, there’s an ogreroot growing near the tower’s base… and a locked chest. This is an extra kick in the dick just in case you managed to make it all the way out here without having lockpicking.

9_2iVBrO_400x400: Finally, we pick up the most useless item in the game: the leather helmet. This is the ONLY leather helmet in the entire game: you can’t buy them anywhere as far as I know. It offers… a whopping one protection to two out of the three physical damage types. Keep in mind that it’s locked behind an area we weren’t even supposed to be in until probably Chapter 2, and also behind a bunch of really tough enemies for a Chapter 1 character. To make things even worse, you can buy a better helmet for like 300 gold as soon as you start Chapter 2.

9_2iVBrO_400x400: That’s more like it… I guess.

9_2iVBrO_400x400: In our next regular update, we’ll finish the swamp and head on to Harbor Town for real. Weed sorcery may also be involved.

1 Like

9_2iVBrO_400x400: I forgot to mention it, but I picked up Lockpicking 2 in the swamp the last time we were there. This is a very useful skill for several reasons, though it’s useless if you’re going the wizard route as wizards get a spell that can do that for them.

9_2iVBrO_400x400: Anyway, on the way back from grabbing the helmet, I found a couple more Hero’s Crowns and Ogreroots. There’s… I want to say two more crowns and two more roots in that central area of the East Coast where we found those bodies near the locked chest.

9_2iVBrO_400x400: I was going to skip until we got back to the swamp, but then I found the source of a quest I hadn’t actually found my first run through. Near the entrance to the East Coast is this house, which is up on a hill and kind of hard to see. I only found it because I got turned around trying to get back to Harbor Town.

9_2iVBrO_400x400: There wasn’t much up here, so again I was just going to throw these screenshots out… until I found this guy. I was kind of surprised because I looted the house, and normally going into a house owned by an NPC will cause them to get angry and try to kick you out. Leon has some critical information that is going to make our route into Harbor Town easier. In fact, I thought this information was a glitch and not something that Piranha Bytes intended.

PCLeather: “Of course I’m real. Who are you?”

Leon: “I’m Leon.”

PCLeather: “You seem a little nervous, Leon. What are you doing out here in the wilderness?”

9_2iVBrO_400x400: For this conversation, our character suddenly becomes Sherlock fucking Holmes. I attribute it to the weed.

Leon: “Just looking for a bite to eat.”

9_2iVBrO_400x400: The other thing I don’t get is why our character gives a shit. We’re joining what is basically the island mafia, and no one seems to still be living on this part of the island anyway. What’s he going to rob, the skeletons?

PCLeather: “Sure that’s all you’re doing? You don’t look like a hunter.”

Leon: “I can’t help how I look!”

PCLeather: “Come on, what are you really doing out here?”

Leon: “Okay, okay… so I’m a treasure hunter, seeker… I heard that the ruins are full of… stuff and so I set out to get my share. I even got myself a shovel and a pickaxe.”

9_2iVBrO_400x400: I find it really funny that Piranha Bytes in all of their games are very willing to sacrifice game design for narrative, but as far as I know there are no “temple ruins” out here. I also feel like that leather helmet might be squeezing our character’s brain or something. Maybe it’s a Revolver Ocelot situation and we’re being possessed by the ghost of the skeleton we bashed to get it.

PCLeather: “Cut the crap.”

Leon: “You’re really not going to let this rest, are you? Okay, okay. But you won’t believe the truth either. I started hearing whispers. Then, it got worse. I started seeing these apparitions, hearing these voices inside my head.”

Leon: “I escaped town, but it’s no better out here. I haven’t slept properly for ages. The whispering. Always the whispering. These apparitions, these restless ghosts, they won’t leave me alone.”

PCLeather: “So, do these ghosts talk to you?”

Leon: “Only one of them. He calls himself Lord Patroscon. When he comes to me, I can hear his horrible, whispering voice inside my head. He says terrible things… terrible, terrible things.”

9_2iVBrO_400x400: He then tells us about the tower we just visited, as well as a few on the western coast.

PCLeather: “If they singled you out, you must have done something.”

Leon: “I found a ring, alright? I didn’t steal it, it was just there. Been seeing them since then.”

9_2iVBrO_400x400: We then get a sidequest to go find the other rings. Each ring is held by an “undead lord” (read: higher-level skeleton) at the top of a tower. There was one where we found the helmet, but I didn’t bother dealing with it because we didn’t have the quest for it. We’ll come back for it later. The key thing we want to know right now is how he got out of Harbor Town.

Leon: “I climbed over the town wall.”

9_2iVBrO_400x400: We’ll just keep that in mind for the near future.

9_2iVBrO_400x400: Not much else interesting happens on the way back, except that there’s a gravestone with an un-marked dig spot in front of it. Unfortunately, we can’t open the chest. I think it takes Lockpicking 3, which we won’t have until after Harbor Town at earliest. The gravestone is just off where Leon is.

9_2iVBrO_400x400: Back in the swamp, we can finally finish that quest for Brogar. In the south-east corner, there’s an abandoned mine. Luis will point out that he saw the guy go in here if you offer him a bunch of beers. That little snail thing in front of us is a Nautilus, which can be killed for 10 EXP and a spell ingredient.

9_2iVBrO_400x400: Inside the mine are a fuckload of grave moths - there’s seven total in here, and usually if one aggroes you they all do. I’ve done this quest at base strength with just the sword from Jan’s house, and it is not fun. You CAN skip fighting them by running to where the guy’s body is, or you can kite them out to Luis and have him tank while you kill them.

9_2iVBrO_400x400: The only thing you have to be careful of if you do that is that if you kite more than 5 or so, they’ll kill Luis long before you can finish them all off.

9_2iVBrO_400x400: Behind the moths is the body of the guy we’re looking for. The grave moths will give you enough time between when they see you and when they start attacking that it is entirely possible to run in, quickly loot the body, and then run out.

9_2iVBrO_400x400: Near the body is a chest containing what I believe is our first “tell joke” scroll. Basically, if you steal from an NPC without them being knocked out, they’ll hold a grudge against you forever unless you use one of these. It’s why you always want to KO people before you loot their houses.

9_2iVBrO_400x400: We’re not done here yet, though. There’s a hole in the floor that leads down into a tunnel. I’m pretty sure this is meant to be a one-way thing, but if you jump enough you’ll eventually get the game to let you come back up here from down there.

9_2iVBrO_400x400: There’s a bunch of inexplicably-placed stingrats and a locked chest down here, as well as a bunch of ore veins if you have prospecting.

9_2iVBrO_400x400: The gold and vendor trash isn’t bad, but by this point we’ve got almost enough weed that we’d make more than that from doing one Rhobart loop. The actual reason we want to clear all of this out…

9_2iVBrO_400x400: Is because this is the tunnel that forms the shortcut from the swamp to the farm. I’ll probably wind up clearing out the second part of the shortcut that goes to the monastery before we leave for Harbor Town.

9_2iVBrO_400x400: If you’re wondering why I’m going to transcribe the dialog here, it’s because it forms an important part of the overall plot of the bandit camp.

Brogar: “Yeah? Where is the lazy bastard?”

PCLeather: “He’s dead. His body’s in a cave near the swamp.”

Brogar: “Oh well, if it keeps some swamp creature fed and off my back, it’ll be the first useful thing he’s done. Now, did he have anything on him? Anything at all?”

9_2iVBrO_400x400: Dorgan had two things on him, and I’m just now realizing that I forgot to post it. The first is a fragment of a sword, which is a quest item. The second is a list of all the people in the bandit camp. You get three options here:

9_2iVBrO_400x400: Dorgan didn’t actually have any gold, and we definitely do not want to tell Brogar about the list as that would end a questline prematurely.

PCLeather: “I didn’t search the body.”

Brogar: “You didn’t go through his pockets for gold?”

PCLeather: “I’m not into strip searching corpses. I’ll leave that to you. Anything else for me to do?”

Brogar: “Well, maybe one thing. If you’re up to it. But don’t say I didn’t warn you. Have you ever collected funds ‘generously donated’ by those grateful for their security?”

PCLeather: “You mean protection money?”

Brogar: “Ssshhh! Not so bloody loud!”

PCLeather: “You want me to do this job, or not?”

Brogar: “Hmm… maybe you can succeed where that damn Dorgan failed. Well, all the folks in this camp who ain’t fighters… go and tell them their monthly payment is due. Collect it. I want it done and I want it done right.”

9_2iVBrO_400x400: This quest will take us through about 90% of the remaining content in the bandit camp. The first thing we actually want to do is talk to Rachel.

9_2iVBrO_400x400: One thing I neglected to mention is that Rachel will give you a small amount of bonus EXP for every quest you complete in the bandit camp - sometimes multiple bonuses depending on the quest. She also has a quest to deliver 10 raw meat, which is why you don’t want to cook any of the meat you get if you talk to her early on. She has a ton of useless dialog interspersed with like two lines that matter. Those two lines are that she knows someone has been stealing gold from the Don, and if the Don finds out he’s going to kill them.

Rachel: “Can I see it please?”

Rachel: “Seems Dorgan was helping Brogar to pocket Esteban’s gold. Where is he now?”

PCLeather: “Dead. I found him in a cave near the swamp.”

Rachel: “This list will help. We’ll need more evidence though, if we’re to persuade Esteban that Brogar is working for his own interests. I’m betting that Dorgan wasn’t the only one in on it.”

PCLeather: “Brogar has ordered me to collect protection money for him.”

Rachel: “What? Really? And who are you supposed to collect it from?”

PCLeather: “From all the men here who aren’t one of his fighters.”

Rachel: “He’s really gone too far this time! How long has he been getting money from them? All right, just play along. Collect the gold and find out who’s not paying so willingly. Then we might be able to put a nail in Brogar’s coffin. He’s not taking over this camp. Not while I live.”

9_2iVBrO_400x400: The protection money quest is largely straightforward, but at the same time it’s one of the most broken sidequests in the game.

9_2iVBrO_400x400: For one thing, Brogar’s list is off in the last official patch. “Danny” doesn’t actually exist - his name got changed to “Branon” for some unknown reason. Branon is the worker we killed the grave moths for near his work site. Most of this is just going up to them and going “Give me the money” and getting the money. And yes, you actually have to get the money - there’s no option to just bash Rhobart a few times and give Brogar that money instead.

9_2iVBrO_400x400: I also wanted to point out that while doing this quest, I discovered that I had actually found a ring and completely forgotten about it. It was in one of the gnome camps on our way to getting the helmet. Our defenses are now almost as good as if we were wearing the second tier of bandit armor and nothing else.

9_2iVBrO_400x400: The hard part is Rhobart, which is both surprising given that he’s a fucking wizard with infinite money and also not surprising at all given that he’s the glitchiest NPC in the game. Rhobart wants us to kill a couple of Bog Bodies that are off to the side of the weed farm.

9_2iVBrO_400x400: Even with the ring and the armor, these bog bodies hit like trucks and there’s also three of them.

9_2iVBrO_400x400: The problem is that if we try to turn this quest in and get the protection money, there’s no option to do that.

9_2iVBrO_400x400: First, we have to click through a bunch of Rhobart’s dialog to get a quest to deliver a bunch of beer to Rachel so that Rhobart can pay his protection money.

9_2iVBrO_400x400: You can get Rachel to pay you 100 gold even though Rhobart is only looking for 50, but it requires clicking through some extra dialog and in the amount of time it takes, we could just beat up Rhobart again. There’s also a fun glitch in the last official patch where you have to click through any dialog option with Rhobart to get the turn-in to appear for the protection money.

9_2iVBrO_400x400: In fact, I did each time I went to see him, because there is never not a good time to be beating on Rhobart.

9_2iVBrO_400x400: What we’re going to do next isn’t going to make a whole lot of sense, but trust me when I say it’s necessary. First, we have to tell Rachel we’re done collecting for Brogar.

PCLeather: “I collected all the money for Brogar. Now what?”

Rachel: “If my husband learns about this, he’ll have Brogar killed on the spot. Then he’ll give me hell for not keeping an eye on things. Perhaps… if you go to Brogar and tell him what you know. Threaten to pass it on to Esteban… maybe he might buckle.”

9_2iVBrO_400x400: The thing is, if we do that, Brogar will just tell us to fuck off. What we want to do instead is challenge him in the arena… but we can’t do that until we’ve fought all of the other fighters first.

9_2iVBrO_400x400: Craig will tell you who the fighters are, but this first one is Ricardo. He’s the guard by the entrance to the camp, and even Craig thinks he’s a dipshit. All you have to do is ask and he’ll fight you.

9_2iVBrO_400x400: This was one hit on Ricardo. Granted, it was the last hit of a combo which does several times the damage the first two swings do, but still. Ricardo is basically a non-threat unless you don’t have the worker’s clothes and haven’t upgraded your strength. I have beaten him with no armor and base strength before, and even then all you have to do is just wait longer.

9_2iVBrO_400x400: The arena also allows you to loot the guards. None of them have anything good, except for one fighter who has the upgraded wooden shield if you didn’t get it from Oscar.

9_2iVBrO_400x400: Next up is Domingo, who also sits near the entrance. Domingo doesn’t give a single fuck and will only fight you if you give him a beer. Hope you didn’t spend all your beer on Luis.

9_2iVBrO_400x400: As you can see, Domingo has the same shield we do. He’s actually the third fighter you’re supposed to fight, and he also has a few tricks up his sleeve that Ricardo and Clay didn’t. I didn’t get a good shot of it in this fight, but Domingo has what’s called the “counter parry” - you can get this yourself for levelling up swords. If we use it, the counter parry basically makes us invincible against a single opponent: you can spam it and it’ll either do a small amount of damage or you’ll miss the timing and your shield will block the hit anyway.

9_2iVBrO_400x400: Up next is Lorenzo. Lorenzo actually has a quest I forgot to do, and I’m not entirely sure we can go back and do it now, but oh well. It’s not interesting anyway - he tries to lure you away from the camp and then you fight him.

9_2iVBrO_400x400: Finally, we have to fight Craig. Craig wants us to put up 50 gold as an entrance fee.

9_2iVBrO_400x400: Craig has the counter parry as well - this is where I got a shot of it. The counter parry throws you off-balance for a few frames, but if you mash the shield button quickly enough you’ll have your guard back up before he can follow up on it. Craig’s counter parry doesn’t do damage in and of itself, but that’s because you need Rank 4 in Swords before it’ll do that (you get the parry itself at Rank 2).

9_2iVBrO_400x400: This is another reason why the fan patch sucks. Craig has a sword piece on him that we need. If we were playing this on the fan patch, we’d lose our entrance fee if we grab it off him. However, Craig works the same way Rhobart does: the gold we gave him goes into his inventory instead of being removed from the game. We can just steal it right back.

9_2iVBrO_400x400: With all of the other fighters out for the count, we finally get to face Brogar.

9_2iVBrO_400x400: Brogar is essentially an upgraded Craig - he has a shield and a thorn mace. Brogar also knows the counter parry and can do damage with it.

9_2iVBrO_400x400: However, Brogar has one major weakness, which is shared by most enemy shield users. For whatever reason, Brogar loses his tracking during his swing - most other enemies don’t. This means we can easily sidestep him and hit him once or twice when he swings.

9_2iVBrO_400x400: Brogar has the fourth of five sword pieces on him. The reason I’m grabbing these now, by the way, is because we don’t get any bonus experience for having the quest before taking the items.

PCLeather: “Feeling a bit more humble now, Brogar?”

Brogar: “Okay, okay, I’ll quiet things down but I’d think before you rat on me. The rats in this swamp get their necks wrung.”

PCLeather: “Threats don’t work so well when you’re looking so bruised.”

9_2iVBrO_400x400: Another quest complete. As for the last piece of the sword, well… normally, you’re supposed to go to Luis and give him three beers for it: one for him to tell you he has it, the other two for him to hand it over. However, this is a Eurojank game and we are quickly becoming a shoo-in for the title of swamp’s most powerful weedlord.

9_2iVBrO_400x400: You do want to give him one thing of beer, mostly because you can just take it back from him and it’s an easy 100 EXP.

9_2iVBrO_400x400: I then proceeded to knock him the fuck out and take the last sword fragment. Since I’m guessing that we’re going the weedlord route, we are going to be doing a lot of this once we get to Harbor Town.

9_2iVBrO_400x400: This also nets us another 400 EXP. I want to say that by the time we finish with the swamp, we’re almost level 8. In most cases, you’re going to finish the game somewhere between level 20 and 30 unless you grind Rhobart or the other EXP glitch a ton.

9_2iVBrO_400x400: Once we have all the sword pieces, we can turn them in to Oscar. The reason we need to do this, by the way, is because we need to see the Don before we leave and we can’t get near him without an approved gift.

9_2iVBrO_400x400: We can either pay Oscar for the sword, or just take it from him in which case he sends Domingo after us. Domingo is a complete pushover at this point.

9_2iVBrO_400x400: Next time, we’ll meet Don Esteban and then go right to Harbor Town. Voting for the Wizard/Weedlord split will close as soon as I post the next update.

1 Like

9_2iVBrO_400x400: Before we can go to the Don, we have to talk to Rachel again. I’m not entirely sure why they felt this was necessary.

9_2iVBrO_400x400: It gets us 400 EXP and also wraps up the Brogar plot line.

Rachel: “That’s amazing! You can’t even tell it was broken. Oscar certainly knows his metals.”

PCLeather: “Surely this is enough to get me an audience with the Don.”

Rachel: “Are you kidding? He’ll probably divorce me and marry you!”

PCLeather: “By the way… you were right. Brogar folded.”

Rachel: “Thank you. That will help calm things for now. Don’t worry, that’s not an end to it. When he’s least expecting it, I’ll slip something into his food. I know poisons that will work slowly to turn a person inside out over several weeks.”

PCLeather: “Hmm… I might just stay away from your cooking in the future.”

Rachel: “Here. You’ve earned a reward. Oh, and one more thing… don’t let Esteban know about this. He’d just blame me.”

9_2iVBrO_400x400: The Golden Sword is a slight upgrade from our Skullsplitter, but we have to give it up to progress with the game. I also found out that what we want to do in terms of whether we level strength first or swords first is that we want to level strength. The reason for this is that while levelling swords will eventually allow you to one-hand a bastard sword or two-handed sword, all of the good swords of those types have insane strength requirements. We’re probably going to want to level strength to 50 or 60 before we do anything else.

9_2iVBrO_400x400: One perk we get for exiling Brogar is the right to use his house. Brogar has a chest with some vendor trash in it, but more importantly…

9_2iVBrO_400x400: We are now officially a weedlord. All we have to do now is walk right in and meet the Don.

Esteban: “Who are you?”

PCLeather: “A castaway. I’ve come to offer you my services.”

Esteban: “A castaway? I need true men, lucky men! You saw your ship wrecked beneath you. Do you see that as luck?”

PCLeather: “When all but one other died and I lived? I call that luck.”

Esteban: “Hmm… well, I suppose we are all castaways on this island. Castaway by life, now cast away by those storms. I’ll give you a chance, castaway. Prove your luck to me.”

9_2iVBrO_400x400: At this point, we have no choice but to give up the golden sword. Not that it matters: 2 attack points won’t make any dramatic changes to how we fight. The 1000 EXP is also nice. By the time we get done here, I believe we were within a few hundred EXP of level 8.

Esteban: “This is Oscar’s work. We both sought this sword since we heard of it. Now, here it is in my hands.”

Esteban: “Pride gets eaten alive in this damn swamp. It gets swallowed by anger. Poisoned by idleness. Sometimes I think Fincher is the only man jack of them left with any self-worth and Fincher told me that you have pride. I am in need of pride, so I shall give you a chance to prove yourself.”

9_2iVBrO_400x400: I should mention that apart from that last sentence being badly translated - this game was originally in German - Fincher is the only person on the island who can train us in sword fighting up to the maximum level. If you go the wizard route, you are forever locked out of that. This is NOT, by the way, the point at which we choose which route we’re on. That happens in Harbor Town, meaning you can get this scene and then completely fuck over the bandits for the rest of the game.

PCLeather: “I’d like to know more about what’s happening here. Why are you and your men in this swamp?”

9_2iVBrO_400x400: We already know the answer to this: it’s because they got chased out of Harbor Town by the Inquisition. I’m gonna skip ahead a little bit.

PCLeather: “What do you plan to do?”

Esteban: “I want my town back. It is our town. It belongs to the people of this island, not the mainland. For that reason, I left some of my men there when we withdrew. Gathering intelligence, frustrating the plans of the inquisition.”

Esteban: “They were supposed to be sending me information. But I have heard little recently. These aren’t times when plans run smoothly.”

PCLeather: “How can I help you?”

Esteban: “Find out what is happening in Harbor Town. Find my men. I have no idea if they are alive, imprisoned… dead. Or worse, if they have defected. Go there. Discover the truth for me.”

Esteban: “The town’s rear gate is guarded by the old town watch. They are men without a master and their loyalty can be bought with a little gold.”

9_2iVBrO_400x400: This is the main reason we did the swamp first, apart from the good EXP. If you go straight to Harbor Town and wind up at the back gate - which is pretty likely given that there’s a guy in front of that one Inquisition dig site we snuck through when we went to get the leather helm who will automatically approach you if you don’t take steps to avoid him who will tell you the same thing - you’ll probably wind up there having little to no idea what the fuck you’re supposed to be doing.

9_2iVBrO_400x400: On the way out, Domingo stops us because Oscar hired him to kill us because we took the golden sword without paying. Domingo’s weed powers are weak, and we quickly beat the shit out of him.

9_2iVBrO_400x400: I also remembered to do that quest with Lorenzo where he tries to lure you to some ruins only to try and kill you. We kick his ass with little fanfare.

9_2iVBrO_400x400: One other minor side thing I did before heading off to Harbor Town was stop by the Inquisition-held ruins outside the bandit camp. We are definitely strong enough to kick the guard’s ass now, and there’s a pretty decent item inside if you have lockpicking.

9_2iVBrO_400x400: This ruin has a very simple puzzle. There’s a couple of grave moths guarding a locked portcullis that’s opened via a switch on the ceiling.

9_2iVBrO_400x400: The game gives you a scroll of the Telekinesis spell, which you can use to hit that switch, but we want to save this for a required quest in Harbor Town. Instead, we can equip a bow and use that to hit the switch.

9_2iVBrO_400x400: There’s only two things in here we give a shit about, and one of them is that scroll. This bookstand is special, but only if you’re going the wizard route. Bookstands will give you 3 wisdom the first time you look at them.

9_2iVBrO_400x400: There’s a crystal ball inside the portcullis that gives you infinite telekinesis spells, so we use this to open the portcullis that came down over the door outside by toggling the switch again.

9_2iVBrO_400x400: The other item we want is this. This potion increases our max HP by 10, which is a not insignificant boost. I also haven’t eaten the 17 Druid’s Hemlocks we have, so we could get an even bigger boost that way.

9_2iVBrO_400x400: Here’s our current stat loadout. We have 16 wisdom because there’s a second bookstand in the farm we were in earlier that I looked at. I’m probably going to back and make a quick Rhobart run to get enough gold to get our strength up to 60, and then we can start putting points in sword fighting.

9_2iVBrO_400x400: Now we’re on our way to Harbor Town. There’s two ways we can get in: one that is intentional, and one that as it turns out is very unintentional. You can see that there’s two roads that lead there. One leads to the back gate, while the other leads to the Inquisition-held front gate.

9_2iVBrO_400x400: We’re going to head to the front gate first, because there’s a rather useful item there. The road is pretty clogged with stingrats and sea vultures, the latter of which are still annoying as fuck to fight.

9_2iVBrO_400x400: This is the front gate itself. We could head right in, but…

9_2iVBrO_400x400: There’s weed here, bringing us up to a total of 41 weed. We can now farm Rhobart that much more effectively, and we definitely want to do so because our training bill is going to be rather high, no pun intended.

9_2iVBrO_400x400: Nearby is Harbor Town’s… harbor… which has a few gold coins and some mussels in the water. There’s also a little camp nearby that’s not important right now, but will be once we leave Harbor Town.

9_2iVBrO_400x400: This little ramp-like area off to the side of the gate is where we want to go. There’s a single stingrat guarding it, but at this point stingrats are nothing to us.

9_2iVBrO_400x400: It’s hard to see because of this tree that’s in the way, but if we jump right here…

9_2iVBrO_400x400: We wind up on a rock formation right next to a low spot in the town’s gate. This is not an intentional way into the town - you’re supposed to use this spot to leave town rather than enter - but you can just barely make the jump up if you hit it at the right spot.

9_2iVBrO_400x400: This puts us right next to a guard who doesn’t seem to care that we’re just jumping into town. We’re actually entering the town right near the main Inquisition headquarters, which has a very important item just outside of it.

9_2iVBrO_400x400: To the right of the Inquisition building is this little bush. It doesn’t look like you should be able to get past it, but you can.

9_2iVBrO_400x400: Behind it is a skeleton who happens to be right next to a dig point.

9_2iVBrO_400x400: The treasure chest here contains one of the best free items in this game: the Ring of Stealth. This gives us the Sneak skill without us having to waste learning points on it. Sneak is used to get into people’s houses or other private buildings, which is outright necessary for doing a few of the quests here and still useful for stealing people’s shit with lockpicking otherwise.

9_2iVBrO_400x400: I jumped back out of Harbor Town, which is a lot harder than you’d think, and went back to the swamp to train. There is a place to train in Harbor Town, but I wanted to beat Rhobart up some more. We had just over 2,000 gold and it cost us 1,700 to put strength up by 20 and get two levels of sword fighting. We now have the counter parry (though it does not do damage) and a useless skill called the “lateral blow” that basically gives you a different attack animation if you attack immediately after dropping your guard. I also went and farmed Rhobart to get back to 2,000 gold.

9_2iVBrO_400x400: Side note, we’re now strong enough that we can kill Rhobart in a single hit, assuming we finagle it so he gets hit with the third hit of our combo chain.

9_2iVBrO_400x400: Other side note, I robbed Tristan’s farm because I could. As it turns out, he has a chest in his house with a set of “seaman’s clothes” which are basically a worse version of the worker’s clothes. They look like this and have no shoes. There’s also a Hero’s Crown behind his house that I missed, which means that we are DEFINITELY going into Alchemy sometime in Chapter 2.

9_2iVBrO_400x400: Right past the farm, on the way to the back door to Harbor Town, is a pretty good item that we can grab now that we’re strong enough. I stumbled upon it while grinding enemies, since we’re pretty close to a level up and I wanted to make sure we had enough points for alchemy.

9_2iVBrO_400x400: If you’re not using the Rhobart exploit or are using the fan patch, you probably won’t be strong enough to kill everything on the way to Harbor Town. The developers did this really insidious thing where most of the enemies on the way to the back gate are tutorial enemies, but they have one or two regular ones mixed in that will probably fuck you up. Just past where those wolves were is another one of these things. They’re called Thunder Lizards.

9_2iVBrO_400x400: There’s a chest past it which I was able to get to without aggroing it, and inside…

9_2iVBrO_400x400: Is the first amulet we can find that doesn’t totally suck. I know on my first run I found an amulet of frost resistance or some bullshit, but this will put us at over 200 HP when we started with like 90. We could get even higher if I remembered to eat all those Druid Hemlocks.

9_2iVBrO_400x400: I wasn’t able to get OUT without aggroing it, however. I dragged it to an Inquisition camp to see how many NPCs I could kill with it, but found out that while Thunder Lizards move very quickly and have tons of HP, they don’t hit very hard.

9_2iVBrO_400x400: The rest of the way there is pretty uneventful. There is an exit to a ghoul cave on the left side, but even with our loadout we’re not strong enough to kill them.

9_2iVBrO_400x400: This is the back door to Harbor Town. I took a slight detour because there’s a beach down below and I couldn’t remember if there was weed there or not.

9_2iVBrO_400x400: The answer is no. There’s a couple of those recolored grave moths meant to keep you from going to that island, which has nothing good on it. There’s a buried chest on it we can’t open, an ogreroot, and a hero’s crown guarded by a giant scorpion that can kill us in like three hits.

9_2iVBrO_400x400: For reference, I did manage to fuck with the scorpion’s AI and grab the crown without it doing anything.

9_2iVBrO_400x400: Back at the gate, we run into Leto, who wants 100 gold to let us into the town - but won’t let us out if we go in. The only reason I’m doing this is because it gives us the map for Harbor Town.

9_2iVBrO_400x400: We also had about 780 gold of random crap lying around, a lot of it discarded weapons from beating up Rhobart. Leto will let you sell stuff to him to get enough money to enter the town.

9_2iVBrO_400x400: This is Harbor Town… or more precisely, the “gutter” section of Harbor Town.

9_2iVBrO_400x400: To our right is a farm that we’re going to have to come back to later if we want to do all the quests in Harbor Town.

9_2iVBrO_400x400: Underneath him is Arno, who is going to give us a hint as to what to do… if we wanted to be a nerd-ass wizard.

PCLeather: “How can I help?”

Arno: “My wife is so sick. I fear the worst.”

PCLeather: “What’s wrong with her?”

Arno: “She’s feverish. I blame these cursed bloody ruins.”

PCLeather: “Why? How did they make her ill?”

Arno: “They came out of the ground right next to my damn farm. Next day, Martha caught this fever, and she’s got sicker since then. I don’t know what to do. Her only hope is Master Belschwur.”

9_2iVBrO_400x400: Belschwur is the NPC you’d talk to if we were planning on becoming a wizard, but fuck that shit. In fact, we’ll probably knock him unconscious at some point.

PCLeather: “Who is Master Belschwur?”

Arno: “A mage from the monastery. He spends his time at the Shrine of the Flame, back in the Gutters. He cares about poor farmers like us. No one else does.”

9_2iVBrO_400x400: His wife uses the same model and face as Rachel in the bandit camp. Hilariously enough, you can attack her and she’ll get out of bed and be ready to fight - in fact, I think if you do that she won’t go back to bed.

9_2iVBrO_400x400: Right away, we run into the first person who’s obviously with the Don - Delgado. He’s wearing bandit armor and has a sword.

Delgado: “Leto let you in, huh?”

PCLeather: “Yes, I’m from outside.”

Delgado: “You’re breaking the Inquisitor’s new laws, you know that? You should be more careful. You tell the wrong people… you could get yourself in trouble.”

PCLeather: “You’ve had trouble with the law?”

Delgado: “Hah! The law is just an excuse to lock us all in the town. The Order wants to loot the ruins in peace. Once they’ve taken the last crumb of gold out of the ruins, they’ll let us out again. Don Esteban figured that out right away.”

PCLeather: “What’s the order doing about the Don’s men?”

Delgado: “They’ll stop us where they can. Since they came here with their fancy white uniforms, they’ve never taken their eyes off us. They’re just waiting for us to step out of line then they’ll take us to the monastery.”

Delgado: “Keep your eye out for Sebastian. He’s always around, watching.”

Delgado: “We could. I have to scrape together a lot of gold for the Don. If I don’t send him something soon… if I don’t get some gold in… I’ll have problems with my own boys. If you help me, I can cut you in for a slice.”

PCLeather: “What can I do?”

Delgado: “Hmm… Costa the pawnbroker’s doing good business here in the Gutters. He’s preying on the farmers and stuffing his pockets with gold.”

PCLeather: “So what do you need doing?”

Delgado: “Since the Order has been here, he hasn’t been paying his dues to the Don. Hired himself a bodyguard he has, and he pays the Inquisition’s taxes. What about the Don’s taxes, ey? Where’s our slice? Someone needs to make sure we get paid.”

9_2iVBrO_400x400: And now we’re on a quest to collect protection money. Again. This time though, it’s significantly harder and much, much shorter.

9_2iVBrO_400x400: Just past Delgado is Sebastian, a monk who automatically stops us if we talked to Delgado. He wants us to to the Order side of this quest, which is exactly the same except we give the gold to Sebastian and Delgado is forced out of Harbor Town. I should mention that Delgado is a trainer for Dexterity and Pickpocket, as well as Lockpicking… but we’re already beyond what he can teach in that and Pickpocket is a useless skill that’s basically just a more roundabout way of knocking people out.

9_2iVBrO_400x400: The Order are a bunch of nerds who hate weed, and we’re now officially a weedlord, so let’s just beat Sebastian’s face in.

9_2iVBrO_400x400: The main reason we want to do this is for this staff he has, which does a whopping 46 damage compared to our current weapon’s 26. The Executioner’s Staff is a good weapon even though staves suck as a whole, simply because of how easy it is to get.

9_2iVBrO_400x400: One thing I should mention is that Sebastian and all Order NPCs have a very unique quirk to them. In most cases, if an NPC knocks you out, they’ll steal most of the gold you have on you. Order NPCs won’t. This, combined with the fact that NPCs regenerate health very slowly, can be abused to hell in several spots in Harbor Town. As you can see, Executioner Staves also sell for a good amount.

9_2iVBrO_400x400: Sebastian stands probably five feet away from Costa and his bodyguard. Costa is the one on the left. We COULD talk to the bodyguard first to lure him away and fight him alone, but fuck that shit, we’re a goddamn weedlord.

9_2iVBrO_400x400: We then turn the quest in to Delgado, putting us 1/4th of the way to being on the Don’s side. This is the overall objective of Harbor Town: doing certain quests either for the Order or for the Don. We’re going with the Don because the Don has weed.

9_2iVBrO_400x400: Anyway, before I finish this update off, I ate all of the Druid’s Hemlocks to get our HP up to 239. This is more than enough to ensure that we can handle anything in Harbor Town. I also found out that Eggs are a key food… as it turns out, if you eat 10 of them you get a free point of strength, up to 5 at 50 eggs eaten. I’ll look into our egg supply next time.

9_2iVBrO_400x400: I checked to see if we had enough eggs, and no we don’t. I think there’s exactly 10 near Tristan’s farm, but I only found 9. Anyway, moving on. This guy here gives us another sidequest that I’ve never actually bothered to complete because it can’t be finished by just bashing someone’s face in.

9_2iVBrO_400x400: Basically, he wants us to find a buyer for his fish stall. From what I remember, it doesn’t award a whole lot of EXP. Instead, we’re going to go ahead and hit the next main quest.

9_2iVBrO_400x400: Down the stairs from the fish stall is Rodriguez, who we have to talk to in order to pick up the quest even though he’s an Order member.

9_2iVBrO_400x400: First though, we want to beat the shit out of him and steal his weapon. Rodriguez is an EXCELLENT target for this because he’s almsot completely alone. Even at minimum strength, assuming you can get a single hit in on him you’ll eventually take him down. We don’t really need the money, but each NPC gives you experience the first time you knock them out. In fact, I’m pretty sure that if you fight all of the NPCs involved in the quest he’s about to give us, you get more EXP than you do from completing the quest itself.

Rodriguez: “There’s a hungry look. If you don’t have any coin, Master Belschwur is handing out stew to the poor. Though you don’t look that poor.”

PCLeather: “What’s your job here?”

Rodriguez: “I guard this warehouse. Not a plum job, but when you decide to switch sides from the Don to the Inquisition, takes time to earn trust.”

Rodriguez: “That’s why I’m stuck guarding meat. Although that’s certainly increased in value now the storms have curbed the fishing trade. People are as likely to steal steak as they are artifacts!”

PCLeather: “Have there been many break-ins?”

Rodriguez: “Several, but there’s not much we could do apart from keep an eye on local troublemakers. I am positive Cid’s behind it though.”

Rodriguez: “If I can prove Cid’s behind the burglaries, maybe I can improve my standing in the Order. But I doubt anyone would talk to me. The Don’s men feel betrayed and the Inquisition are suspicious. So, I need someone who doesn’t have my baggage.”

9_2iVBrO_400x400: Of the quests that you have to do to progress the story in Harbor Town, this one is probably the easiest. We have to talk to three people who have been burglarized - and the first happens to be right next door to the building Rodriguez is guarding.

9_2iVBrO_400x400: Baxter is notable for two reasons: one, he gives what is possibly the dumbest quest in the game. Two, he has a locked chest with a food recipe that increases your MP. Needless to say I knocked his ass out and looted his house before talking to him, which is kind of ironic given that we’re supposed to be investigating a burglary. I should note that his bookstand does not give wisdom, it gives 5 EXP instead.

Arno: “If I take three at twenty-five plus eighteen hams that’s… I can’t do this with you staring at me. I keep the books for the butcher’s shop. You think calculating’s easy? There’s not many round here who can do it.”

PCLeather: “You want to test me?”

9_2iVBrO_400x400: I realized reading through this on my laptop that this game has some severe lighting issues. If you can’t see the text, he’s asking us what 14 x 17 is.

9_2iVBrO_400x400: The answer is 238, and for doing it we get 100 EXP. You actually have to do this quest (even if you fail) to get him to talk to you about the burglary.

PCLeather: “About the break-in… what was stolen?”

Arno: “What else? Gold, of course. The gold belongs to the Order. Now it’s gone!”

PCLeather: “How much gold was taken?”

Arno: “All of it. I don’t know exactly how much.”

PCLeather: “Who was here on the day of the break-in?”

Arno: “Well… Doyle tried to sell me fish, but I don’t like fish. That fat oaf Vasili brought beer. I paid for that. And of course, Mo was here a few times. But that isn’t unusual. He works here after all.”


9_2iVBrO_400x400: The second person we need to talk to is Nelson. Nelson is a cartographer who will sell us a complete map of the island once we leave Harbor Town. He also uses the same model as Arno, Baxter, and a few other people.

PCLeather: “I heard you had a break-in. What was stolen?”

Arno: “A ring. I received it from Commandant Carlos personally in return for a map of the island.”

PCLeather: “Who was here on the day of the break-in?”

Arno: “Er, a few people. Mo from the slaughterhouse brought me a delivery of meat.”

PCLeather: “Anyone else?”

Arno: “The laborer, Doyle, sold me fish. And… Pavel, one of Flavio’s men. He sold me a couple of wolf pelts.”

9_2iVBrO_400x400: We can find Nelson’s ring by going directly next door to where Cid is.

9_2iVBrO_400x400: Cid’s wife, Kayleigh, will fully admit that she has the ring and that Cid stole it for her. Remember that pearl necklace we found in the swamp? This is what we need it for. She’ll only give us the ring if we give her a pearl necklace in exchange. I actually tried knocking her out, and that (surprisingly) doesn’t work.

9_2iVBrO_400x400: Nelson’s Ring gives us the Acrobatics skill, which causes our protagonist to do a roll when he hits the ground after a fall. It works kind of like the Silvercat Ring in Dark Souls 2 or 3 in that it mitigates most fall damage. This is mostly useful if you’re doing a speedrun, but I don’t think the current speedrun strat gets the ring.

9_2iVBrO_400x400: The final person we need to visit is on the other side of where the fishmonger is.

9_2iVBrO_400x400: This is where Belschwur is. I’d beat him up, only Belschwur takes a little bit of finagling to properly knock out because attacking him will also cause a bunch of people nearby to become hostile. That’s not to say I couldn’t pull it off.

9_2iVBrO_400x400: I’m going to skip his dialogue solely because there’s a fuckload of it. The people that visited him were Vasili, Pavel, and Doyle.

9_2iVBrO_400x400: Going back to Rodriguez forces us to choose a suspect. We have Mo, Doyle, Pavel, and Vasili to choose from. If you’ll notice, Doyle was the only person in all three locations. This quest is extremely janky, as the game just kind of expects you know where Doyle is so you can get him to confess.

9_2iVBrO_400x400: Doyle is in the hotel near where we entered Harbor Town.

Leon: “I sleep here. Nothing wrong with that, is there, mate?”

PCLeather: “You were seen in a house that was burgled. You’re the only person seen in all the houses that were broken into, which makes you a prime suspect.”

Leon: “Come off it. You can’t prove that and you know it!”

PCLeather: “I can beat a confession out of you. Or we can skip the beating and get right to the truth.”

Leon: “I cased the houses for Cid.”

PCLeather: “But what do I do with this information?”

Leon: “And if the Order finds out, they’ll send me to the Monastery! You’ve got to keep this quiet.”

9_2iVBrO_400x400: So yeah, this quest kind of makes no sense. Basically, you either make Doyle leave town and magically the Order will know and like you for it, or you make him leave town and the Don will like you for it. It’s real dumb.

9_2iVBrO_400x400: We get 500 EXP from it though, plus 80 more for knocking Doyle out before he leaves town.

9_2iVBrO_400x400: Cid will tell us that our reward is reputation with some guy called Scordo, who is apparently the Don’s main contact in Harbor Town. This quest is still inexcusably bad.

9_2iVBrO_400x400: Moving on, there’s another combat-oriented quest we want to do for a gear upgrade, but first we need to stop at this lighthouse on the way and use some dank weed magic.

9_2iVBrO_400x400: There’s a golden bowl up here we’re going to need for a quest later. The problem is that we have no way of reaching it. Objects in this game don’t have physics attached, so we can’t just shoot it off the ledge. This is what that telekinesis scroll we picked up in the ruins is for. If we had used it to do the ruins puzzle, we’d have to buy one to do this.

9_2iVBrO_400x400: Around the corner from the lighthouse is Don Esteban’s old mansion, which is under heavy guard by the Inquisition. We could get in there by doing one of the possible story quests, but there’s one that I think is… more suited to our skill set.

9_2iVBrO_400x400: Sitting just outside the mansion (you can actually see him on the far-right side of the last screenshot) is Weasel, who is the town’s weedlord.

PCLeather: “So what’s going on here?”

Weasel: “Not much. I can’t do anything while those scum-sucking White Robe bastards won’t let me out of their sight.”

PCLeather: “Why are the White Robes watching you?”

Weasel: “Because they know I hate them, and they think I’m a thief.”

PCLeather: “And are you?”

Weasel: “Of course not. I even used to offer protection to the merchants. That’s how business works. And now? Carlos is just waiting for me to give him a reason to banish me from the town.”

PCLeather: “I could help you.”

Weasel: “Why? Why should I even trust you? This town’s full of spies and collaborators.”

9_2iVBrO_400x400: There’s a bunch more dialogue if you haven’t done anything for the Don yet, but since we’ve done two quests for him at this point it’s enough for us to skip it.

Weasel: “You don’t just go door to door collecting protection money. Those White Robe bastards are everywhere, and they see everything. Before I show you the tricks, you’ll have to do something else for me.”

Weasel: “Don Esteban controls most of the weed on the island. Leonardo the alchemist processes it for us, and then Garth, his assistant, brings it to us. But recently, some of the goods have gone missing.”

Weasel: “Bring me the missing packages of weed, and I’ll show you how we separate rich merchants from their property! We’d be prepared to trust you more as well.”

PCLeather: “Who do you suspect is taking it?”

Weasel: “Garth, the alchemist’s assistant.”

PCLeather: “Why don’t you just punish him?”

Weasel: “I can’t risk those infernal White Robes finding out. Even though Garth is a coward, I don’t know that a beating would make him talk.”

9_2iVBrO_400x400: With that, we get a quest to follow Garth and find out what he’s doing with the weed. You don’t actually need to be able to sneak for this… nor do you actually need to follow him, so long as you know where he’s going. I’d post screenshots but since everyone in this game wears pretty much solid brown, it’s kind of hard to pick Garth out of a crowd.

9_2iVBrO_400x400: Garth basically makes a loop around town to reach a spot on the other side and meets up with a guard by the name of Cutter. Cutter has a shield we want - and honestly, we could’ve just beaten Cutter up and stolen the missing weed off him before even talking to Weasel. That’s actually the easier way to finish this quest.

9_2iVBrO_400x400: Doing it this way is MUCH harder. I’ve done this at minimum strength with no armor and boy let me tell you, even WITH armor and the stats we have it’s not great. You wind up fighting Cutter and Garth at once.

9_2iVBrO_400x400: Thankfully, with our stats, I was able to KO Garth in one hit, and Cutter in two. Cutter has some blunts (which we, of course, take) as well as the missing weed packages.

9_2iVBrO_400x400: The War Shield is a significant defense upgrade, having twice the stats of the wooden shield we were previously using. It’s good enough that I wound up switching back to the Skullsplitter. Next time, we’ll finish up the Harbor Town story quests.

These visuals are taking me right back to Divinity II. I don’t suppose we can be a dual-class Weedlord/Dragon?

9_2iVBrO_400x400: Before we turn the weed in to Weasel, we’re going to do a different quest since it’s right here.

9_2iVBrO_400x400: Toni is basically a man-sized infant. Seriously, he’s kinda frightening to look at.

Toni: “Hernandez realizes I’m watching the Don’s old house - we’re screwed.”

PC: “Sounds like you’re no fan of the Inquisition. And you’re working for the Don?”

Toni: “You’ve just realized? Yeah, I have orders from the Don. And when he gives orders, you obey. Thing is, I could use some help.”

Toni: “There’s an old family heirloom of the Don’s in the house. A golden amulet. If the White Robes get their hands on it, they’ll take it to their stupid Monastery, and the Don will kill me.”

PC: “Where is this amulet?”

Toni: “The Don mentioned a secret room accessed by a hidden switch behind a picture.”

9_2iVBrO_400x400: So, the problem here is that Toni, in addition to being a baby-man, is COMPLETELY AND UTTERLY WRONG. You can’t wait until night to break in, because the guard at the front door of the house never leaves.

9_2iVBrO_400x400: Instead, you want to talk to the guard at the front door. His dialog tree is largely unimportant: if you didn’t get the quest from Toni, you’d get it from Hernandez here, so all of his dialog is basically a duplicate of Toni’s. Once you mention the amulet he’ll let you in the house.

9_2iVBrO_400x400: The Don’s house is mostly pointless - there’s a couple of treasures you can steal because the guards here are pretty blind. The real attraction is in the room directly behind where we are in this shot, to the right of the entrance.

9_2iVBrO_400x400: Sure enough, there’s a painting that acts as a hidden button that moves a bookcase so we can get through to the Don’s secret room.

9_2iVBrO_400x400: If you’re doing the wizard route, you absolutely want to do this quest because there’s a bookstand in here.

9_2iVBrO_400x400: The amulet is nice, and we could keep it, but meh. I don’t think too many enemies actually use piercing damage.

9_2iVBrO_400x400: We also turn in the missing weed quest, which gets us the final alignment quest we need to officially become a weedlord. Weasel tells us about another painting hidden in the brothel, so let’s go there.

9_2iVBrO_400x400: If you’re doing the weedlord route, this is basically free EXP. If you’re not, it’s the hardest quest in Harbor Town bar none. The brothel is directly behind the Don’s house.

9_2iVBrO_400x400: The inside of the brothel is mostly uninteresting. What we want is the room directly to the left of the entrance. If you’re doing the wizard route, you have to instead talk to Sonya here and pay her gold to get her to tell you about the hidden room.

9_2iVBrO_400x400: This guy here is Scordo, the leader of the Don’s men in Harbor Town. If you’re a weedlord, he’ll simply talk to you and give you a quest. If you’re a wizard, on the other hand… you have to fight him.

9_2iVBrO_400x400: The good news here is that Scordo is completely alone. The bad news is that Scordo is rather tanky for a random NPC - he has about as much health as one of the Order people we’ve been beating up to steal their weapons. He even KOed our weedlord because I wasn’t paying attention: Scordo has a counter parry that for some reason hits for probably three times the damage everyone else’s hits for.

9_2iVBrO_400x400: If you’re doing the weedlord route, you still want to fight Scordo because it gives you EXP as if you were fighting him on the wizard route.

9_2iVBrO_400x400: Fighting Scordo instead of talking to him gets us the Sewer Key, which is the ultimate goal of both the weedlord and wizard routes.

9_2iVBrO_400x400: The Sewer Key opens up a door right outside the front gate to Harbor Town, which allows us to come and go as we please… even though we could already do that by weedlording ourselves over the wall.

9_2iVBrO_400x400: With these learning points, we can get to Alchemy 3 without any issues. Alchemy will probably be the last non-sword related skill we spent points on. As far as I know, Lockpicking 3 is kind of pointless. We COULD leave Harbor Town right now, but there’s still a bunch of quests there, including one that ties directly into Risen 2. Plus, we need to talk to Scordo to get the plot flag to go into Chapter 2.

Scordo: “And I should trust you… why?”

PCLeather: “You can trust me.”

Scordo: “So, you are the castaway that has been helping my men in town. Why didn’t you say so right away? You have done good work.”

PCLeather: “The Don has sent me. I’m to report on the situation here.”

Scordo: “Why should I believe you’ve talked to Don Esteban?”

PCLeather: “Why would I lie?”

Scordo: “There are a thousand reasons.”

PCLeather: “I proved my loyalty in the camp, rooting out people who weren’t loyal to the Don. If you want, ask him.”

Scordo: “If you’ve proved your loyalty to him…”

PCLeather: “So, will you send a report to the Don?”

Scordo: “I’ll give him a full report. You can take that and a package to the Don.”

9_2iVBrO_400x400: Apart from Scordo’s dialog not making a whole lot of sense, he also gives us a sidequest to bring him three golden bowls - we have one already, so let’s get the other two.

9_2iVBrO_400x400: Scordo’s quest is probably the easiest one you can do for alignment purposes, assuming you know how to reach him. As far as I know, the painting in the brothel is active even if your character doesn’t know it’s there. All you have to do is pay 150 gold to two different people: Dytar, the first, is in the bar right across from the butcher shop.

9_2iVBrO_400x400: I should also mention that Dytar is immortal, and thus we can’t just beat the bowl out of him.

9_2iVBrO_400x400: On the way to the second bowl owner, I stopped in at Nelson’s to get the completed map of the island. It costs 250 gold, but we have over 5000 at this point and can get an infinite amount by beating up Rhobart.

9_2iVBrO_400x400: The second guy lives in the hobo bar across from Cutter. Dirk is also immortal.

9_2iVBrO_400x400: For the second to last possible alignment quest, we can talk to this guy - Lukor. This quest is without a doubt the hardest alignment quest you can do short of Scordo’s.

9_2iVBrO_400x400: In case you can’t see the text, Lukor wants us to steal back five ceremonial armor plates. This quest is very similar to the golden bowls quest, except you can either fight everyone or lose some 600 gold in the process.

9_2iVBrO_400x400: First up is Vasili, who demands 200 gold for his two armor plates. Alternatively, we can kick his ass for them, but you have to be careful in doing so.

9_2iVBrO_400x400: If you simply pull out your weapon and down him, it will aggro every single NPC in the bar as well as about four Order guards outside. Even with our build, that is more than enough to destroy us. Instead, you have to go through a dialog tree that is way too fucking long to get him to fight you.

9_2iVBrO_400x400: Vasili is probably the hardest of the three people we’re going to need to fight for this quest. He knows the counter parry and is capable of doing some pretty good damage even with our armor.

9_2iVBrO_400x400: There’s also Ingvar, who is also in the bar. Ingvar is a bit different - you’re meant to talk to him and then he leads you outside and you fight. Instead, I, uh…

9_2iVBrO_400x400: Surprisingly, it wasn’t all that hard to club these guys down. The swords the regular town guards have do nowhere near as much damage as the Executioner Staff the Order guards have.

9_2iVBrO_400x400: Our last fight is against Duram, who lugs crates at the dock. Unlike Ingvar and Vasili, there is no way to get Duram to fight us in such a way that the guards won’t come. I didn’t realize this at first and got my ass kicked off screen by two Order guards who showed up as I was looting him.

9_2iVBrO_400x400: The correct answer is to club him down over by the crates, where none of the guards will notice. Ignore the quest pop-up by the way - no one’s ever documented it, but I’m pretty sure that it’s for if you find the armor plates he has on your own. He has a whole speech about how he’s hidden them, but I’m not going to transcribe it because Duram is a completely unimportant character.

9_2iVBrO_400x400: The funny part is that because we have lockpicking, we didn’t even need to beat Duram up. I just did it because it’s the weedlord way.

9_2iVBrO_400x400: Right next to the warehouse on the dock is this troll named Ukkos. Ukkos is actually a trainer - if you’re not with the Don, he’s the only way you can train in Axes. The problem with Axes is that they’re very slow and that there’s WAY fewer of them then there are swords, so it’s harder to get more damage. Duram lives up those stairs you can sort of see on the right side.

9_2iVBrO_400x400: The chest with the armor plates in it opens right up, and then we take a weed-induced nap in Duram’s bed for good measure. That’s all but one of the possible alignment quests done. Next time, we’ll do the final alignment quest (it’s a long one) as well as the two major sidequest chains in Harbor Town before heading into Chapter 2. I might also do a quick Wizard overview for those of you wondering how that goes.