Zodi Plays: The Legend of Zelda The Wind Waker (Wet Breath of the Wild)

Many good and heartfelt thanks to my friend Pinkhaired August for the banner.

So, once more we return to the Legend of Zelda, and a lot has changed since we last played. Last time was Ocarina of Time, and since you all voted for Wisdom it’s time for ADVENTURE! So as it turns out, sending Link back to the present in Ocarina of Time split the timelines up a bit, so now there’s a present day that’s all post Ganon take over and the hero’s just up and gone. So they’ll have to deal with that however they do. But that’ll be for later, for now let’s focus on the task at hand. The Wind Waker was originally released for the Gamecube, and shocker of shockers a lot of dumb nerds didn’t like the art style. Then a couple months passed and people started actually playing the game and realized they were dumb and the game is great. We’ll be playing the Wii U’s HD rerelease of the game, which fixes some of the problems and changes a handful of things that we will touch on as they come up.

This’ll be a 100% run, everything will be got. As I am at least half decent at this game I will actually be trying to be GOOD at this game compared to my sort of vague flailings that usually happen. Updates will be Monday and Friday as regular, though I can’t 100% promise I’ll hit every day since I’m starting a new job soon and it looks like it’ll suck scheduling wise. But I’ll do my best every time I say I’ll miss an update I end up not doing so so hey. Without further ado let’s get going with The Legend of Zelda The Wind Waker!

Zodi Plays: The Legend of Zelda The Wind Waker [1] Outset Island

Video Length: 23:04

After a beautiful opening scene, we open properly onto Outset Island, a peaceful little island village. Aryll, our sister, runs up to the lookout tower to wake us up because it’s our birthday! Grandma wants to see us, so let’s go give her a look. After some un-intrusive optional tutorials that tell you how some of the basic mechanics of the game works within the context of the lives of these people. We do get the forced tutorial of how to do Z Targetting but given it’s such an important thing and SOME people are really stupid and don’t know how to grock it properly it’s honestly something worth tutorializing. Of note is that this small old man’s house is full of other simple Instruction Book level tutorial things which you can read at your leisure, and I think that’s cool if not entirely needed. Games should have a way to refresh your memory on the controls. I can’t even begin to count the number of GBA games I will never be able to play properly due to a lack of instructions.

But yes, an idyllic and happy life where we get given a job for our birthday to find some pigs (which rewards us with a cool 60 rupees total, nice) and, once we go talk to our Grandma, a nice green tunic and hat. Which given the tropical nature of this island would be HORRIBLE to wear, and the game makes it very clear this is not an enjoyable bit of clothing. But it’s only for one day, right? It should be fine. We go back to the lookout to find our sister, and she gives us HER gift, and it’s actually a good one! The spyglass, our first time! Spyglasses and telescopes seem like something all games should have, because there’s always a need or want to zoom in on things in games nowadays, given how good they look. We quickly make use of ours to spy the birdman mailman, but…trouble is afoot! A pirate is being carried off by a giant monster bird and it’s being attacked by her pirate crew and oops they hit it but now she’s fallen into the forest!

This is clearly something we need to investigate, but first we need a weapon. And it’s here we find the biggest change in Wind Waker to it’s contemporary Zelda’s. The combat has a lot more focus on it, feeling a lot more involved than Ocarina’s did. It’s way more animated and feels more organic, and the way your hits flow with the music creates a sort of magical feeling. It’s not the best Zelda combat system but it FEELS so good. After training with the gruff old man, we get given the sword as a keepsake. Next time, join us as we go to rescue the purloined pirate and see what this is all about anyway! I hope you all enjoyed, I’ll see you guys next time.
1 Like

Sturgeon’s House is one of the few tutorial houses in the series I’ll actually bother visiting, if only because Sturgeon himself doesn’t get enough screentime.

1 Like

Sturgeon is a good boy. I’ll be sure to get more indepth into the NPCs because a lot of the NPC behavior in this game is actually really cool, thanks for reminding me.

Small delay due to oops blowing up my sleep schedule.

[B][URL=“https://www.youtube.com/watch?v=6PE-8tz8Iag”]Zodi Plays: The Legend of Zelda The Wind Waker [2] Below Deck[/URL][/B]

[B]Video Length: 27:57[/B]

We open this video where we left off, sword in hand and ready to go save that pirate lass! So off we go, to the fairy woods at the tippity top of the island. As we get higher and higher, the music slowly fades, and is fantastic. Wind Waker does this a lot, having ambient music that changes as you go, and it’s astounding. More games should do this. Also from the top of the island we get a pretty good view of the sea, though I’m focused more on peeping the pirate ship and the forest up ahead. Once I’m satisfied with my spyglassing, it’s off to the forest to face our fate. Within we find our first enemy, the Bokoblin! Blue, specifically, and quite nasty. These jerks are also pirates and are often armed with a deku stick or a giant machete, though in this case the guy’s only armed with his stubby little fists. He’s easily dispatched, though the lack of a shield on our part means this could of gone poorly. We venture further into the forest, and two tiny versions of that massive bird appear, dropping down two more Bokoblins for us to fight! It’s pretty dramatic and I think I handled the fight well enough.

With the monsters dispatched, the pirate lady has been saved. And we get to learn that she’s Petra, leader of this pirate crew. She’s not very happy about her current situation and is rather indignant despite us saving her. Ah well, it’s to be expected. And as we make our way out of the forest…the bird returns. And it sees Aryll, who has the same spiked ears Tetra has. It swoops down and kidnaps her! Link…just about falls to his potential death chasing after the bird, but is of course saved by Tetra and her fellow pirates. Though it’s not like we’re in a happy mood about being saved either, huh? After some discussion (involving the post man rightly pointing out that the pirates caused all this in the first place) Tetra decides to take us on as her crewmate…if we can find a shield. We know where that is, but first let’s prepare for supplies, with a visit to an old friend. Beedle!

So, Beedle as you may recall from Skyward Sword if you’ve been watching me since then, first appeared here. He’s the ever lovable bug enjoying merchant, though he doesn’t have MUCH personality here. He’s still fantastic cause Wind Waker has a lot of good personality thrown into it’s characters. We buy the piggy looking Bait Bag from him, which lets us store bait for animals, and then buy a full inventory of bait and pears. The bait lets us attract certain animals, among other things. The pear lets us take control of seagulls briefly. Both of these will get used later, but it’s important to stock up on them now when we can. Another thing of note is that, it’s sort of important to get a lot of rupees in this game but also important to burn through them just as fast. There’s a lot of stuff to spend money on, but also a lot of rewards that get you a ton of cash. So you wanna make sure to have empty pockets if you can help it.

Finally, after stocking up, we return to Grandma’s house. We get a…incredibly sad scene where we get the shield and have a sad goodbye with our Grandma. This has always made me sad, and it’s made me sadder in recent years. But it’s such a good moment. With the hero’s shield on our back, Tetra finally allows us onto her ship. We’re a swabbie, the bottom of the totem poll, but that’s fine. We pass the time by hanging out with the guy directly above us, Nico, who promises us a treasure if we can beat the rope swinging tutorial in under a year. This is actually often a pretty substantial wall for some people playing the game, it can be tricky! Especially since it’s timed and all that. I manage to do it perfectly first try frontwards and backwards so, you know. Our reward for this is Nico reluctantly giving us the Spoils Bag, a monster looking purse that I’d love to have in real life, that lets us store all sorts of monster bits and loot treasure. It’ll be more important later.

But now we’ve arrived at our destination. The place the bird was taking Tetra, and has now taken our sister. The Forsaken Fortress. A nasty place of darkness, once just a simple pirate gang but now something more…sinister. We infiltrate the Fortress in one of the best scenes in this game, but unfortunately lose our sword in the process. It’s time for a sneaking mission. I’m not super upset about this, because it happens at a point where we literally have nothing but our sword and shield, so we don’t feel like we’re losing a lot of power for an arbitrary sneaking mission. It is annoying in that, the biggest threats here enemy wise are actually really easy to dispatch, but I guess the idea is that if they see us they just call in EVERYONE from the entire fortress so we can’t run THAT well. Of course, they can’t force you into jail if they can’t CATCH you, which is what I’ll be trying for here. Our first objective is to kill the Bokoblins at the searchlights, since that’ll make climbing the rest of the fortress actually possible. It’s not that hard to get the first two, but the last one will take some doing and will be done next time.

As an aside, Tetra gave us a shiny sparkly stone that lets her talk to us. Neato. But yeah, that’s it for today. Join us next time where we truly begin operation bird eater. See you all next time, hope you enjoyed.

Super Early Post because I have work at a stupid hour today hoo boy somebody kill me.

[B][URL=“https://www.youtube.com/watch?v=6i25_1MUc4Y”]Zodi Plays: The Legend of Zelda The Wind Waker [3] Forsaken Fortress[/URL][/B]

[B]Video Length: 20:19[/B]

And so we resume our sneaking mission, taking down the final spotlight and trying to navigate our way up to the top of the fortress. We do a minor side track (and I do one myself off screen…) to try and find the map totally on purpose, and end up sneaking our way down to where we get thrown if we get seen. Oops. We also counter the ever annoying Mini-blins, who’s fearsome blood curdling cry of “dankdank” actually kind of scared me as a kid. Something about these creepy imp looking monsters with pitchforks that just really looked scary to me. Regardless, we avoid those (for the most part) and make our way further and further up the fortress, meeting the first of two short cut blocks. Blocks that are quite useful to push down and, as I said in video, responsible for me leaping down and having to restart this entire dungeon effectively as a kid. Aaah, good times

In a twist that’ll surprise no one, I did actually avoid getting seen by anyone, impressing at least me, and we make the final approach. We meet a Green Bokoblin, and after getting our sword make quirk work of him using his own machete. We break our way into the prison and find…our sister! And other point eared girls! We also find the giant bird, who easily removes us, and at the bidding of it’s master launching us into the sea. Fortunately for us…we have a friend. Awakening on Windfall Island, we meet the man who saved us…The King of Red Lions, a mighty looking boat. He can talk, too, and says he’ll help us gain the power to defeat the birds master, Ganon. Spooky. But, alas, we are in need of a sail, for this talking boat has no real means of conveyance.

We end the episode by exploring Windfall a bit, meeting some NPCs, all of whom have some degree of side quest or neat feature associated with them, and all of which have a schedule they follow that’s pretty cool, and will change slightly as we play. I’ll do my best to point these out or show them out, because they’re pretty cool! The main important thing here however is…you know, the reason we’re even still here in the first place. The local shop run by Zinari, an inuit lookin’ fello who washed up on shore with a friend. Alas, said friend was thrown in jail because he looks creepy. If only some kind green stranger would free him from this actually pretty wrongful imprisonment, regardless of who it is. This is a change from the original Gamecube version, where Zinari has on connection to the prison man and just sells the sail for 80 rupees naturally. Without helping his friend, it’s 200 rupees. The starting wallet CAN hold that much so if you avoid buying EVERYTHING and get every rupee drop and secret chest you can, you can have 150+ by this point, so it’s not impossible. But you SHOULD save the guy in the prison cell. It’s important.

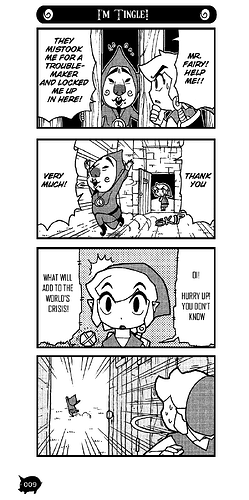
Of course…when we arrive in the prison cell, it’s our good friend Tingle. You remember him from Minish Cap right? 40 year old man who dresses in a green leotard and red underoos because that’s how he thinks fairies dress and he wants to be one. I’m starting to think this wasn’t actually wrongful imprisonment. Ah well. See you guys next time, when we free Tingle upon the world and then do a bunch of side stuff related to this island that we wanna do asap. See you guys then, and I hope you enjoyed!

You fool, you cannot unleash Tingle upon the world. Who knows what disaster he could bring.

1 Like

It is time…for Tingle.

Zodi Plays: The Legend of Zelda The Wind Waker [4] Windfall Island

Video Length: 24:44

Starting us off today, we get around to saving Tingle. For better or worse, we’ve unleashed him upon the Great Sea. In return for saving him, he gives us an incredibly cool mechanic: the Tingle Bottle! We can send messages out on the Wii U’s Miiverse system, and our bottles will appear in the ocean and on the shorebanks of other people’s games. This is actually really cool, and I’ll try my best to show off any good ones (and if any of you have Wii U’s and this game, please feel free to send my your info so I can add you so we can get your bottles). It’s a fascinating mechanic that I feel really fits the world this game takes place in. He also gives us his chart, which shows off a couple interesting things. He notes out some locations, one of which is clearly where he lives so we’ll be avoiding that as best we can, and the location of what is probably some fairies. That’s neat.

Now, I don’t mention it in video, but I’ll bring it up here. In the Gamecube version, you obviously don’t get the Tingle Bottle. Instead you get the Tingle Tuner, which takes advantage of the GBA to Gamecube link cable we saw back in Crystal Chronicles. It lets us make use of Tingle and basically make him a secondary character. The Tingle Tuner let’s the player drop bombs wherever the GBA player chooses for a price, can heal Link for a price, and can even give him various magical effects like making it feel like he’s wearing the Hover Boots. Again, for a price, Tingle loves him some rupees. The Tingle Tuner is also part of a side quest, which is STILL IN THE WII U VERSION, and we DO have to do. There’s another minor side quest which we’ll talk about later when we have more freedom that isn’t required to 100% complete the game, but I think I’ll still try to accomplish in game just to see what happens (it involves the Tingle Tuner and involves upgrading it, so we’ll see). Finally, Windfall Island and the Forsaken Fortress have special areas that if you go to them, the Tingle Tuner prices get slashed in half permanently. This isn’t super relevant but is worth making note of just because of how weird and experimental it all is. Finally, Tingle has a comment to say about EVERY island in the game, which I’ll at least tell you what it is, though not yet. Also also if people are interested enough I’ll bring out the Gamecube again and show off the Tingle Tuner in video, though there is extremely no reason to.

ANYWAY, with Tingle saved, we could go and buy that sail and leave right now. But Tingle mentions something nice in his cell that we may want to spice up our messages in a bottle, and though I’m loathe to follow his advice…it’s good advice. So after a brief crawl maze section we arrive at a place full of skulls and rocks, with a treasure chest! Within we find, the Pictobox! This old fashioned camera is vital to our quest, and obtaining it begins a side quest that spans the entire length of the game. A side quest we won’t talk about indepthly until like…four or five videos hence. The Pictobox lets us take pictures, as you’d guess. They’re black in white, but before we leave Windfall we’ll be fixing that minor issue. Also unique to this game, is that you can take selfies! This is actually really good and also hilarious, and really does let the tingle bottle messages have a lot more flavor and feel to them. Also, because of it’s zoom feature, it is essentially an upgrade to the spyglass, just with more UI stuff over the image.

With that done, it’s time to explore Windfall proper. We meet Doc Bandem, the herbalist that teaches us a bit about Chu Jelly and how we can make fabulous potions. We meet Mila’s Father, a rich pompous man (who would give it all up to save his daughter) who gets super mad at us for doing the classic Zelda thing of smashing his pots. This is great because it flips the whole “go into someone’s house and break their crap” dynamic on it’s head, AND is a reference to the old men in the older Zelda games who’d steal money from you for going into their homes. It manages to both parody a feature of Zelda while also referencing another one. It’s brilliant. The main bulk of the video today though is dealing with The Killer Bees, jerk children that go around the island making noises at people and generally being rude. The teacher of the island, Mrs Marie, asks us to straighten them out. The Killer Bee’s challenge us to hide and seek. It’s fun, and the hiding spots for the kids both point out some stuff we can do around town as well as little nooks and crannies we may of missed. For a seemingly optional thing, a lot of subtle tutorialization happens here that we’ll discuss in another like six videos. We find all the kids, and they give us our first Piece of Heart for our trouble! They then admit that they want us to apologize to the teacher for them, since they have a reputation to keep up. We indulge them, get paid by the teacher, and then are encouraged by the Bee’s to give a Joy Pendant to her. Thus begins another fairly lengthy mandatory sidequest, getting those Joy Pendants! She only gives us 20 rupees for the first one, but rest assured the rewards will be worth it. And again, at least part of this sidequest is mandatory.

Rounding out the video, we go to the camera shop to show off our Pictobox to Lenzo. He admires the craftmanship of the camera that was very likely stolen from him in the past, and asks us to see his photo gallery. We oblige, and it’s a lot of really cool hints and teases about future stuff we’ll have to deal with (as well as the implication that Lenzo is our grandpa?). In reward for looking at his cool pics, he asks us to become his apprentice in photo taking. We accept, and he says he’ll give us three challenges to prove our photography mastery. But that’ll have to wait for next time! I hope you all enjoyed, I’ll see you then.

OOPS almost forgot to post the video today because I was busy recording and editing videos!

Zodi Plays: The Legend of Zelda The Wind Waker [5] Just Straight Creepin’

Video Length: 21:32

In today’s episode, we do a buncha side quests! Primarely, we’ve been ordered by Lenzo to take some candid photos. This is a little creepy, especially given the context of these pictures. We take a picture of Garrickson mailing a love letter, a picture of Gossack being a scardy cat, and a photo of Anton and Linda’s eyes meeting in a secret love. It’s all really skeevy, especially coming from the guy who admits sneaking up on people silently is kind of a thing he enjoys doing. But our reward is a colour pictobox! In the original game, we had to do a looot more stuff to get this camera, but the Wii U version gives it to us now. This is good because it makes a certain side quest completable without going into a new game plus. So yeah, that’s good. With camera in hand we can now complete a few other side quests, but for now we simply make a nice lady feel better about herself.

After that we also have the Battleship esque Sinking Ships minigame. Pay a few rupees to play a single player Battlership style game where you need to kill three squids on a grid (the squids coming in two, three, and four grid space sizes). You’ve only got a certain number of shots, and you get a reward for beating the game, beating it again, then beating the record of 20 or less shots. We shockingly get them all! The main strategy you want for this is to shoot a shot every four squares. Squids can be verticle or horizontal, so if you do it right it’ll be super simple to kill all the squids under the limit. We mostly get a bunch of treasure charts that we aren’t able to make use of yet. But hey, we also get some Heart Pieces!

But yeah, after that we then sail off to our destination, Dragon Roost Island, and receive the instrument (hah) with which we’ll perform the game’s main gameplay mechanic. We receive from the King of Red Lions the legendary WIND WAKER, a conductor’s baton that let’s you command the winds…theoretically. We need to go to the Shrine of Winds just near Dragon Roost to get the Ballad of Winds that lets us actually CONTROL the winds. Interestingly, the game expects you to NOT do that until we’re entirely done with Dragon Roost, but the way the game is set up you’re basically funneled directly to the Wind Shrine. So we go and get the…song? Performance? Whatever, we get The Thing, and then end our video. Next time we’ll explore Dragon Roost proper!

Hope you all enjoyed, I’ll see you guys next time!

Okay, sped-up Salvatore is the best thing.

1 Like

One day we’ll hear sped up Beedle. It’ll be…very good.

We return to Zelda now.

Zodi Plays: The Legend of Zelda The Wind Waker [6] Dragon Roost Island

Video Length: 24:40

In this episode, we actually go out and say hello to the fine bird people of Dragon Roost Island. We meet the mailman who helped us out when our sister got kidnapped, as well as the village chief himself. Turns out, the Rito are having some issues of their own. Valoo, their great dragon spirit, is throwing a hissy fit on the top of the mountain. It’s causing the place to become super volcanic and bad, and making it so that their young can’t go up to him and get a dragon scale to become teenagers. Without a dragon scale, Rito can’t grow their wings, so that’s a big deal. The worst of it of course is that the chief’s own son, Komali, is of age so he needs that scale…and unfortunately he’s all dour and depressed because of it. Our postal worker friend suggests that hey, we’re a child, let’s have us talk to him and see how that goes. Everyone agrees, and they also say to go meet Medli to get some more information. Sounds good. We also get given a postal worker bag so we can do mail things. Neat.

But first, some exploration. There isn’t much to see in Dragon Roost, but there are some highlights. One of the birds wants a Golden Feather for his girlfriend (he actually wants 20 but won’t say as such until you return with one). We also have a mail sorting minigame that’s super easy. Sort the mail, get paid, easy as pie. This minigame is free to play and always gives rewards, and once you beat the record of 25 (after the game decides to tell you that you can do that) you’ll get a raise that makes the pay actually pretty good. Considering the above, if for SOME reason you’re ever low on cash, I recommend playing this one. It’s low risk, and fairly high reward all things considered.

With that distraction out of the way, it’s time to talk to Medli. This cute duck girl tells us a bit more detail about what all is going on, and provides us with a letter to give to Komali. We go visit the sad prince and discover he has the glowy orb that I’m pretty sure the King of Red Lions said we want. We talk a bit, give him the letter, and generally get called out for not understanding his issues. Guess words won’t work. Time for action. Medli told us to visit her at the entrance to the Caverns, so let’s do that. Said area is actually really cool looking, ash flying every which way, a massive rock blocking a spring, and wind howling from the heat. Medli asks us to wait for the time to be right to throw her up to the cavern entrance, and we do so. She…rewards us with a bottle for this, and I don’t rightly know why. I mean yeah mechanically it’s so we can use the spring water to refresh the bomb flowers so we can go join her, but in universe she’s like “yo thanks for throwing me up here. I’m gonna go do a thing that might lead to my death. In thanks, here is this small bit of glassware.”

Regardless, we follow after, and we finally hit our first dungeon! For reference this introduction lasted as long as Skyward Sword’s. Not dissing either game, just wanted to point out that so far Minish Cap is still the “fastest” in terms of pacing, with regard to start time vs first dungeon. Dragon Roost Cavern is a fun dungeon, fairly linear (though one could argue all the Wind Waker dungeons are like that, but more on that in the next dungeon) and with a lot of really good aesthetic choices. Even if you don’t find it compelling to play, the dungeon LOOKS gorgeous, and has a lot of good detail put into it. First things first, we encounter a magic pot that is connected to two other pots in the dungeon. Typically spaced out so that one’s at the mid way point and the other is at the boss door, these are warp points. We haven’t seen them in the other Zelda games we’ve had, but typically in older Zelda’s the miniboss of each dungeon generated a little warp to the front. Minish Cap kinda has the same thing with it’s warp tiles, but it’s not quite the same I feel.

Puzzle wise we don’t run into anything TOO elaborate in this one. The most interesting puzzle here is hitting the bomb flowers on a wall to blow up some rocks, and even then it’s only interesting in that the way I solved it gave us a pretty funny scene if I do say so myself. That aside there’s some block pushing (though Wind Waker goes out of it’s way to make them enjoyable to push) and some light combat against Keese and some Bokoblins, and Red Chu’s, our first new enemy in awhile. All in all, a nice introduction to the first dungeon. Join us next time for when we beat it! Hope you all enjoyed.

Oh man, time for more of this.

Zodi Plays: The Legend of Zelda The Wind Waker [7] Dragon Roost Cavern

Video Length: 26:45

In today’s video, we resume Dragon Roost Cavern, the first dungeon. And what a long one it is, one of the potential complaints I can see levied against this game is that the dungeons are in fact very long. But no matter, we’ll make our way through without much trouble. Today’s episode we begin by showing off something I had thought we showed up yesterday, and if you’re a close reader may of noticed before I edited it away. First, we show off how the rat shop works, and then we get a call from the King of Red Lion’s on our mysterious stone that Tetra gave us. Weird, that. How’d he get this number? He…then proceeds to tell us about rat shops. Thanks boat. We also encounter Magtails in this episode, annoying worm enemies that are only vulnerable in the eye, and Fire Keese, which are keese but on fire.

So one of the problems of my new, more constant job, is that I record a lot in advance and I forget all the details of what I did. So that’s making this write up a bit harder than normal because…I sort of forget the fine minutia of the dungeon now after like two weeks. Long story short we get through the dungeon solving various minor puzzles that are relatively easy and not worth mentioning in overt detail except maybe the fact that some rope bridges can be cut down, which is cool. Also the giant platform we need to do a spin slash to free from it’s ropes, that one is cool too since to me it feels like an evolution on the water platform puzzle we see throughout the dungeon, but with differences in kind that make it more unique. It’s a better “difference” than the one we have to deal with that has that Magtail in our way though. That one is…always a sore spot for me. We collect treasure chests as we go, some which contain items we need to progress and some which are just treasure, or even treasure charts, because dungeons are so massive in this game they even have optional loot.

Finally, after a great deal of faffing about, we reach the summit! The path falls behind us, locking us off from ever returning up here. I’m trying to conceal why I’m taking all these photos, but suffice to say, if you’re following along please take a picture of Valoo now like I do. Up on the summit we see that Medli has been captured, and do our best to save her, slaying the Bokoblins that protect her cell…and then the Moblin that gets air dropped in! Moblins are a good deal harder to take down than Bokoblins, their spear doing quite a lot of damage (especially for when we have three hearts) and having quite a bit of range. In the end we managed to beat him, though my messing around to try and show off something leads to us getting our faces kicked a few times. Medli thanks us and gives us the dungeon item, basically right at the end of it: the Grapple Hook! This lets us grapple to things and do rope swinging, like a real swashbuckler. It also very briefly annoys enemies, and steals their loot item from them, giving us a 100% chance of obtaining it since we just…steal it from them. It even leaves their modal as well. Subsequent uses steals hearts and rupees and stuff. The grapple hook has other uses, but we’ll talk about those next time.

With grapple in hand, we’re able to do the stuff that gets us the Boss Key, as well as get to the boss door proper, which we do. Once inside we are faced with an old foe, in a new form. Gohma, the armored parasite! This one is vaguely scoprion/armaldo esque in appearance, and is quite rude. Nipping at Valoo’s tail and making him angry. It’s up to us to stop her…but first a quick selfie. Or at least, that’s what I would say, but sadly selfie shots do not count for the purposes of the side quest that the photo taking is secretly a part of. This actually super disappointed me, and because of my confusion with regards to it I was thrown off my game FANTASTICALLY, leading to the worst time I’ve ever had fighting Gohma. The way we beat her is to hook Valoo’s tail, swinging across the arena and dropping the roof down on the foul beast. If you do it properly you land on the rafters and defeat Gohma with basically no effort. I keep on juuust missing it, due to my frustration. After three times the rock sheet we’ve been dropping on her shatters, along with her armour. Then it’s just as simple as hooking her face to drag her within sword range to finish her off.

With Gohma’s defeat we get our first Heart Container, and we’ve saved Valoo from it’s torture! The bird people thank us greatly for saving their way of life, and Komali himself gives us the divine Pearl of Din. Valoo speaks to us in a language we do not know, and Medli tells us the gist of what it means. We’re a cool hero huzzah! If you do know the specifics of what they say, don’t tell us. It’s something I’ll go over later, since we’re not supposed to know the finer details of his speech yet. With Pearl in hand, the King of Red Lions then tells us…to go meet Zephyr of the Winds so we can gain magical wind controlling magic, maybe. Potentially. This is what I meant earlier about a minor, inconsequential sequence break. You can, and given the layout of the island should basically be expected to, do the wind shrine bit of the island first, but here we see quite plainly that they did not intend for you to do this. It’s just a weird thing I noticed.

Anyway, that’s it for the video. Join us next time where we…do a lot of stuff actually. Hope you all enjoyed, I’ll see you then.

1 Like

Onwards, to more of this.

Zodi Plays: The Legend of Zelda The Wind Waker [8] A Faster Sailstrong text

Video Length: 24:52

Starting us off today, we finish off most of what all we need to finish off on Dragon Roost. We take a picture of a dude for reasons I’ll truly elucidate later, get another treasure chart from within Dragon Roost Cavern that we couldn’t get until we got the Grapple Hook, and then finish up the mail sorting minigame to get it’s final reward, a letter from the part timer to his Mom. We send it for him for a small fee of 5 rupees, and later his Mom responds to us with a letter of appreciation. We get a Heart Piece from the deal as well, which rules. Usually my coworkers parents just annoy me and ask me why their son isn’t in today because their entire family moved to BC and left him up here. Would that I’d be so lucky to get some fancy magic jewelry. Ahem.

After that we leave the island, and in doing so are introduced to the reason why I spent so much money on all that bait. Roving every island is a Fishman who’ll map out the island of that cell coordinate on your Sea Chart. He also gives hints about puzzles in or near the island, and sometimes just makes some good jokes. There’s other stuff we can do with the Fishmen, but we’ll get into that later. After that, it’s time to return to Windfall. Now that we’ve unlocked “the ability for time to actually pass” there’s stuff we can go over there that definitely wants to be done sooner rather than later. On our way we stop by Pawprint Isle to properly investigate that strange stone dome. Within are a ton of Chu-chu, plus a heart piece. Weirdly, there are other treasure we can get here, but it’s apparently all just money. I’m surprised that they hid the monetary rewards behind things we can’t break yet, but the HEART PIECE, that gets to be just out in the open. Weird.

Anyway, we return to Windfall, and check out some stuff. For one, we give Doc Bandem some Red Jelly to get healing potions unlocked. We can buy them, but we get a free copy every time we just give him the five jellies required for him to make it. Makes sense. More importantly however, we check out the home of that rich man. Turns out Zinari rents it out to hold an auction, and we’ve got a couple prizes to get. But we’re gonna focus on one for now…new to the Wii U version, it’s the Swift Sail! This majestic item lets us zoom along the seas at a faster speed than the regular sail. It also makes it so that the wind changes to always be behind us. This is SUPER useful, in many ways. It removes a lot of busy work in changing the direction of the wind manually, and just expedites travel time in general. I don’t mind the slower sailing, but the Swift Sail is vital later on when you’re crossing the entire ocean back and forth trying to get every Fishman. But in order to obtain this sail, we must do some auctioning. Auctions work fairly simply. Over time and through mashing A you’ll build up hype to put in a bid, if you bid higher than the current by a certain amount you stun your opponents. The stun time was reduced from the Gamecube version, making it slightly harder. As you can see, I…kinda cut it close here due to that. But, the sail is ours.

Finishing up on Windfall, we talk to the somber and sad Kamo at night and see that he’s not all that bad. He’s just a nighthawk with social anxiety, living on a super business merchantile island. I’d probably be morose and emo too if I was confined to such a tiny, loud space. He looks up at the moon, wistfully wishing it was the girl of his dreams, but he likes it all the same. So obviously we snap a picture of that to show him in the morning to cheer him up. To facilitate that we go to Tott and, following his instructions, command a wonderful song known as the Song of Passing. Within an instant, it is now day, and we’ve learned the ability to change the world from day to night. Fantastic.

With all said and done we return to Dragon Roost Island, and pick up the treasure chart treasure we had here using our grapple hook, accessible via boat as a salvage crane. Unlike the original game, we no longer have to have it on an item slot to use it. It’s regulated to the D-Pad like the Wind Waker, and it is incredibly good that they do this. Additionally, while I can’t show it to you, the Wii U showing the maps and charts on the game pad screen makes finding these treasure salvage spots super easy. We can see Link on it in real time, and just move over the X and get it in one shot. It’s great.

Join us next time where we…actually continue the plot. I swear this’ll probably be the last diversion until we hit The Point. Until next time, I hope you all enjoyed. I’ll see you there!

Oh look more Zelda.

Zodi Plays: The Legend of Zelda The Wind Waker [9] Forest Haven

Video Length: 23:16

Today, we finally head off to our next destination, due south of here. In our way are a couple of islands, some of which have a level of importance to them worth thinking about, some of which that are decidedly not. Still, they’re all good islands in their own ways. Directly south of Dragon Roost is Fire Mountain, a smaller volcano than Dragon Roost but a far more volatile one. It’s interesting, but the advice the Fishman gives for it is more interesting. If I didn’t want to specifically get to the new plot island today I’d go check out what he said! Further south is the Eastern Triangle Island. Presumably there are other triangle islands near it, and looking at our map we may or may not have a treasure chart for this island, or at least one like it. The only thing of note is a weird statue with that ancient language on it, and a symbol that I swear we’ve seen before. Below that is Bomb Island, one which seems to be quite the puzzle…but we have no means of solving it just yet. We’ll be back some day, I’m sure. Somewhat annoyingly, if we had arrived here during the day we’d of met someone new, but we missed it. Dang. We do however meet Old Man Ho Ho, a traveler with a spyglass. Pay attention to where he’s looking and what he says, he gives you hints as to a location in the sea you can go to!

Follow Old Man Ho Ho’s mutterings, we find a wooden submarine piloted by monsters! It’s an easy infiltration, and within we find a whole bunch of Bokoblins and rats, the rats of which are VERY annoying and show off how they steal rupees when they hit you. Super annoying, to the point that I spend perhaps far longer than one should trying to murder all of them. However the real important thing here is that, if you kill all the Bokoblins, a chest appears. Within said chest is another bottle! We’re up to two and it’s only video 9, that’s quite a big deal! It is in fact quite vital to some of my secret plans I’ve got in store.

One more tile south we reach our destination, Forest Haven. The King of Red Lions instructs us that we’re looking for another Pearl here, though this one should be easier to obtain. The island has a few new monsters for us to fight. First, the Boko Baba, which is where all those hardy Boko Sticks are coming from, because they’re NOT Deku Sticks as we’ve been mistakenly calling them. Oops. Boko Baba’s are rude plants that do as you’d expect their normal Deku Baba cousins to do, but they’re unique in that they can also do a grab move. Don’t get eaten by plants! Each Boko Baba has a Boko Seed inside it, full of concentrated evil and magic. These are…the least useful of the loot items, but it’s still worth a consideration. Next up we have the Octorok, the classic Zelda enemy. Like the ones in Ocarina of Time they just hang out in the water, spitting rocks at us. A shield block can simply send the rock back, killing them in one shot. Further into the Forest Haven, we find a gigantic tree with a face on it…and he’s having some trouble, as he’s covered in Chu-Chus! And not the good kind. The classic Red ones are there, but we’ve got Green ones now too, which have the unique and annoying ability to sloomp into the ground as slime, avoiding all damage for awhile.

After killing the gross goo, the tree is healed, and babbles some gibberish at us we can’t understand before apologizing. Our old clothes reminded him of an age far gone, and he forgot himself. Introducing himself as the Deku Tree, he says he’ll gladly give us the pearl…but first he must finish the ritual with his lovely forest friends, the Koroks. These tree people are incredibly adorable, and I definitely don’t mind staying until their festival is over…only there’s a problem. Makar, one of the Koroks, is missing! Taken in by the Forbidden Woods nearby. Guess it’s up to us to save him. The Deku Tree gives us a Deku Leaf, which lets us paraglide through the air on a magic meter based timer, as well as send blasts of wind at our foes. We also get a minor tutorial on how Boko Buds work, which is a fun mechanic if a little disorienting due to the every so slightly weird camera angle.

One of the interesting things about this run is, due to my insistence on stopping at every island, wev’ve come here during the day. This almost never happens to me, and it’s kinda weird. I feel this area works far better at night, and probably should of done my best to fix this, but such is life. I’ll consider it next time something like this is a thing. At any rate, some tricky flying and maneuvering around another new enemy type, the Peahat, aside (we’ll talk more about them in the dungeon proper) we finally reach the Forbidden Woods. Say hello to dungeon two! I dispatch some Green Chu-Chu’s, but other than that we don’t step further in today. For that, you’ll have to wait till next time.

I hope you all enjoyed, and I’ll see you when the next video comes up. I think of the early dungeons, Forbidden Woods is one of the more interesting. It has probably the best examples of some of the things people really like about Wind Waker dungeons, which also happen to be the exact things people really DON’T like about Wind Waker dungeons. But of course, more on that next time.

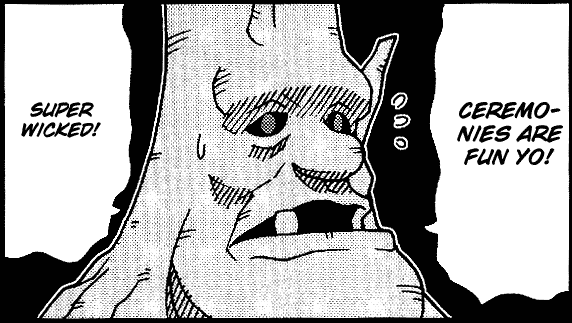
The Great Deku Tree is the source of one of my favorite standalone Link’s Logbook panels:
Zelda WW - Chapter 5 - Page - 004

1 Like

Onwards, into the Forbidden Woods.

Zodi Plays: The Legend of Zelda The Wind Waker [10] Forbidden Woods

Video Length: 25:11

In this one, we actually begin the second dungeon proper! The Forbidden Woods is an interesting dungeon with some interesting mechanics that iterate across the entire place. It’s main mechanic is finding ways to bust open these plant locks, gross vines that keep us from opening doors. We need to find a way to smash the bulb that is the source of those vines, and while there is usually an option around at hand, sometimes there isn’t. One of the ways we deal with this is by using these hard nuts scattered around, huge nuts that slowly (very slowy) start to disintegrate when picked up. A quick toss as the plant lock bulb will destroy it utterly! This nut is used a number of times, and can be greatly influenced by the Deku Leaf’s wind blasts. The second main mechanic of sort you encounter in this dungeon are then gondolas, platforms that are moved by blasting wind at some fans. They’re more than a little finicky at times, mostly because one just spinning it isn’t the answer, you have to spin it a specific way to move then gondola a specific way. Another option is to just blast some wind behind you to move the gondola forward, but sometimes that feels “bad” or “wrong” but it’s really because the rope for the gondola is shorter than you’d expect so you just go slower. We’ll be seeing both of these mechanics used throughout a good portion of the dungeon.

Now let’s talk about enemies. You’ve already met the Green Chu-chu’s, but lets talk about the rest of the fearsome foes of the forest. We’ve got Morths, strange spike ball guys that don’t actually cause any damage to us, only sticking to us and making us all stompy and slow. The only danger they really pose is agonizing pain for the poor friend who’s keeping track of my kill counter, for then purposes of science. Making that worse are then Mothula, a rare enemy in the dungeon. It’s a gross insect that lunges at you, trying to chomp Link’s little feet off. It can also spew out more Morths. We actually encounter a winged Mothula as a miniboss as well, but it’s not actually a different enemy. Mothula’s with wings give you gold feathers like Peahats, which is weird. I’m basically just going to assume gold feathers are so rare (since otherwise they’d only be from Kargarocks, an enemy that basically doesn’t fit any dungeon in the game) that they decided to just give it to all winged enemies. Speaking of, Peahats! These annoying plant orbs spin their petal feathers around to fly, and the rotating blades deflect your sword swings. You’ve gotta stun em with the Deku Leaf, bending them all out of shape so you can stab them. They will of course straighten those leaves out after awhile. The final enemy in the dungeon are Dexivines, which aren’t actually counted as enemies and I never actually interact with. They grab you, hurt you, and throw you around a little bit. How rude!

After pushing our way through the dungeon, we eventually come across the dungeon item after slaying the winged Mothula. Within we find the Boomerang, an amazing tool for our arsenal. The boomerang in Wind Waker is great, able to target five things at once when you go in direct aiming mode, bouncing around or otherwise curving to strike at the targets. It kills Boko Bada’s immediately, disarms Peahats for a longer amount of time, does weird modal freezing stuff to the Mothulas, kills Morths, it’s great. It’s also used to solve a specific puzzle, cutting down the flower in the, for lack of a better word, hub of the Forbidden Woods. When we first get to here, we are given a path that lets us go up to the top of the flower (near the dungeon’s middle warp pot) that lets us clearly see “oh, we should cut the vines. We’ll need something to cut it then come back here”. But once you get the boomerang, you can go a new path that lets you see some new stuff, try out the boomerang a bit on some vines, and then get plopped out right in front of the flower in the hub room. The other vines being so nearby and required to cut basically makes it obvious what you need to do, and the lack of backtracking is…annoying, to some people.

I myself don’t find this a problem. Backtracking, while it can be made fun by introducing new concepts or iterating on room design by having your newly found item doing something new in those rooms you traverse across…it’s still backtracking, which I feel is never a really fun mechanic unless the game is designed around it (like say, Metroid). Others disagree, thinking that it’s good because it helps give the player, among other things, a feeling of power since it’s a place you’re familiar with but now you have new tools to get through it faster or in a better way. It helps the player have to have a mental map of the dungeon so they know HOW to get back to where they’re going, rather than just hitting a new shortcut that puts them right where they need to be. It makes the dungeon feel less linear, a problem that the Wind Waker dungeons have overall as a sort of problem. Again, I don’t agree with this, but I can definitely see why someone would look at this and say “this is right”. If you want to hear more about this (and just dungeon design philosophy in general) please feel free to look at Boss Keys by Mark Brown, a very fascinating and great producer of content. Warning that spoilers abound, and also he’s one of those people who dislike Fi I think a little overmuch. He also does Game Maker’s Toolkit, which talks about game design in general, and it’s REALLY good.

I bring all the above up because the Forbidden Woods is basically the most egregious example of Wind Waker’s Linearity. You don’t feel clever for figuring out you need to cut down the flower, because the game literally plops you in front of it after a room full of vines that you have to cut. It makes it clear that there’s really no choice to the dungeon, and that it’s more just a series of rooms to solve before going on to the next one. Like I said, I don’t really mind this. I think it works perfectly fine, and that some dungeons in some of the Zelda games are perhaps a bit TOO open (we’ll talk about this way later when we hit Link to the Past, thank god you guys didn’t vote for that) but overall, I can’t fault people for saying they prefer dungeons with a bit more freedom.

Anyway, we cut down the flower, breaking open the floor and letting us progress onward. We end today in a room where there’s a large red flower that we need to cut down, a further iteration that’ll probably lead to some Minish Cap flashbacks. Hope you all enjoyed, I’ll see you guys next time!

Oh hey more Zelda I guess

Zodi Plays: The Legend of Zelda The Wind Waker [11] Kalle Demos

Video Length: 21:41

Starting us off this episode, it’s time to raft. Only for a bit though, they realized the precision controls for the Deku Leaf are, perhaps, not very precise, so the flower top rafting segment is very short. This leads us to a room that I’ve always had problems with as a kid. A big tree stump/former house with a series of crystals around it. The swirl on the tree stump makes it clear, hit em all with your boomerang! But as a kid, I don’t know why but it’s never worked 100% of the time. I always had to repeat it a bunch. But here I do it first shot so bully for me. Doing this unlocks the chest for the Big Key, so now we’re ready to take on the boss of the dungeon! But first we’ve got some moblins in our way…the first time fighting two of them, and the first time fighting any where we have access to the grappling hook. The loot item you can steal from Moblins is the Skull Necklace. Depending on your definition this is probably the least useful loot item, but also the one that has the most uses. So that’s…a fascinating bit of overlap isn’t it. Huh. We dispatch the moblins, and make our way to the boss room.

We slice our way path two annoying Mothula’s to find ourselves in the room just before the boss. It’s a fascinating looking area, with a really interesting feel to it. The big door, the lighting of the torches, the chestnuts laying around full of enemies and items and stuff. As always there is a warp pot near the door, which we open. Now then. It’s time to face the boss.

Or we could just leave. That’s an option too. We return to the Forest Haven and pick up some of it’s spring water. The Forest Haven, due to…you know, being a haven for the forest, has rather pure water. It also happens to be magical, giving you an infinite amount of water for 30 minutes (20 in the original Gamecube version). The timer starts counting down once you leave the Deku Tree’s house. Why did I do this? Well…you’ll see.

Returning to the boss chamber, NOW it’s time to fight Kalle Demos. Kalle Demos is a tiny little plant with a massive body beneath it, protecting it from harm. Thankfully for us it’s got vines to attach it to the ceiling, giving us a perfect route to disabling it’s protection. That’s what you get for having too heavy leaves jerk! Kalle Demos’ only way of attacking you is to send out it’s roots to flail wildly at you in an attempt to hurt you. It’s honestly the least threatening boss in the game, especially given the Wii U version lets you move while aiming the boomerang. A boss that might be a little tricky due to managing your positioning has now been rendered moot since you can aim and shoot. The worst of it is, the flower will close back up after the vines regrow, and if you’re within the bud you’ll get ate and take quite a bit of damage. Thankfully, we have just the solution to this problem.

With Kalle Demos defeated, the good boy Makar is saved and another heart can be added to our collection. We also took a shot of Demos for later. We return to the Deku Tree, and Makar plays a really good song that I’ve always really liked, while the other Koroks dance about and sing, and with some effort the Deku Tree creates seeds that drop down for his little tree children. All but Makar and Hollo take a seed and fly off to random parts of the ocean to plant a tree from those seeds, in the hopes that their roots will pull the islands upward. Perhaps one day they will make that fabled thing once known as “land”. In return for our hard work, the Deku Tree gives us the Pearl of Farore, a glowing green crystal, and second in our quest. Just one more remains!

But now. Now it is later. So it’s time to do the thing. Climbing back up the Deku Tree, we go one step beyond and come out at a different opening in the Haven, and spy a mysterious bunker down on one of the mini islands nearby. Soaring down on our leaf to investigate, we find a kid named Manny. He wants access to this so called “Nintendo Art Gallery”. While we don’t have a member pass, we DO see the crystal needed to open it. And we did buy those pears…using one of our pears we take control of a seagull and fly it into the switch, opening up the bunker! This is I believe a sort of sequence break of sorts, since the bird always reacts a little weird to the switch like you’re really not INTENDED to be able to hit it with the bird, but then hey it works so why not. Once inside, we meet Carlov, who you may recall from Minish Cap was a mini-fig creator. Well in this one he makes full on statues, based on photos we’ve taken.

Those of you paying close attention may of noticed the “good!” marking on some photos we’ve taken. That’s new to the Wii U version, a way to tell if the picture is good enough for Carlov to make art from it. This is a long running sidequest that spans the entire game, and I will be finishing the entire gallery. This is, for lack of a better term, GOING TO TAKE A BIT. The reason for that being, EVERY NPC and EVERY enemy, boss or otherwise, shows up here. Some of them are obtained as a set and some are missable, and I’ll be getting them all. That Rito I took a picture of awhile ago, he vanishes after a certain point, for example. In the original game the pictobox could only hold three photos at a time, and Carlov could only do one statue at a time. Here the camera’s got higher capacity and Carlov can work on all of them at once. This will greatly speed up the process, but even then it’ll take awhile.

But, that’ll be for later. For now, we’ve finished the video. Hope you all enjoyed, I’ll see you guys next time!

Makar’s the best Zelda character, and nobody can tell me otherwise.
The nice thing about the figurine quest in HD is that, thanks to Miiverse, you can get a lot of figurines early on, including the last ones, (provided you allow spoilers, anyway.) I 100%-ed the figurines last time I played, meaning for my next playthrough I’m free to use the camera exclusively for selfies.

Yeah, sharing pictures is fantastic a mechanic, especially if you miss any. I’ll definitely keep that in mind when I get to actually finishing it up.

I’ve been super messed up on what day it is due to work, but here have a Zelda.

Zodi Plays: The Legend of Zelda The Wind Waker [12] Greatfish Island

Video Length: 25:43

In today’s episode, we begin by doing some clean up. First of all, we take a photo of near everyone on the island (only missing the Koroks who left, who we’ll get later) and getting all the enemies we didn’t have, minus the octorok which I just plum forgot to get. We also pick up all the optional chests we missed, getting a good handful of loot items plus the final Treasure Chart the Forbidden Woods has. After giving the photos away and reporting back to the King of Red Lions, we get told our next destination. Far to the north east is another island, and on it another Pearl. Onwards!

The boat trip is pretty chaotic, as far as traveling in this game goes. We pass by or otherwise make landfall at a couple of islands, the most immediately pressing of them being the Private Oasis, owned by Miss Marie of Windfall Island. It is here that we encounter our first miniboss of then sea, the Eight Eyed Big Octo! These bad boys create a whirlpool around them, trapping you in a slowly shortening loop. Once you get to close to them you’re sunk, and deposited somewhere else on the Sea, missing some hearts. The Big Octo itself is pretty challenging to deal with right now, since we only have a boomerang and that can’t really damage the eyes all that fast. Luckily, I was able to destroy him…and less luckily, I forgot that then eight-eyes only give rupees as a reward. As a result, we’ve finally taken a big hit to our wallet in terms of efficiency. Let’s hope this doesn’t come back to bite us. Other enemies of note include the Seahat, large fish based Peahats that are a massive pain to deal with, pirate warships that we cannot deal with yet AT ALL, and gyorgs, who are barely there shark monsters that can do basically nothing to you.

One thing of note is that we start hearing about some weird stuff from the Fishman. Tales of golden silverware and ways to find pieces of it. You may recall an Old Man Ho Ho said something along those lines back on Outset Island too. Mysterious. Tingle also has some…interesting things to say about the islands, mostly things that raise questions like “okay so the Great Sea doesn’t have fish, but we know crabs exist, is sea food still really a thing or not?” It’s something that’s somewhat unclear, and Tingle being Tingle he just has to raise more questions than we’ll ever get answers for.

Anyway, after all is said and done…we arrive on Greatfish Island. And find that we were not here first. Hope you all enjoyed, I’ll see you guys next time…where we deal with what just happened.