Noob Plays: Sid Meier's Civilization VI

Good morning, afternoon or night (depending where you are right now) everyone and welcome to BigScreens’ Noob Plays: Sid Meier’s Civilization VI.

Ah, Civilization. The acclaimed, old as shit 4x - eXplore, eXpand, eXploit, eXterminate - game where you take control of a historic personality in charge of a Country/Territory/Empire/whatever-statelike-organization-has-existed. Then, you have to, in Sid Meier’s own words: “stand the test of time”, which reads: crush your enemies under your army’s feet, build a rocket and leave to Mars, force them to buy your stupid jeans and listen to your catchy pop music or straight the planet on the ways of your god.

Civ VI has been out for a couple of years now, with one expansion, Rise and Fall, and a second one called Gathering Storm on its way, arriving on Feb. 14. The expansion will bring new features like climate change and a bunch of new civs like the Inca, Maori and Canada. To stave off the hype, I decided to do this Let’s Play, since I’ve been toying with the idea of trying the underrated art of screenshot LPs.

At first I’ll try to explain the game for those who aren’t familiar with the series. Then, I’ll just play and show you what’s happening. Just keep in mind that I’m kind of a noob, so I have no idea if I’ll be able to properly explain every game mechanic (hence the thread’s title).

The main objective of these series is to win at least one game by each victory condition (except score cause score is dumb), in no particular order. I’ll begin on Prince difficulty, bumping it up by one level for each win (I’ll probably put a limit to how many tries I’ll do before tuning it down again. Remember: noob).

I’ll be using some mods. Nothing that changes too much of the game, just add some QoL improvements.

Ok, so without further ado, the disclaimers:

  • Sid Meier’s Civilization VI is property of Firaxis/2K. Every single image from now on will be taken direct from the game and doesn’t have any monetary intent.
  • The mandatory “sorry for my english”.

And here we go:

Once you launch the game, you’ll be treated to the usual main menu screen, which is pretty self-explanatory. Single/Multiplayer, Scenarios, Quick Play etc. Also, you DEFINITELY should stop for a second and hear the music. Christopher Tin won a grammy for Baba Yetu, the Civ IV song, and he nailed it once again in Sogno di Volare.

Anyway, I’ll choose ‘Create Game’ and these settings for our first playthrough:

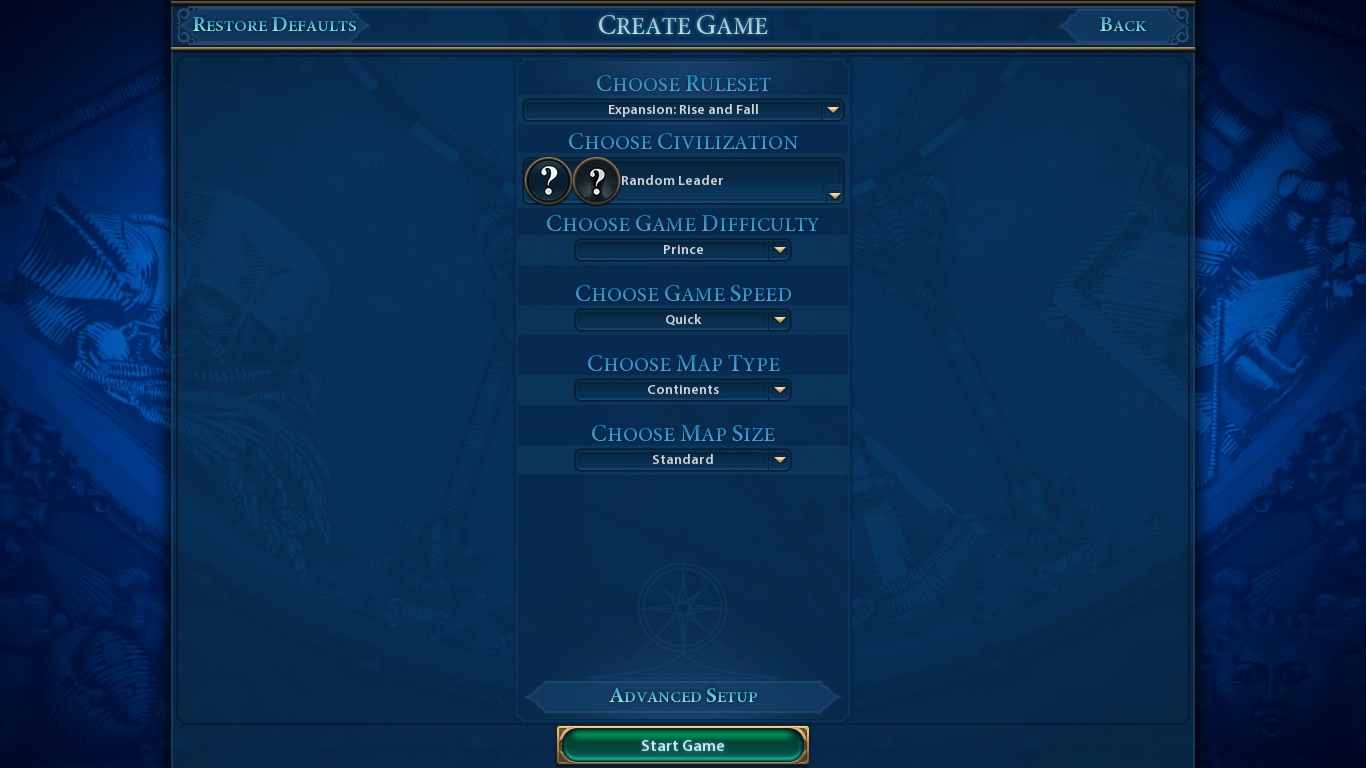
I’ll also go to advanced setup and disable turn limit and score victory because, again, these are dumb. I like to play until someone wins.

After pressing start, our leader/civ is revealed to us:

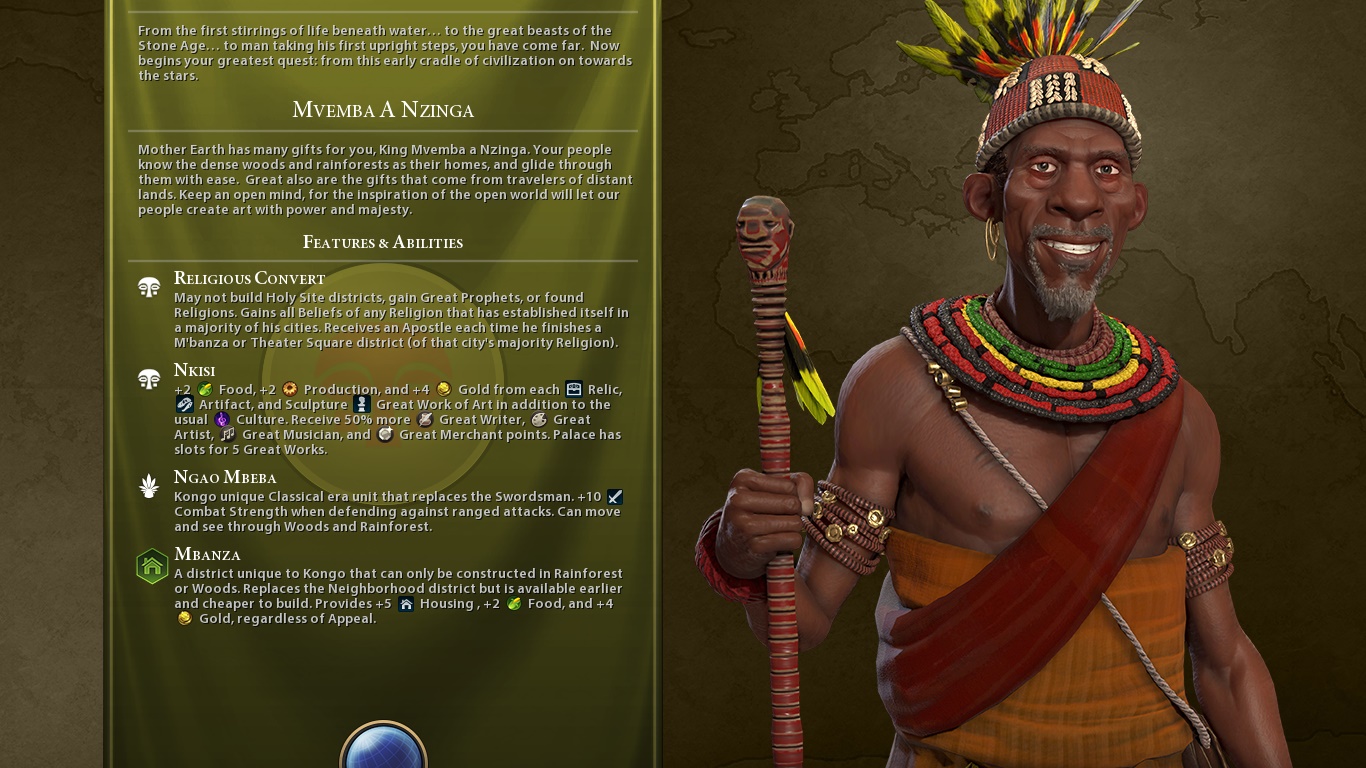
My resolution seems wrong due to Loading Screen Mod’s changes. The original interface is just “an unique unit/building/district

Mvemba a Nzinga from Kongo! Mr. Nzinga, also known as King Afonso I, was the second Christian king (or Manikongo) from Kongo. After his father converted to Catholicism, he was also baptized and became a zealot Catholic, with his entire reign being marked by it. He made an effort to syncretize Kongo’s original faith with the Christian beliefs.

So, Kongo is a civilization for whom there’s one victory type less: the Religious one. They can’t build holy sites, gain Great Prophets nor found religions by themselves. Instead, they use the beliefs from the religion established in the majority of their cities. Neat. The tradeoff is that they’re geared for culture, and religious relics are even better for them in this sense thanks to their Unique Ability: Nkisi. It gives them more food, more gold and more production for each Relic, Artifact and Sculpture in their museums. It’s also easier for them to generate Great People.

Both their Unique Unit, Ngao Mbeba, and their Unique Infrastructure, the Mbanza district, are meant to take advantage from the terrain. The Mbeba are faster in woods and rainforest, and the Mbanza can only be built in it. The district gives good housing, along with food and gold.

Didn’t understand a thing? No problem. It will all become clear in time (or so I hope).

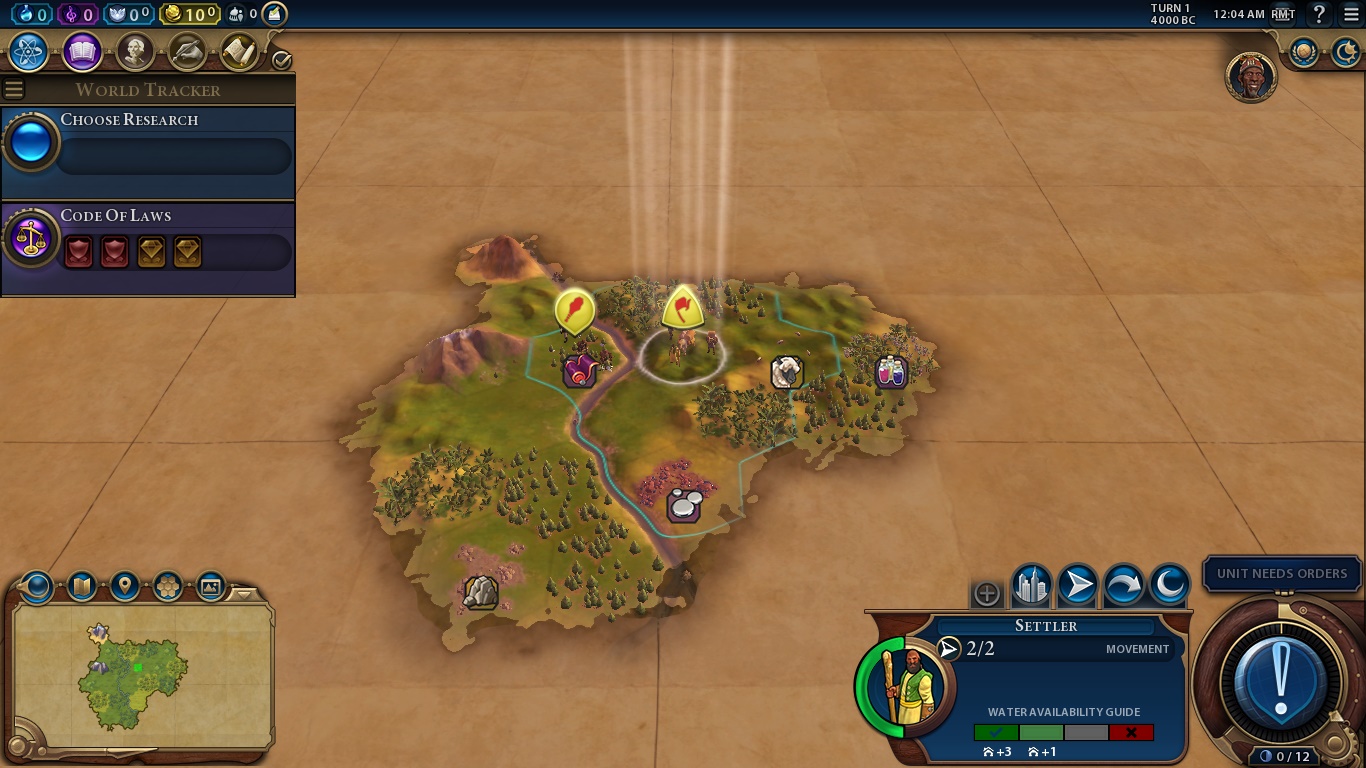
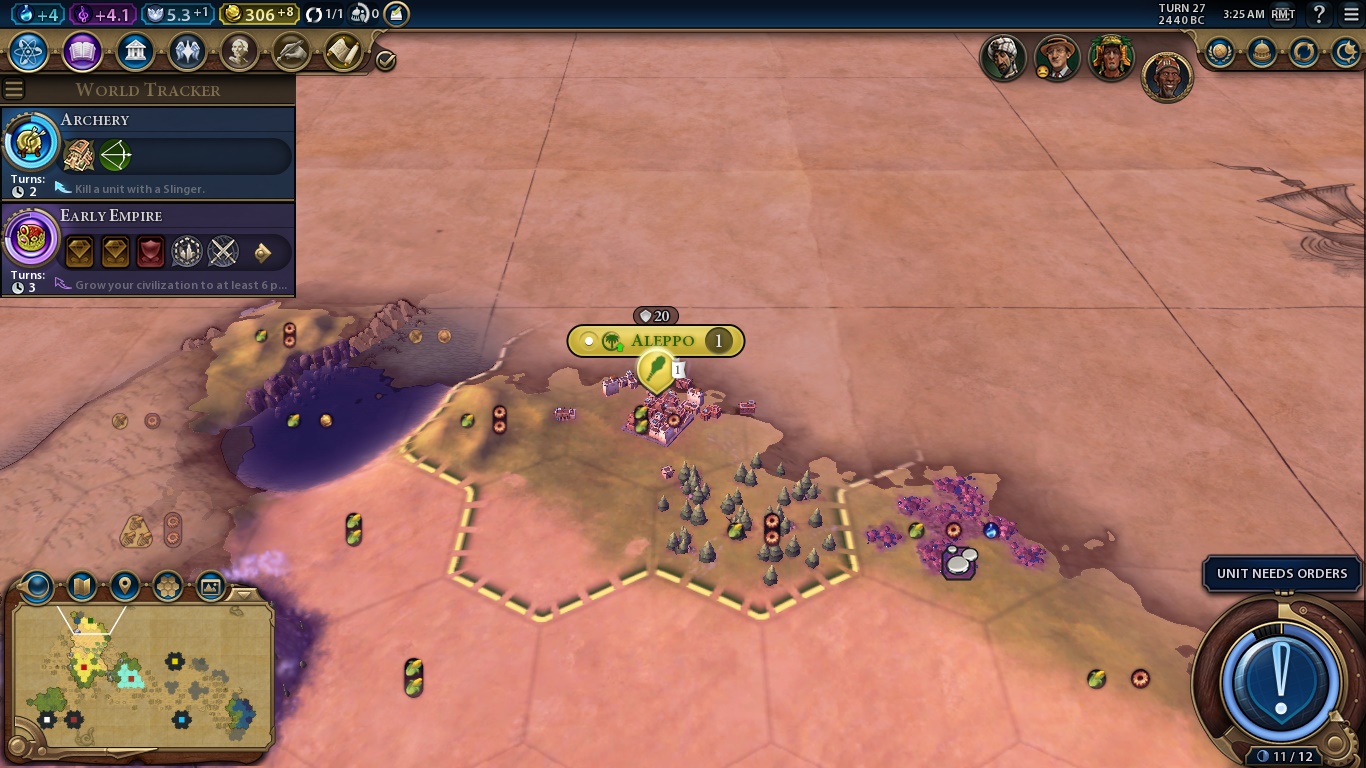
Here we are. The game in all its cartoonish glory. There are a bunch of things we can see right away. Let’s start from the start: The buttons on the upper left are, respectively, how much we earn of science, culture, faith, gold and envoys, with the report button being the last one. Science allows us to evolve technologically, culture makes our state/society as a whole more complex, faith is necessary to found a religion and everything related to it. As Kongo, our faith points will be expended in other things. Gold is, obviously, our currency. An empire in debt is highly inefficient, and we can even rush-buy some things if we have enough moneys. Envoys are sort of diplomats that we send to city-states to be their suzerain and earn unique bonuses.

On the top right, we have the turn, the year, the local time, RMT is the radial measuring tool, a mod which allows you to see until where your proximity bonus bonuses apply, the Civilopedia and the options. Also, there’s a small portrait of Mvemba a Nzinga, a world ranking button where you can see how you currently stand in all victory types and an Era button, which we’ll delve deeper later.

Looking left, we have the tech tree, where we can choose what to research, see further techs and their requirements. The civics tree is the tech tree for culture, and, as we can see in the pic, we’re already researching Code of Laws. It’s the mandatory first civic. Right next to it, we have the Great People and Governors buttons. More on those later. The last one is the history timeline, a Rise and Fall feature where you can see the proudest moments from your civilization. These points translate into Era Score (you can see it on the lower right, the 0/12 next to the small moon symbol). The game’s timeline is split in eras: Ancient, Classical, Medieval, Renaissance, Industrial, Modern, Atomic and Information.

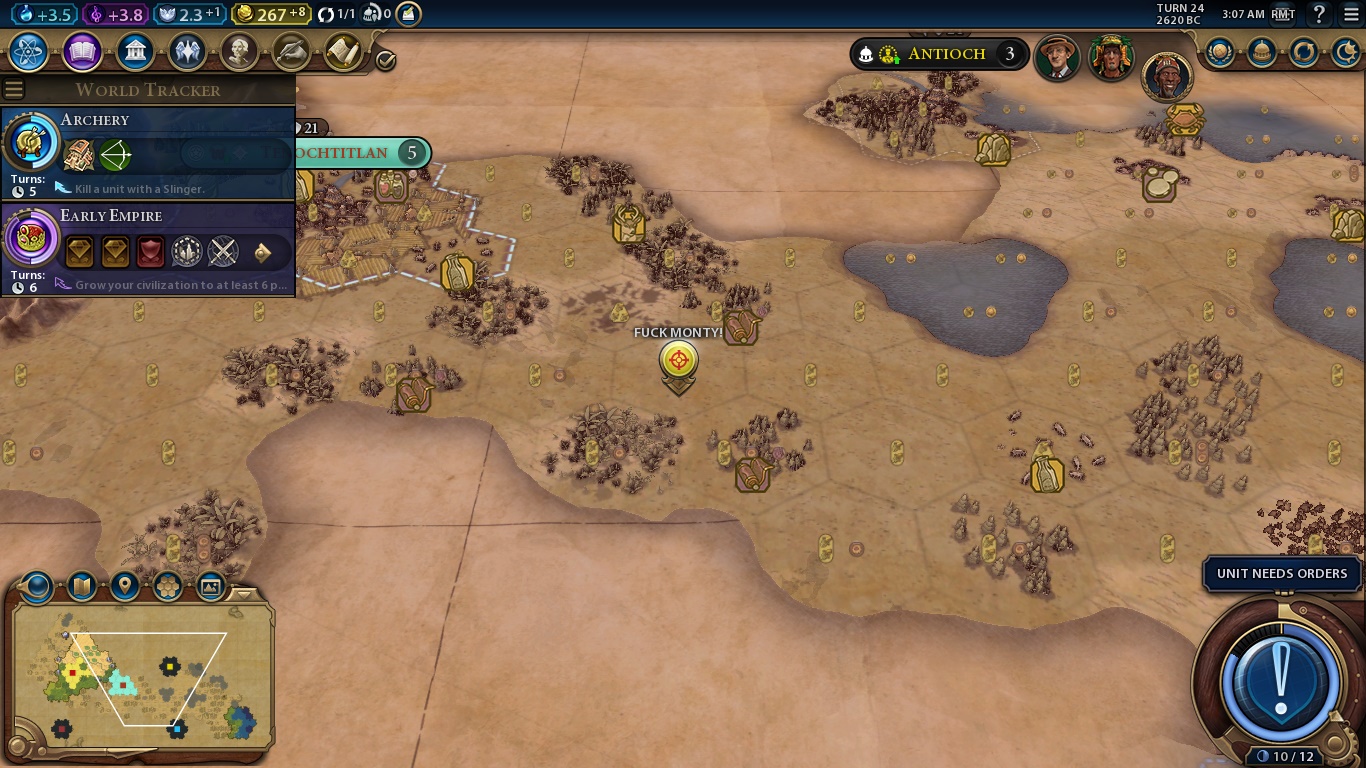
Down left, we have map options and the minimap itself. The first button, the lens, changes the interface to whatever you choose. Continents, Loyalty, etc. The second one is the map options, and I highly recommend to tick the “show yields” box, as it’ll be a lot easier to know what each tile generates. Map Pins are little markers that you can put on the world. The strategic view is usually the last button, that last one is just screenshot mode (it hides the interface so you can take nice pics) and comes with the UI mod. Strategic View is great.

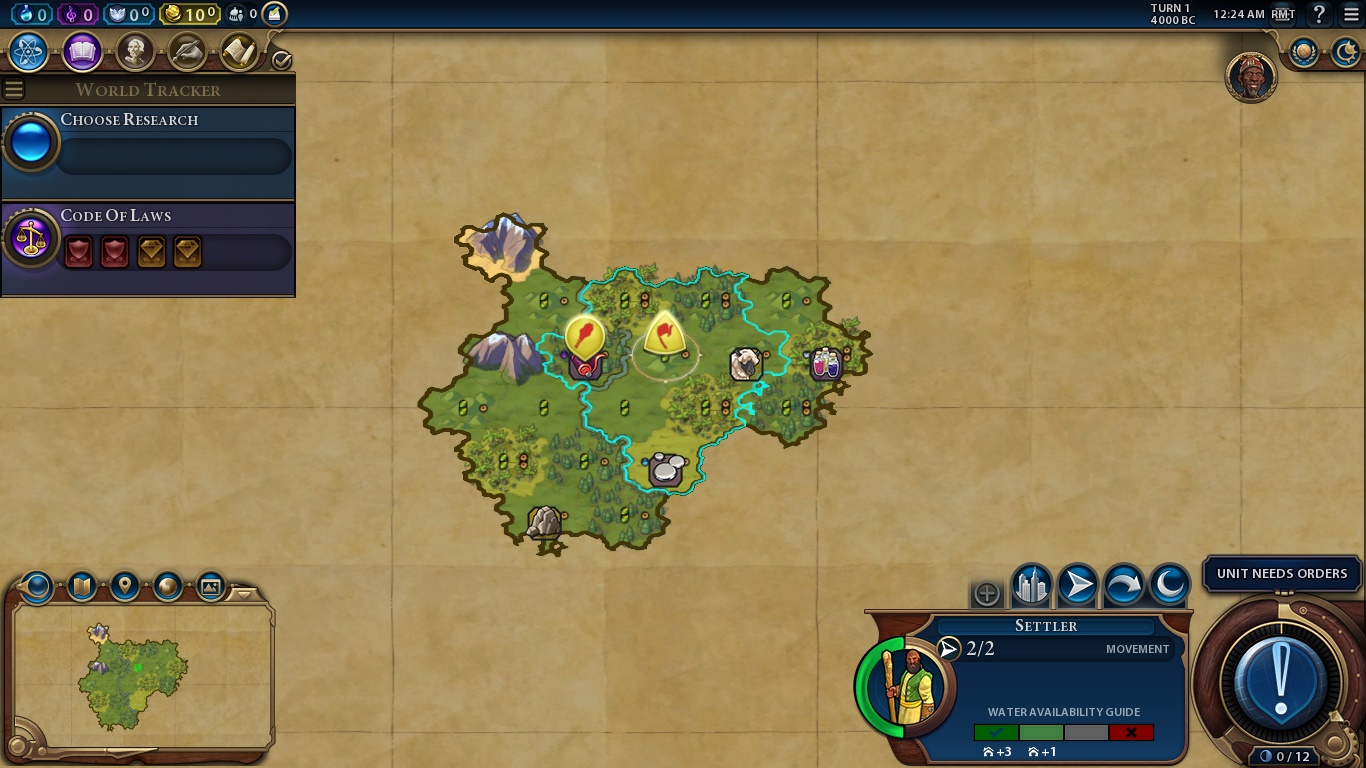
It allows you to clearly see the rivers, hills, mountains etc that sometimes can be kinda hard to spot, mainly when your land is full of buildings.

On the bottom right, we have the aforementioned Era Score, our selected unit, Settler, stats and a huge AN UNIT NEEDS ORDERS BUTTON, which is the “Next Turn” button when you finished all the mandatory tasks for a turn.

The Settler has 2/2 movement, but we’ll just settle on his spawning spot (if your starting hex isn’t good enough, you can always shuffle your settler a bit before founding your capital). Clicking on the “Found City” button above his stats does this:

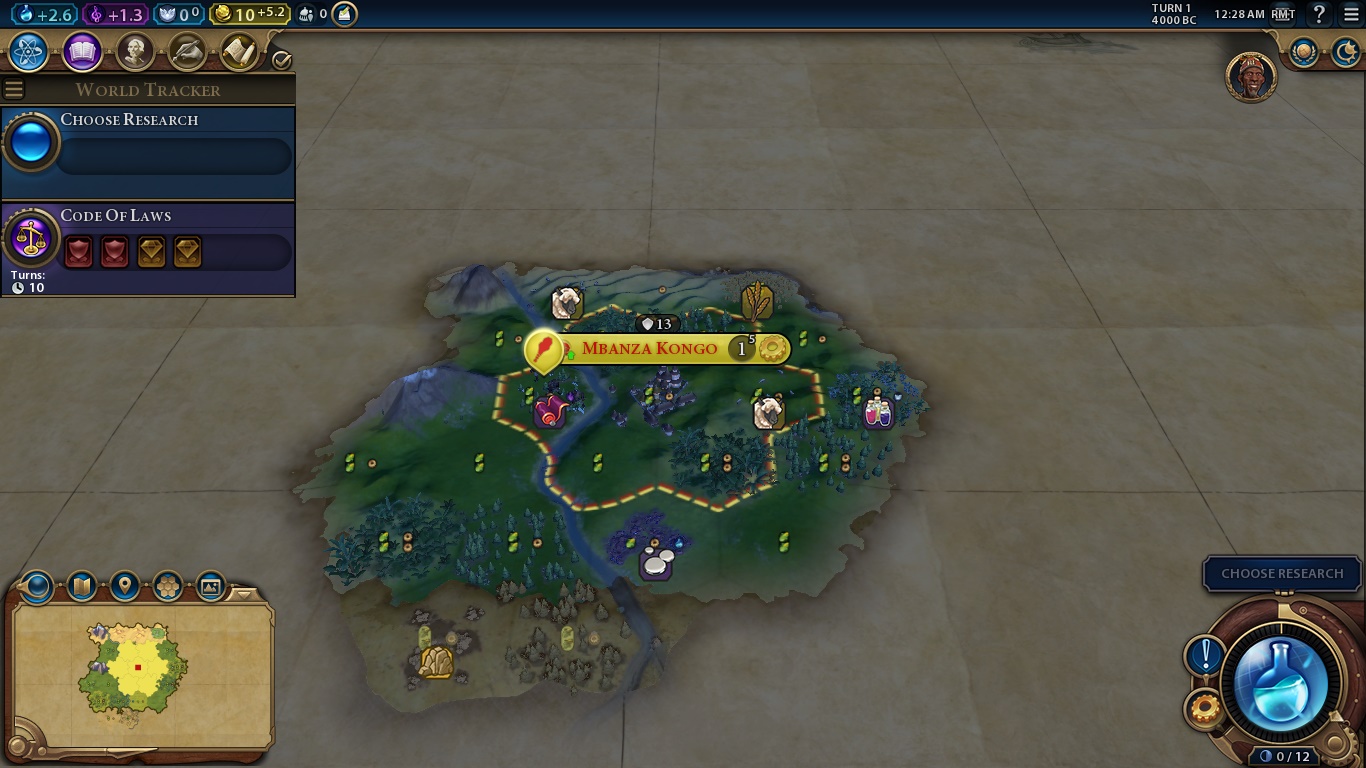
Right, now that we just built Mbanza Kongo overnight and from nothing but dust, we can talk a bit about the game proper. We have a bunch of resources near our capital and I’ll explain what they are, but first things first. You may notice that by settling a city we can see that our empire is now producing a bit of science, culture etc. That’s because of the main Civilization mechanic: citizens.

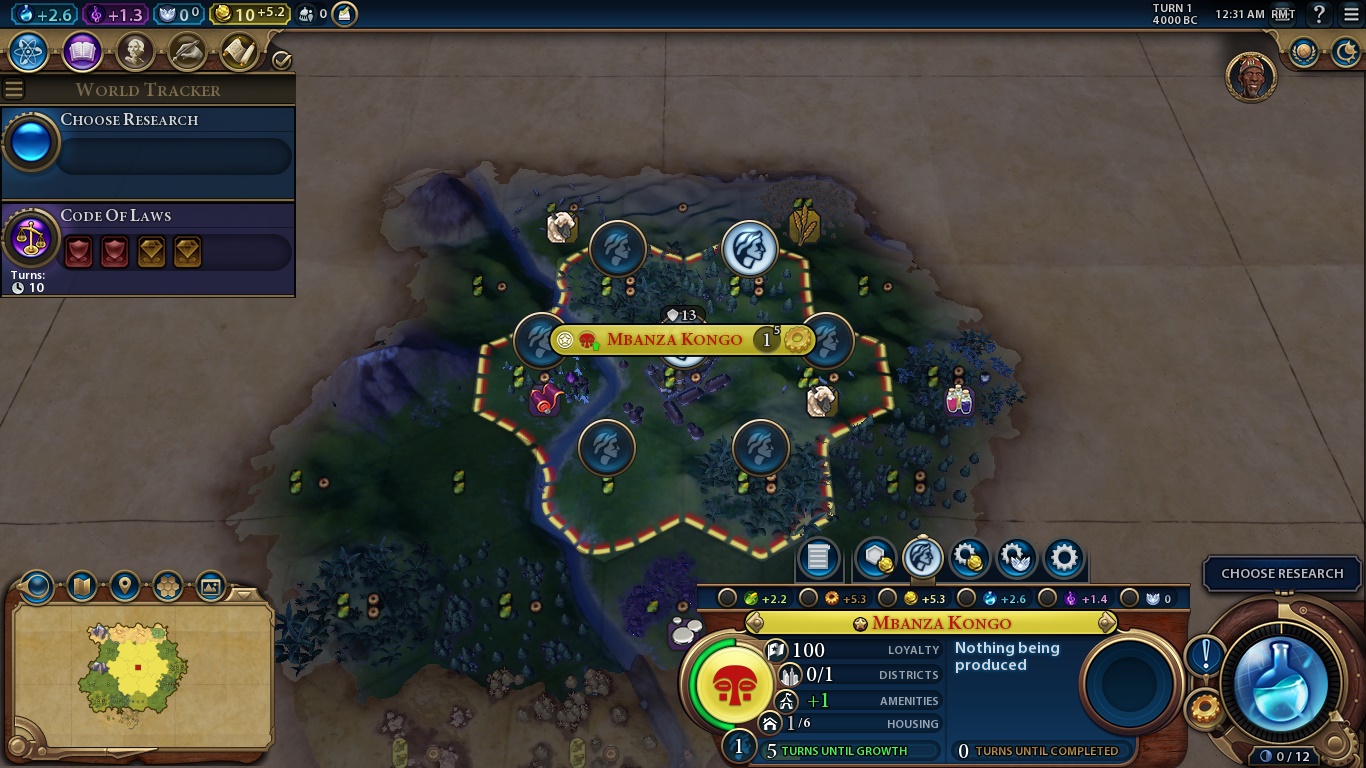
Clicking our Capital’s banner opens up a window with some details about it. Those buttons are: toggle city details, which gives you a nice report on what your city builds, generates, lacks etc. Purchase tile with gold, buying things with gold or faith and changing production are pretty much self-explanatory. The middle button, highlighted in the screenshot, changes the interface to show which tiles your citizens are currently working. Yes, that’s right, you can’t reap in your tiles’ precious outputs if there’s no one working on them.

That’s what the huge 1 right next to our capital’s name means: it’s the city’s population. Currently, we have just one citizen, but our city will have enough food for the population to grow by one in just 5 turns. Those small buttons below the city details/purchase tile/citizen management/etc are your city’s focus. If you click on any of them, the AI will automatically shuffle your citizens to produce whatever you’re focusing on. Really useful if you want to specialize your city to generate science, culture or build a world wonder.

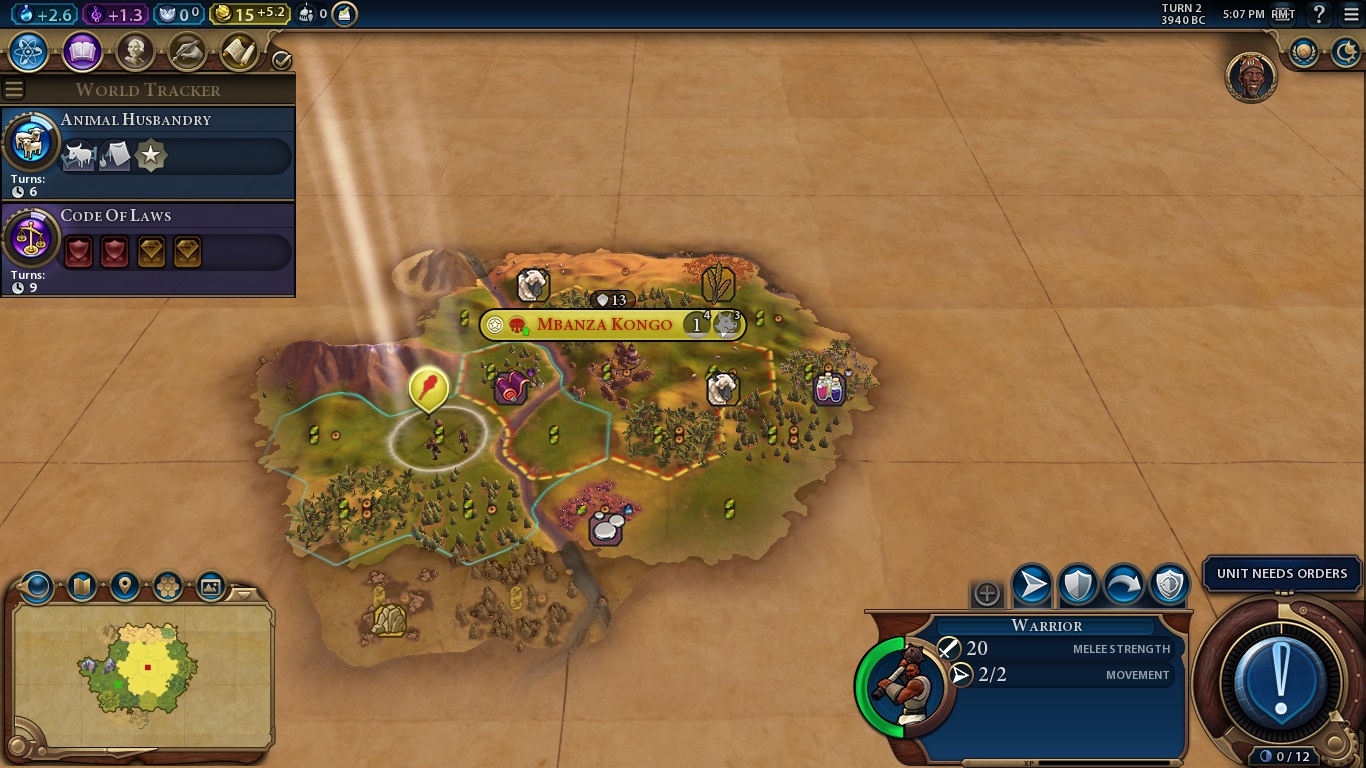
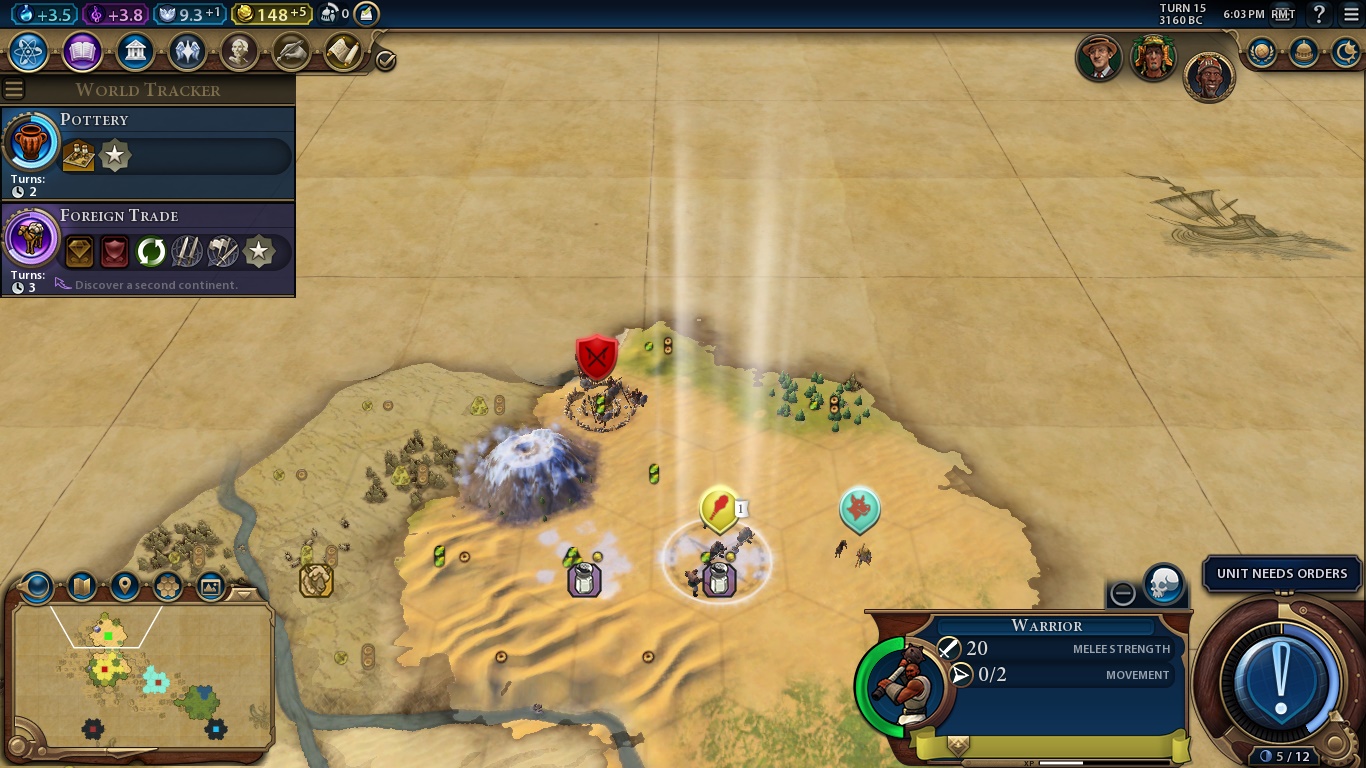
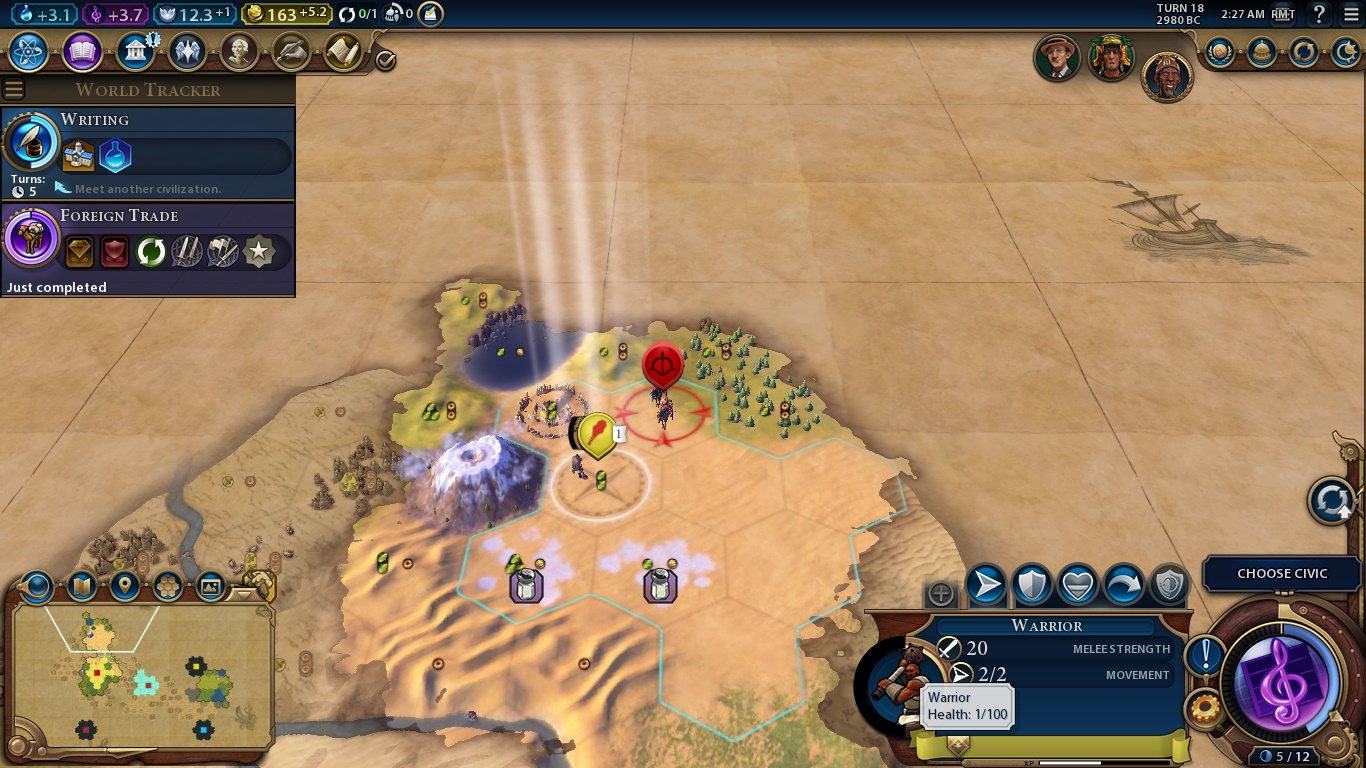
So we go back to the default screen. That small club next to our capital is our Warrior, the earliest military melee unit. You start with one of them every game, and they’re useful to scout your surroundings and providing some defense against barbarians. Barbarians are mob-ish camps which, like city-states, can’t win the game. However, they’re always hostile and can wreak havoc in your civilization if not properly dealt with.

Our territory is limited by the dotted line (it’s dotted now because we aren’t a proper empire yet, which means our frontiers aren’t established and anyone can go through our lands at will). It will grow as we earn more culture, one tile at a time. On our lands we have Sheep, a bonus resource, and Silk, a Luxury Resource.

Bonus resources just give bonus yields to the tile where they are located and can’t be traded. Luxury gives you Amenities, and those are vital to your empire’s growth. For those who played Civ V, Amenities work like Happiness, but now it’s per city and not empire-wide. For those who aren’t familiar, Amenities are the “circus” part of your panis et circenses. They make your citizens happy. Happy citizens work with a smile on their faces and don’t have any penalties to their production.

Each unique luxury resource gives you +4 Amenity, one per city which needs it the most. If you have more than one of a resource type, you can trade it to other civilizations and, thus, earning more amenities. Luxury resources don’t need to be worked by citizens to give Amenities, you only need to improve their tile.

Also, there are Strategic Resources. These aren’t initially revealed on the map (I think horses are the exception) and are usually required to build stronger military units. They start to appear as soon as you research their requisite tech.

I know this seems like a lot of information, but I swear it’s way easier when you’re just playing. And the civilopedia is a great tool. Don’t neglect it.

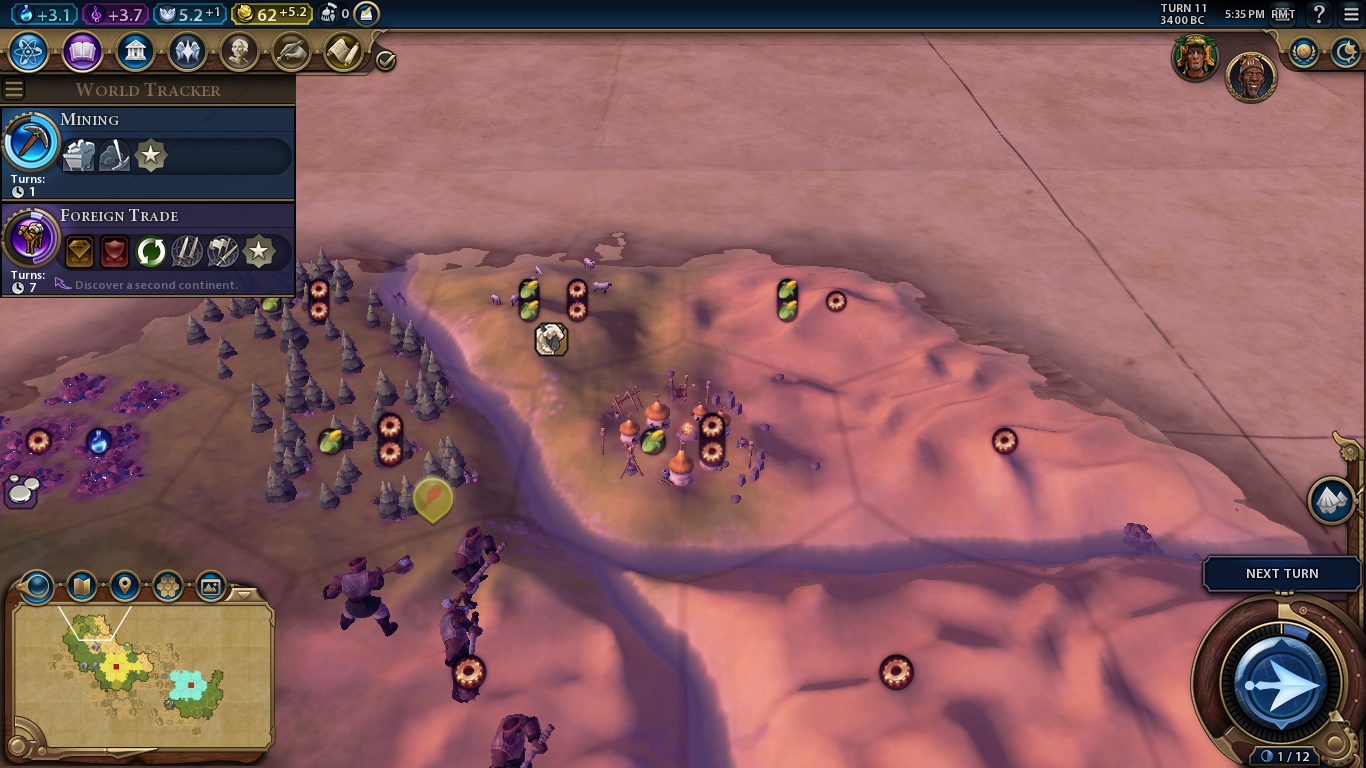
Onwards, we click the Choose Research Button, which gives us this screen:

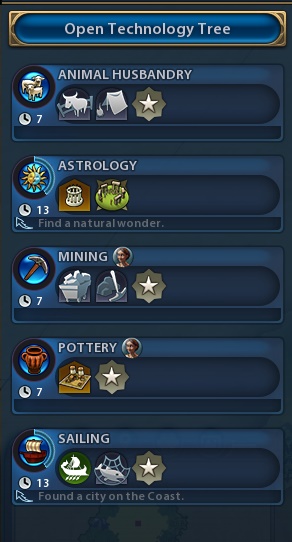
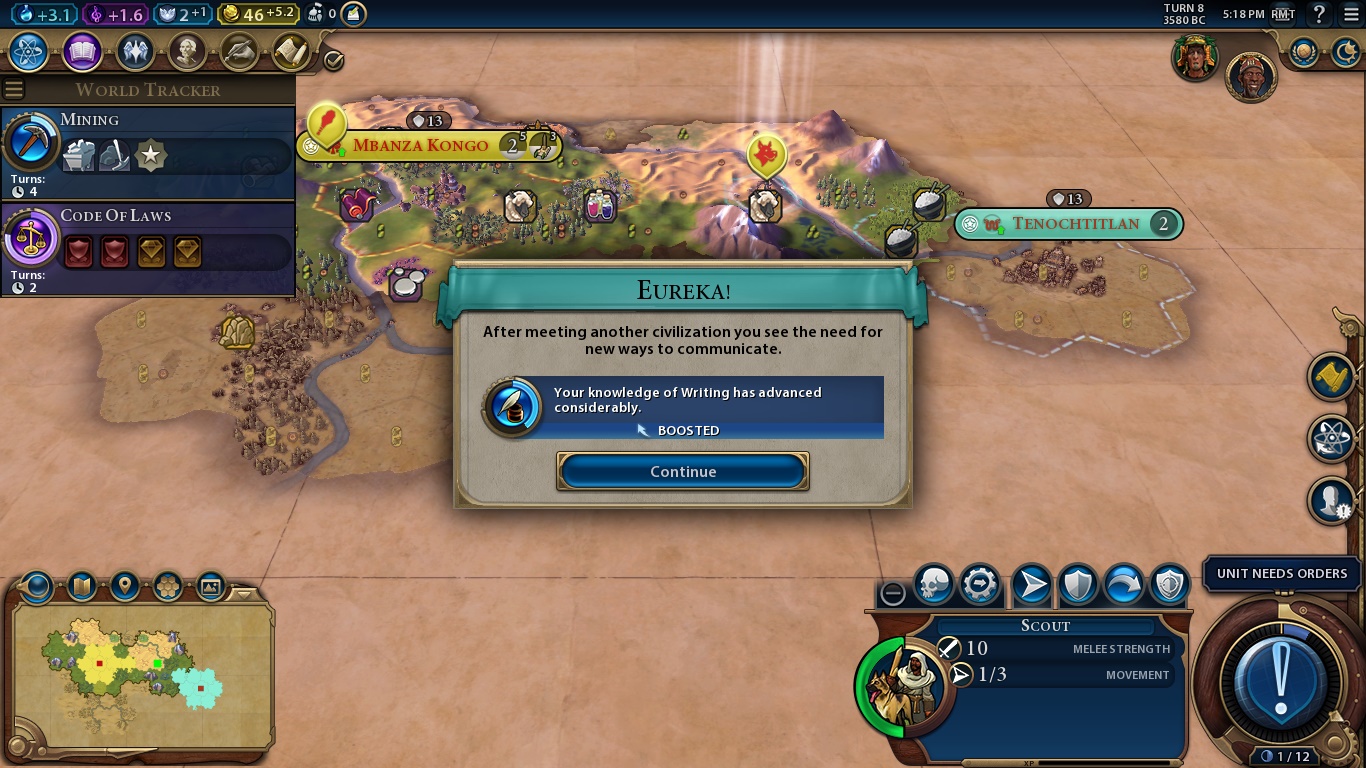
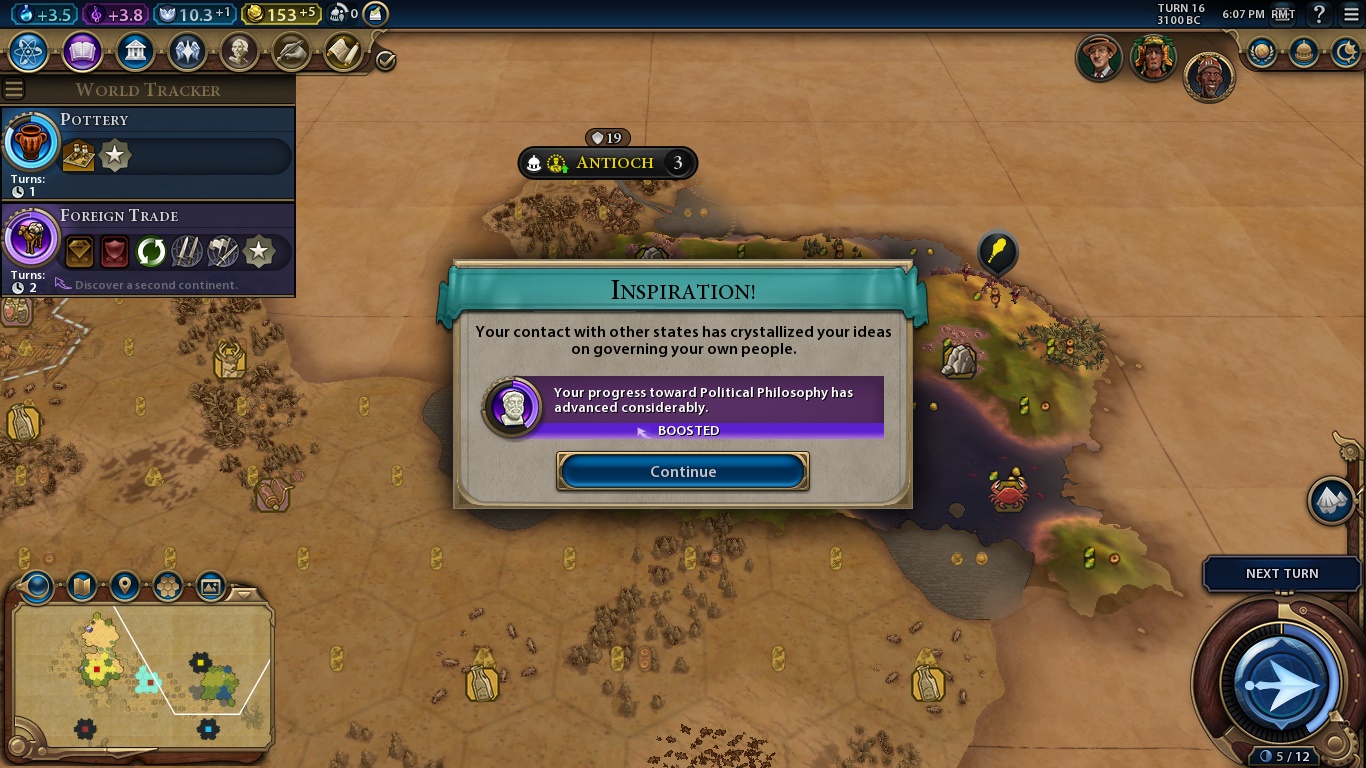
These are the available techs, and we can see the tech tree if we click the button. Those small symbols beneath each tech’s name show what we can build when our civilization discovers the tech. The small arrows under Astrology and Sailing are Eureka Moments. If you do what’s written, you earn a nice boost to that tech’s research (something like 40%, but I’m not completely sure). The civics tree has its own Eureka mechanic, it’s called Inspiration and works the same way.

We’ll go with Animal Husbandry first to take advantage of both those sheeps near our capital. I know one of them isn’t on our land, but it’ll be soon enough. We’ll also want to explore our surroundings with the warrior, so we’ll send him one hex south.

Now, we just need to choose our city’s production before we can (FUCKING FINALLY, I know) go to the next turn:

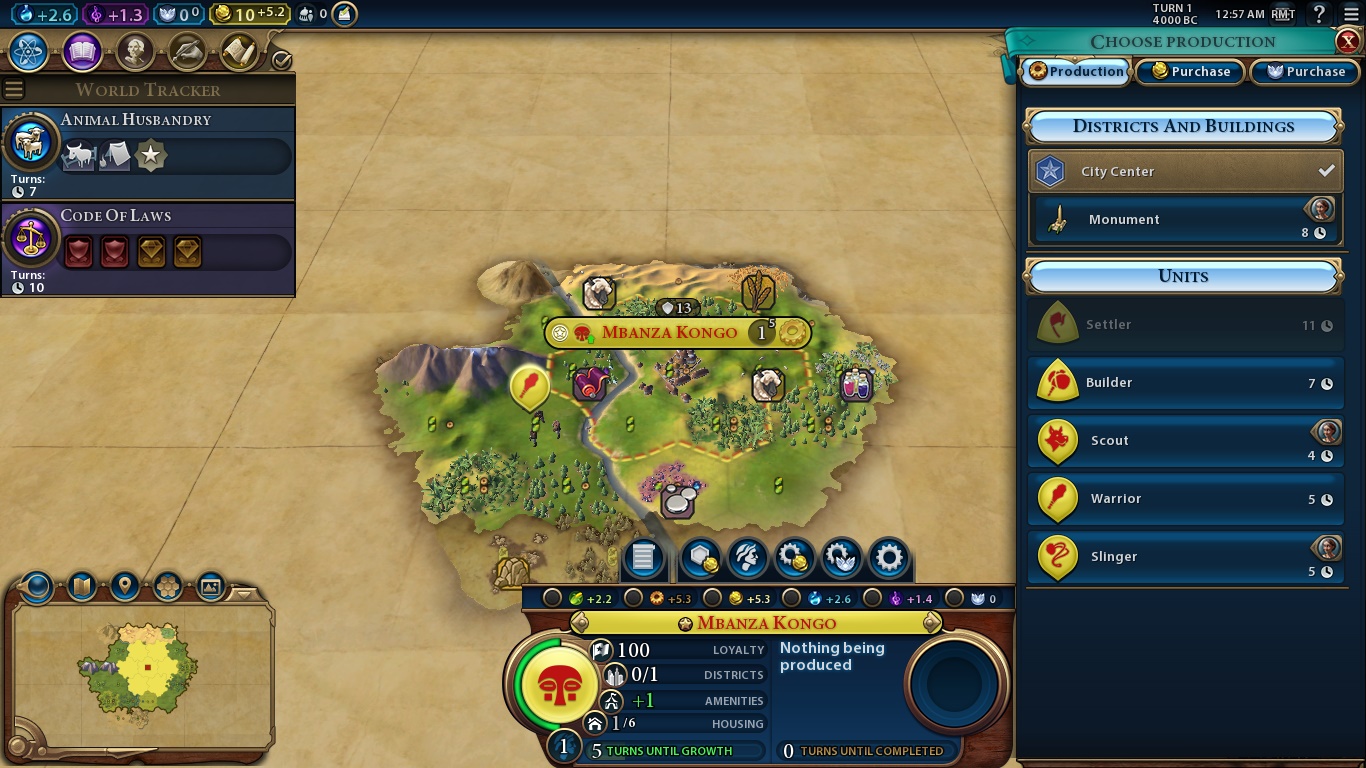
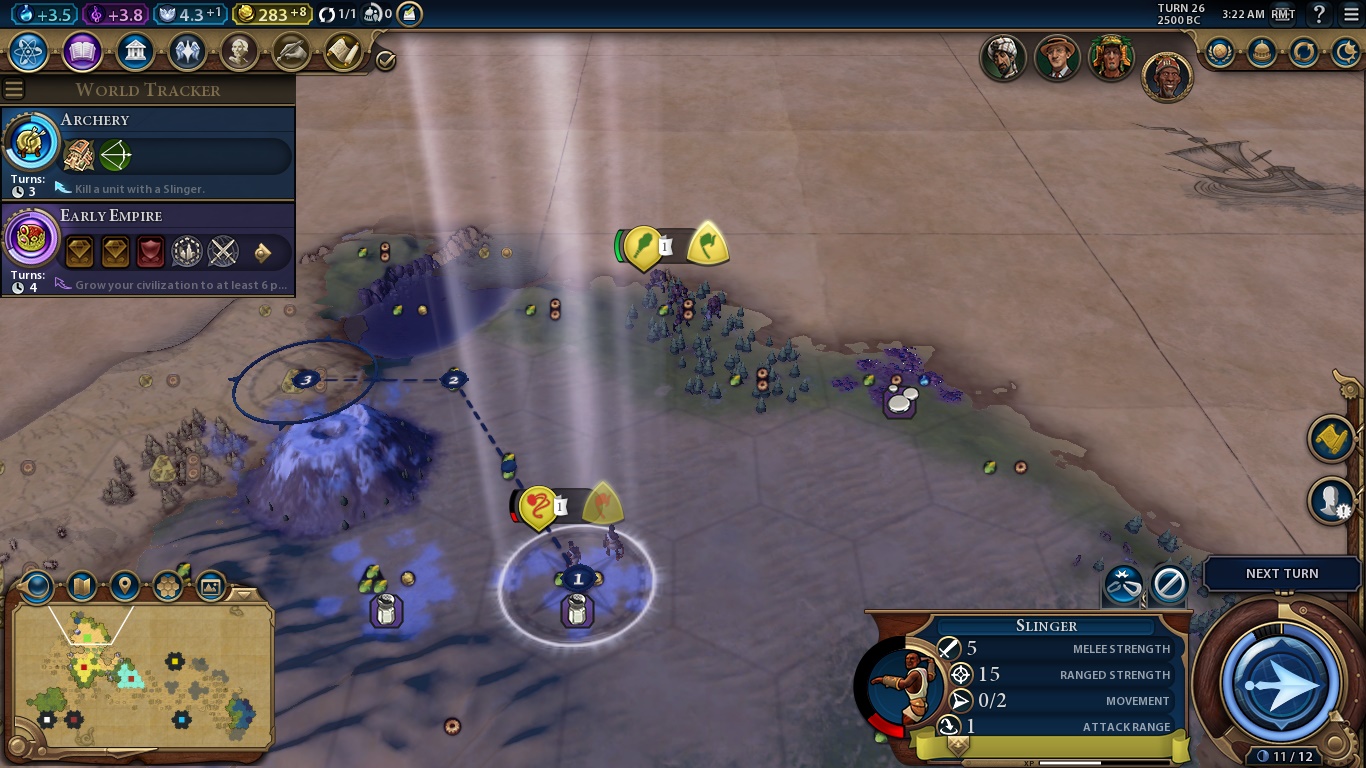
We can build a Monument, the first building of the game, which gives us +1 culture per turn. We can also build some units: Settlers, as we already saw, allows us to found a new city, but we need at least 2 population in a city to build one. Builders gonna build. Every tile improvement is done by them: farms, mines, plantations, pastures… They have limited charges, so prepare yourself to make A LOT of builders throughout the game. Scout is the first recon unit, a person and a dog with more movement points than normal military units who earn experience by discovering new land. Warriors we already met before and Slingers are the first ranged unit, just a bunch of people slinging rocks.

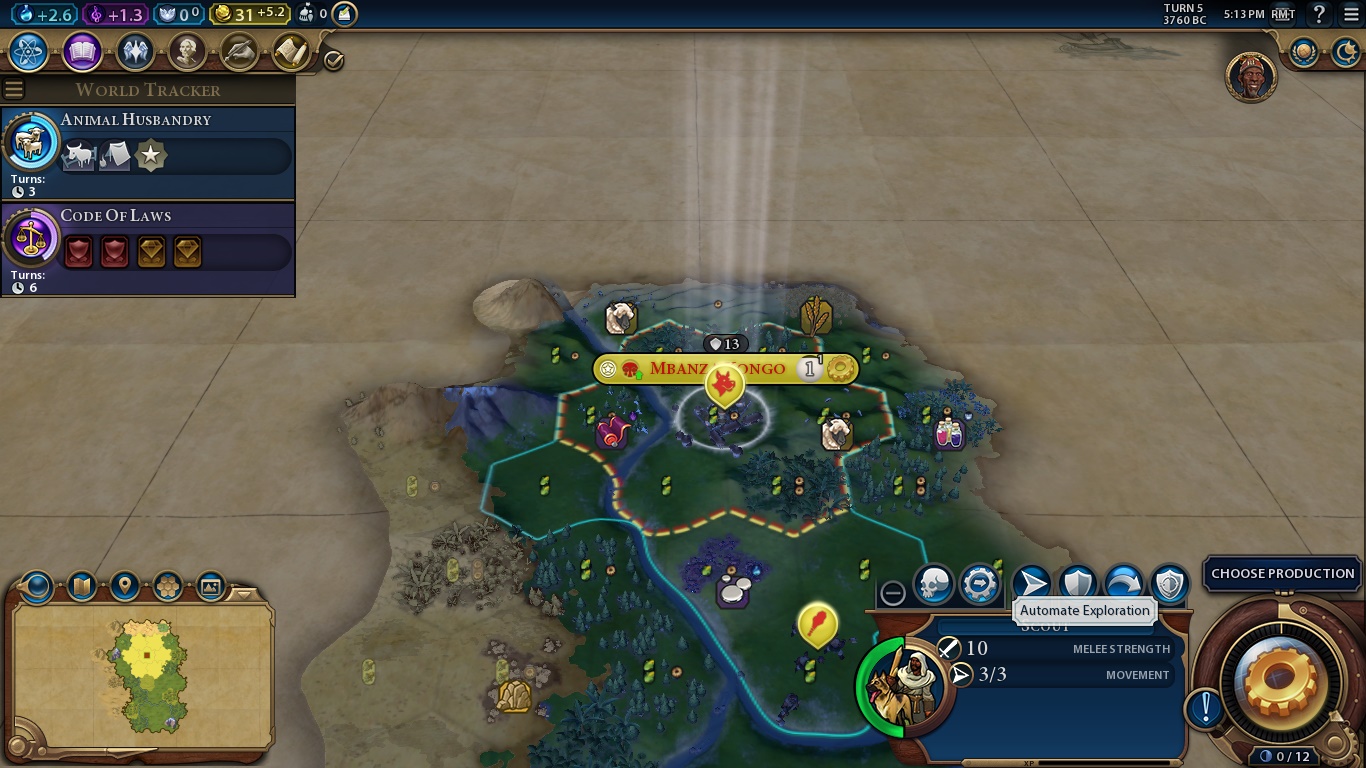
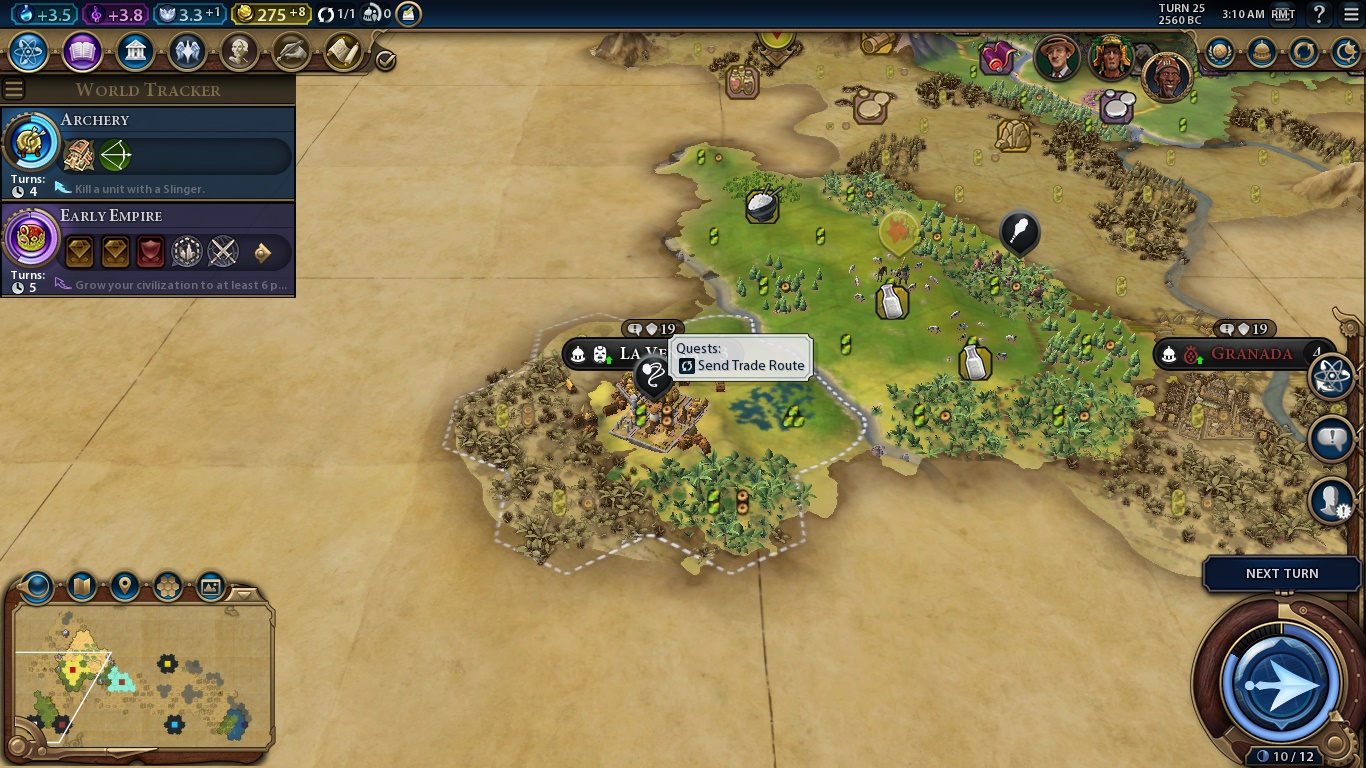
We’ll go with a scout first. Exploring is a huge part of Civ (it’s one of the 4Xs after all), as you can earn bonuses if you find Small Villages (treasure-huts like, scattered across the map) and city-states before anyone else. It’s also good to find barbarian camps and good resources for future settling. Settling new cities is a huge part of any Civ game, but in Civ VI it’s even bigger because the game is made for playing wide (for the agony of those, like me, who love playing tall). As I selected Standard map size, we’ll have 7 civs along with us, so our map is kinda big and can be kinda crowded later. Scouting helps you stay ahead.

Now we FINALLY click the next turn button, and here’s where I’ll stop this first update. Sorry if things aren’t much clear and sorry for the size, but I didn’t want to split this first impression into two posts. Anyway, I promise it’ll get easier in time. The forthcoming updates will also be pretty much about information, but after everything (or almost) is properly explained, we’ll just play the game and whatever. Thank you for the attention, hope I manage to do a good job in this thread. Stay safe. See y’all next time.

Hello everyone, good morning, afternoon or night. Welcome back to our glorious Noob Plays: Sid Meier’s Civilization VI. I’m BigScreens and I will be your host through this messy journey.

Last time we met, you had gone through my endless babbling to finally advance one turn. Sweet. So, here’s where we stand right now:

We’re building a Scout. That blue line around our Warrior are the tiles where they can go in this turn. Remember what I said: it’s important to know where you are and, even more, where the good stuff is. With this in mind, we’ll send our warrior to investigate something like a 5 tile radius around our capital, with the Scout going deeper into the unknown.

Some turns later, our Scout is ready.

By selecting the Scout and clicking on the plus button where his actions buttons are, you can automate exploration. He’ll just walk around trying to discover the most land he can. It’s pretty useful when you don’t want to micromanage where your scouting team goes. Right now, though, we’ll just send him east. We’ll also build a Monument in our capital to produce more culture.

As Animal Husbandry finishes researching, we’ll go to Mining. In Prince difficulty, your initial researching order doesn’t matter that much, nor do you need to make use of strategies like stealing Builders from a City-State. That’s why I hate playing on Immortal/Deity, feels cheesy as hell. But I digress.

Our Warrior found some copper to the west, while our Scout found a small strip of desert, more sheep and…

Montezuma, leader of the Aztecs! Monty is all about his luxury resources: they provide him more amenities and more military strength. Yyyyyyyyyep. The Aztecs also can use Builder chargers to build districts faster.

It doesn’t help that he is in spitting distance of our capital.

Meeting the Aztecs gave us the Eureka to Writing and that’s a good time-saver on an important tech, but also revealed that our nearest neighbor is a soulless warmonger that will use the power of fun to send us on an one-way trip to hell. Neat, huh? This means we’ll have to gear for war, and we’ll have to do it fast, because his Unique Unit is an Ancient Era one: the Eagle Warrior replaces the regular Warrior. He’s strongest and also has a chance to capture a military enemy unit by turning them into Builders.

This unholy meeting also gave us this:

Last update I mentioned Era Score, but I think I didn’t explain it properly. Now it’s the time: this is a Rise and Fall mechanic. When your civilization does some cool things like building your uniques, meeting a new Civ, getting any city to 10 pop etc etc, you gain a small boost to your Era Score. These build up to determine which Age you’ll get when the world advances to the next Era: Dark, Regular or Heroic.

You can make dedications as you go through the eras. They help your empire get more era score when you do things like building districts, triggering Eureka moments etc. There are also some backhand Policies associated with Dark Ages, which gives you powerful bonuses in some areas in detriment of others.

But BigScreens, what the fresh hell are policies?

That’s a good question, fellow spectator. Behold the answer:

When you finish the research for Code of Laws, you’ll be treated to this screen. This shows your government and all the policies and their respective slots. I think it’s self-explanatory, but the red policies go into the red slots and the yellow ones go into the yellow slots. Right now our form of government, Chiefdom, is the simplest there is, so we just have 2 slots for policies. As we progress through the civics tree, our state gets more and more robust and complex, allowing a myriad of policies to be enforced.

You can shuffle your policies at will every time a civic finishes researching. As soon as you hit the Confirm button, you’ll have to wait or pay a small price in gold to change them again. Watch out for that.

We’ll go with Survey and Urban Planning as we didn’t find any Barbarians yet (matter of time, believe me) and faith is sort of useless for us in the early game as we can’t found religions as Kongo (we can found Pantheons, though, but I’d rather have the production bonus right now).

So, our monument is built. We’re researching the Foreign Trade civic to build Caravans. We’ll build a Slinger right now. Remember, we gotta wipe Montezuma out before he gets too strong. We’ll also build a Settler soon enough.

We send our warrior ein bissche north and he finds a Tribal Village.

And also:

John Curtin leads Australia in Civ VI. He receives 100% more production if they are the target of a declaration of war by another civ in the last 10 turns or if they liberated any cities in 20 turns. The Australians also earn bonus housing in their coastal cities and bonus district yields in tiles with good appeal (I’ll explain these later). His pastures also trigger a culture bomb: an ability that immediately brings the nearby tiles to his empire.

Curtin is usually pretty chill and often opts to play a defensive game as he’s certainly geared for it. We’ll try to stay on his good side unless they pull up too far ahead.

I send our Warrior to the tribal village. He earns enough experience for a promotion. Nice, but even better, he finds this:

Mount Kilimanjaro is a Natural Wonder. Natural Wonders are special, often impassable tiles – they all exist in the real world – which gives specific bonuses. Kilimanjaro gives +2 food to every adjacent tile. Now we already know where our first settler’s going.

Finding a Natural Wonder also triggers the Eureka for Astronomy, as you can see in the first update. Time-savers are always good. It also gives us some Era Score.

So, we discover Mining. We can now build mines on hills and on some resources. We’ll now research Pottery.

Our Scout goes beyond Tenochtitlan and also finds a tribal village. Moving upon it gives us some gold and also promotes our Scout:

This is the unit promotion screen. Every time you accumulate enough experience, your units level up and gain nice bonuses according to this “talent tree” of sorts. Promoting your units heals them and also spend all their movement points for the current turn. I’ll give Alpine to our Scout, making him faster on hills, and Battlecry to our Warrior, making him stronger in combat against any units.

We also meet our first City-State buddy. Or, to be honest, they meet us:

City-States aren’t gunning for victory, but they are a huge part of the game. As you may notice in the upper left screen, your civilization earns some influence points towards Envoys. These envoys can be sent to the city-states, and they give you powerful bonuses in return. You can also earn envoys by completing quests, as shown. Being the first major Civilization to find a City-State also gives you a free envoy there.

There are several types of City-States. Granada’s a militaristic one. The City-States bonuses usually go like that: 1 envoy = capital bonus. 3 envoys = district bonus (related to the City-State type. In this case, Encampment). 6 envoys = district buildings bonus. Every Civ can reap in those rewards as long as they have the required number of envoys. However, there’s a Vassalage mechanic. Every time a civ sends at least 3 envoys to a city-state, it becomes its Suzerain, giving the Civ an unique bonus according to the City-State. Granada’s unique is the Alcázar, a tile improvement that gives culture and a defensive bonus to your units standing on it. Any vassal City-State will also declare war to your enemies. The Civ with most envoys (after 3) becomes the suzerain of that city, so you must plan carefully before placing your envoys.

Remember, and I cannot stress this enough, if this is too dense for you, use the Civilopedia. It’s better explained and worded than I could ever hope to do.

Going to Next Turn, we build our Slinger and start to make a Settler. We also find another City-State far east, Hattusa.

Hattusa is one of the best City-States and, unfortunately, another Civilization found them first (probably the Aztecs). Their suzerain bonus gives one copy of each strategic resource you already know but don’t have any. That’s really great since you can have a hard time finding resources like Niter. That’s why having a huge sprawling empire is good.

Our Warrior also finds our first enemies: a barbarian camp up north.

Barbarians, like City-States, aren’t competing. They are just a nuisance, spawning more and more units until their camp is cleared by a military unit of any Civ/City-State. They are always hostile and we’ll almost surely engage in combat if any units are within their sight. Clearing a barbarian camp rewards you with some gold.

Before going to combat with this unholy scourge, our scout discovers a new tribal village and another city-state, Antioch, and that triggers the inspiration for Political Philosophy, the most powerful of early game civics.

Antioch’s suzerain bonus gives +1 gold to international trade routes for each luxury resource at the destination. I’ll explain trade routes soon enough, as you can see we’re very close to discovering Foreign Trade.

This update is getting a bit long, so I’ll cut it right here. Tune in next time for combat and trade, and then I think most of the base mechanics will be already properly explained, allowing the thread to run at a more leisure pace. Thank you for the attention. Stay safe. See y’all next time.

Hello everyone, good morning, afternoon or night. Welcome back to the one and only, our glorious Noob Plays: Sid Meier’s Civilization VI.

In our last encounter, we met two new potential enemies, one with more emphasis on the former and other clearly on the latter. John Curtin’s Australia and Montezuma from the Aztecs are dangerously near, and this will be a huge factor on this playthrough.

All good and well, but we have a more urgent headache: Barbarians. Also, combat.

Ok, I think it’s somewhat clear how combat works, right? The fact that a lot of mechanics are self-explanatory shows how Civ does a good job of taking you by the hand and showing you the way, even if the game is kinda dense. Ahem, so… Every unit has a base strength and a lot of modifiers, the most common being the terrain ones. Fortify is an action that gives a defensive bonus. Our Battlecry promotion gives us strength against units. And that’s it. Every bonuses appear underneath the units’ name, but you can just focus on the biggest numbers (31 and 37).

I’ll order our Warrior to attack the Barbarians, and this is the result:

Sorry, I don’t know the exact math of combat, but I think it’s enough to get the idea, right?

I thought I would have no problems wiping this camp out, and then:

This. Barbarians were buffed in Civ VI. This Horse Archer probably means that we won’t be able to wipeout them with our Warrior only. Damn. We have Montezuma to focus and can’t let these road bumps slow us down.

Also we finally finish the researches for both Pottery and Foreign Trade. I’ll go with Writing right now, and these are the new Policies:

For now, we’ll just swap Survey for Discipline. Foreign Trade raises our trade route cap limit by 1, and, as you can see, that’s what Caravansaries does: boost trade routes.

You start a trade route by building the Trader/Cargo Ship unit and sending to a city near yours. Then, you just forget they exist and be sure no Barbarians cross their path, because they can pillage and destroy your route (really annoying. The same, obviously, apply for enemies at war with you). After a predetermined number of turns, the trade route “ends”, creating a trading post in the city of destination and, thus, improving your trade range. During these turns, your city receives some yields (Gold, Food, Production, Faith, Culture and Science) according to their destination and the districts on them.

Trade can be simplified by this: build traders - choose the best destination based on the yields shown - profit. It’s very self-explanatory (again), and we’ll see more of it when we build our first trader. Soon enough.

Meanwhile, our Warrior pulls off a miracle:

He defended against both attacks, killing the attacking Spearman in the process and survived with 1 HP left. Thank you, buddy. You’re so cool that we should, as the Ancient-Era-Society we are, worship you to the level of gods.

Oh, that’s right, we can’t do that. Well, ok.

So I just send them over the camp, earning some gold, era score and the inspiration for the Military Tradition civic. Nice. Unfortunately, our brave heroes are killed by the merciless arrows of these uncultured swines. Sorry, got carried out a little there.

Our first Settler is ready and it’s time to decide where he is going to found our second city

The green spots have the biggest Housing, as you can see in the lower right. Housing influences on your city’s food effects. Your population will grow in a normal pace with 2 or more Housing than Pop, and will stall completely with minus 5.

At first, water is the only source of Housing, that’s why they’re the green spots. It’s also possible to see a small flag icon over some tiles. That’s Loyalty, a Rise and Fall mechanic where cities apply a zone of influence/pressure over nearby cities. The furthest your city is from your empire, the bigger will be other Civ’s cities’ pressure over then, to the point when they flip, becoming a Free City. Free Cities aren’t City-States, although they’re similar. Free Cities are always hostile and can also be conquered by every major civ, or any Civ can apply enough pressure to make then flip again, this time to their empire. You can earn loyalty if your city has enough Amenities or via Policies. Loyalty is a cool mechanic which allows you to capture cities without declaring war and it’ll be enhanced in Gathering Storm, with new Civs like Phoenicia and the Ottomans taking advantage from it.

So, that’s it. Now I’ll just send the Settler to a hex near Kilimanjaro and we’re good. That small desert strip will be kind of a problem early, but it’s manageable (mainly on lower difficulties)

You should never leave your territory with an unguarded Settler. If any hostile military unit moves over any civilian units, they capture and flip them. That’s a good way to steal Builders early.

Our Slinger-Settler duo bump into a Barbarian Scout and dispatch them. This triggers the Eureka for Archery. Our Scout found a Tribal Village that gave us the Eureka for Irrigation. Lots of time-savers, and these are great. Also, most importantly, our first Trader is built.

Only Tenochtitlan is in our range. No problem, we’ll send it there and rake in the diñero. The white road on map will be an actual road after the trade route is completed the first time. These roads make it easier for troops to move and are upgraded era by era.

We get enough faith to found a Pantheon.

Pantheons are the nature-based religions of the ancient world. Their Belief give small bonuses often related to terrain/resources, and they are good way to begin snowballing, which is a huge thing in Civilization. A nation can pull so far away due to an early good start that it becomes uncatchable, just cruising for an easy win.

We select our belief: Oral Tradition

Good tiles get even better, giving us Culture, which, if you remember, is the best victory type to pursue as Kongo. We currently have one Dye and one Silk on our lands, plus one of each just a quick jaunt east. We’ll probably want to queue another Settler soon enough.

Our second city isn’t settled yet because of that cursed Horse Archer, but with the power of promotion our Slinger defeat them. Our Scout finds another village, which gives us… another Scout! I’ll send him southeast.

Steady progress is being made on the Tech Tree. Archery’s the next one, and then I’ll beeline Masonry because it gives us the Battering Ram, a support unit that makes it much easier for fighting cities. Yeah, I’m really serious about defeating Monty early. How serious, you ask?

That would be a great spot for a 3rd or 4th city, but the asshole will probably get it first because the AI in Civ VI settles like crazy. I’d really like to take him down before he has a second city, but I don’t think it will be possible.

Our new Scout also bumps into La Venta, a faith focused City-State which allows they Suzerain to build the Colossal Heads tile improvement. They give + 2 faith and +1 faith for every adjacent rainforest/woods.

Out of nowhere, this fellow shows up:

Saladin from Arabia is our religious counterpart: If we can’t found a Religion, the Arabians can’t NOT found one. When they’rein the game, the last Great Prophet available (the limit for existing religions is x-2 IIRC, where x is the number of civs) will always go to them, and they earn 1 Science for each foreign city following their religion.

With Saladin’s ability, their worship building (mosques, pagodas, churches, whatever) will be available for every civ to buy them for 1/10 of their actual faith-points cost, while Arabia get a boost of 10% in his Science, Culture and Faith for each one of these buildings.

The Ayyubid sultan is a good ally for us, as we won’t object to our cities being converted by him, we won’t be contending with him for a Religious victory, and we’ll also be on his good books because we’ll buy some of his buildings, especially if they give Culture (he usually focus on Science, but we’ll see). They can also build the Madrasa, an improvement that gives faith equal to the Campus district adjacency bonus. Their Unique Unit is the Mamluk, a terribly overpowered Medieval Era Knight-replacement who heals at the end of every turn. We don’t want to take these guys on a fight.

Our Settler FINALLY makes some progress toward Kilimanjaro and that’s what I see:

FUCK! Saladin’s also gunning for Kilimanjaro. Come on, Sally, we’re supposed to be friends! I don’t know if I can outrun him, so if that isn’t possible I’ll just settle in any spot even if its suboptimal. Cities must be at least 3 tiles away from each other.

Or that’s what I thought, because the next turn he does this:

Ffffffffff………. Fine. Fine. I can handle this. We can still get Kilimanjaro, but we’ll probably struggle with loyalty early and the border friction will probably make Saladin hate us. Ok.

Granary and a Warrior are built in our capital. I’ll produce another Slinger before pumping another Settler. No way I’m getting caught ill-prepared with these lunatics right on my doorstep.

On the bright side, Mbanza Nsundi is founded:

By purchasing some tiles, I’m able to get Kilimanjaro, but this kind of settling usually pisses everybody off (perfectly comprehensible). It even gives us this interesting Era Score:

SS39

With Archery’s research done, I upgrade our Slinger to an Archer by paying some gold and I think that’s it for this update, as it’s already long as hell. Things are now heating up. Tune in next time to see what we’ll do about our neighbors. It’s a scary world out there. Thank you for the attention. See y’all next time.