There is an intro to the game that you missed. It’s there on the main menu. I guess a number of games in this era assumed that players would explore all of the menu options.
Yeah, I did see that when I played the game the first time, and kind of forgot about it this time (last time I was using my actual physical CD of the old King’s Quest Collection that had both Colonel’s Bequest and this on it, this time I’m using the GOG release). I’ll probably post the intro once we’ve met all of the characters in it.
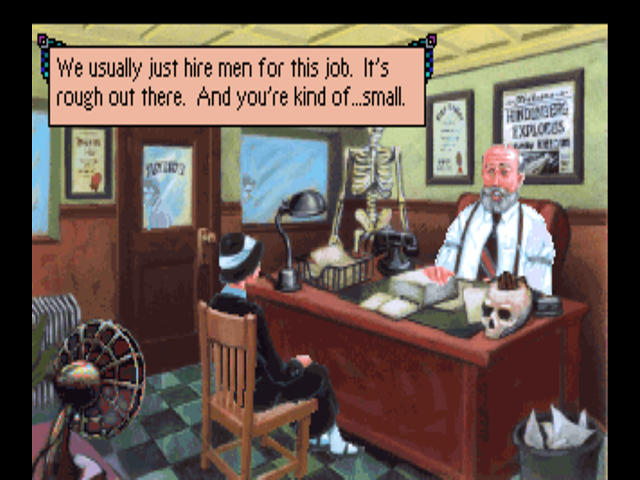
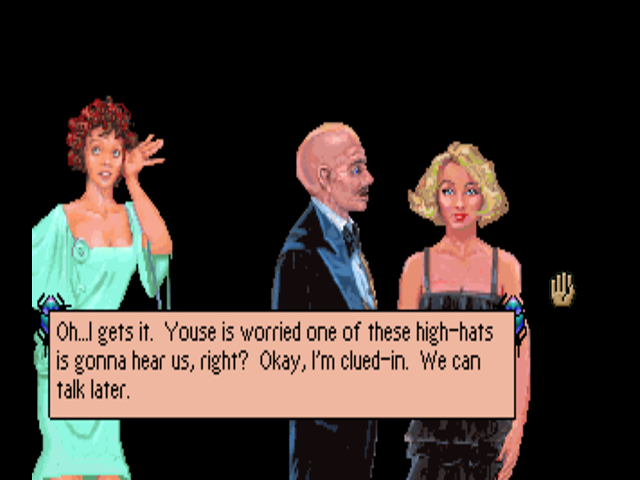
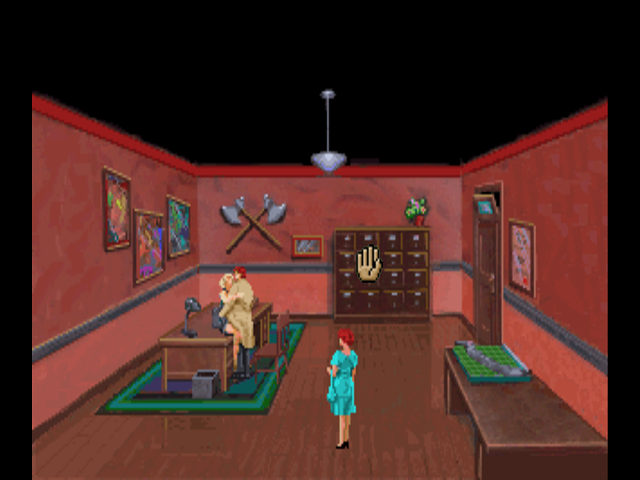
Update 2: The Trib Only Hires Men
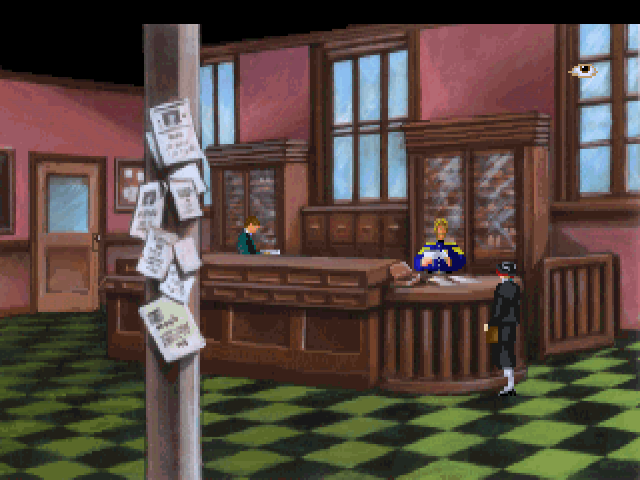
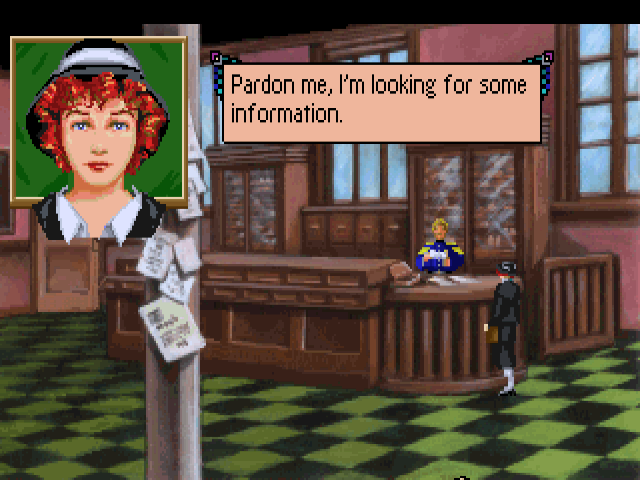
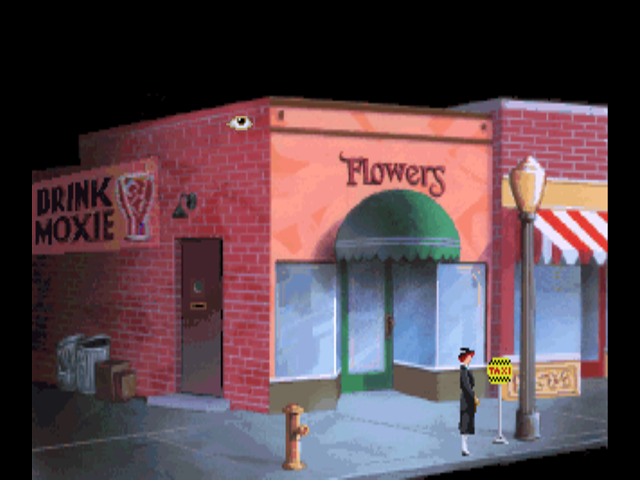
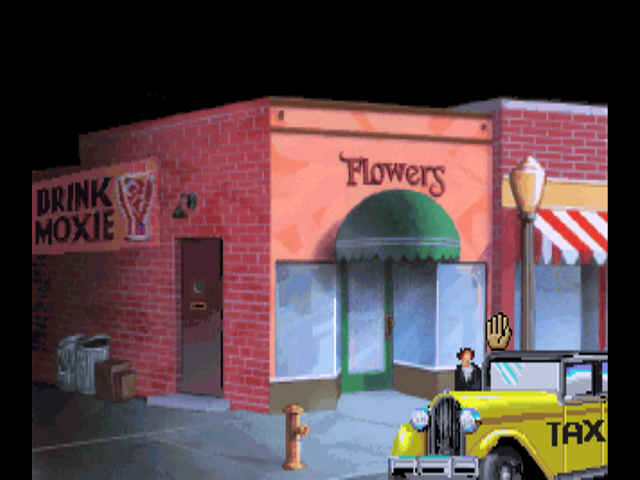
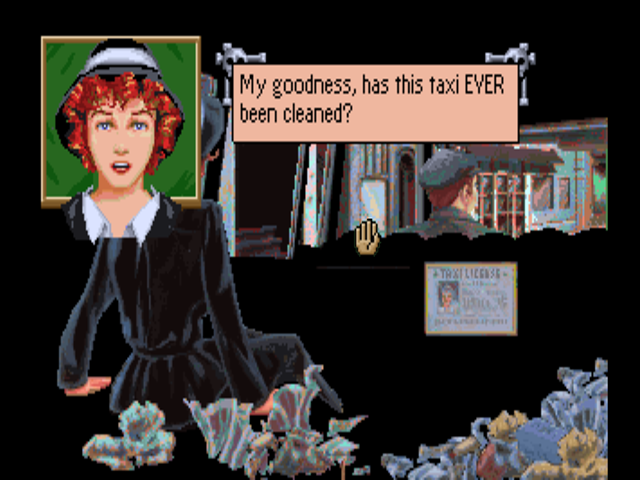
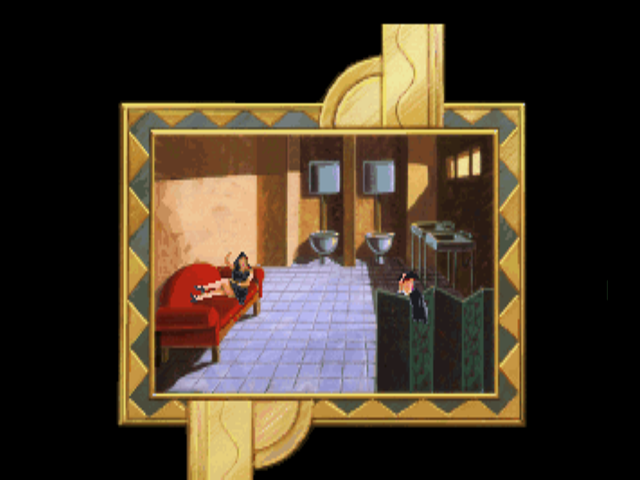
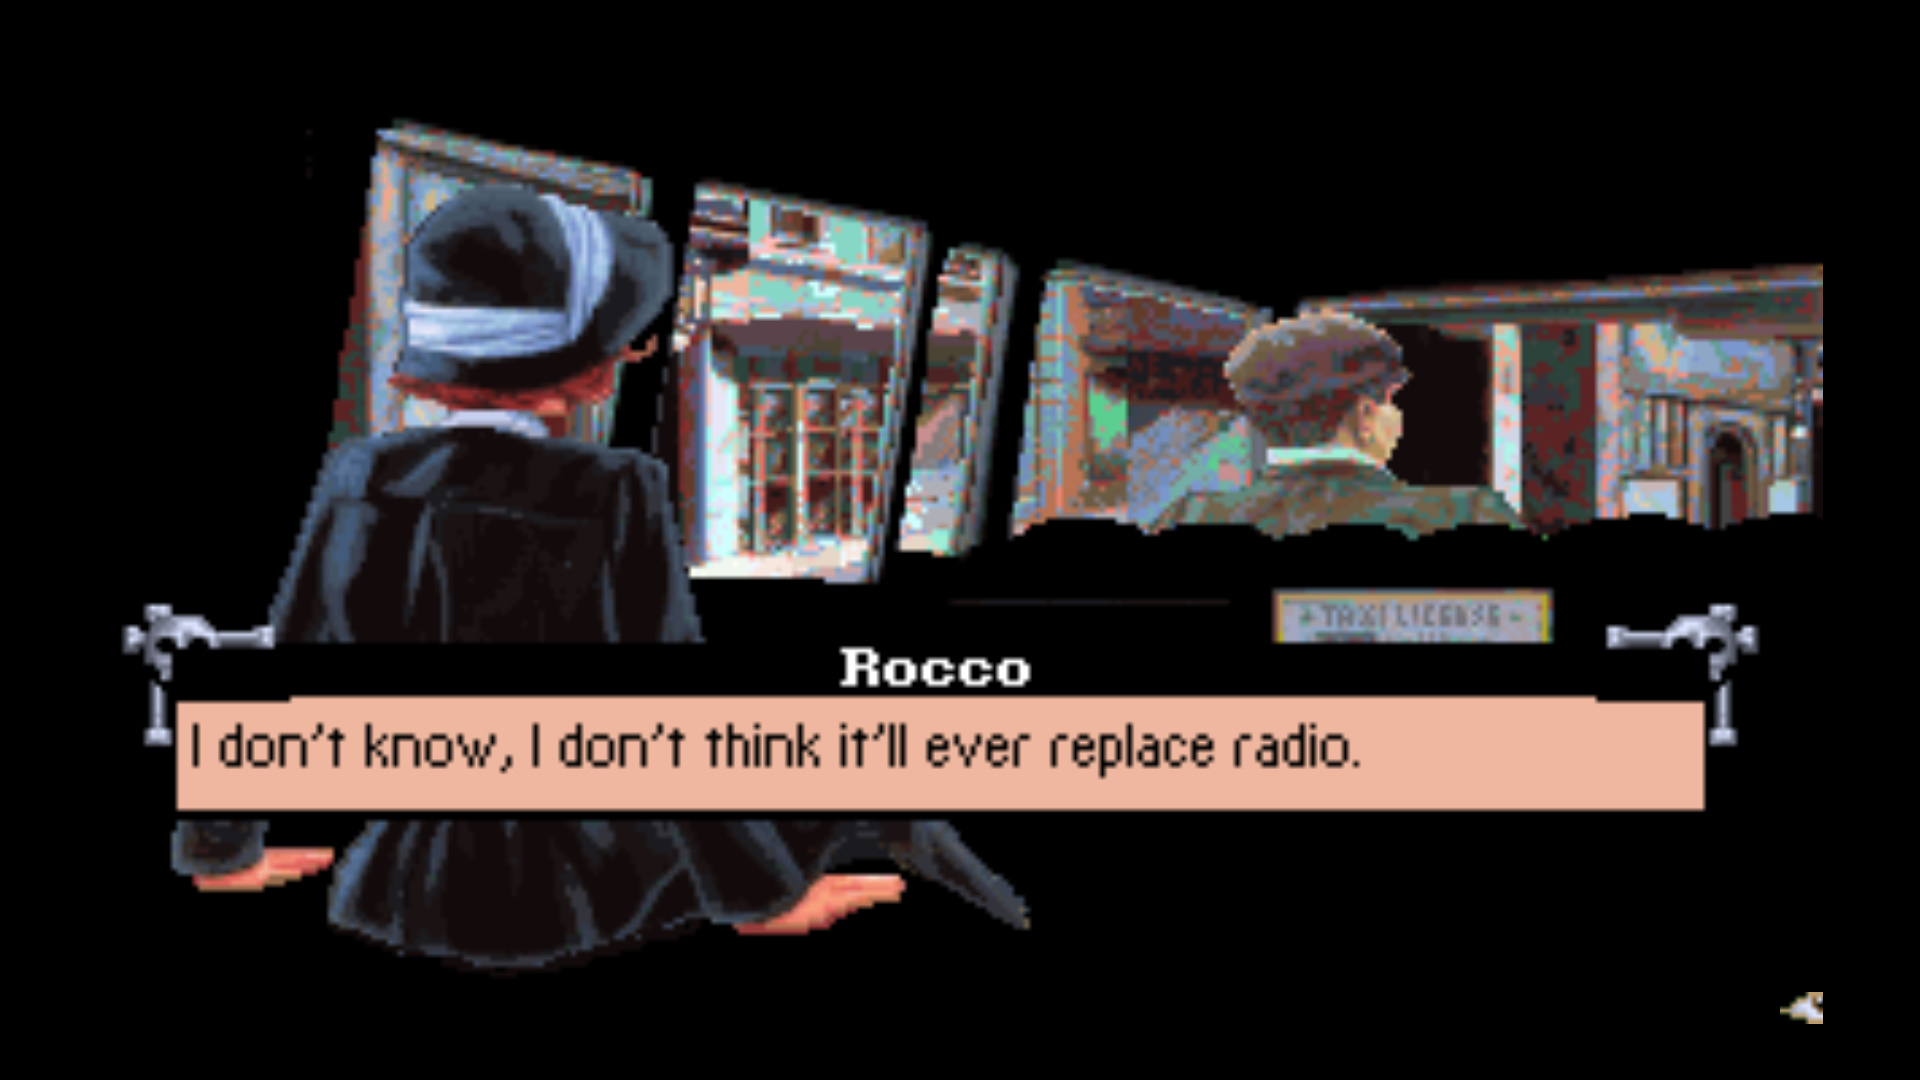
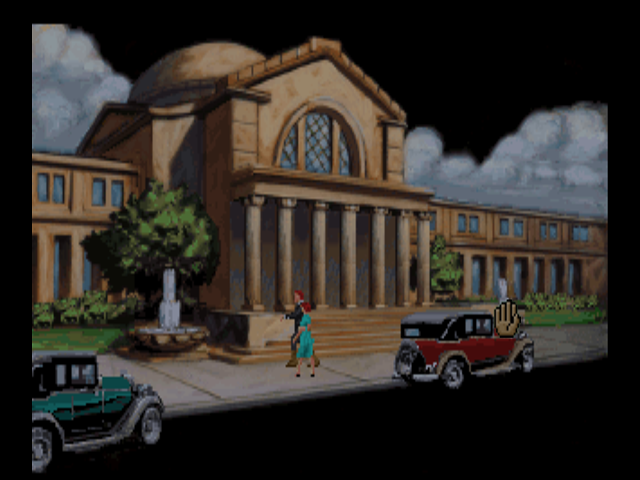
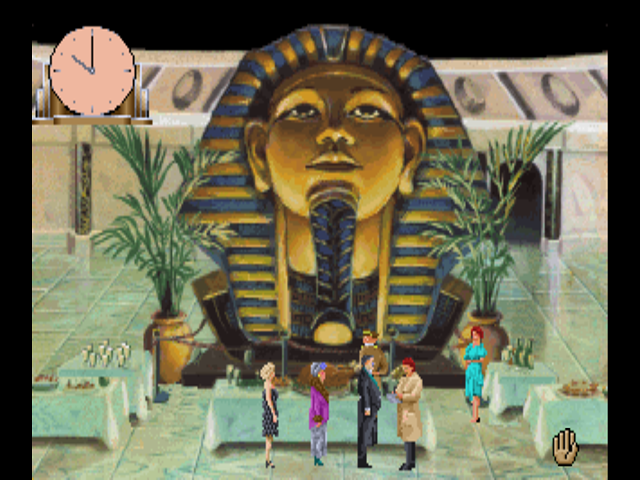
From outside the Tribune building, we can use the Taxi sign to instantly summon a taxi using whatever black magic they use in movies about New York to make taxis appear on command.
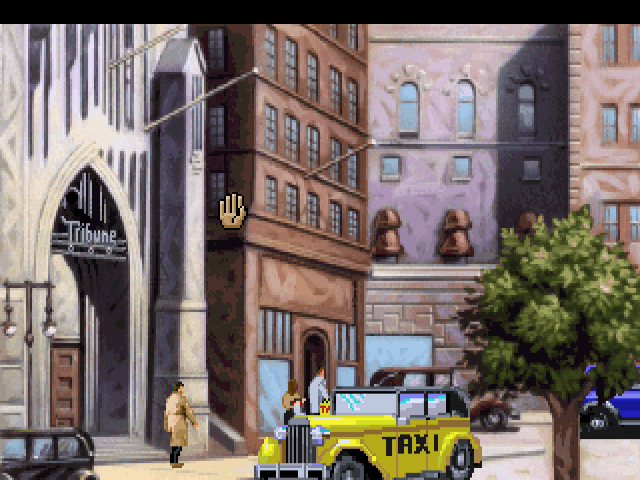
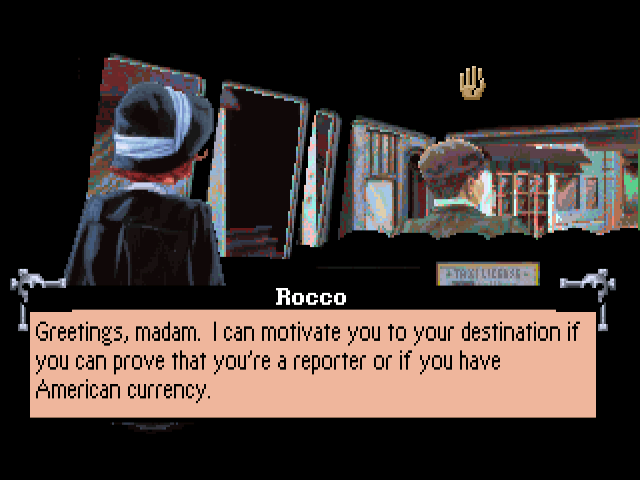
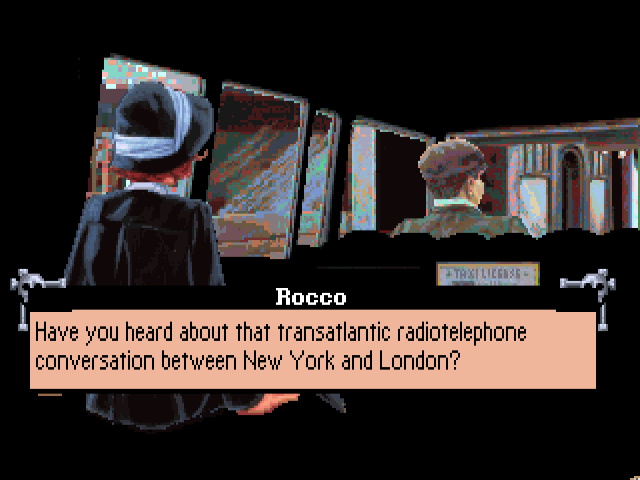
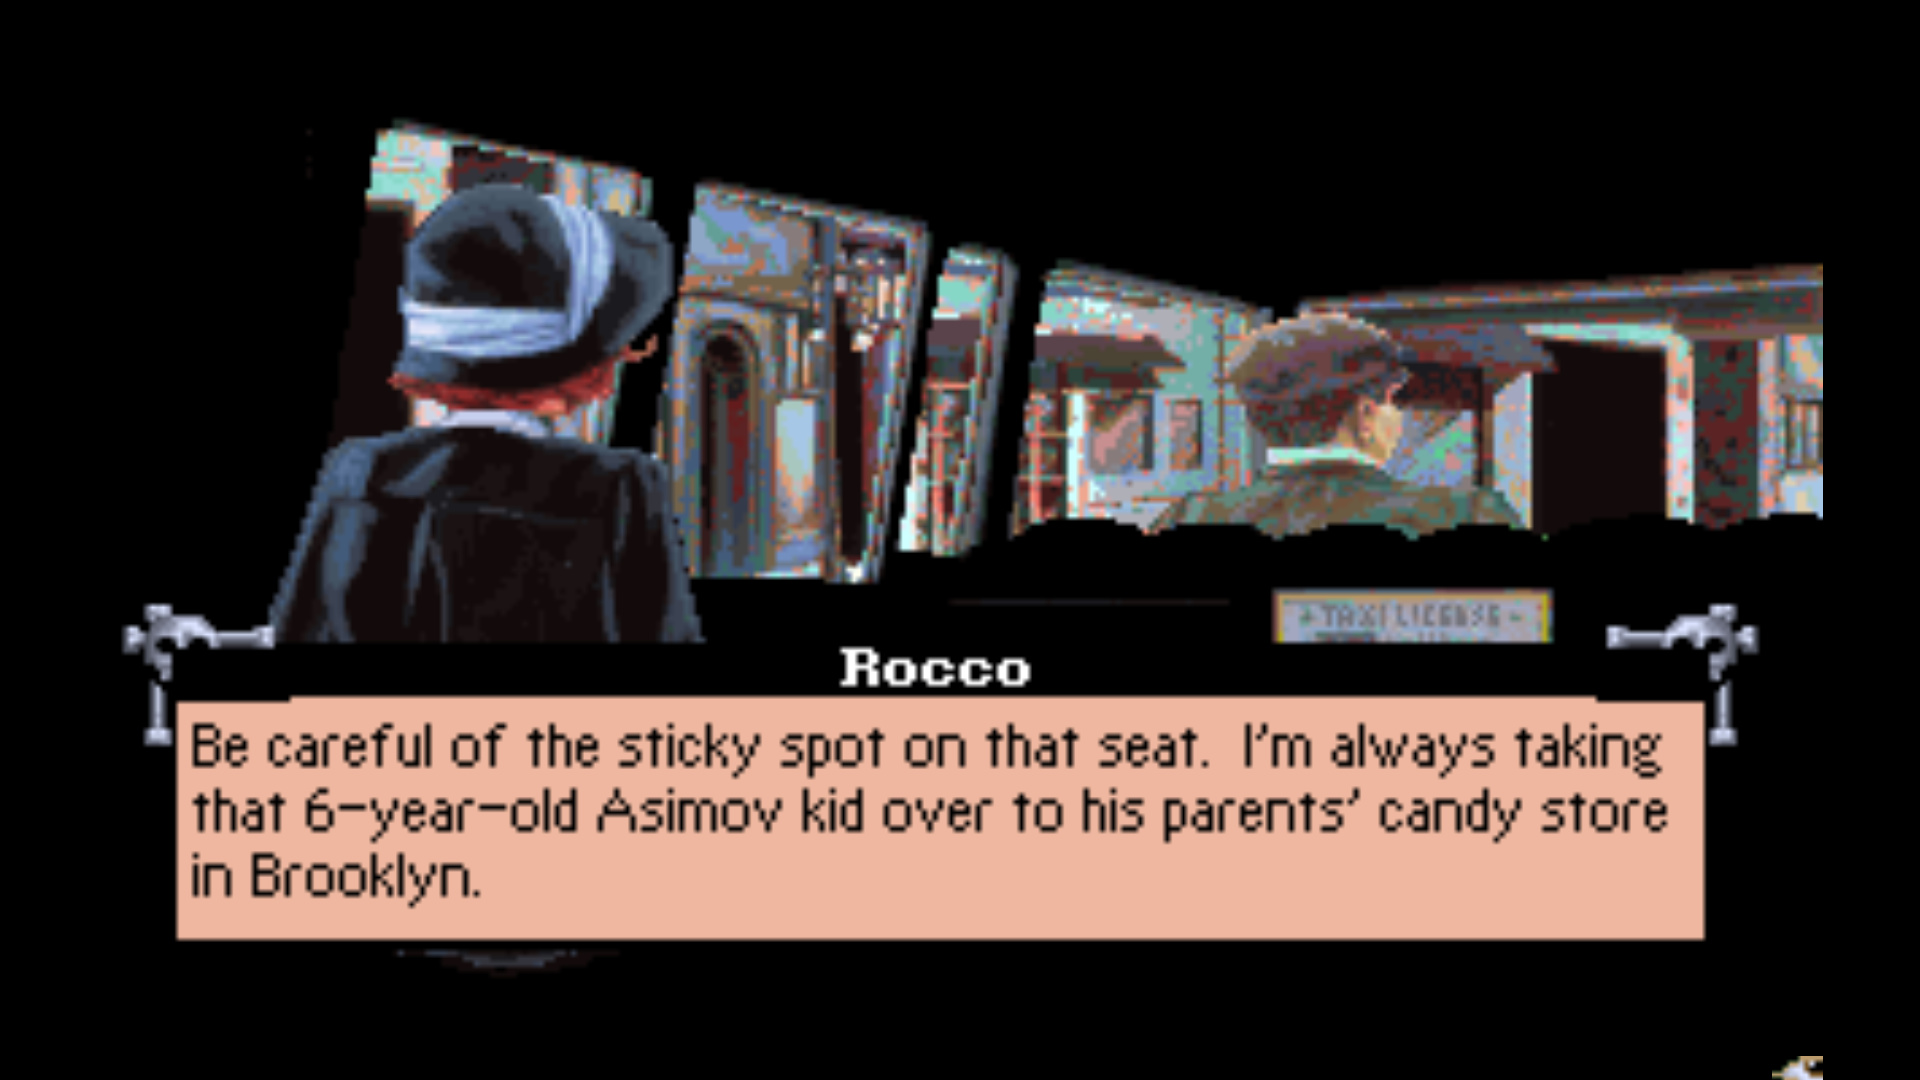
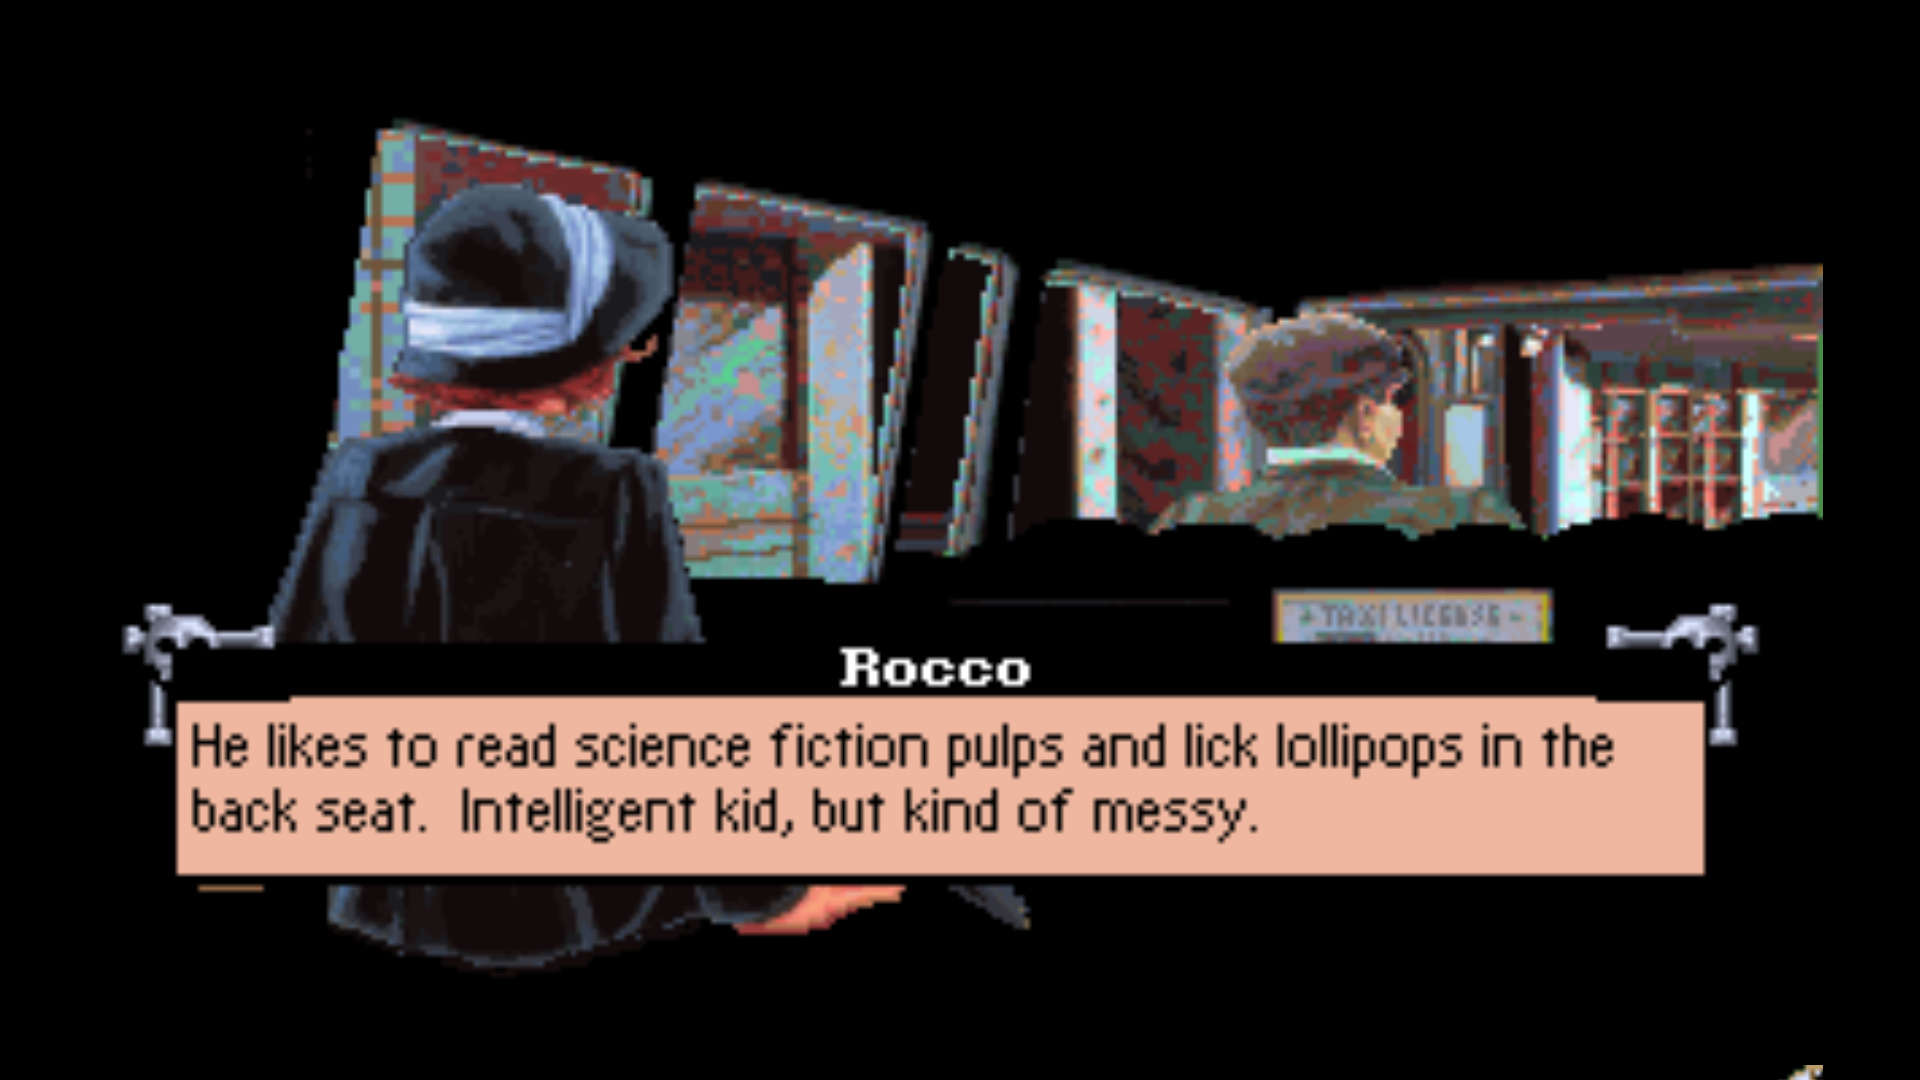
Here, we meet our amnesiac cabbie, Rocco, who is willing to give a ride to anyone with money… or members of the press. If taxi drivers actually did this, I would never have used my own car when I worked in the media.
I dunno, I think we should check his taxi license. I think Ol’ Buttsy disappeared after Dracula Unleashed and no one really knows where he went off to… and this guy talks an awful lot like him.
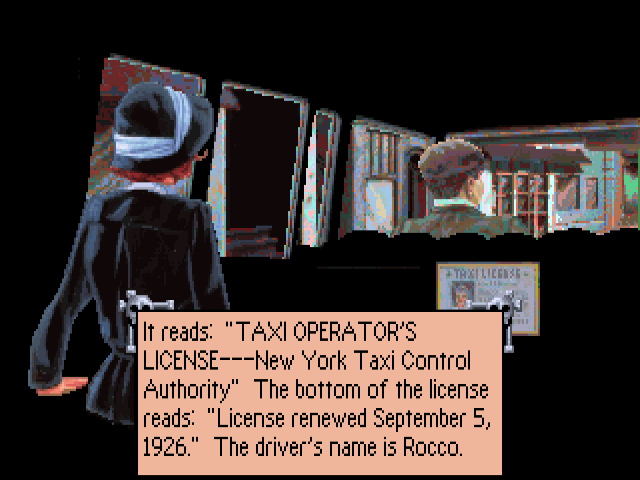
Nope, he’s legit. Rocco is kind of a jerk in that he forces us to show him our press pass every time we want to take a cab ride - he won’t just remember that we’re a reporter. Showing him the pass opens Laura’s notebook, which allows us to pick a location to visit.

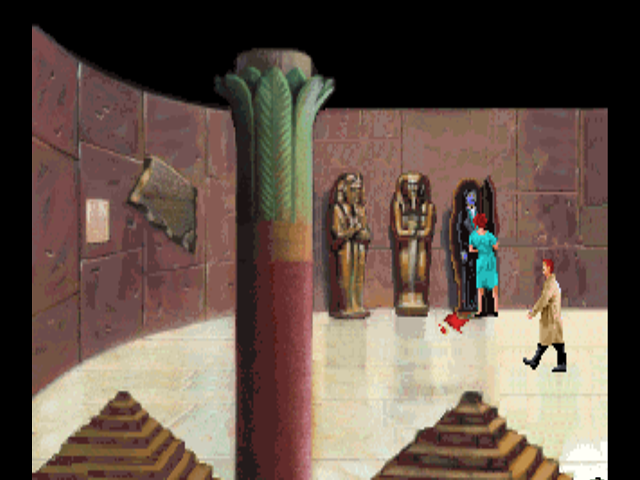
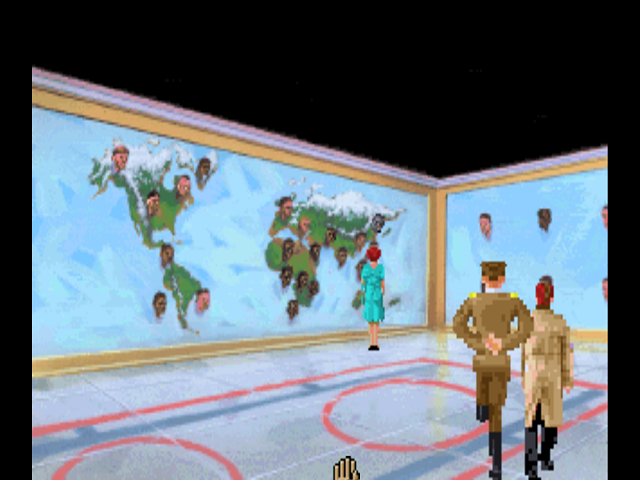
Not all of the locations work - New York obviously is too vague for him to understand - but the rest do. Surprisingly, Rocco knows EXACTLY where the speakeasy we want to visit is located, despite there probably being hundreds in New York City at the time. For now, we’ll go to the police station.
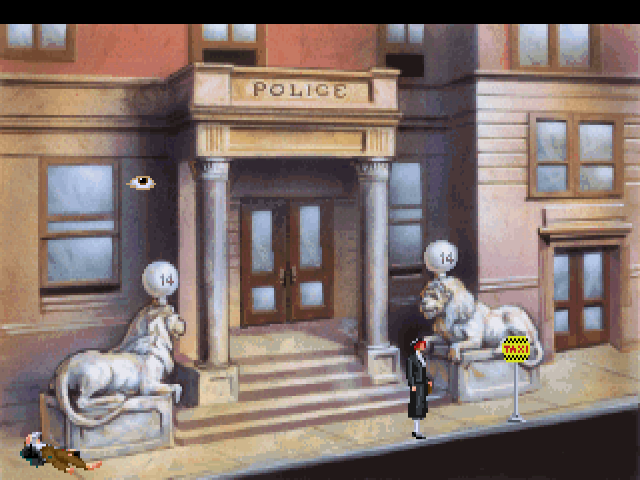
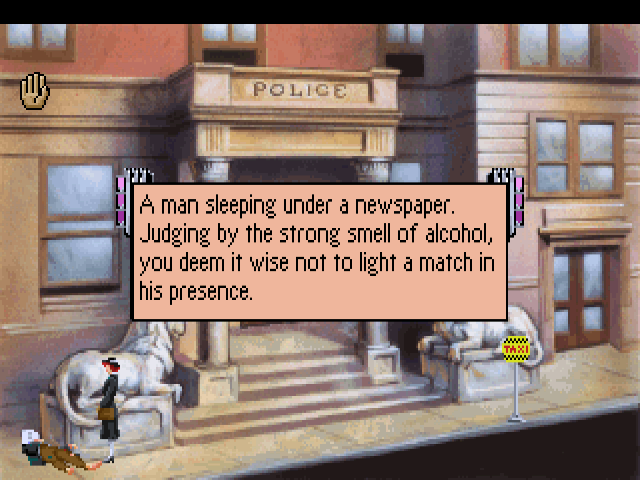
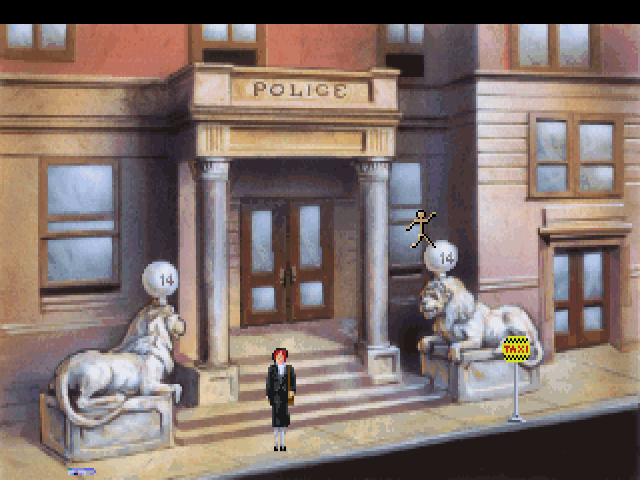
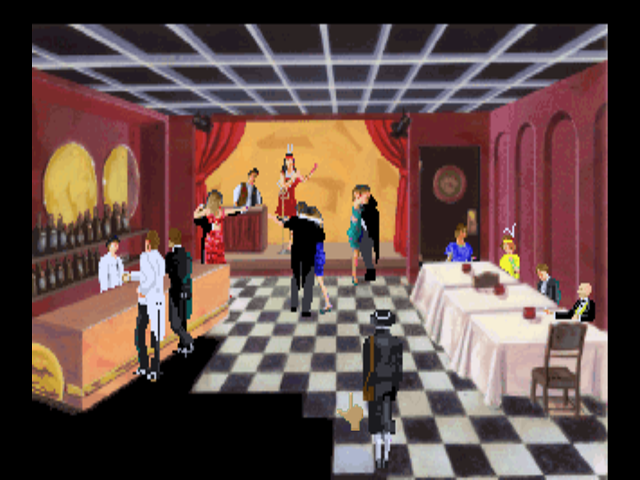
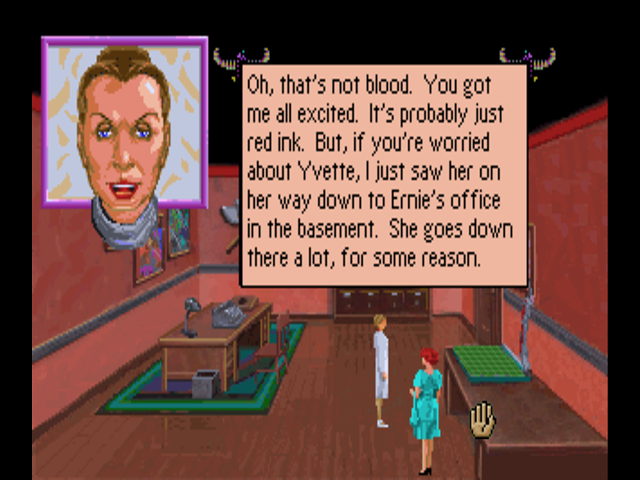
Welcome to the local police precinct… and wait… is that a drunk guy over in the corner? Haven’t I seen this guy somewhere before?
Uh-oh. Hey, buddy, you might not want to take any trips to England anytime soon. In fact, just stay away from British people altogether. Especially detectives.
Anyway, we can take a look at the drunken guy and… wow, Laura’s even more twisted than Detective Halligan.
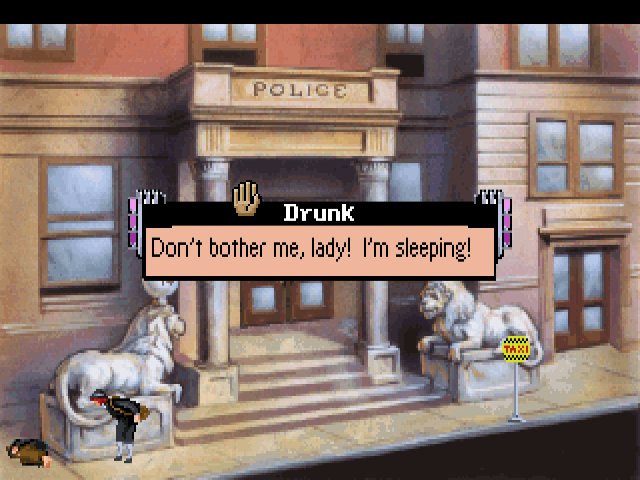
We can also try the “use” action on the drunk, which causes Laura to try talking to him.
 : “Excuse me, sir?”
 : “Don’t bother me, lady! I’m sleeping!”
This also causes the drunk to roll up into a… oh no, Laura… did you feed him some of Halligan’s death alcohol when I wasn’t looking? It’s even more unsettling in-game because the drunk stops snoring.
Anyway, we can now continue into the police station.
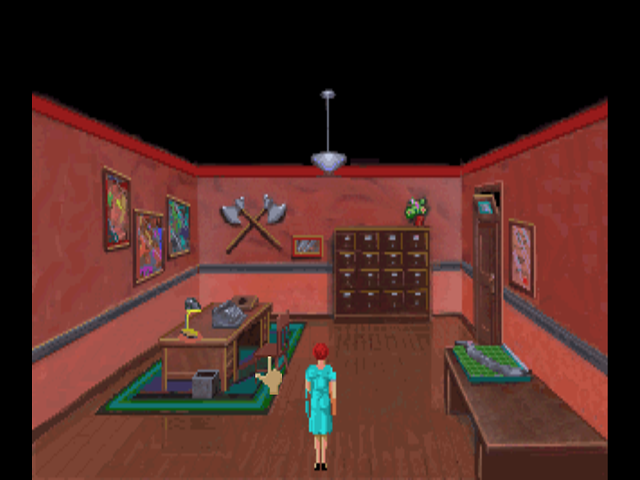
We can examine the man at the desk to learn that he is Sergeant Dennis O’Flaherty. Dagger of Amon Ra is kind of racist against Irish people in particular, which was an actual thing back in the 1920s. This is the description you get if you look at him:

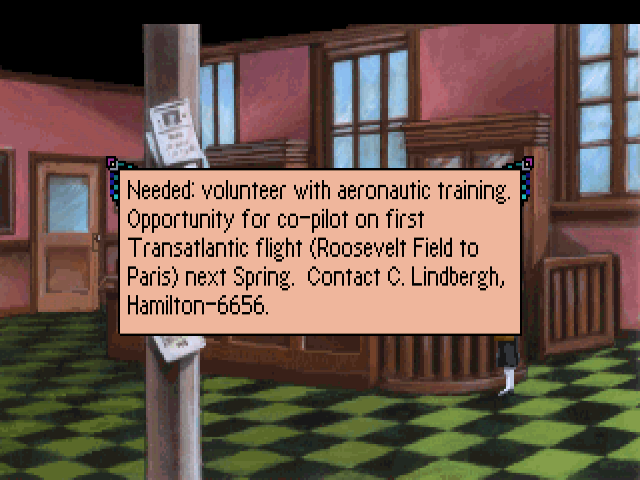
We can also look at the notices on the post across from Sgt. O’Flaherty’s desk.
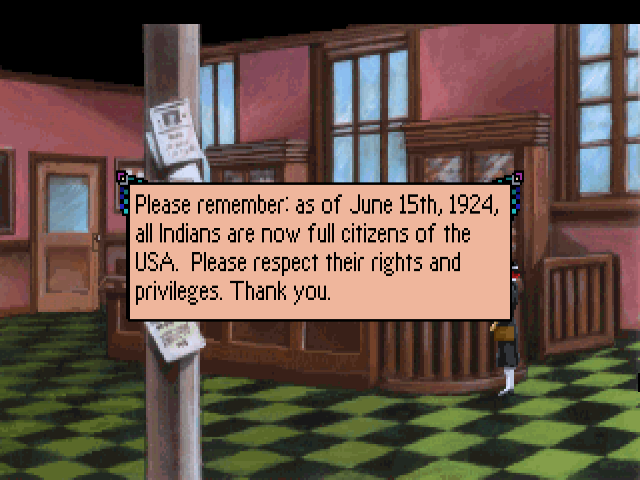
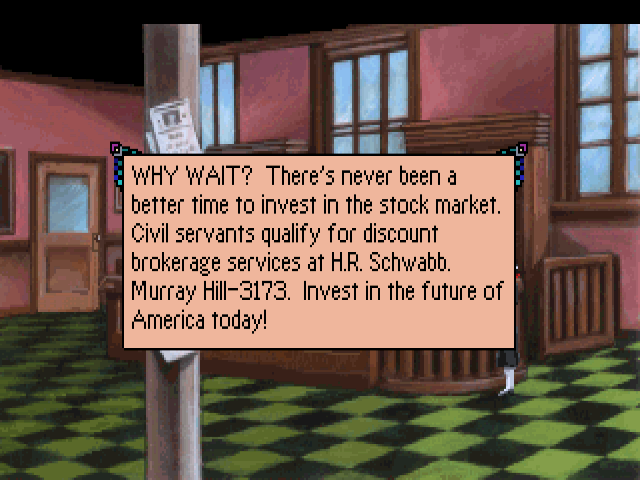
Yep, sure is a great time to invest in stocks. No way that market could go belly-up in about three years, no sir. Market’s strong as an ox, it is.
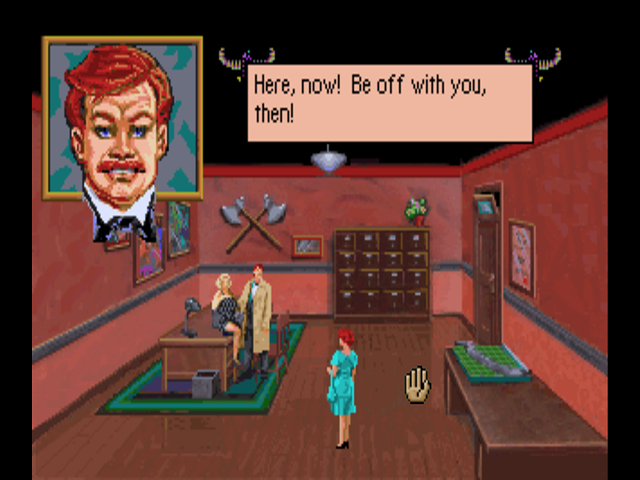
Carrying on, we can talk to Sgt. O’Flaherty. Let’s try to ask him something, like where Detective O’Riley is.
 : "Well, take yerself down to the Liberry, then.
: “Pardon me, Sergeant, but I happen to be a reporter with the Trib.”
: “Oh, well strike up the band, then.”
: “Look, lassie, I’ve been on m’ dogs all day.”
: “I ain’t had m’ lunch, and I’ve got better things to do than to jaw with some slip of a girl reporter.”
: “G’wan witcha, now.”
Jerk. Essentially, we won’t be getting anything out of him until we get him something to eat. Surely there has to be an eatery nearby. Let’s leave the police station, and…
Uh-oh. I told you not to leave for England, and look what you go and do! The drunk was nice enough to leave behind his newspaper, though.

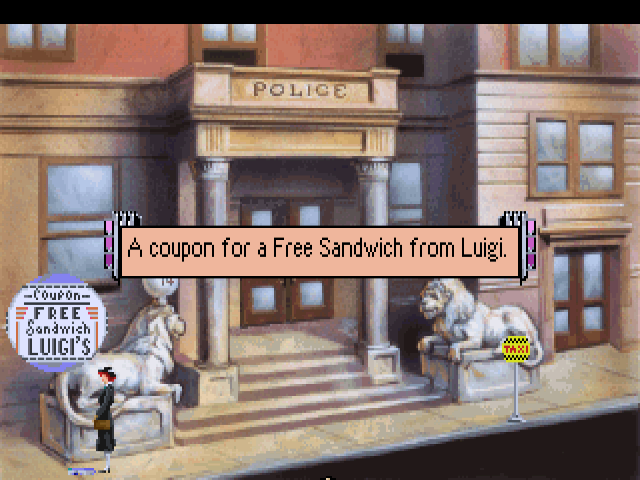
Oh, so THIS is what Luigi was busy doing before the whole Mushroom Kingdom stint. I guess Mario being from Brooklyn actually is canon. Who’d have thought?
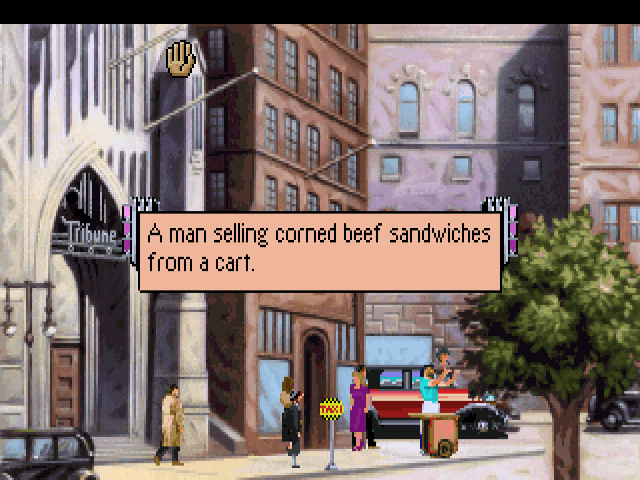
We haven’t actually seen Luigi’s yet, and there’s no real hint as to where it is. Luigi is actually a cart vendor who sells corned beef sandwiches. We’ve been right by where his cart is, though if you check the images from the end of the first update and the beginning of this one you’ll notice that he wasn’t there at that time. This is kind of a dickish move by Sierra to force you to check every location and hope you get lucky. Fortunately, we know that Luigi is parked right outside the Tribune building. This means we need to call Rocco again… but this time, Rocco has a little bit of banter during his cab ride.
 : “Imagine hearing someone’s voice from that distance. Just amazes me!”
Back at the Tribune building, we can now see Luigi selling sandwiches from his cart. Your guess is as good as mine to why he’s wearing teal rather than his usual green. Come to think of it, maybe teal fabric doesn’t exist in the Mushroom Kingdom. Makes sense. Let’s try talking to him.
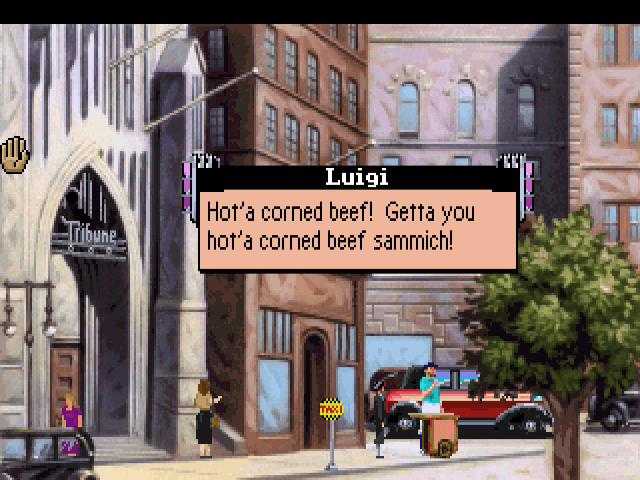
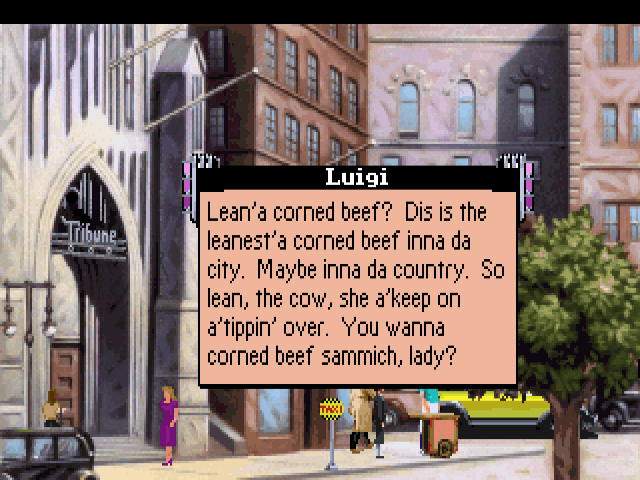
: “Is that corned beef lean?”
: “I believe I would like a sandwich.”
 : “Mama mia, another coupon! I’m a gonna go broke!”
: “Whatta crummy idea I had, attsa da last time I advertise inna newspaper.”
: “Take’a you sammich and get outta here before I change’a my mind.”
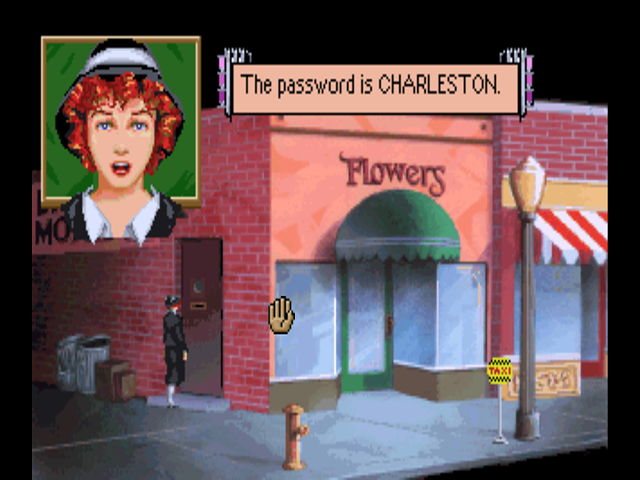
Back at the police station, we can give the sandwich from Luigi to Sgt. O’Flaherty, which allows us to ask him questions. Naturally, the first thing we ask him about is the totally illegal under prohibition which is still in effect speakeasy.
: “What can you tell me about the speakeasy?”
: “Now, I don’t know anything about a speakeasy, not in this town.”
“But there are some nice places where a lady like yerself kin sit and relax, and enjoy a bit of the high life, if y’know what I’m sayin’.”
: “Course, some of these places are restricted, dontcha know, so you’ll have to be givin’ 'em the right sign, so’s they know yer ok.”
: “But just mention the Charleston, and you’re in like Flynn, you got that now?”
: “I think so. Thank you kindly, Sergeant!”
: “Don’t mention it. And I mean it now, don’t you go mentioning it. Not to ANYone!”
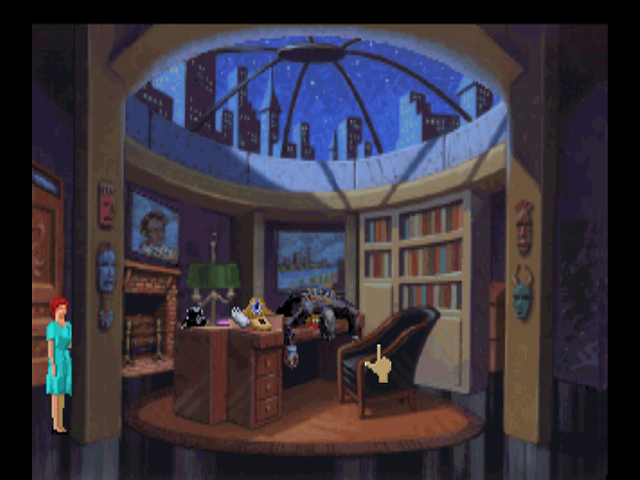
We can also ask Sgt. O’Flaherty about Detective O’Riley. He’ll point us to the door in the back.
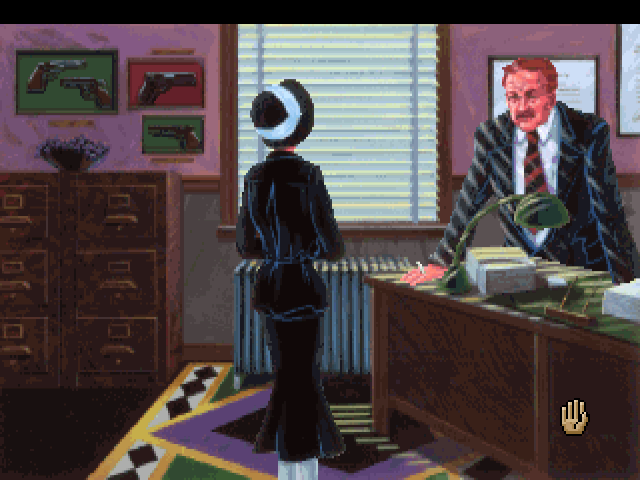
Meet Det. Ryan Hanrahan O’Riley. For some reason, the game doesn’t give him a dialogue portrait the way it did for Laura and Crodfoller (which is weird given that O’Riley has WAY more screentime than Crodfoller does) until much later in the game. For now, I’ll be using his black-and-white portrait from the game’s hint book.
: “I’m Laura Bow from the New York Daily Register News Tribune.”
: “I’m looking into the burglary at the Leyendecker Museum, and I understand you’re the one handling the case.”
: “Would it be possible for me to look at your report?”
 : “You can’t be a reporter, lass. The Trib only hires men.”
: “I AM a reporter, sir, and you can check with my editor, Sam Augustini, if you don’t believe me.”
: “I thought that Crodfeather guy was going to be writing the robbery article.”
: “Crodfoller WAS assigned to it, but the story is mine now. Can I see the report, please?”
: “It’s very technical, lass. I don’t think you’ll be learning much from it.”
: “Thank you for your concern, detective, but I’d like to be the judge of that.”
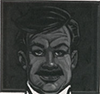
: “You’re a determined girl, I’ll say that much for you. Have a look, then.”
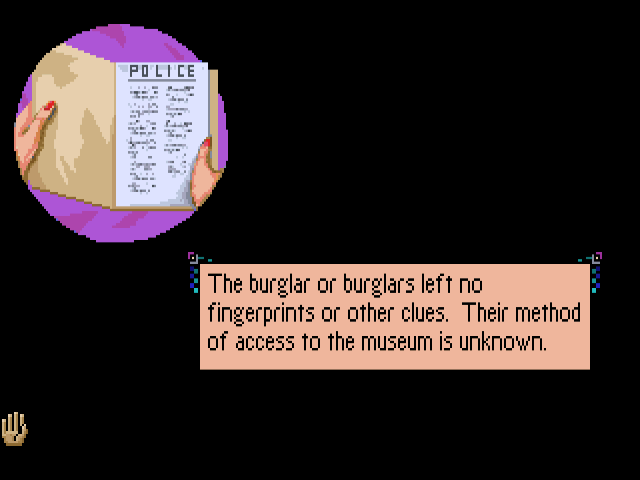
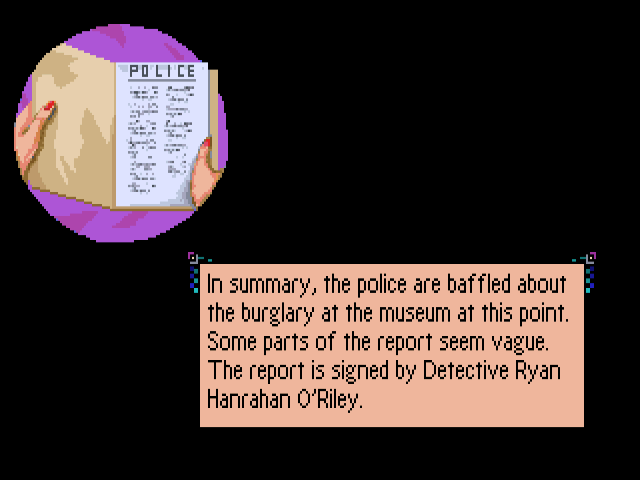
: “There’s only one page to this report! Where’s the rest of it?”
: “That’s all of it right now.”
: “It’s rather vague, isn’t it?”
: “Good police work takes time, and I’m a very busy man.”
: “I haven’t had time to follow up on the burglary…”
: “So what if a museum loses a knife? There are people being murdered left and right in this city, dropping like flies.”
: “Cars are being stolen. Booze is being smuggled into speakeasies…”
: “Pedestrians are being mugged, firebugs are burning down half the city, they’re running out of grapes at the corner market, and I’ve got a headache!”
: “And you know who gets to investigate all the crimes in this district? ME! So, I don’t need any nosy reporters hanging around telling me my reports are VAGUE, girlie!”
: “Well, excuse ME!”
: “Talk to the Desk Sergeant if you have any more questions. I haven’t got time for you right now.”
If O’Flaherty was a sexist jerk, O’Riley is a sexist jerk in addition to being a walking Irish stereotype. Our job at the police station is over. Join us next time for a trip to a Chinese laundry and our first visit to the speakeasy.
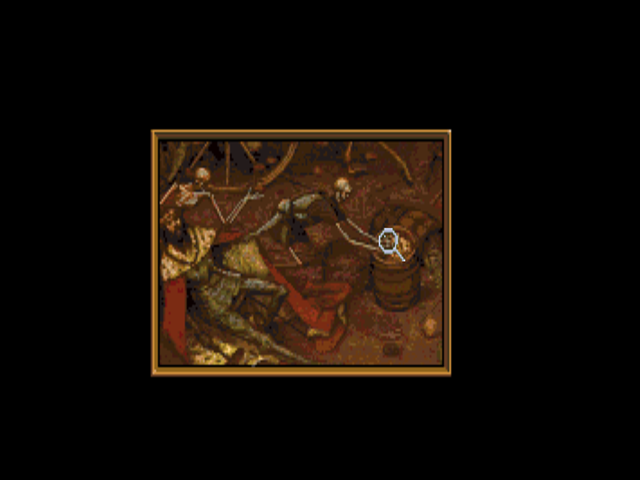
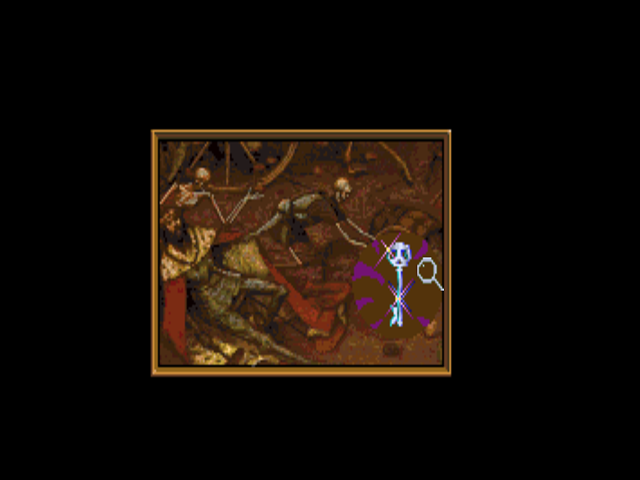
Footnote: Image credit for the Mystery of the Druids shot goes to Slowbeef, as I am far too lazy to reinstall that game just to get a screenshot.
I remember I played this game ages ago when I had no idea what I was doing. Looking forward to seeing the rest of this LP. 
Update 3: Timrod in Realizing Automatic Screenshot Tools Exist
One thing I realized doing Updates 1 and 2 was that taking manual screenshots of a game with automatic text advancement is both really hard and really annoying. Today I took care of that by getting a one-button screenshot tool (unfortunately, the Steam overlay will not work with ScummVM, which I use to run Dagger of Amon Ra). This means that I can get far more screenshots without having to go through the same dialog ten or fifteen times. Unfortunately, due to a technical mishap, I had to restart the game. It only took like, ten minutes to get back to where I was.
Fair warning, the character we’re about to meet is basically the most racist in the game, to the point where I can easily understand how some people might feel uncomfortable reading it, let alone watching a video LP of this part. If that’s not your thing, I’ll post where this character comes into play and then again after all of the interaction in this update is over.
Anyway, after getting back to the taxi, we remind Rocco of his duty to carry around reporters for free and get a free ride to Lo Fat’s Chinese Laundry.
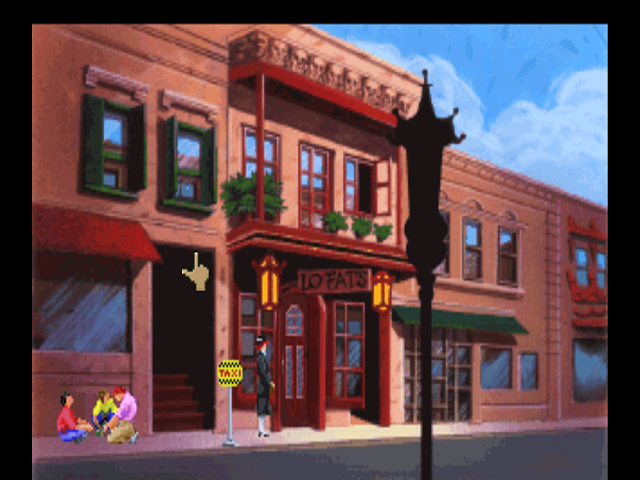
If you’ll look in the lower-left hand corner, you’ll notice three boys sitting around. Their names (from the left) are Tubby, Biff, and Stinky. These kids represent one of the first missables in the game. First, let’s try talking to them.
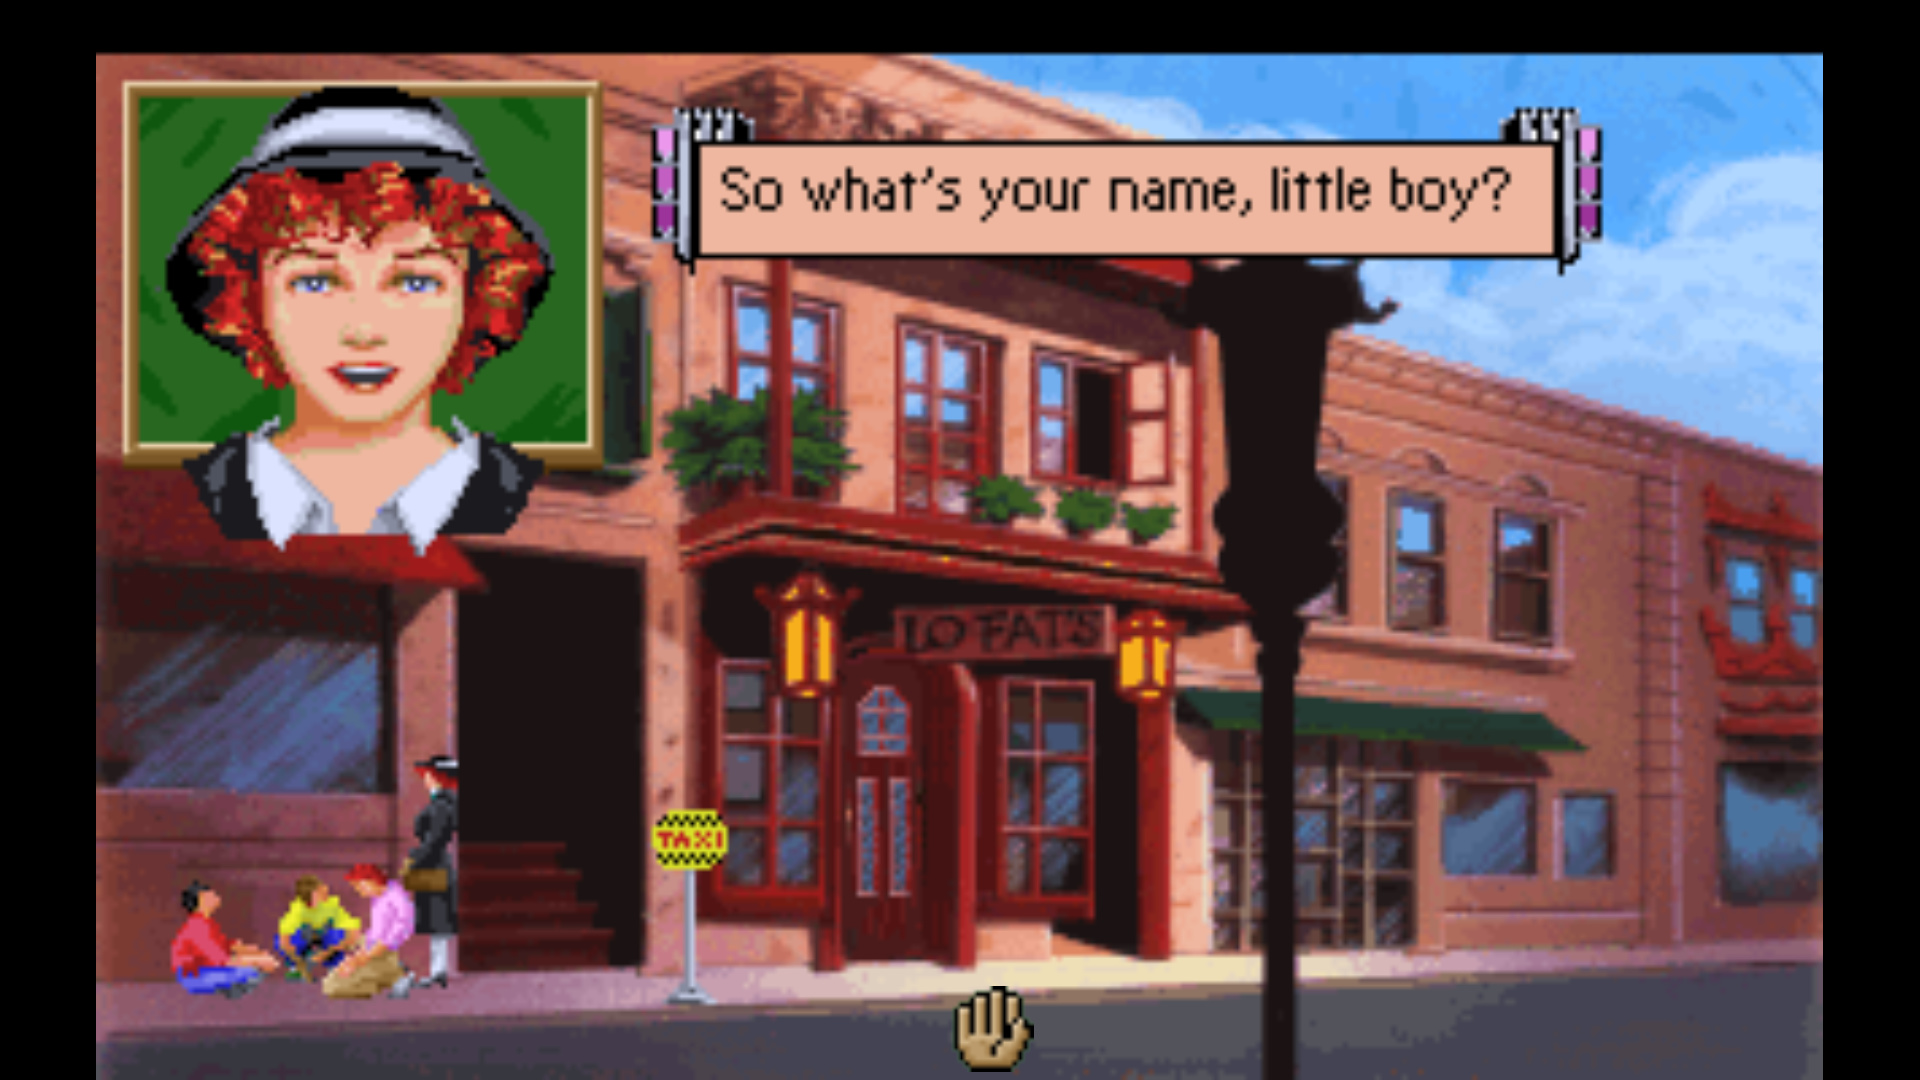
 : (in an assholish tone) “Biff.”
: “I was only asking!”
: “Yeah, well don’t ask again.”
Charming little kid. Anyway, Biff confirms with Laura that his two hobbies are burning ants with his magnifying glass and baseball. Say, didn’t we have one of those things?
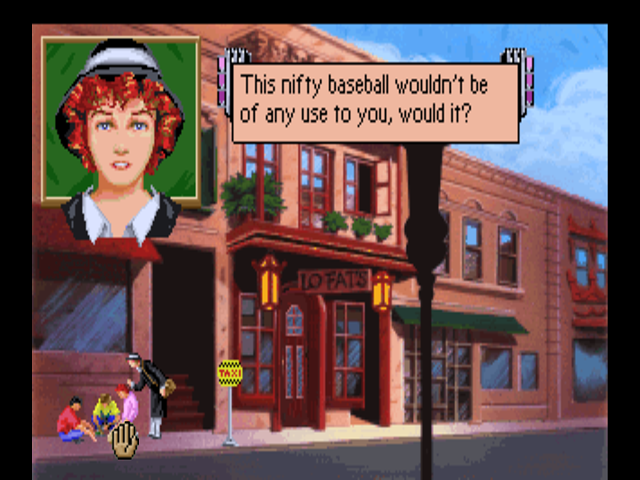
: “Hmm… not bad. I’m not sure about this ‘Bob Ruth’ signature, but it’s not a bad imitation.”
: “Stitching integrity is about 89%. Wanna trade?”
: “That’s just what I was thinking. I could use that magnifying glass you boys are using.”
: “Have we got a deal?”
: (Stinky) “Hey, what a gyp! Now how’re we gonna murdalize those ants?”
: “Ease up, Stinky. We’re almost out of ants anyway. Then we’ll go to Old Man Meadows’ place and bust his windows.”
With that, the kids get up and leave, leaving us free to enter Lo Fat’s laundry. This is the point I was talking about earlier, so you can feel free to stop here and pick back up in a bit if it’s not your thing. I’ll put another line below this section. One final note in this section, though: the magnifying glass is missable once we finish Act 1. Thankfully, Sierra was “merciful” and made the point at which you get stuck without it fairly early into Act 2.
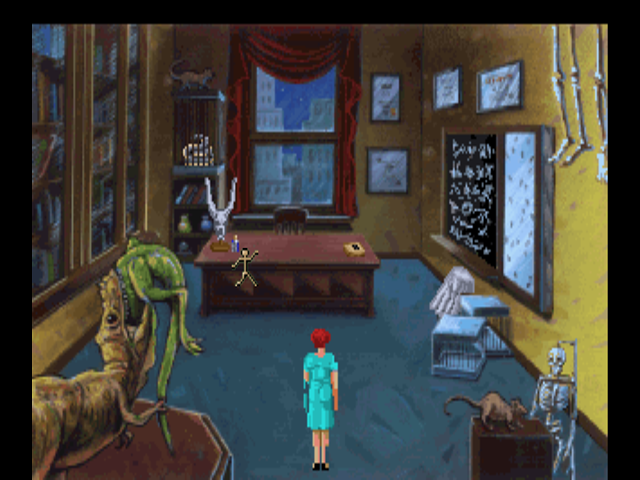
Anyway, welcome to Lo Fat’s Chinese Laundry.
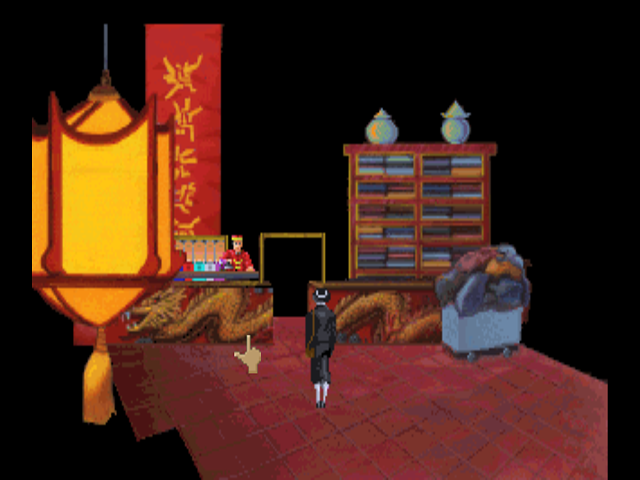
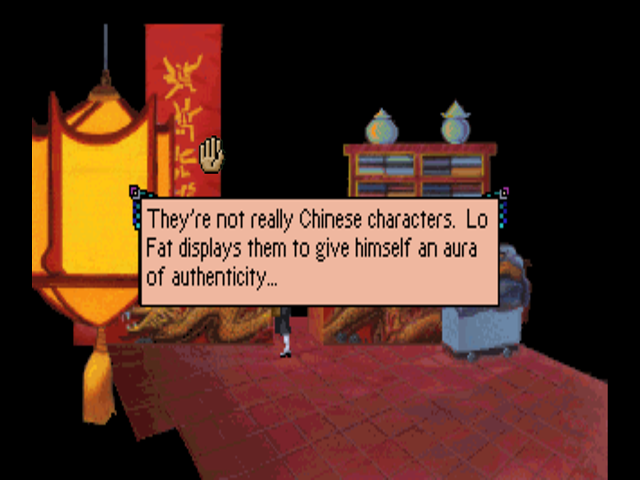
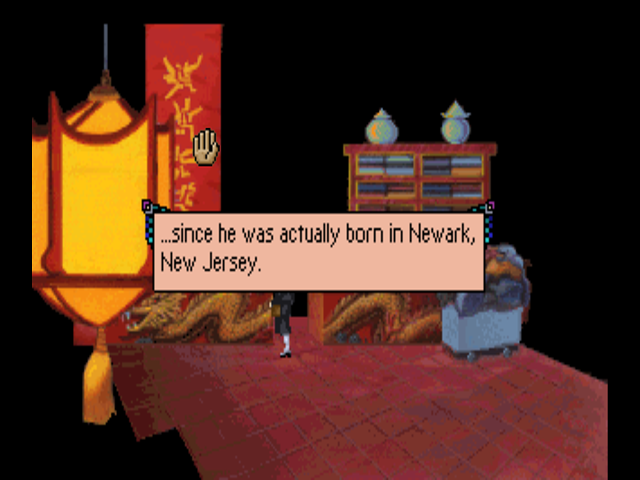
We can actually learn a lot about Lo Fat from looking at the banner behind him.
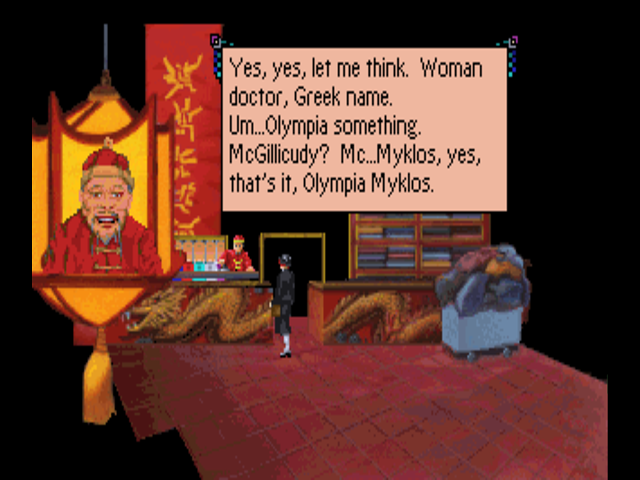
Before I talk to Lo Fat, let me explain what sets him a cut above Detective O’Riley or any of the other stereotype characters in terms of sheer racism - his voice. In the CD version, Lo Fat is voiced by one of the developers (who is definitely non-asian) speaking with a pidgin Chinese accent. You can still get a pretty good idea of what it’s like through the text. Unlike most conversations, I’m going to be posting straight screenshots of Lo Fat’s dialog so that it’s clear I am not making any of this up… but also because he gives us some important character notes. There’s only one thing we can really talk to him about right now, and that is the Leyendecker Museum.
: “Ever been to the Leyendecker Museum?”
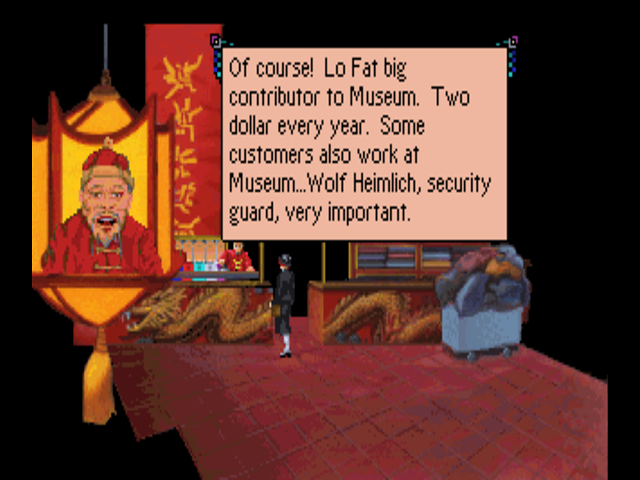
: “Anybody else from the museum ever come here?”
: “Have you been there recently?”
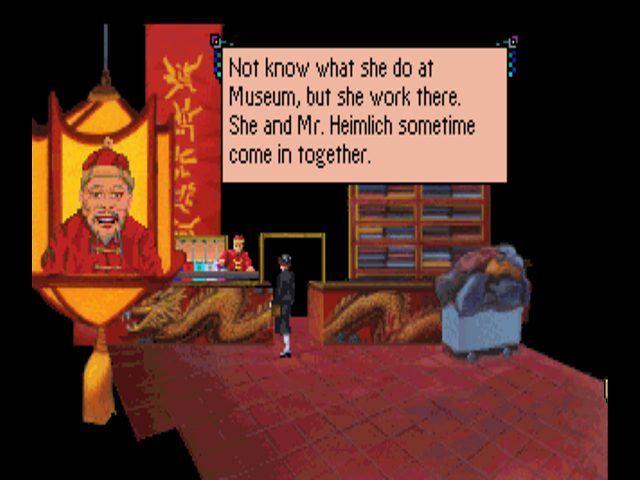
: “Besides Mr. Heimlich and Dr. Myklos, are any of your other customer Museum employees?”
Lo Fat doesn’t have too much more to tell us, other than implying that Yvette gives him… sexual favors… in exchange for doing her laundry. No, I am not making this up either.
: “Is it something private?”

If you skipped the previous part, you can start reading again here. A side note here, Yvette is essentially an expy of Fifi, the french maid in The Colonel’s Bequest who was known to be carrying on love affairs with several people on the side. The developers behind this game were all kinda horny (Roberta and Ken Williams did a softcore porn thing that was included on one of the CDs I had with this game on it as a kid) and I guess this is how they let that out.
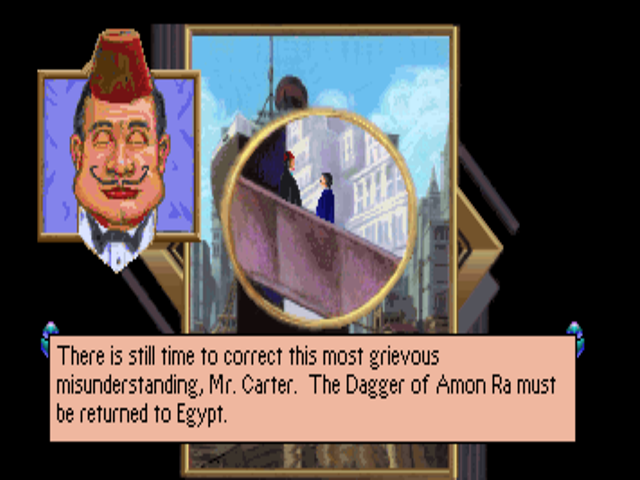
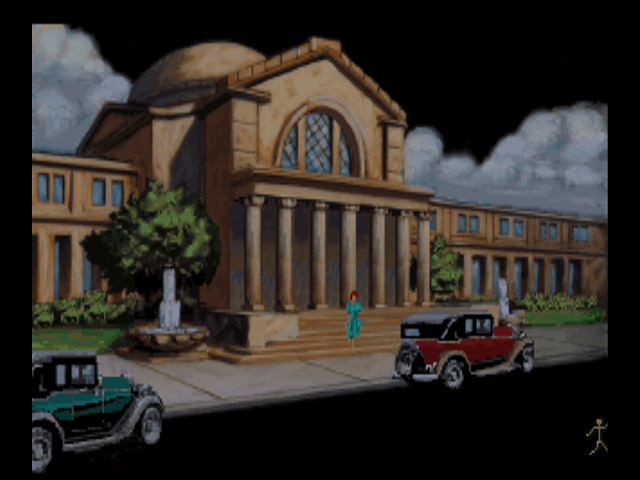
With that over, we can now head to the local docks. I haven’t posted the intro sequence yet (that will be the last update before Act 2) but the reason we’re going here is that this is where the ship that brought Dr. Carrington and Dr. Carter back from their expedition in Egypt is docked.
Meet Steve Dorian, voiced by Josh Mandel… who you may also know as King Graham in King’s Quest V (and later that one Retsutalk episode). Steve sounds like King Graham if King Graham was possessed by Satan at all times. He is, as you’ve probably guessed, a stevedore. Specifically, he’s the stevedore who unloaded the Andrea Doria (the ship Carrington, Carter, and a few other people took back from Egypt). Like Lo Fat, Steve doesn’t know many of the people involved with the museum, but he does have a few choice tidbits of information we’ll need later.
First, let’s ask Steve about Dr. Carrington:

We can then ask him about the only other person that we can, that being Dr. Carter:
Finally, we can ask Steve about the museum, which is what actually sets the event flag that lets us continue.
: “What do you know about the Leyendecker Museum?”
 : “That’s where Mr. Carter’s Egyptian crates were going. Nice place. Ever been there?”
 : “That’s DOCTOR Carter to you! I didn’t go through several years of vague archaeological training to be called Mister!”
: “Actually, I’m attending a fund-raising party there tonight.”
: “Sounds like a formal party. What will it cost to get in?”
: “I don’t know. I’m covering it for the newspaper, so I get in free.”
: “I thought the museum was closed today.”
: “It is, but the party isn’t 'til 7 o’clock tonight.”
: “Sounds like fun. Enjoy yourself. Now, if you’ll excuse me, I need to get back to work.”
I apologize to The Dark Id for stealing his gimmick. It won’t happen again. Steve walks off into the sunset (presumably to drink away the memories of King’s Quest V) and we can call Rocco again to take us to the final new destination of Act I: the speakeasy.
Right away, you can see the door we’re looking for. This is actually the first place (that I’m aware of) that you can die in this game - if you knock on the door and give the person behind it the wrong password, Laura will go down in a hail of gunfire.
Fortunately, we know the password. Just like Sergeant O’Flaherty said, we’re in like Flynn.
There’s actually a bit to do in the speakeasy later, but for right now we’re interested in the bald guy in the bottom-right. This is Ziggy, the stoolpigeon that Crodfoller told us about.
: “Are you Ziggy?”
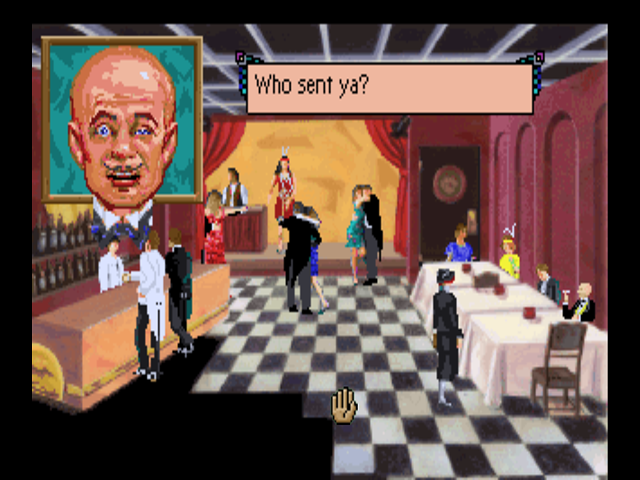
Ziggy is, uh, a bit of a freak. His face twitches all over, and he sounds like an Igor (the one played by Bela Lugosi, not the servant of Philemon). At this point, we’re prompted to pick a name from Laura’s notebook - picking Crodfoller is the right answer.
 : “Crodfoller? He’s an old pal of mine. Whatcha want ta know?”
We can try questioning Ziggy about any number of things, but he doesn’t know much. The correct answer here is to ask him about Egyptology.
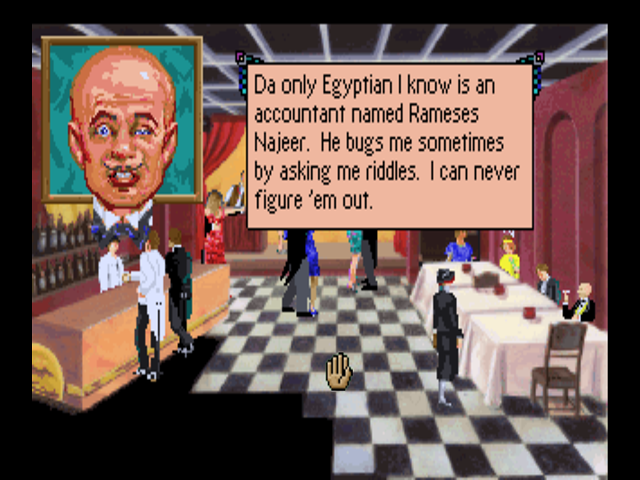
: “What kind of riddles?”

Yeah, there’s no way we’ll ever have to deal with that riddle later. Let’s leave Ziggy to his drink and get out of here. Taxi!
Uhh… you’re not Rocco. Who the hell are you?

Meet Bob “The Slob”, the only other taxi driver in this game. We’ll have to choose our words carefully here, because Bob’s taxi actually has an item we need to progress. I don’t know if choosing wrong is a death or not, as I forgot to try it while playing through for the LP.
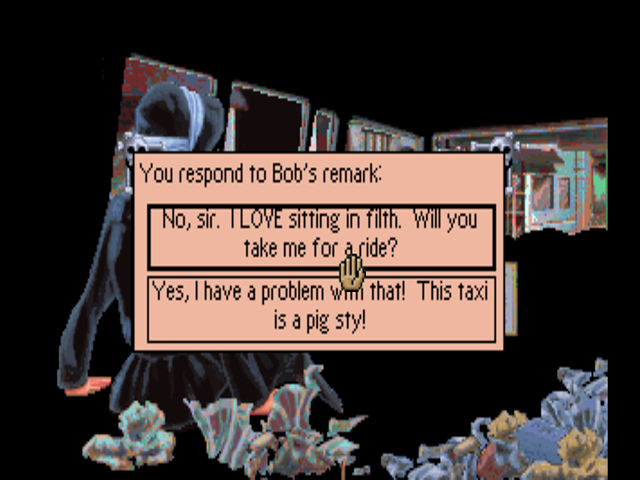
We want the first option. Before we show Bob our press pass, though, let’s rummage through his trash.
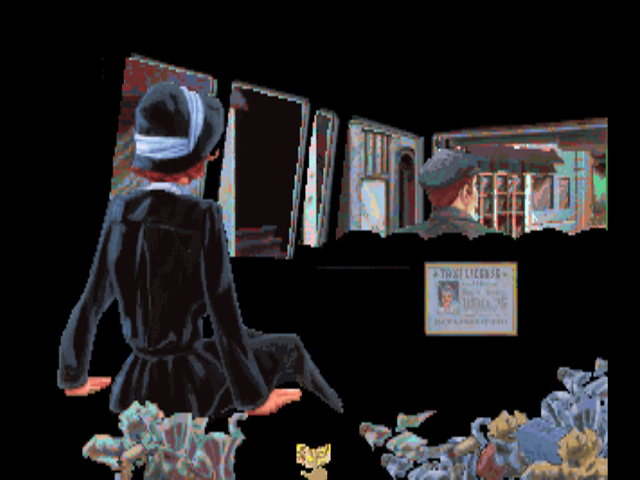
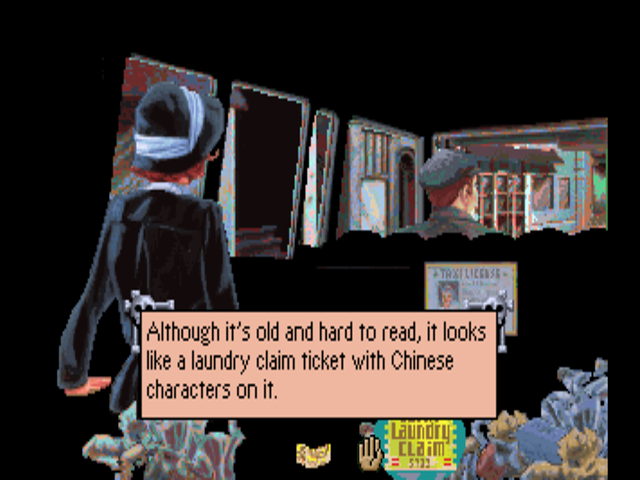
Hoo boy, we get to go see Lo Fat again. Tune in next time for the final meeting with Lo Fat, followed by the end of Act 1 and an update containing the game’s intro sequence! Now, if you’ll excuse me, I have a characters page to update.
Update 4: End of Act I
This update will be rather short because I want to do the intro as a separate update before going into Act 2.
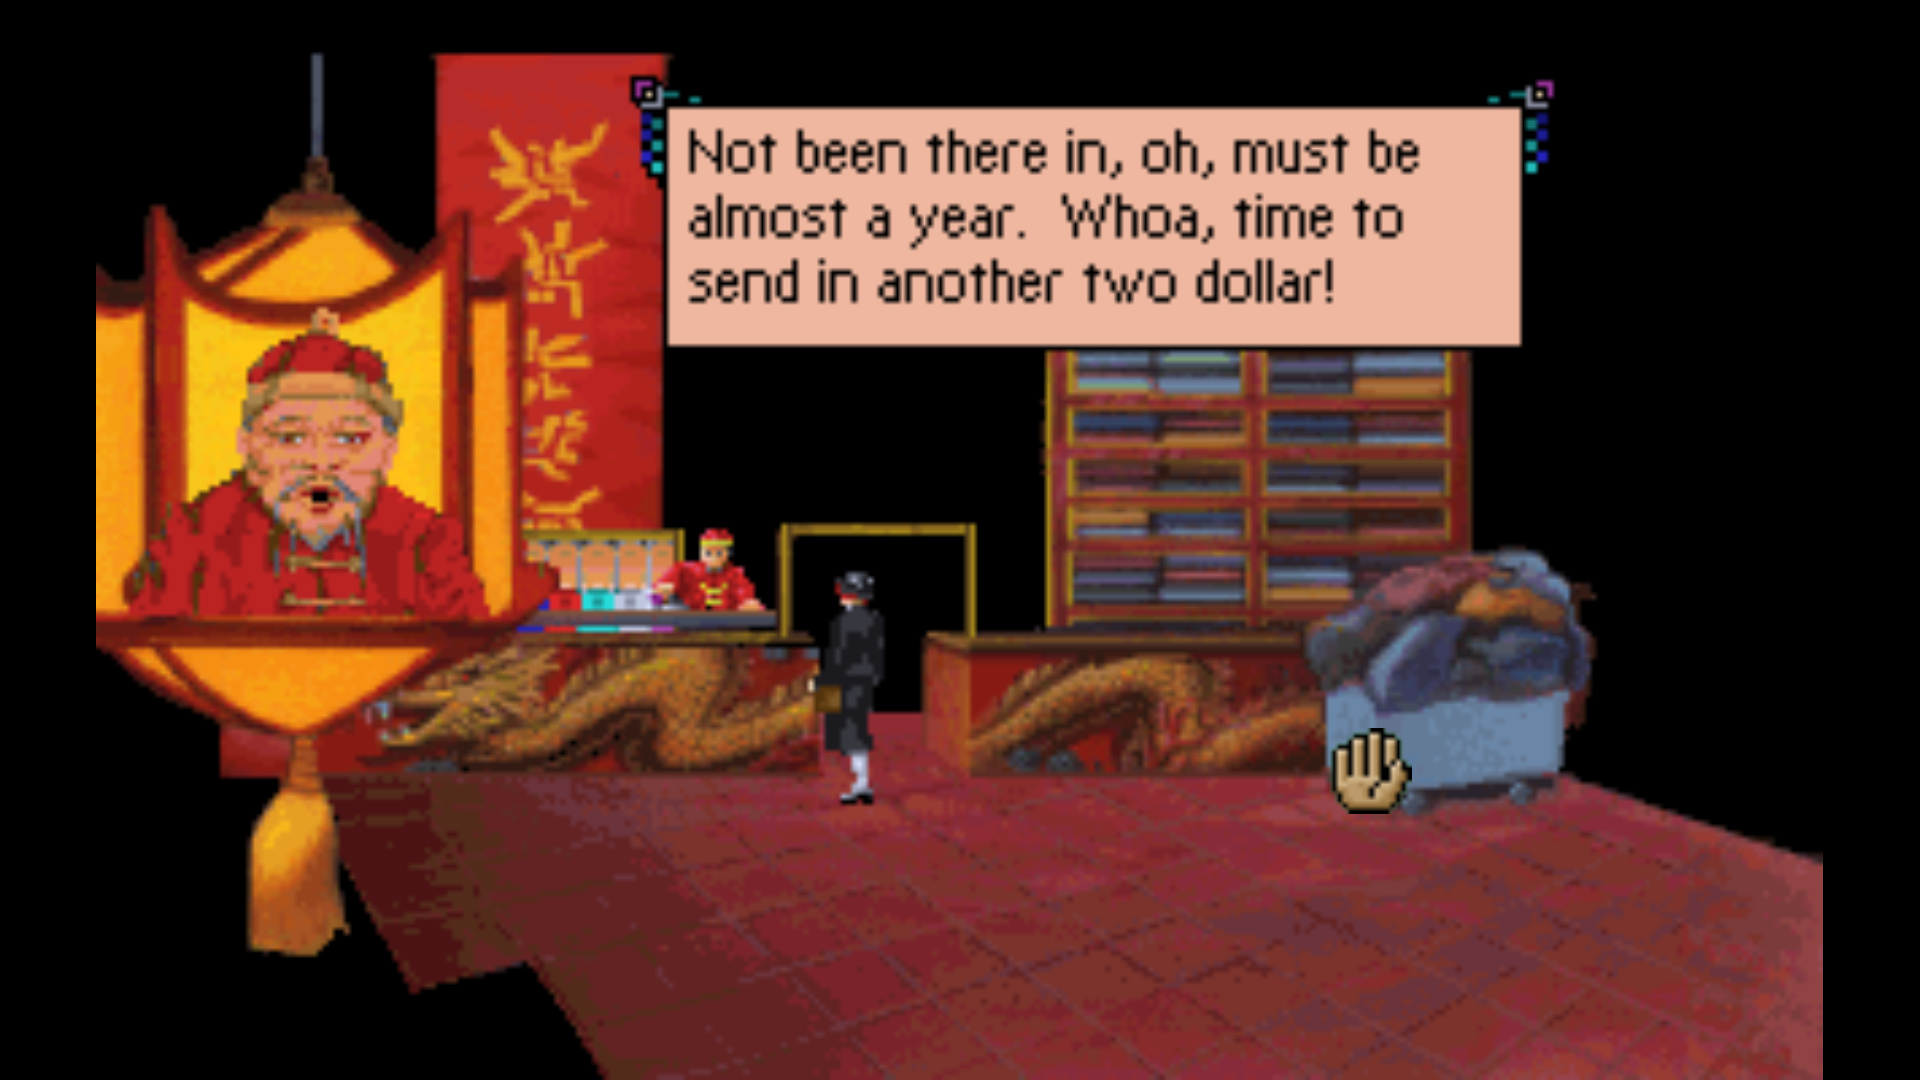
Now that we have the claim ticket, we can go back to Lo Fat and try to use it.
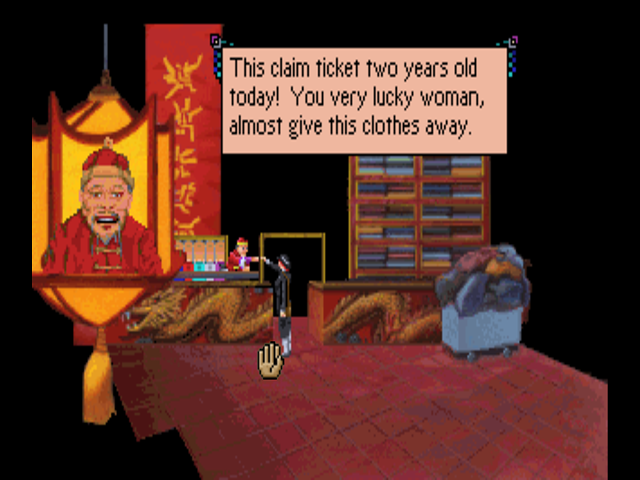
 : “It’ll be ready Tuesday. Hahaha! Just kidding, ancient Chinese joke.”
: “Actually, this isn’t mine at all. I found this claim ticket just a little while ago.”
: “I’d feel badly if someone were to come back for it.”
: “You worry for nothing. Nobody come in for two-year-old laundry.”
: “Lady who own this dress probably DEAD by now! Hahahaha!”
: “You’re a strange man, Mr. Fat, but I kind of like you.”
This is where it gets established that Laura is a terrible judge of character. Lo Fat gives us a turquoise evening dress, which is what the posting on the bulletin board at the Tribune was hinting at in the very beginning of the game. The only problem now is finding a place to put it on.
The logical place would be the Tribune, but Laura is the sole female employee there and can’t simply get the editor to empty out one of the men’s bathrooms for a minute so she can change for some reason.
Instead, we’re going back to the speakeasy, a perfectly logical place for a change of clothes. Rocco must be the doorman there, because we have to go through the password sequence every time we want to go back to the speakeasy.
We can now head through the door in the back, which is actually the door to the women’s bathroom.
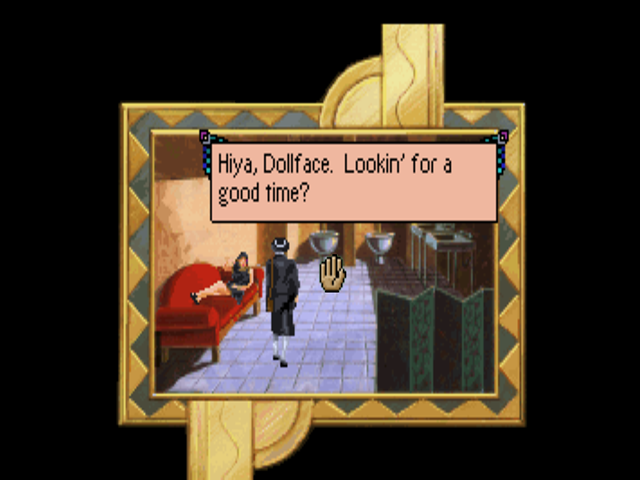
Just like with Bob the Slob, we have a dialog option available. Both of them basically equate to the same thing. I went with the more polite top option.
To change into the dress, we have to use it with the screen… which the flapper on the couch has plenty to say about.
Welcome to Laura’s new appearance. She’ll be in this outfit for the rest of the game.
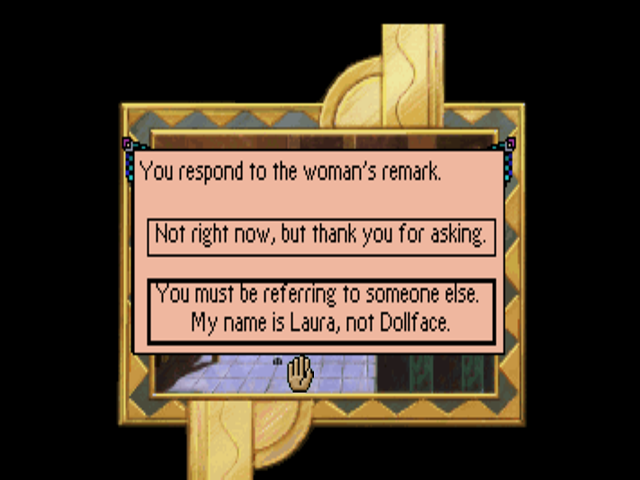
We can try to take her old clothes with us, but…
We can’t ask the flapper any questions, but we can talk to her, which gives us this tidbit of information.
Leaving the changing room causes Laura to immediately leave the speakeasy and head outside to summon Bob again, which takes us straight into Act 2. This will be Laura’s final taxi ride of the game.
Next update, we go back to the intro sequence. Before we do that though, here’s a little bonus I forgot to post last update: Rocco’s banter from earlier in the game.
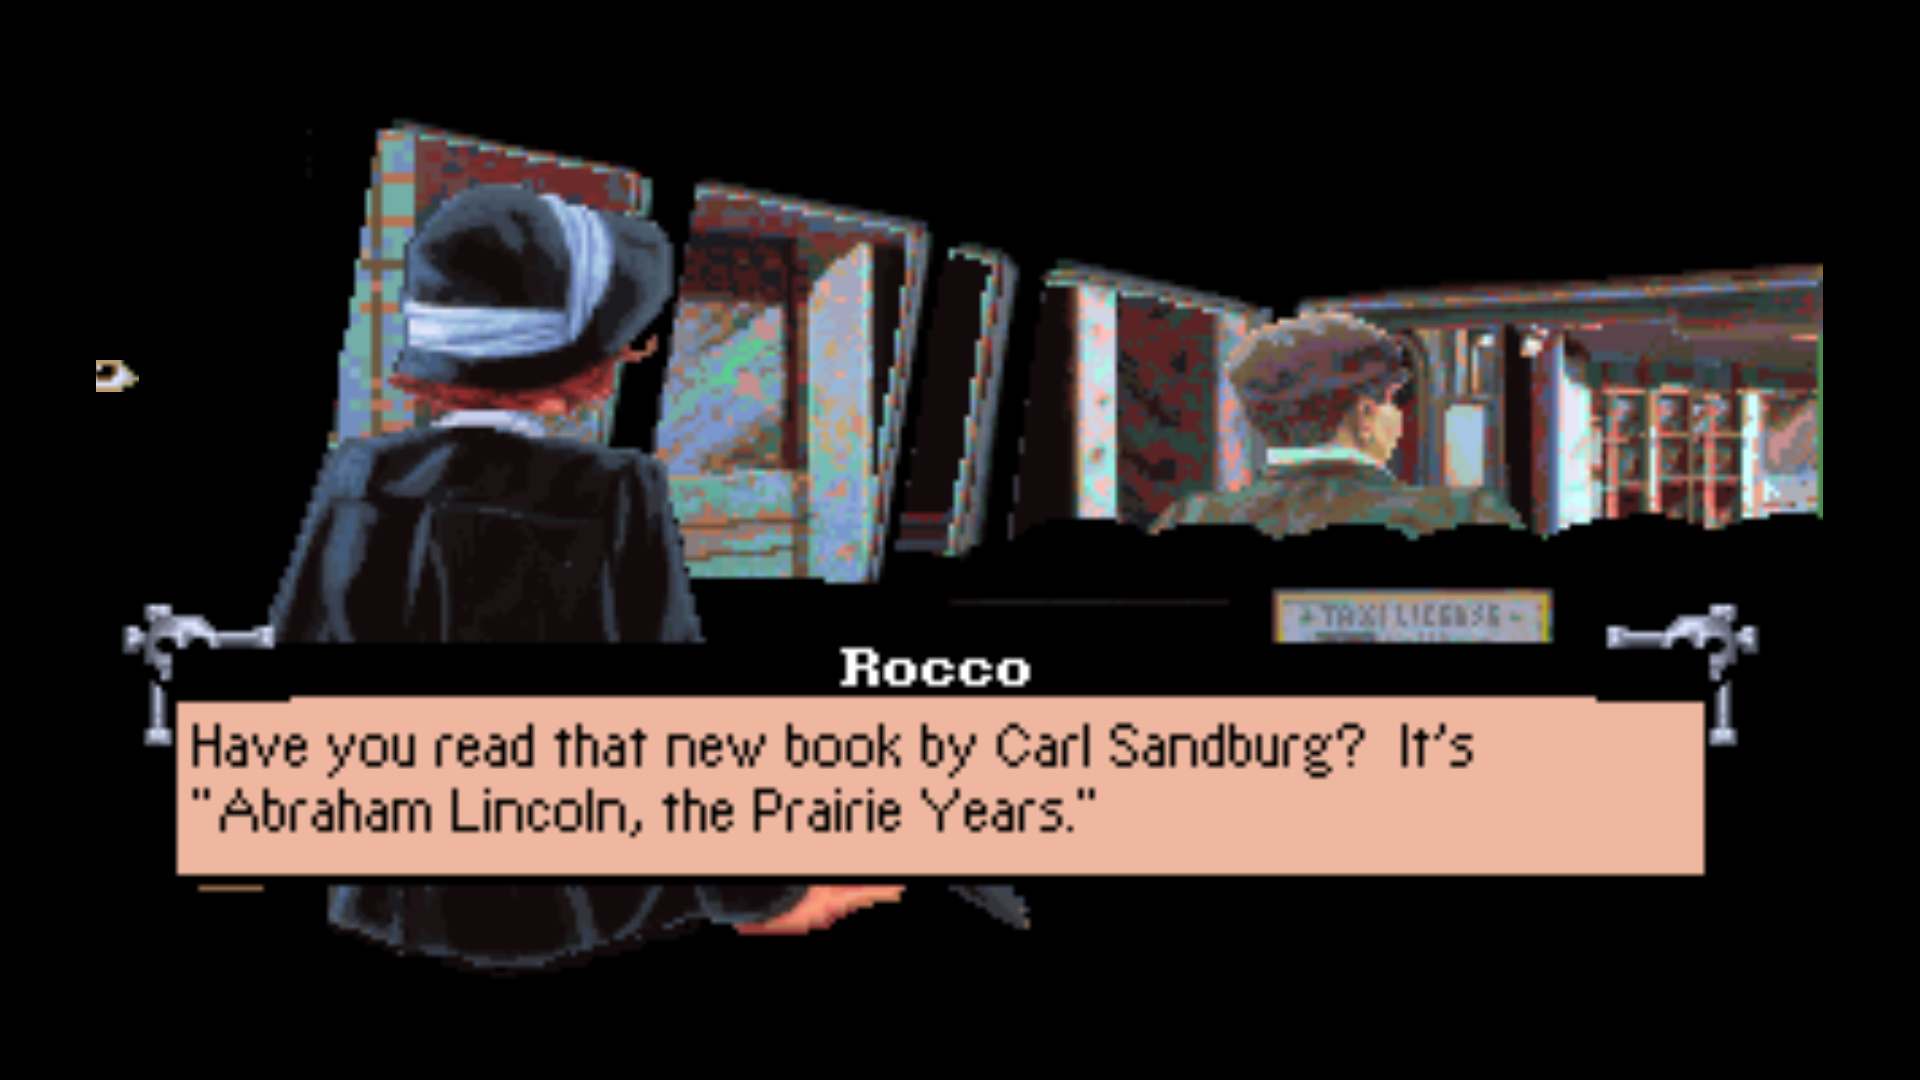

Carl Sandberg was actually quite an interesting person, and won a Pulitzer for his six-volume biography of Lincoln, the latter half of which was titled “The War Years”.
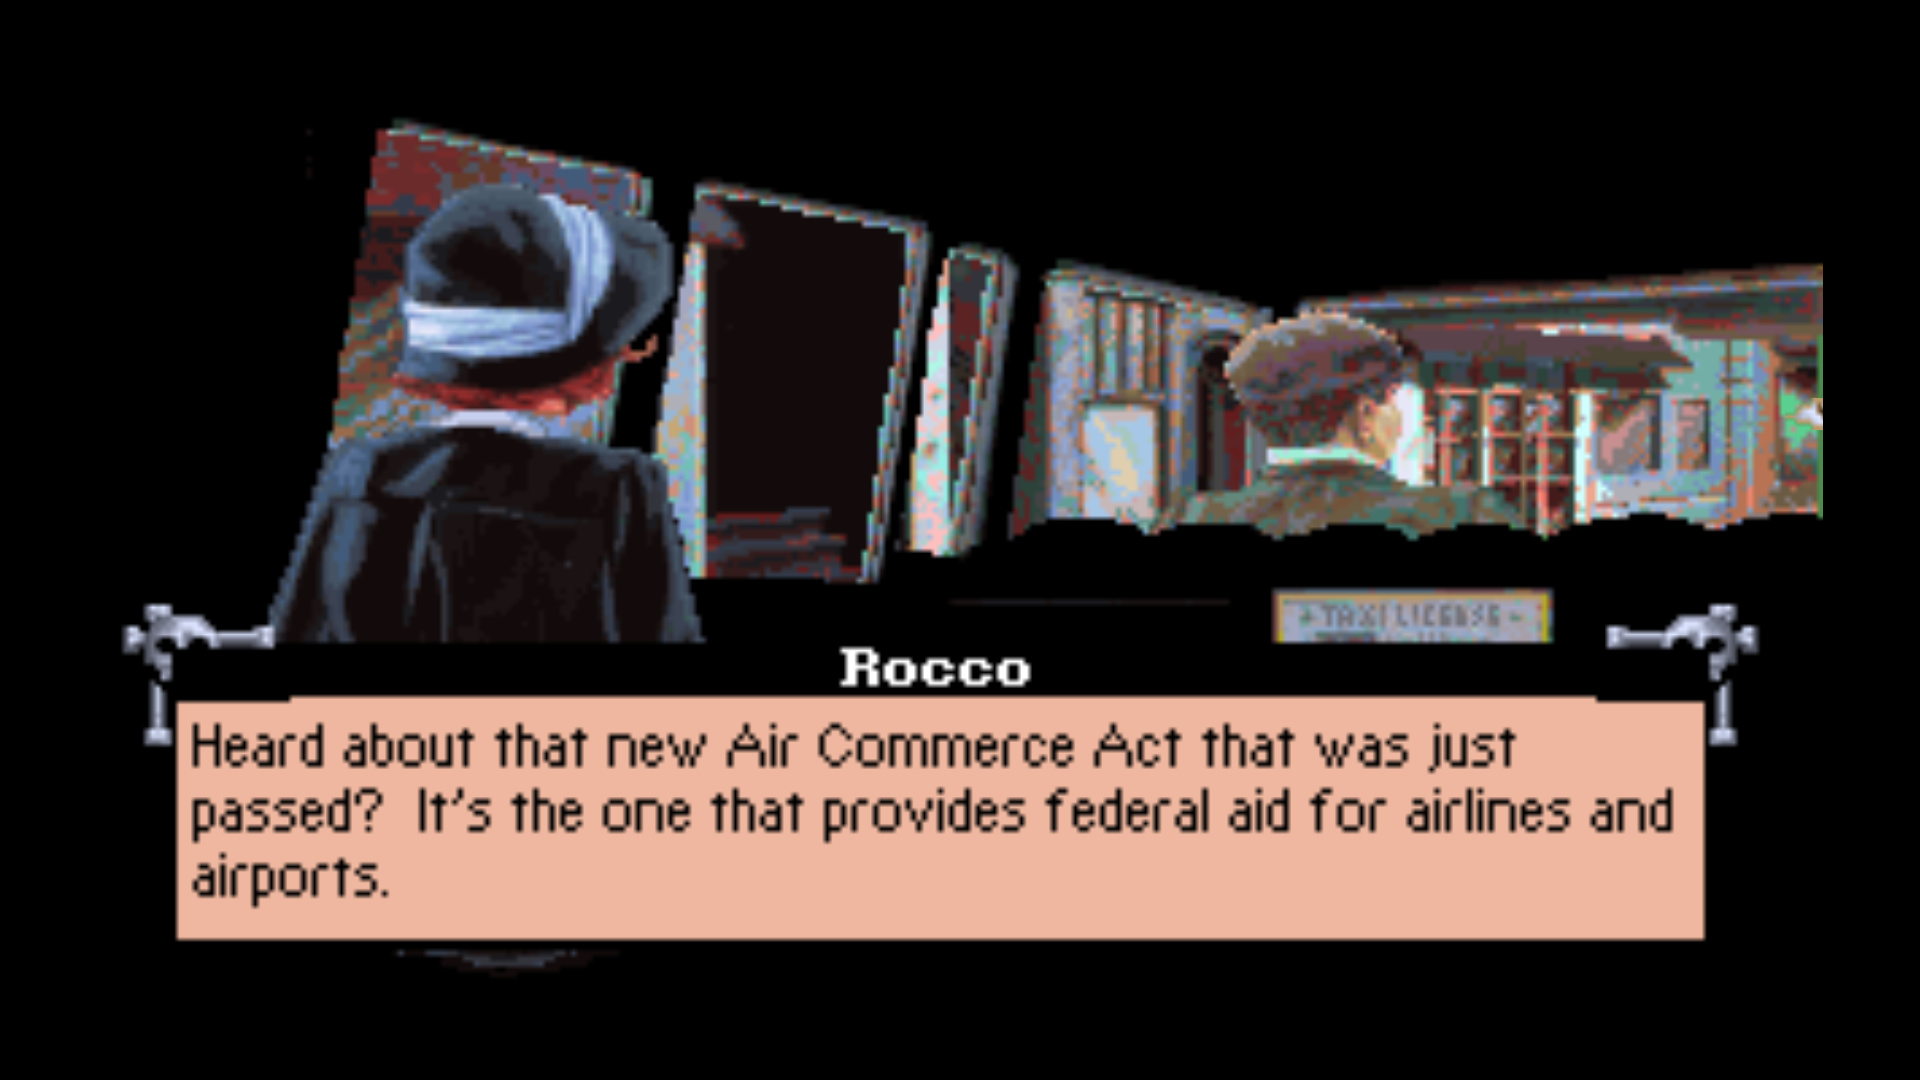
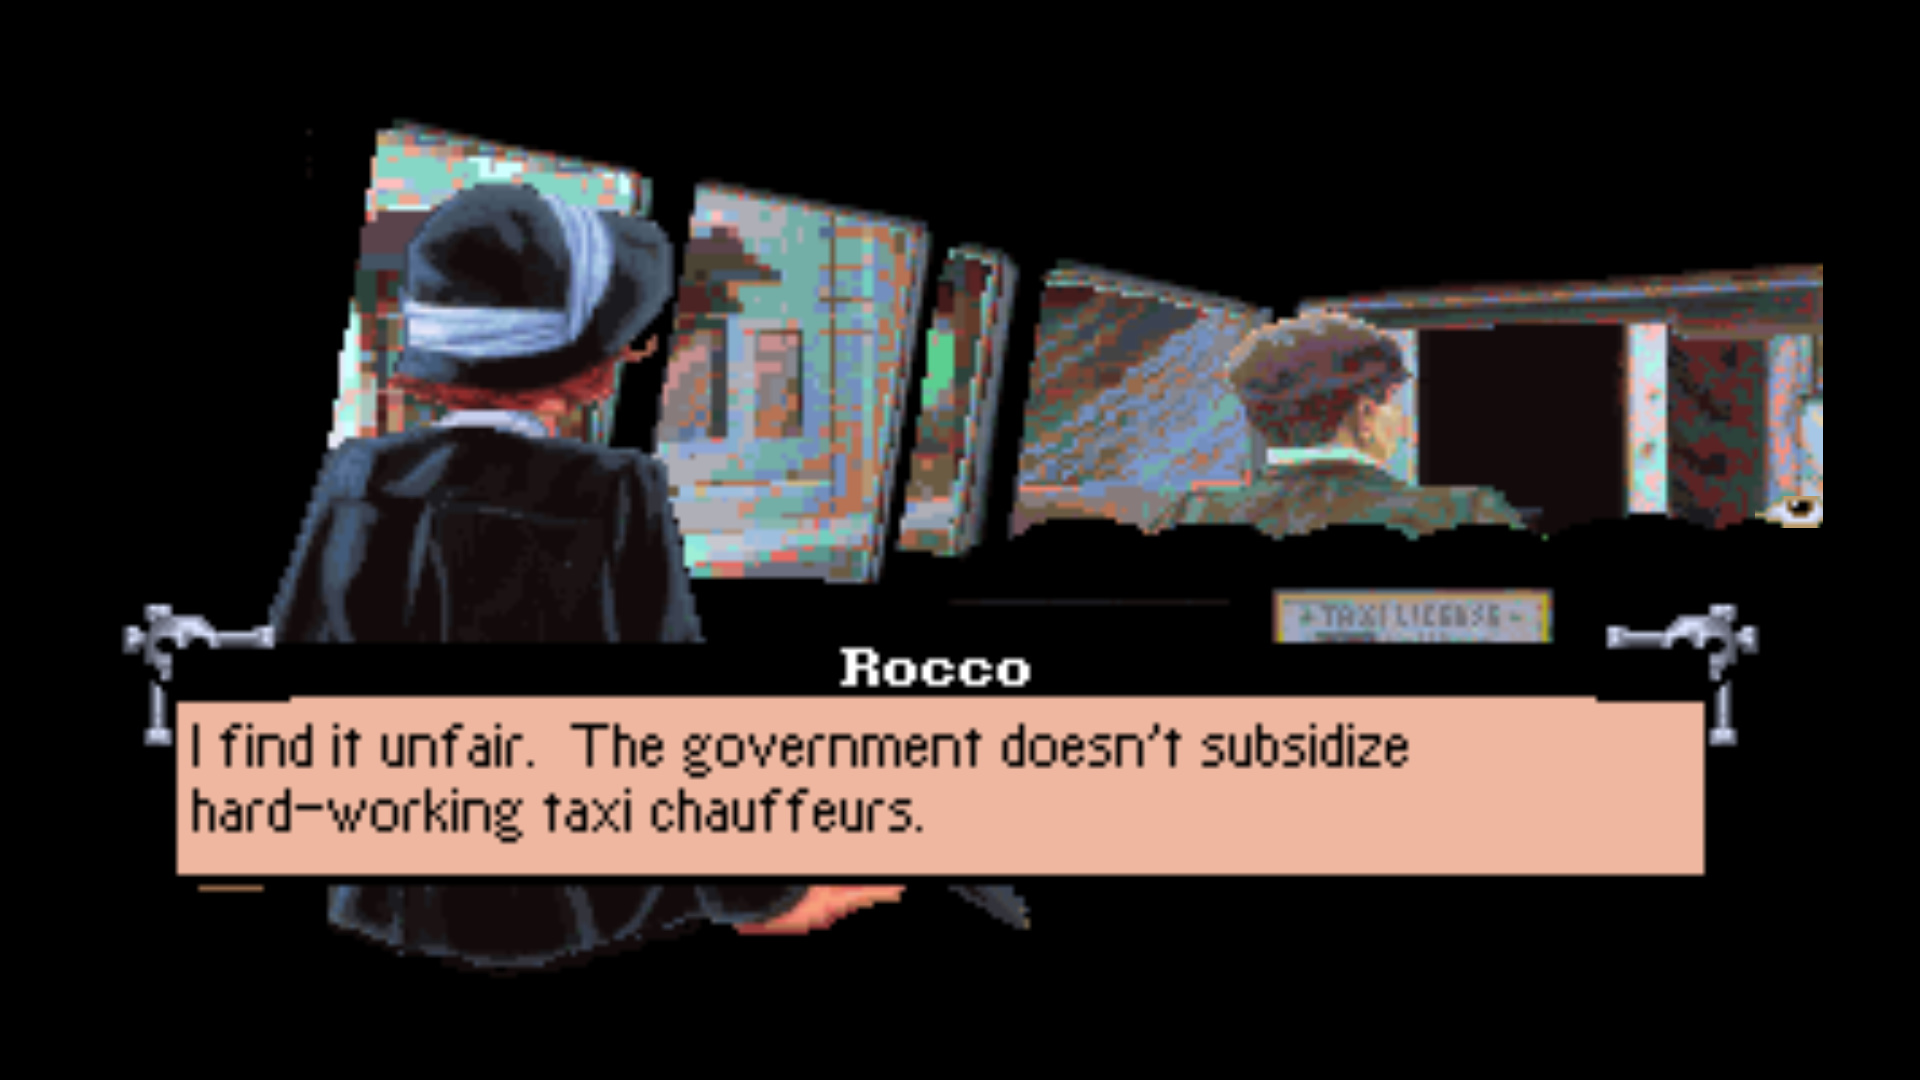
The Air Commerce Act of 1926 was what eventually lead to the establishment of Air Traffic Control at airports and restored the public’s faith in air travel after a decade of frequent (and often fatal) airplane accidents.

Al Jolson was, of course, famous for performing in blackface. The Jazz Singer was his first film, and was (as far as I can find anyway) the first film shot with the intention of having audio to go with it.
Update 5 - UnBREAKable Laura Bow (The Intro)
Now that we’ve met most of the characters in the game, it’s about time I got to the game’s introduction cutscene. This cutscene doesn’t play automatically - you have to select it from the main menu. If you want to watch it in video form, you can do so here.
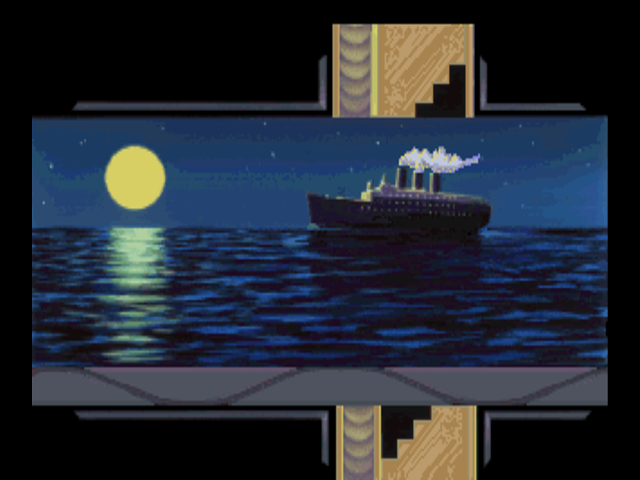
The Andrea Doria, a passenger vessel bound from Egypt to New York…
One of the passengers lies in a fitful sleep. They’re too un-detailed to make out, thanks to 1992-era sprite graphics.

A murder aboard the ship… but who? And why? (You might have an idea of who this is if you read this update in the order it was posted).
The ship docks the next morning, and a ramp descends. Two men exit the vessel.
Meet Dr. Ptasheptut “Tut” Smith. Dr. Smith is the character I know the least about - he’s clearly Egyptian, but none of the literature that comes with the game really explains who he works for… and I don’t remember anything about him from the last time I played through this game.

With him is Dr. Pippin Carter, the head of the expedition into the buried Temple of Amon Ra in Egypt and the head curator at the Leyendecker Museum in New York City. Dr. Carter is… kind of an asshole.
 : “Surely you can find a way to accommodate everybody’s wishes.”
 : “Who are you to tell me what I can do with my own property?”
: “YOUR property?! What authority do you have…”
: “The authority of the Egyptian Antiquities Service. So, if you don’t like it, I suggest you waddle on back to Egypt and complain to your own government.”
: “Would it not be better to work this out diplomatically?”
: “This isn’t a case for diplomacy. It’s a case for your acceptance of the situation.”
: “It is not just my acceptance at issue, Mr. Carter. Frankly, some of our people are quite upset… moved to take drastic measures, if need be.”
: “Are you threatening me, you malodorous little man?”
: “Mr. Carter, there are some who would rather fight back than allow their country to be stripped of its national treasures.”
: “Any fat savage who lays a finger on my exhibit, or threatens ME, will find himself in deep trouble. Do I make myself clear?”
: “As clear as the waters of the oasis, Mr. Carter.”
Dr. Smith and Dr. Carter head down to the docks, and two new men show up.
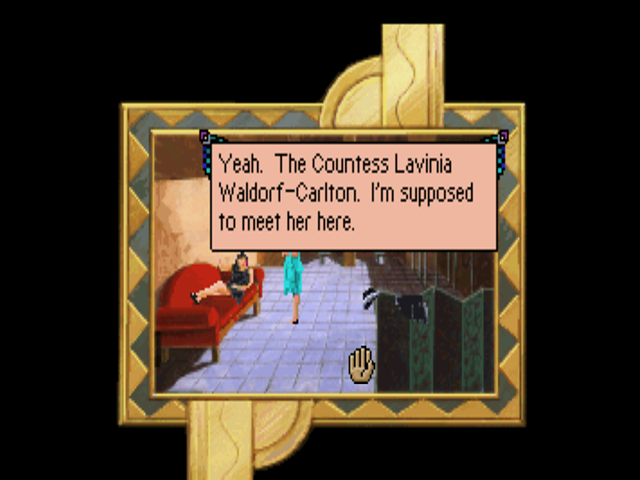
This is Dr. Carrington, the current director of the Leyendecker Museum. You wouldn’t know it unless you read the manual, but he took over just about a month ago after the museum’s former director, Sterling Waldorf-Carlton, died in an accident of some kind.
The man with the red hair is Steve Dorian. In case you’re not reading this in the order I posted it, Steve is voiced by the same person who did King Graham in King’s Quest V. He’s a dockworker (also called a “stevedore”) at the local docks.
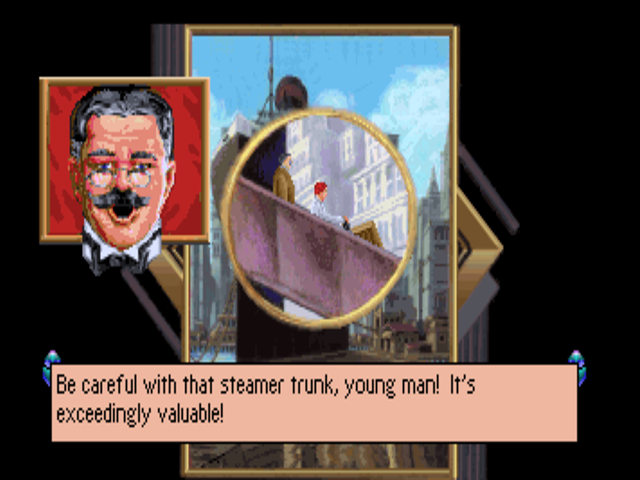
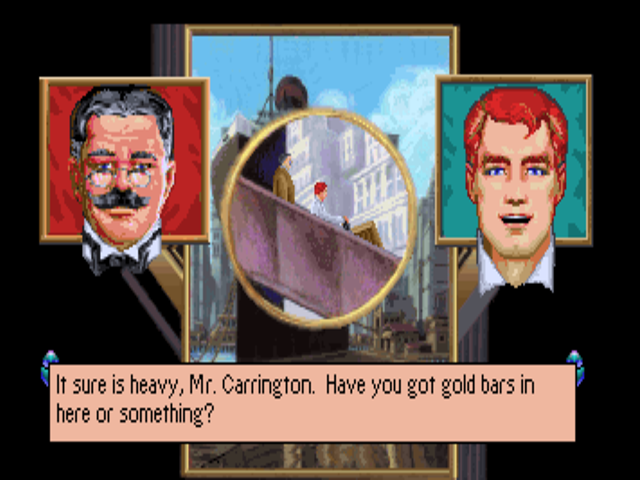
 : “The contents of my trunk are not your concern. Now, be a good lad and take it to my taxi. The Countess is waiting.”
Flash back a few weeks earlier to New Orleans, where Colonel Sanders gives his most entrusted field agent the original fried chicken recipe.
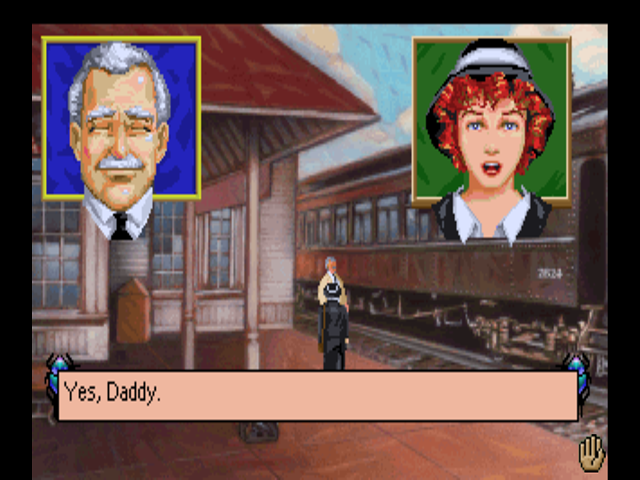
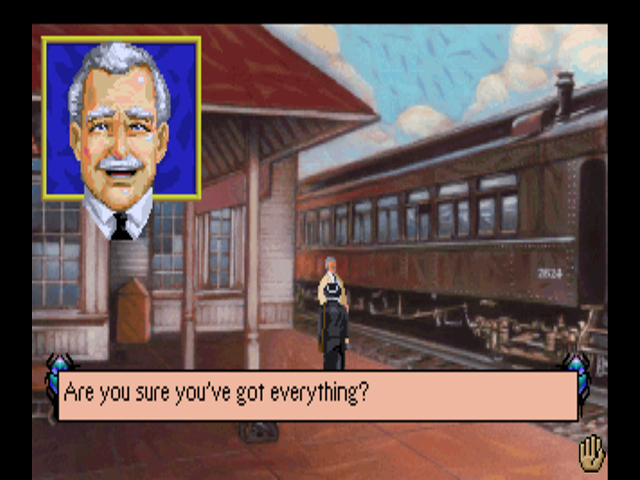
Oh wait, that’s just Laura’s father, John Bow. I think he had a very minor role in Laura’s first game,The Colonel’s Bequest, though I haven’t actually played it to find out. Our protagonist, everybody!
Laura previously solved a bunch of murders in a mansion belonging to a batshit insane army colonel who pulled one of those “Hey all of my relatives who are here in this house, anyone who outlives me gets a share of my fortune! Don’t go murdering each other now!” gimmicks.
 : “You’ve got Sam’s address at the paper?”
: “Yes, Daddy.”
: “You’ve got the money I gave you?”
: “YES, Daddy! Don’t worry!”
: “Put some money in your shoe. New York’s a big city, and there’s a lot of crime there.”
: “Look, I’m going straight to the paper. What could possibly go wrong?”
One train ride with a totally inconsequential character later…
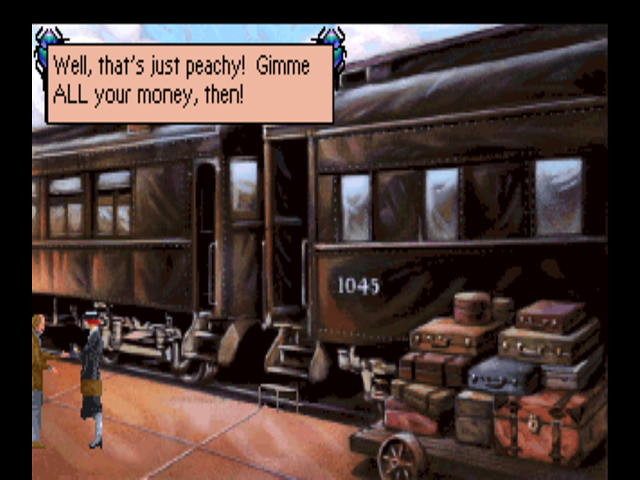

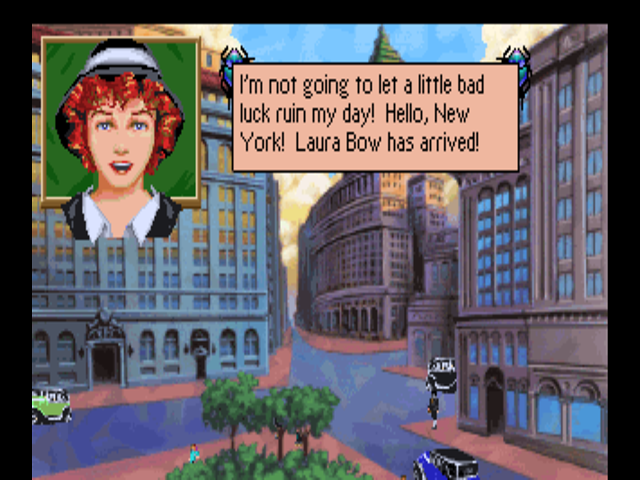
Welcome to Demon’s Souls Dark Souls Bloodborne New York! Laura’s not going to let having her luggage and all of her money stolen get in her way.
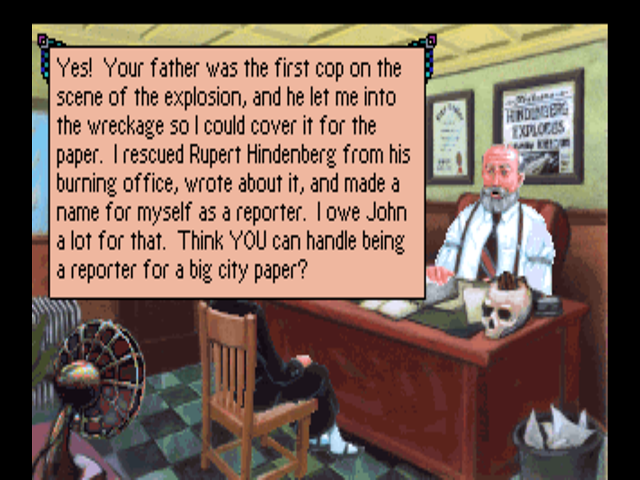
Some time later, we meet Sam Augustini, editor of the New York Daily Register News Tribune.
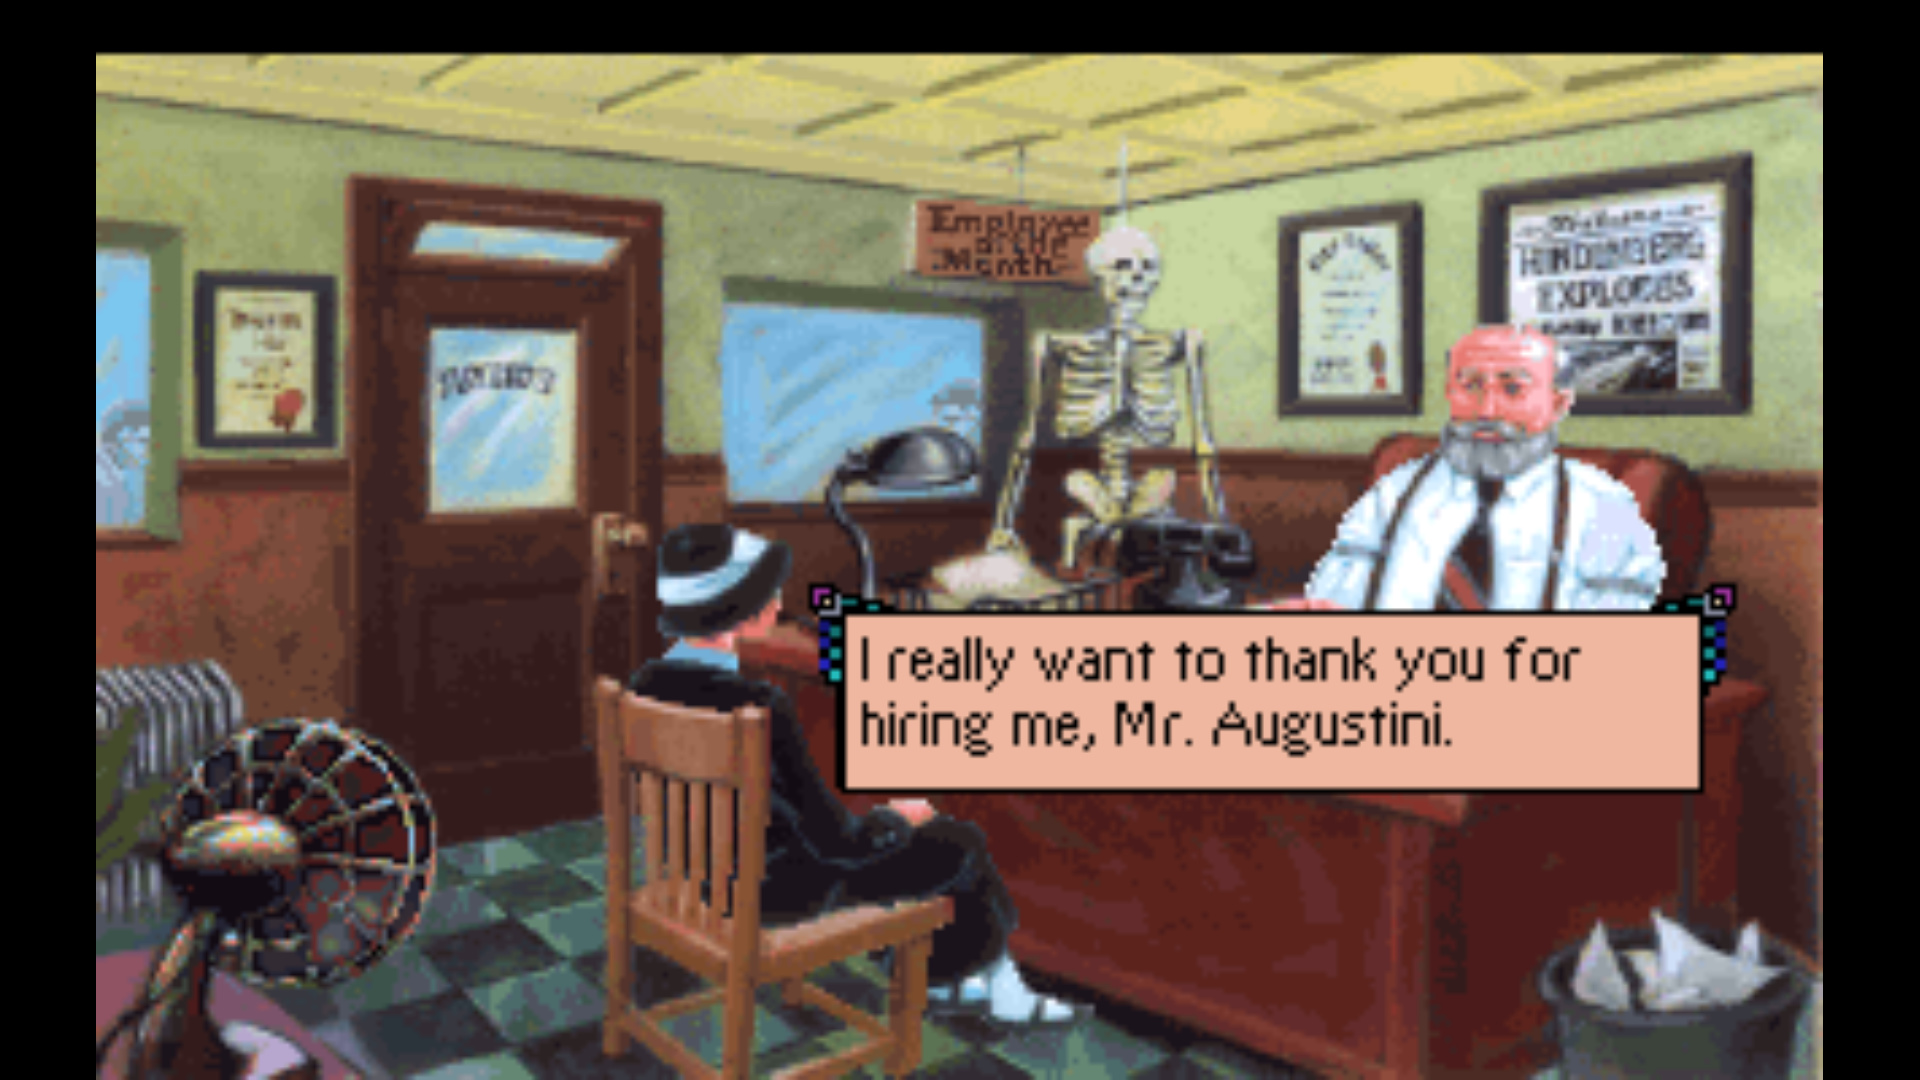
He gives us a little backstory on Laura’s dad…

Well, guys? Think we can handle it? (Spoilers: I used to be a reporter and got laid off, so the answer is clearly no).
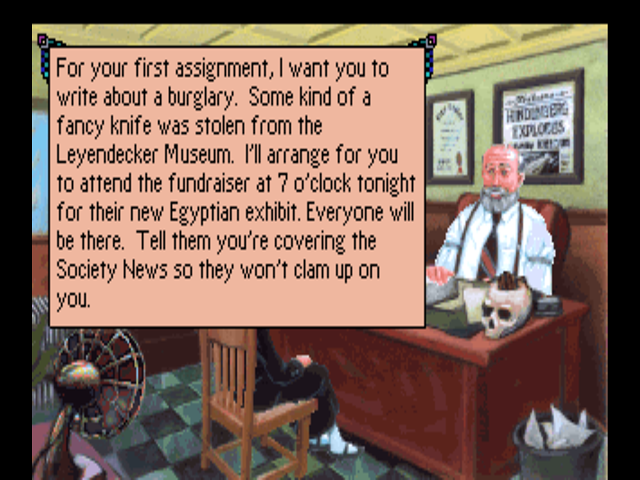
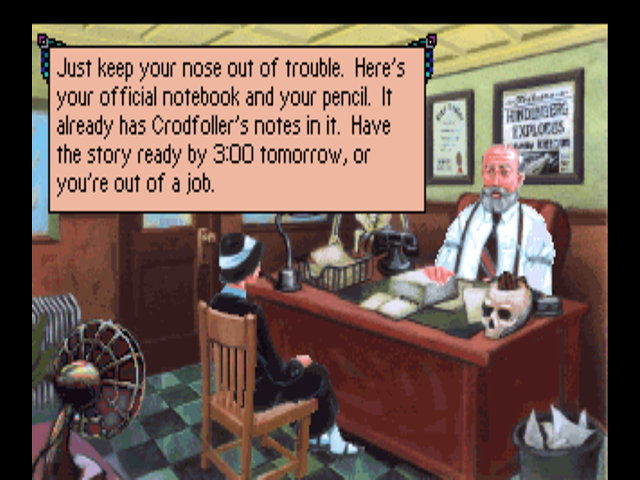
Thanks for the vote of confidence, Sam. With that, Sam gives us our assignment - and our deadline.
Next update: We venture into Act 2! Or Act 1, if you’re new to this and are reading it in the order posted in the OP!
Update 6: Act II, in which the game starts getting dickish


Welcome to Act 2. Act 2 is the shortest playable act in the game, and is where the game designers looked at Dark Seed and said “Hey, hold my drink.” There’s a LOT of conversation in this act, most of it totally unimportant to the overall plot. I’m going to be skipping/summarizing most of it.
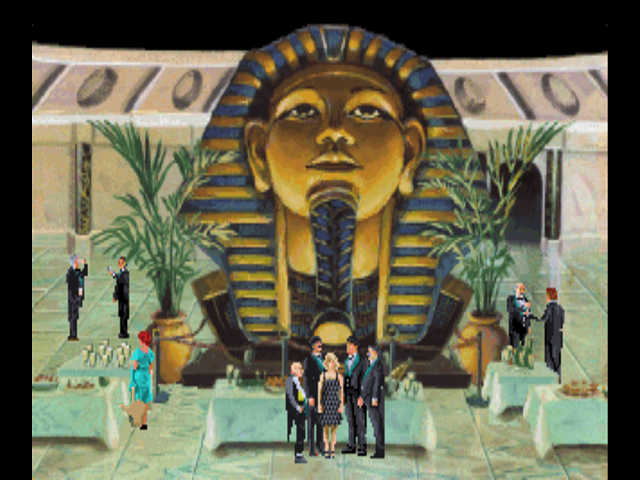
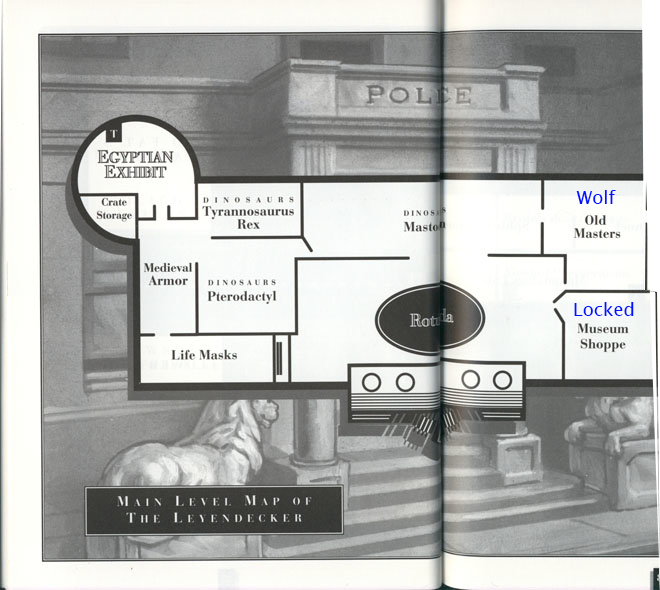
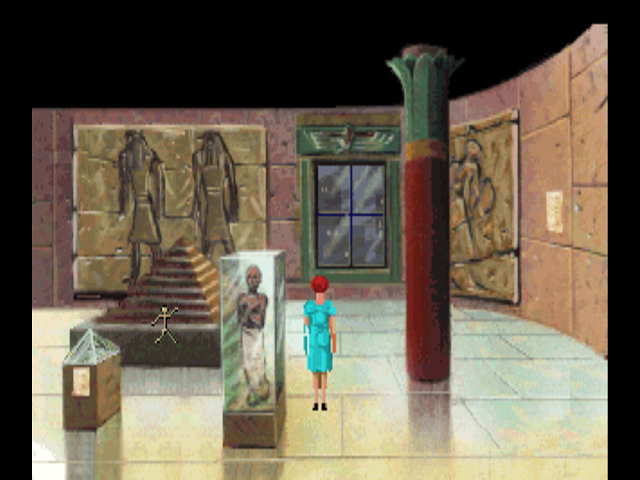
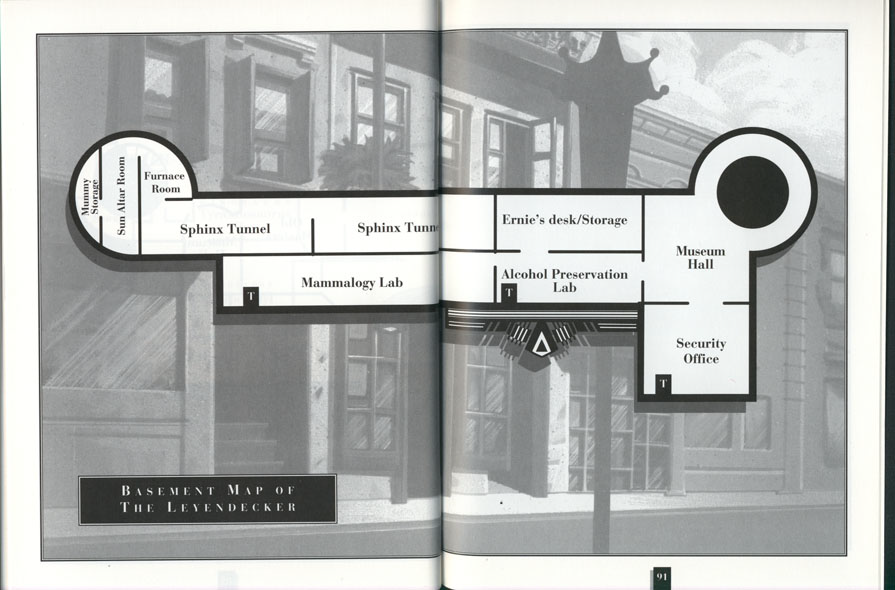
This is the Leyendecker Museum, where we’ll be spending the rest of the game. There are maps of it included in the manual, which I’ll post as bonus content at the bottom of this post. There’s no real transition from Bob’s taxi, we’re just sort of teleported here.
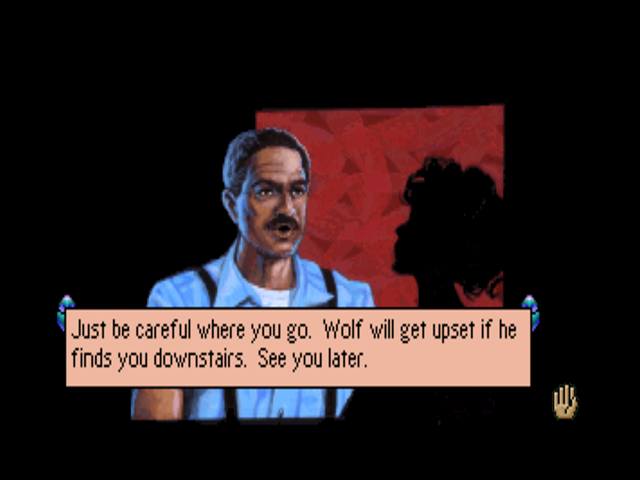
The front door is guarded by a man we’ve heard of from Lo Fat, but haven’t met yet - Wolf Heimlich. Wolf is basically the game’s means of gating off certain areas to ensure sequence progression. If we try asking him a question…
This is pretty much his response if we try interacting with him at all once we’re in the museum. Wolf basically disappears after Act 2, so we never get the chance to ask him anything. The only thing we can do is give him our press pass, which he will hold on to (as there is no other use for it).
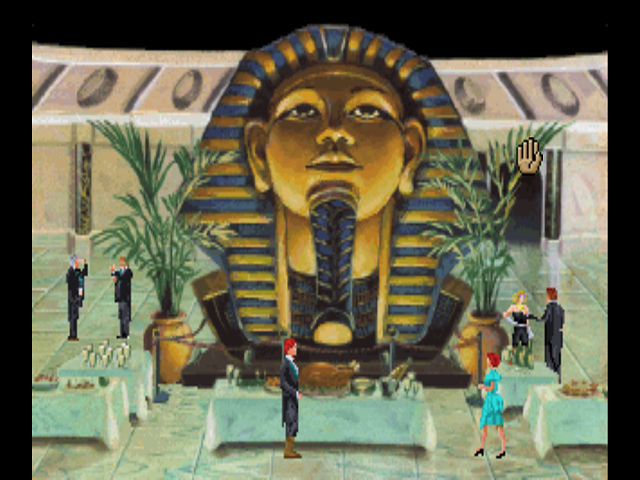
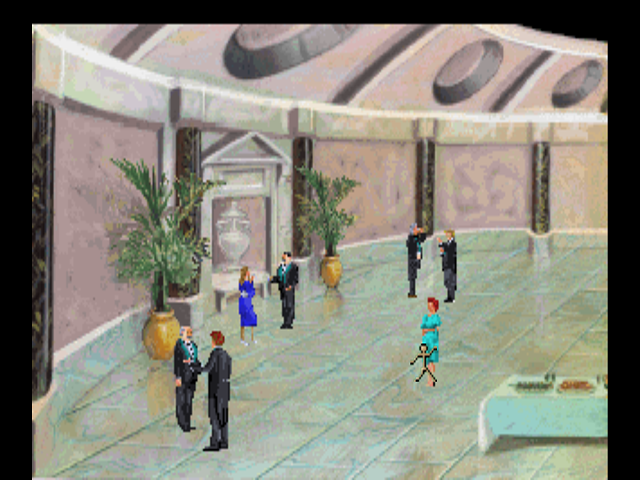
Inside the museum’s foyer, we can see a couple of characters that you might recognize in the group in the center of the screen - those being Ziggy and Dr. Carrington. There are a total of 14 conversations Laura has to eavesdrop on to progress the plot, which are triggered by going near groups of story characters. Most of these aren’t particularly interesting. We’d better grab ourselves a drink first.
From here on out, most items are missable. While we do have a few chances to come back to the foyer, we’re going to need to grab an empty water glass here for eavesdropping purposes early in Act 3.
Unfortunately, the shortest route to where we actually need to go is blocked by the group of people talking, so we’ll have to listen to their conversation on the way there.
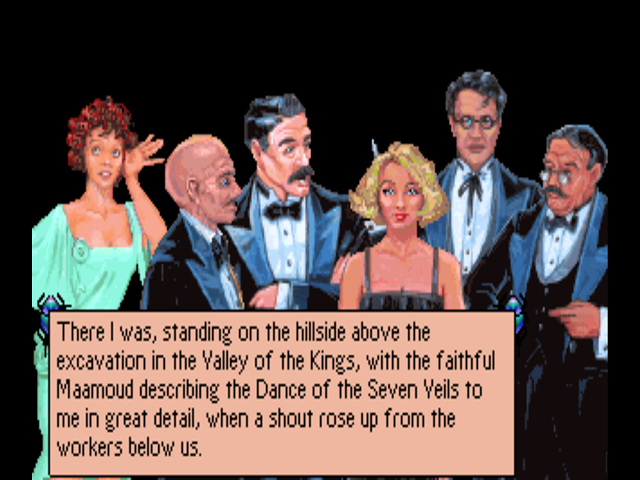
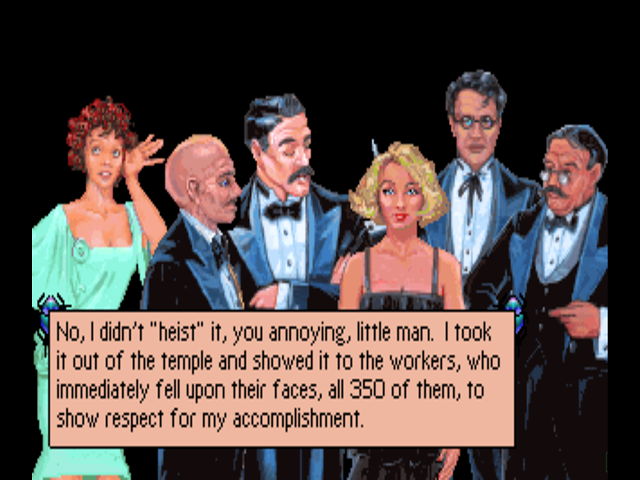
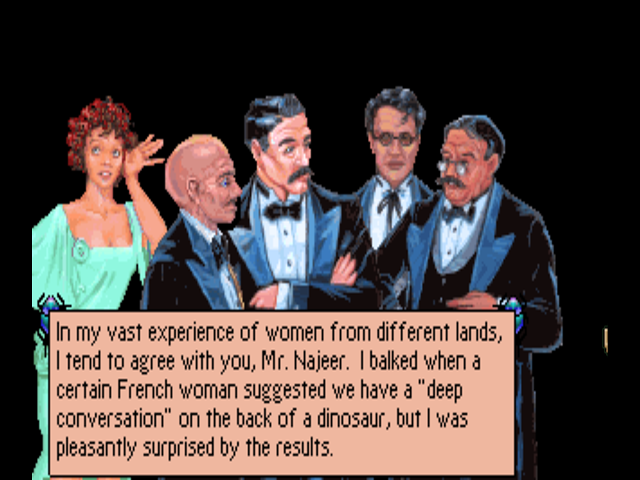
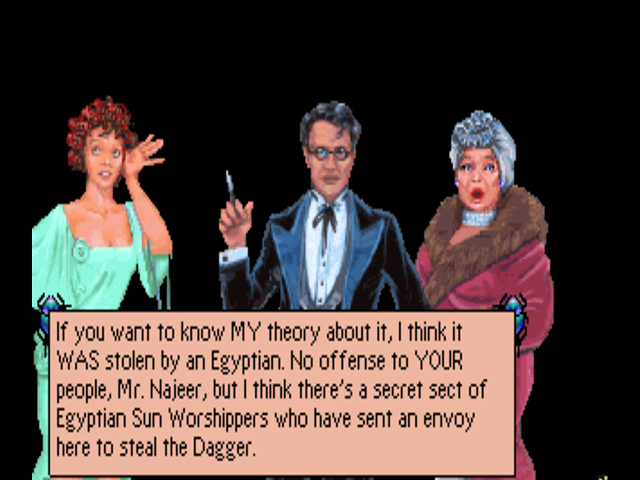
From left: Ziggy, Dr. Carter, Yvette, Rameses Najeer, and Dr. Carrington. This conversation is mostly Dr. Carter going through how he found the Dagger of Amon Ra in a buried temple in Egypt in an attempt to impress Yvette. Most of this stuff is in the manual. The one interesting point, however…
: “Blah blah blah, temple blah blah and then I found the dagger…”
: “And dat’s when youse heisted it, right?”
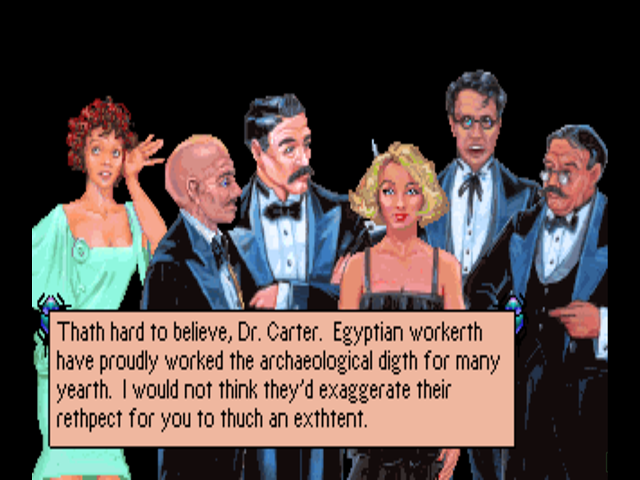
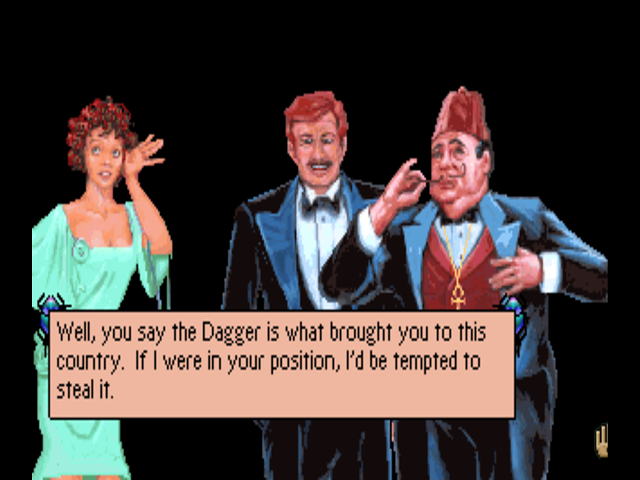
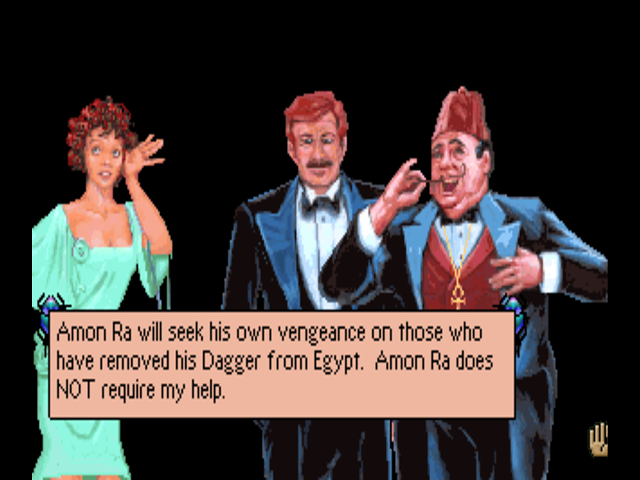
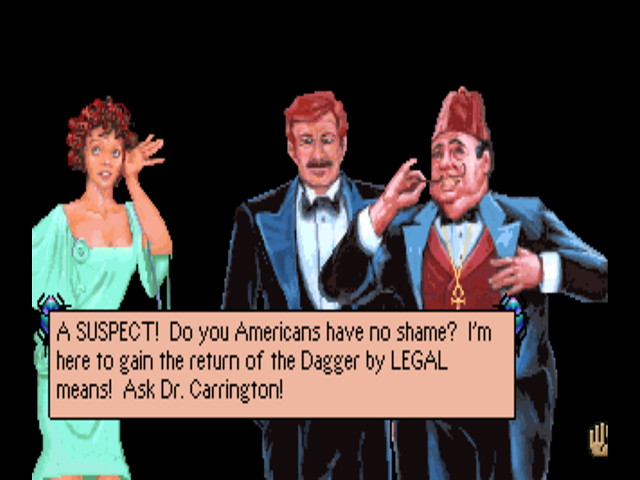
Some background: this conversation (along with some others a bit later on in Act 2) suggests that worship of the ancient Egyptian gods is still mainstream in the game’s version of Egypt. In reality, worship of the gods of ancient Egypt had mostly died out over a hundred years ago. This actually becomes a pretty major plot point. The person speaking with the lisp, by the way, is Rameses Najeer.
Due to the game’s pathfinding, we get dropped just to the left of the gaggle, which causes us to hit the second conversation almost immediately as Laura is still trying to get to her location (it’s the right side of the foyer) and runs right into them again.
Conversation 2 is Ziggy, Dr. Carter, Najeer and Dr. Carrington talking about their… sexual experiences… with Yvette. Nothing we’re particularly interested in.
Anyway, now that we’ve established (for the what, sixth time?) that Yvette is basically a French version of Anarchy Panty, we can go where I was trying to go all along - the right side of the foyer. There’s actually an important clue there.
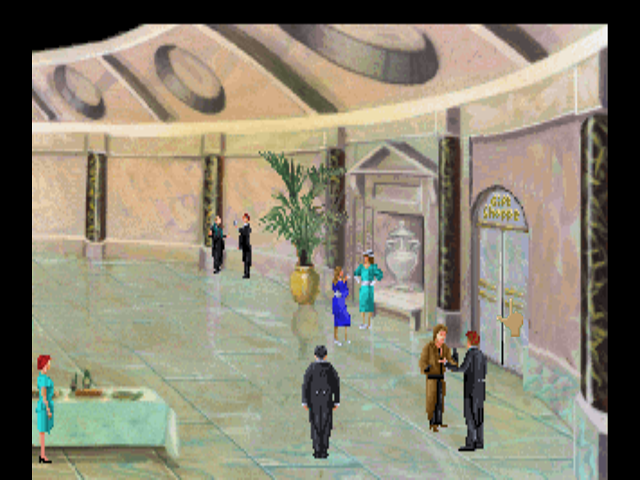
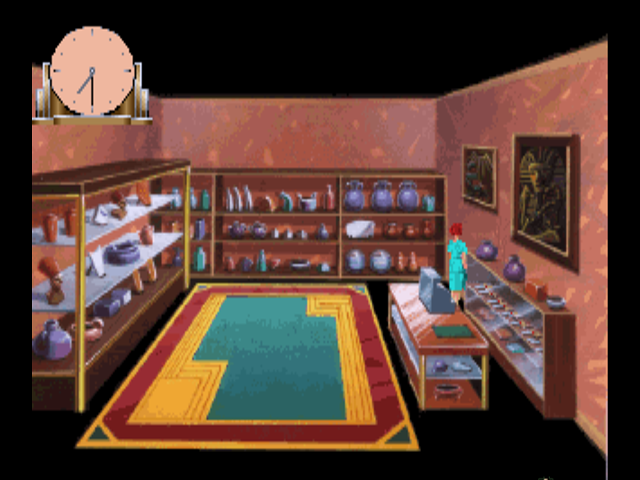
Surprisingly, it’s in the gift shop, which is where we’ll head straight away as there are no conversations to catch on this side of the museum at this point.
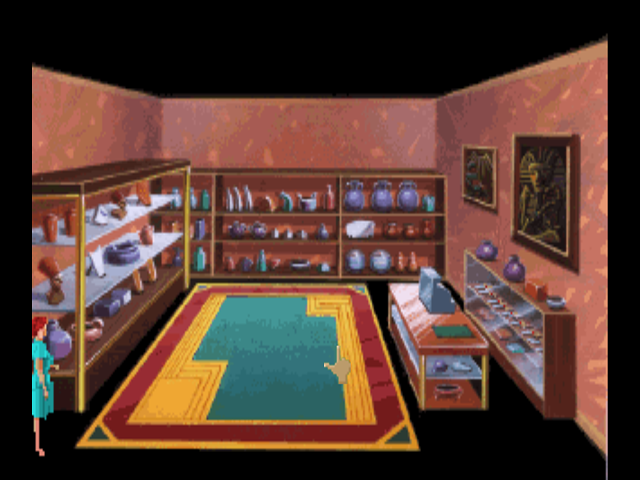
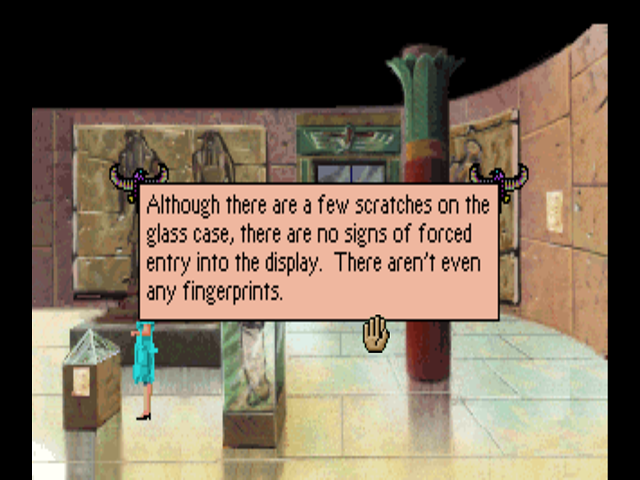
If you’ll look toward the back, you’ll notice there’s a rack of what look like knives. This is the first real dick move the game pulls. You see, in investigating the theft of the dagger, there are certain pieces of evidence we need to have seen - even if you do absolutely everything else right, missing a single piece of evidence can completely screw you over. This is one of them… I think. I haven’t ever bothered to do a screw-up run, but I’m pretty sure this is supposed to be the point where if you missed the magnifying glass, the game goes “HEY DUMBASS YOU MISSED SOMETHING”.
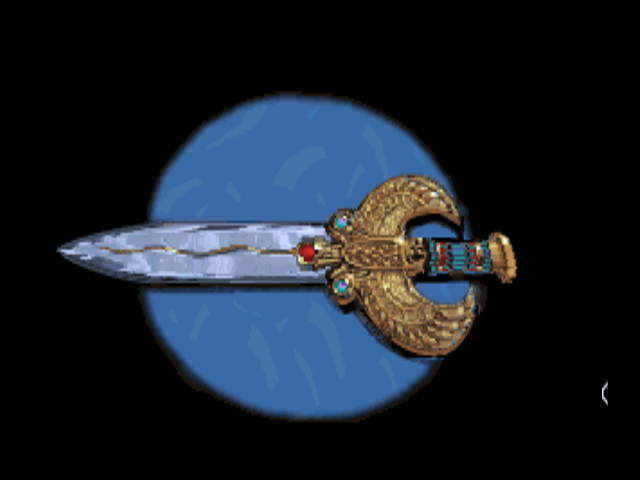
Anyway, this particular dick move is a pixel hunt of sorts. If we use the magnifying glass on the rack of knives, we find that they’re replicas of the Dagger of Amon Ra. Most of them look like this:

It’s a little hard to make out, but you can see the words “Made in Pittsburgh” on the blade. There’s one dagger in the rack - on the left side - that is a little different. It’s a pain in the ass to find unless you know it’s there, and even once you do it’s STILL kind of a pain in the ass because the leftmost two daggers actually don’t register as clicking on the dagger case.
Wait a second… that one doesn’t have the stamp on it! Holy shit, we just found the actual Dagger and solved the mystery! Come on, Laura, we’ve got to tell Detective O’Riley right away… or not. For some reason, this particular scene is never brought up again. I don’t know why, or how it makes sense that Laura wouldn’t tell anyone about what she saw. Even if you assumed it was a factory defect or something, it still wouldn’t hurt to say something.
Oh, right. You might be asking how a company in Pittsburgh is already making replica daggers when the Andrea Doria landed in New York not even a week ago and the exhibit hasn’t actually opened yet. The answer to that is that Dr. Carter’s cousin is the guy who discovered the tomb of King Tut in the game’s universe, and Tut’s tomb had its own Dagger in it. For some reason, this Dagger wasn’t the real one and I don’t know how that makes sense but that’s what the manual says so I’m gonna roll with that.
Once we pull back from looking at the real dagger (and trying to take it only to find that the display case is locked), a tone sounds and the time changes. This is the first of two time shifts in Act 2, both of which are scripted. Once we get past Act 2, the time shifts will come more frequently and are no longer scripted (for the most part) so it is possible to lose the game by running out of time. Shortly afterward, we can hear some jackboots marching down the hall…

: “Oh, I’m sorry. The door was unlocked.”
 : “UNLOCKED! My assistant vill be disciplined harshly for zis mistake!”
: “Please rejoin ze party now, or I vill be forced to injure you.”
Yeah, on second thought, maybe mentioning the dagger being in here is a bad idea. I can see Wolf being one of those Sierra-brand asshole characters who would kill you to stop the word getting out. We get unceremoniously booted back to the museum’s foyer, where…
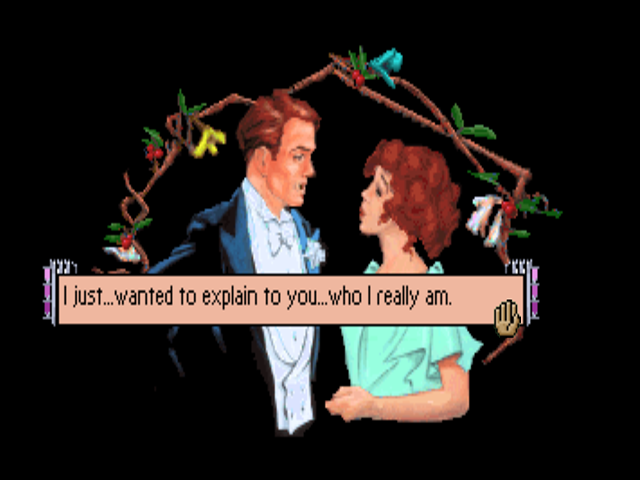
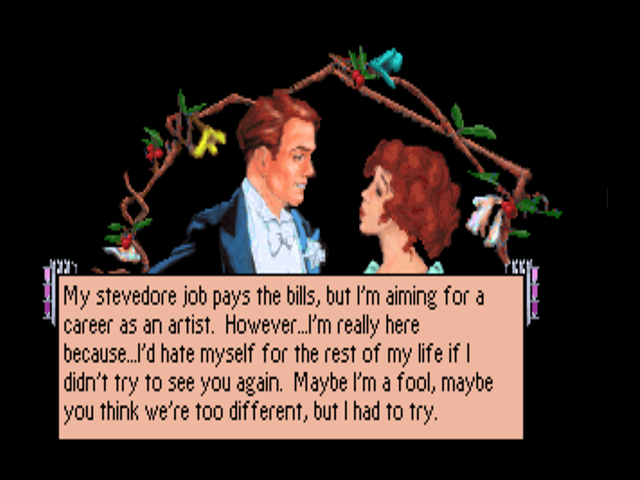
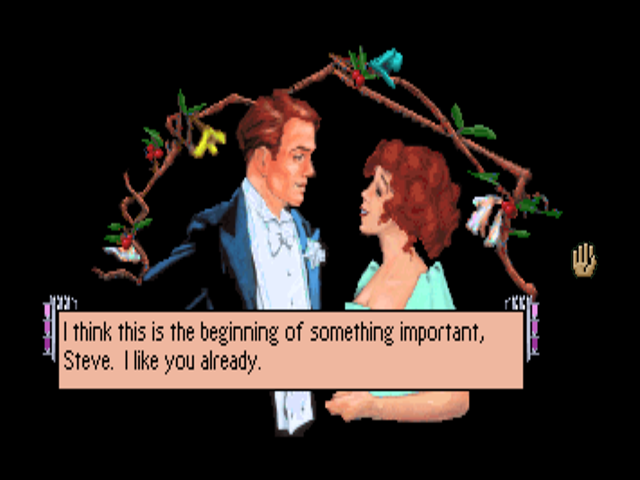
A wild Steve appears! Laura and Steve are about to have a big, overly-long conversation to set them up as love interests, so I’m going to be skipping a lot of that (I took a screenshot with each new line of dialogue and it’s bigger than the last two updates combined). The gist of it is that Laura comments on Steve being there, Steve mentions he came to see her, and then she asks why he’s wearing work boots with a tuxedo.
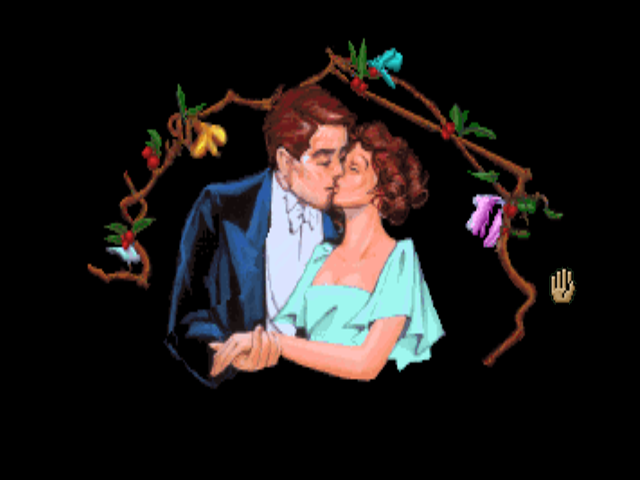
Steve invites Laura outside. The first time I played this, I thought I had screwed up and this was going to be a death scene. The scene changes over to Steve and what looks like an eighty year old Spanish grandmother having a romantic moment.
Oh man, this is the point where he says he’s really King Graham and we’re going to Daventry, right? LP over, let’s go switch over to King’s Quest. There’s no way they’re going to do the bad romance novel thing they did in King’s Quest 7… right?
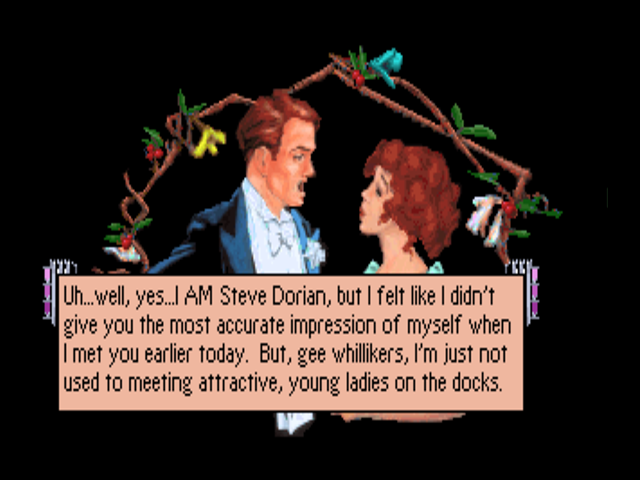
God damn you, Roberta Williams!! (On a side note, I’m almost certain both Steve and this entire scene were entirely hers.)
“The contents of this scene were almost physically painful for you to read.” - Yu Narukami, Persona 4

Oh god, I can’t take any more of this shit. Quick, what else can I LP? Steam, give me some ideas!

Oh no… no no no no no…
Okay, fine, I’ll do it! Anything but more of…

Oh, good. We’re back in the museum and Steve is going back to his home planet. Next update, we’ll eavesdrop on a bunch of people and finish Act 2… and hopefully never see any more of Roberta’s godawful writing.
Bonus Content:
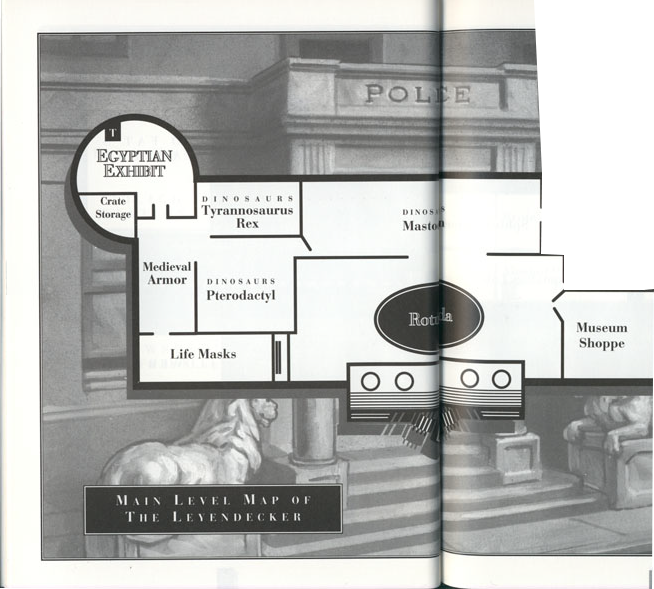
Map of the Leyendecker showing the rooms we can currently visit. I’ll add more when we get there.
Leyendecker Foyer concept art.
1 Like
Update 7: End of Act II
Back in the museum, we head to the left side of the foyer and get into conversation number three. This is between Yvette and Detective O’Riley. Interesting… Yvette considers O’Riley to be pretty close. I wonder if she says that to everyone?
Conversation number four is between O’Riley and Dr. Smith, and happens in the same location as the previous one. It’s rather easy to get put into this one right from the first one. O’Riley seems convinced that Dr. Smith is the one who stole the Dagger and tries to goad him into letting something slip.
Dr. Smith is having exactly none of the detective’s shit.
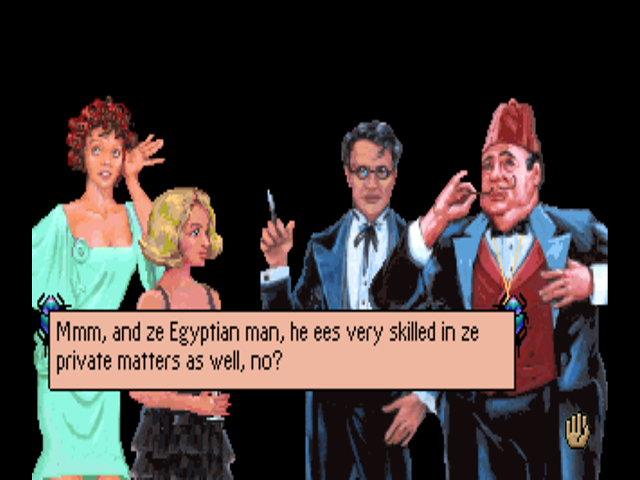
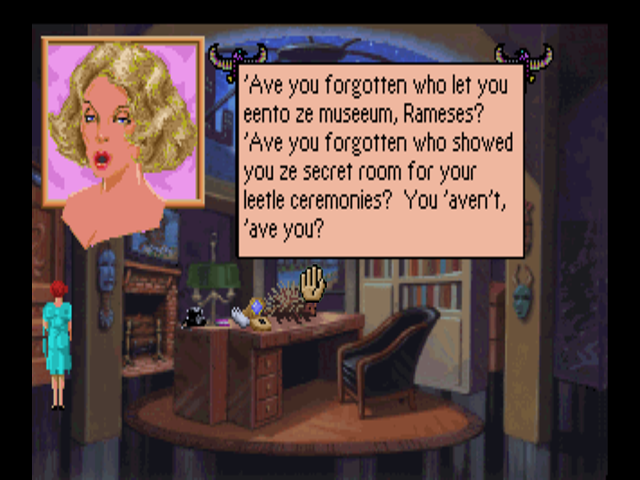
Conversation number 5 is between the Countess and Rameses Najeer, and is easily THE most important conversation we’ll be eavesdropping on.
 : “Counteth, I hardly think thath likely. Thecret thecth like you’re dethcribing haven’t exithted in hundreth of yearth.”
 : “Oh, REALLY. And what makes YOU such an authority on secret sects, Mr. Najeer?”
: “Well, I am only exprething my opinion, madam. I’m thertainly not an expert on the thubject.”
: “QUITE so. I think my theory is as GOOD as anyone’s, DAHLING. And I heard it from a RELIABLE source.”’
: “Oh? Who wath that?”
: “Never MIND. Let’s just say my source has never been WRONG before.”
This is the first we’ll hear of the sect of sun worshippers. You know, I wonder with all this talk of secretive Egyptian cults if there could be… nah, nevermind. It’s probably nothing.
Conversation six is between Ziggy and the Countess, and is only four lines of dialog total. It’s meant to imply that Ziggy is the Countess’s source. No surprise, given that he’s basically an information broker.

Likewise, number seven is between Ziggy and Yvette. Ziggy insists that he knows something about Yvette, but she pretends not to know him. What I haven’t shown is that a number of people are catching on to the fact that Laura is eavesdropping on them.
Number eight is more of Yvette flirting, this time with Carrington. Have I mentioned yet that Yvette is a card-carrying member of the Anarchy Panty school of Heteromancy?
After the last few dialog points, number nine is actually pretty interesting:
: “I’m a big patron of da arts. Dat’s da kind of high-class guy I am.”
 : “You don’t even know what the word, “patron,” means.”
: “I does too!”
: “Okay, what does patron mean?”
: "Umm… HEY, ain’t dat da Countess I see over dere? I needs to talk to her.’
Detective O’Riley actually makes a pretty good point here. We really have no clue why Ziggy is here at all - he didn’t say much about the museum or his interest in it when we talked to him in the speakeasy in Act I. Then again, I suppose if Steve is here, Ziggy really isn’t THAT out of place.
Conversation number ten is, and you won’t believe this, Ziggy going up to the Countess and putting in a commission for some hentai… oh wait no, it’s just Yvette flirting again. ![]()
Moving on. Conversation 11 is a bit between Yvette, Dr. Myklos, and the Countess. Surprisingly, it does NOT involve Yvette flirting with anyone. Here, we have Dr. Myklos showing off her impressive social skills.
The Countess spends most of this conversation talking about Sterling, her late husband. Sterling was the previous director of the museum up until his death a little over a month ago when Dr. Carrington took over.

 : “Zees Sterling, he must have had ze large broom.”
I’m just going to skip conversations 12 and 14. You can probably guess why - number 12 is Yvette flirting with Dr. Carter (with Dr. Carter saying he’s going to take a tea break around 3 AM) and 14 is Yvette flirting with Steve. This leaves us with the final conversation - number 13 - which is essentially a reprise of the argument between Dr. Carter and Dr. Smith from the intro.
Dr. Smith’s line here basically sums it up - he accuses Dr. Carter, Dr. Carter accuses him right back. The part about the Dagger’s case being undisturbed sure is interesting, though…
Anyway, we’re now done with what is easily the worst part of Dagger of Amon Ra. As soon as the final conversation between Yvette and Steve is over, the foyer empties out of all plot-relevant characters.
We can now go through the back door in the center of the foyer to go deeper into the museum.
This is the Mammoth room. It’s kind of a hub for the main part of the museum. Let me just re-post the map to add a new room onto it. We can’t actually go in there yet, but it’s worth knowing that it’s there.
The Old Masters Gallery is actually the exit on the left side of the screen. If we try to go there…
Yeah, Wolf’s there. Since the art gallery is blocked, there’s only one other way to go: left to the Pterodactyl room.
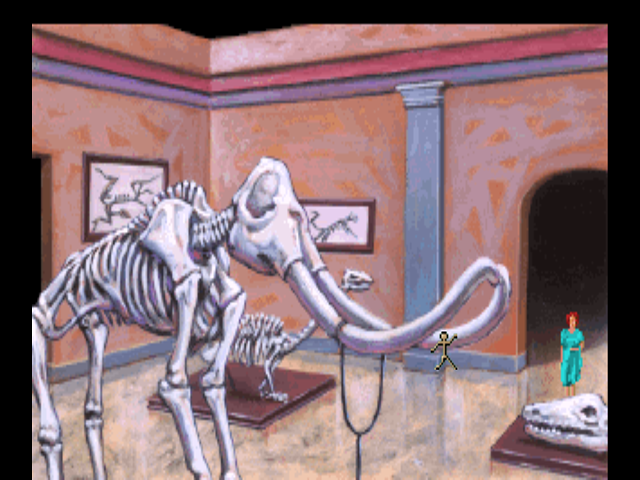
The Pterodactyl room also has nothing we can do in it right now. While it would make sense to go to the Egypt exhibit where the Dagger was stolen from, we’re actually going to do something that isn’t going to make a whole lot of sense and go into the T-Rex room.
In the T-Rex room is an item we’re going to need later, that being this bone that Laura is standing in front of. It’s labelled “Please Touch”, so Laura just goes ahead and steals it like a good adventure game protagonist. That’s pretty much all we came into this room for. Now we’re free to hit up the Egypt exhibit. To do that, we need to go through the Medieval Armor room.
To the north is the Egypt exhibit. The door across from Laura is locked, and the room to the south is the Life Mask exhibit which has nothing of interest for us right now.
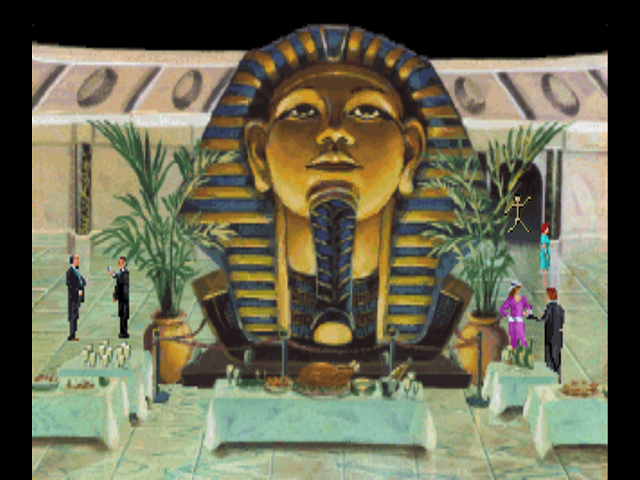
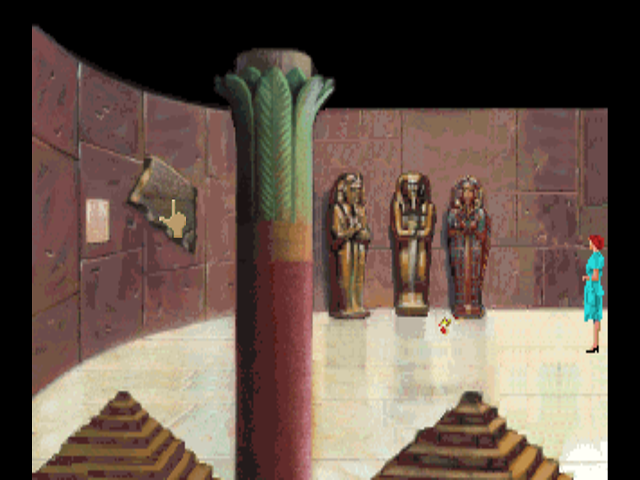
Welcome to the Egyptian room. Most of the items in this room have lengthy descriptions that talk about what they are and where they came from. For now, what we’re interested in is that little pedestal next to the mummy with the pyramid-shaped glass on top.
Hmm… it looks like Dr. Smith was right. Maybe we can find Dr. Carter and ask him a few questions about this now that we’ve seen it for ourselves. We’ve only seen half the Egyptian room though, so let’s take the time to look around first.
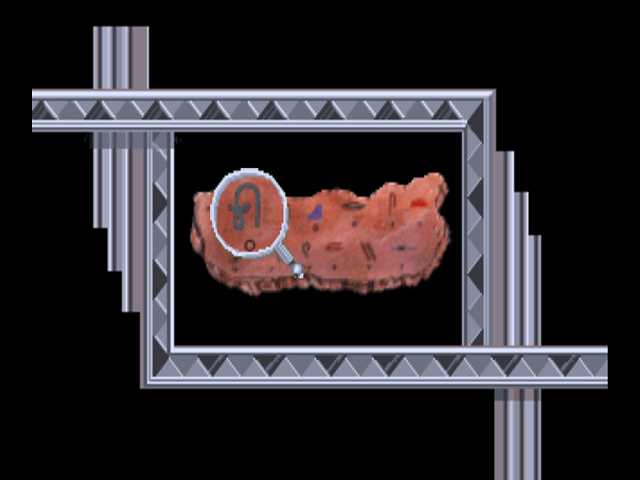
This is the other side of the exhibit. You can probably see that red and gold object on the ground near the sarcophagus. Investigating that right now would be a mistake. Instead, we want to look at this stone on the wall with our magnifying glass.
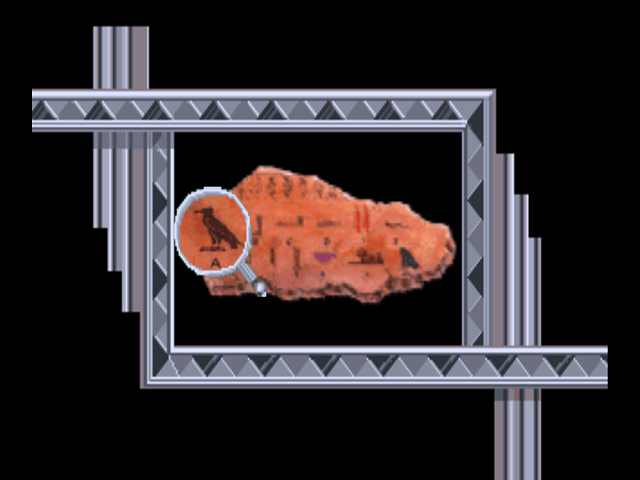
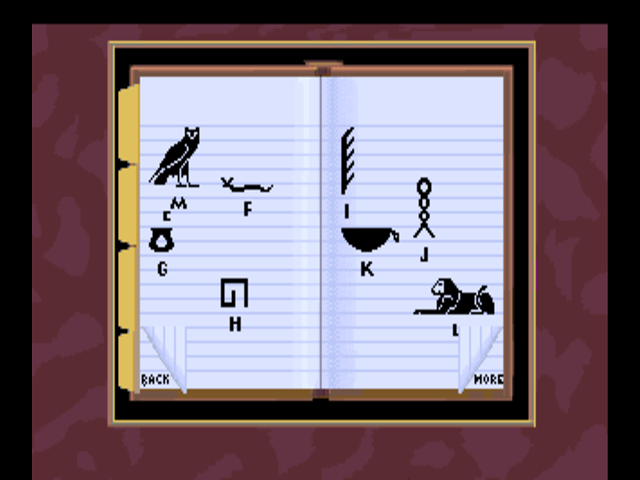
This is the Rosetta Stone - well, the top half of it. Looking at it with the magnifying glass causes Laura to copy all of the heiroglyphs and their translations into her notebook. For some reason, taking screenshots of Laura’s notebook with the heiroglyphs in it causes the screenshot to bug out. Here’s the best one I’ve got.
Okay, NOW we can look at that stuff near the sarcophagus. The reason we want the stuff off the Rosetta Stone first is that it’s used for a puzzle later on, and our movements are kind of limited from here on out. Missing the stone here does not by any means cause the game to become unwinnable, but we might as well get it while we’re here.
The gold object is an ankh medallion. Hey, come to think of it, don’t we know someone who wears one of those? And what’s that about… oh boy… that can’t be good.

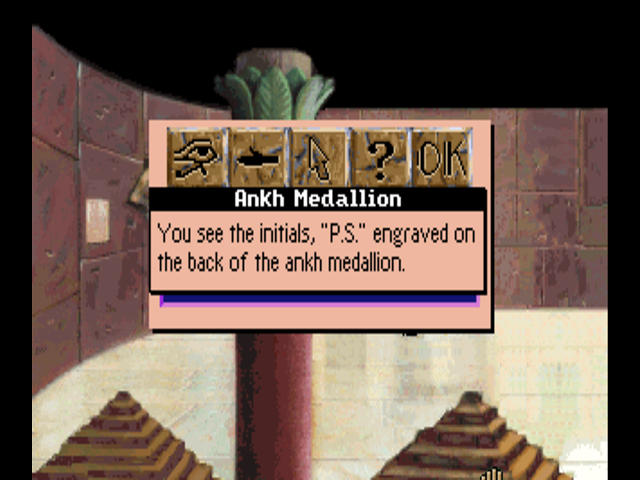
There’s only one person in the museum with those initials - Dr. Smith. This must be from his necklace. I wonder where he went off to, anyway?
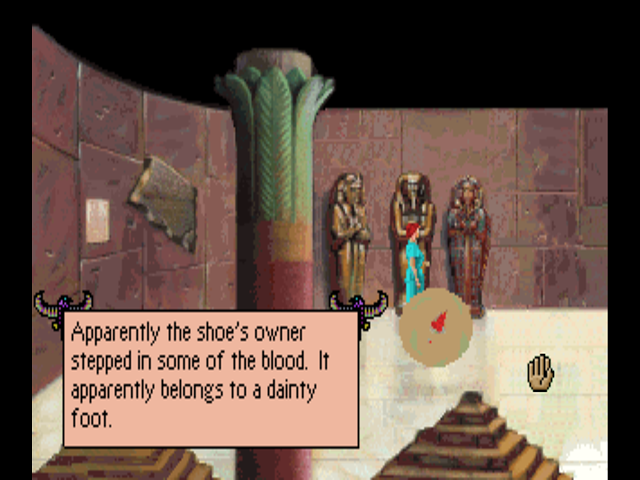
Underneath Dr. Smith’s necklace is a footprint. The game never outright tells you who it belongs to. It’s Yvette’s.
Okay, let’s open the sarcophagus. What’s the worst that could…
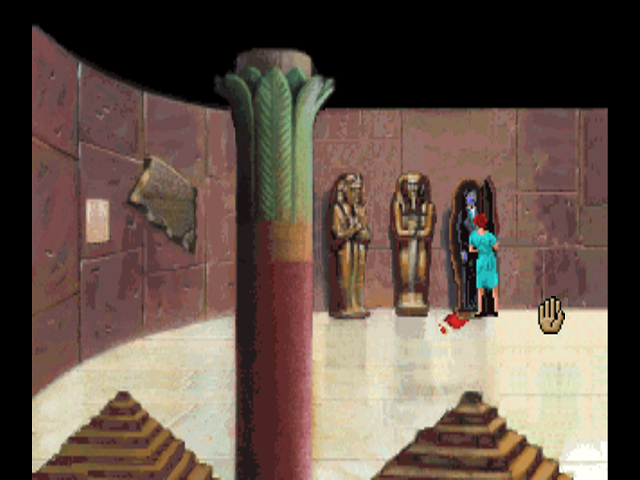
Okay, Laura? Laura, hear me out here. You’ve just found the museum’s curator dead in a sarcophagus with a knife impaled into his chest. You’ve been in this situation before. The smart thing to do would be to keep quiet, get the hell out of the museum, and write about it the next day. I’m sure “Museum Curator Stabbed To Death” would make a great headline. Whatever you do, do NOT draw attention to yourself because you know whoever killed him is going to be nearby to clean up any-

God DAMMIT, Laura! Why would you do that? ESPECIALLY after The Colonel’s Bequest!
Laura then goes ahead and incriminates herself by rifling through Dr. Carter’s jacket and grabbing a notebook.
Okay, we can still save this. Let’s just hope no one’s around, and then run for the exit as quickly as possible. You can do this, Laura!
Oh, crap. And to make things even worse…
The time is now 8:15 P.M.
: “You scream like a banshee, lass! Did you kill the man, then?”
 : “No! I… just walked in here… and found him.”
: “I suppose that would explain your screaming, then. Did you see the murderer?”
: “All right, I’ll talk to you later after you’ve had a chance to calm down. Just don’t try to leave the building.”
With that, the screen fades to black. Next time, we’ll tackle the first half of Act 3, and the game’s dickishness will just keep ratcheting up.
Bonus Content:
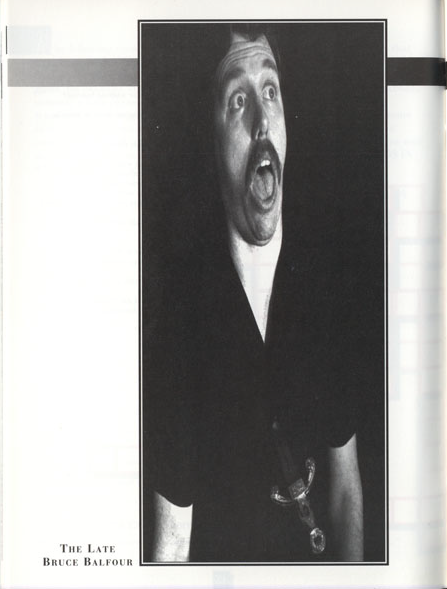
Bruce Balfour, the lead designer for Dagger of Amon Ra, in Dr. Carter’s death pose. It’s pretty clear they modelled Dr. Carter off him.
Update 8: Laura Bow, Psychic Detective


Welcome to Act 3, where we’re going to start doing a lot of things that would make absolutely no sense to do except that we happen to know they progress the plot. Some of these actions are actually revealed by the game if you wait long enough - but doing that will actually cause you to miss out on a lot of stuff. In Act 3, apart from one initial time change at the beginning, none of the time changes are scripted. Act 3 is by far the longest one in the game.
Oh, well… thanks, game. I guess. The beginning of each act has one of these (I accidentally forgot to grab the one for Act 2) that basically tells you whether or not you missed anything important in the last act. In this run, we actually grabbed everything we could in Act 2 right off the bat, which saves us some precious time in Act 3.
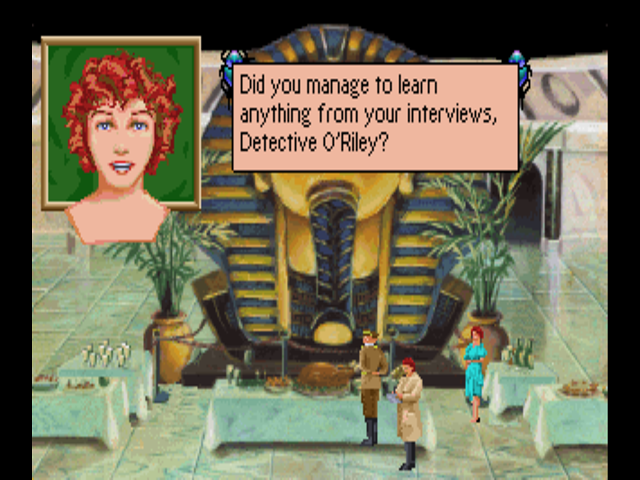
We open Act 3 back in the foyer, with Detective O’Riley interrogating the museum’s staff. The rest of the guests from the party have been cleared out… yet strangely enough the detective hasn’t called for backup or sealed off the crime scene. We can’t do anything except watch as time advances to 10:00 p.m., the only scripted time shift in this act.

All of a sudden, Danny Glover appears out of nowhere.
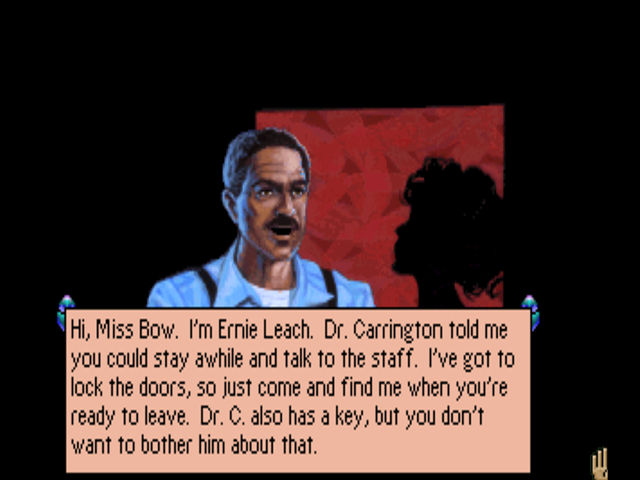
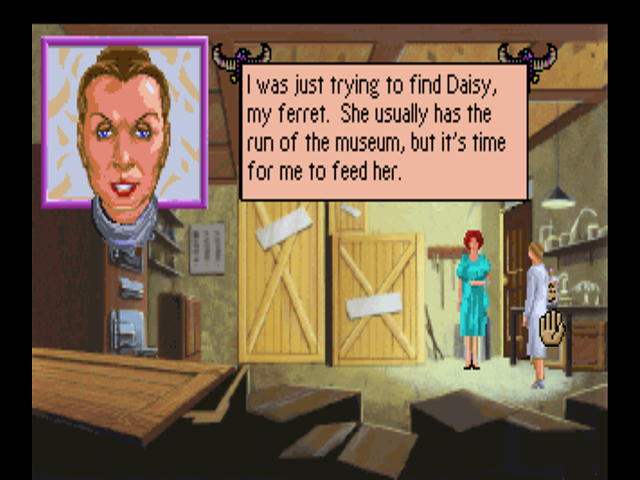
Ernie is basically the museum’s handyman - he’s the “underling” that Wolf mentioned when he confronted Laura in the gift shop. He also appears to do some of the lab work. Ernie is the last new character we’re going to meet in Dagger of Amon Ra.
Once Ernie leaves, Laura asks O’Riley about his investigation. This is an automatic conversation.
: “Don’t bother your little head about it, lass.”
: “It’s my job, sir.”
: "Zis ist an official murder infestigation, Miss Bow! Do not be interfering!’
: “Oh, I don’t mean to interfere. I just want to know what’s going on. Any leads so far?”
: “Dr. Carter died as the result of someone sticking a gift shop dagger in his chest. What more do you need to know?”
: “Well, for one thing, who did it?”
: “Someone who didn’t like him… that’s my guess.”
: “Brilliant deduction.”
: “If you think that YOU can do BETTER…!”
: “I can try!”
: “Oh, wunderbar. Now we’ve got ze AMATEURS involved…”
: “I may not be a detective, but I’m terribly clever. I’ve solved murders before.”
: “Just stay out of the way, lass, and don’t destroy the evidence.”

Now that Wolf is out of the way, we can finally go visit the Old Masters Gallery. If we touch any of the paintings except for one, we find out that the paint on them is still wet. You may notice Dr. Carrington standing around - from this point onward, we can find various staff members wandering the halls. I play with the movement speed on the fastest setting, so Laura moves much faster than they do, increasing the number of times we’ll see them. If we touch the big painting on the wall Dr. Carrington is looking at, we find that it’s actually an original.

It takes a noticable amount of finagling with the controls, but there’s a glint coming from the right side of the painting. By moving up and looking at that spot (actually not on but near the glint, it’s very finicky) we can get a zoomed-in look at it.
Inside the pot of gold, roughly where my cursor is, you can zoom in AGAIN using the magnifying glass to find…
A mysterious key. Unfortunately, the key is stuck in the painting and we can’t get it out for some reason. It is, however, good to know that this is here.

Beyond the gallery is the statue room. Come to think of it, we’re going to know most of the secrets about the museum by the end of this update, so it’s about time I posted the entire map of the first floor.
The door Laura is looking at is Yvette’s office door. We can hear whispers coming from it… and this is where we use our drinking glass. The drinking glass can be put up against doors to hear conversations beyond them. In this case…
Olympia?! Wait… the door’s locked…
 : “You’re very welcome, my dear. What can I do for you?”
: “A bone, you say? How fascinating. Where did you find it?”
: “I found eet right here in the museum. Here eet es, Doctor.”
: “Ha ha! Yvette, you silly girl! This is a chicken bone!”
: “Eet ees?”
:" Yes, of course! Why, it is still greasy. You got this at dinner, didn’t you?"
: “giggle Oh, you have caught me, Olympia. I was playing ze leetle joke on you.”
: “You are a funny girl, Yvette, but I am quite fond of you.”
: “Olympia? We are ze good friends, no? I have ze problem I wish to talk to you about.”
: “Oh? Certainly. What is it?”
: “Come closer so I can whisper eet to you. Eet ees very personal… and I want no one to overhear…”
: “Oh, my. Oh, my… OH, MY!”
Oh…kay, let’s just pretend we didn’t hear that. In fact, let’s look at the statue - specifically, the handful of pixels that make up the statue’s neck, as opposed to its head or back which will not get us the same description. If you go long enough without finding this, Yvette will eventually use the statue and reveal its secret, but now that we know…
Oh look, the statue was a secret switch the entire time. We’ll see what it opened… actually, right now.
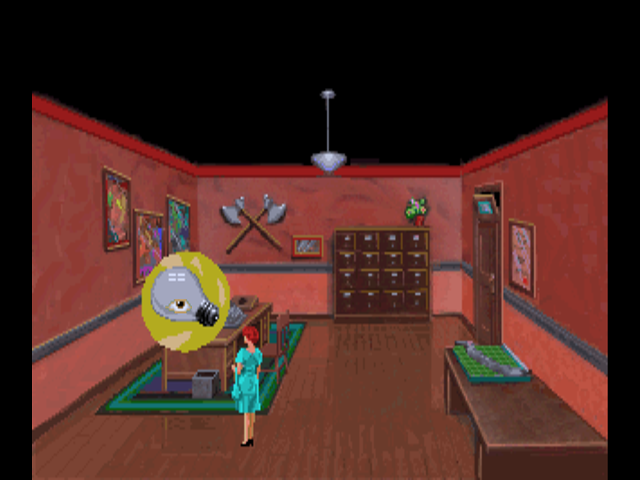
Using the statue’s head opens up a hidden staircase in this column in the room just behind the statue. Unfortunately, the light bulb burns out as soon as Laura gets close - a reference to the staircase to the basement in The Colonel’s Bequest which had a similar hazard. Trying to go down the stairs now will result in Laura breaking her neck, so we need a new light bulb.
So instead, let’s go into Yvette’s office. Strangely, we never see her leave it (unless she did it in the roughly ten seconds Laura spent on the screen with the staircase). This is the site of another dick move by the developers - there are actually two items we need in this room. One is in the garbage can, but we’ll grab that on the way out. The other…
Is Yvette’s working light bulb. Unfortunately, the light bulb is too hot to touch right now. This means…
We need to shut the light off. We still can’t take the bulb even with the lamp off, by the way - we actually need to wait for an event flag to happen in the next room (the door to the right). First though… is that a diploma on the wall there?
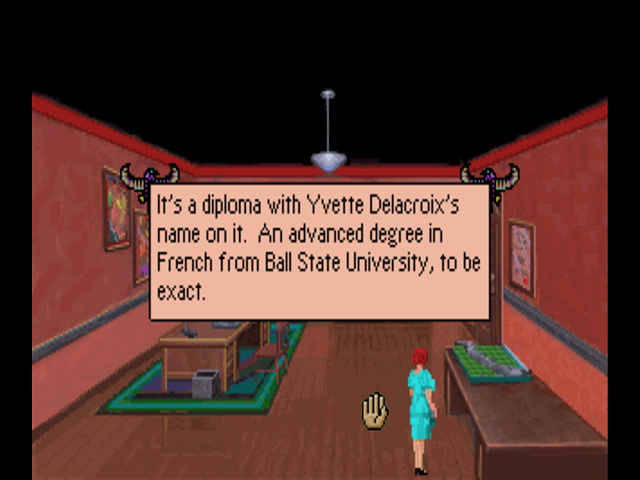
Ball State University is in Indiana, if you don’t get the joke. (Spoilers: Yvette isn’t actually French).
Anyway, welcome to Carrington’s office. As soon as we go in here, the door locks behind us and we can hear Yvette again. This time, she has Rameses Najeer with her. Their conversation is, uh… exactly what you’d expect to hear between Yvette and literally any man ever. However, there is this highly important tidbit. This is important. Remember this.
Next update, we’ll look around Carrington’s office, pixel hunt for evidence, and go downstairs. Also, as a bonus:
I had actually taken screenshots up to replacing the lightbulb on the stairs for this update (and somehow lost them as my screenshot tool decided to stop working the second I entered Carrington’s office) and completely forgot about this but ran into it on my second time through. If you go back through Yvette’s office (she leaves with Rameses once they finish talking and the door magically unlocks) after searching Carrington’s office and forget to grab the light bulb or the item in the garbage can, you walk in and this happens:
1 Like
Update 9: Bad Game Design
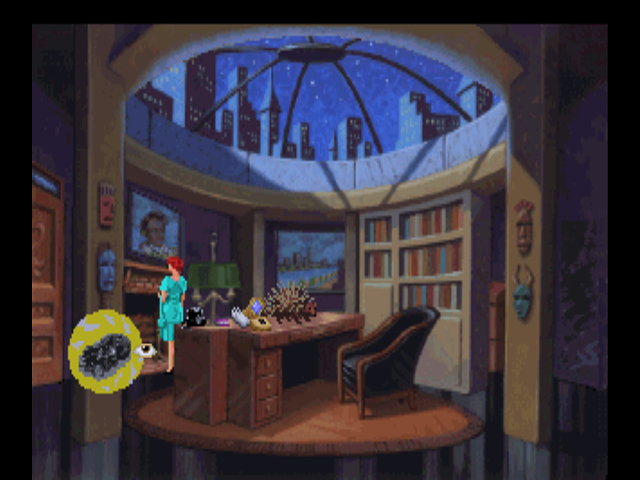
Once we’re done listening to Yvette, we’re free to explore Carrington’s office. Carrington’s office is an area I’m pretty sure none of the people who tested this game ever actually entered, because it is easily the worst-designed area in this game.
There are actually a bunch of things we need to examine in here, and one thing we need to take. Almost immediately, this room turns into a pixel hunt as we try to get to Carrington’s phone book. The phone book is the small mound of purple pixels underneath the lamp on Carrington’s desk - it’s a straight line from Laura’s head to it in the last image. Even if you know the phone book is there, clicking on it is actually pretty difficult. In fact, it might lead you to believe (if you haven’t played it before or are not using a guide) that there’s nothing in that spot, since touching anything around it will give you a generic “Don’t touch that!” message.
Once we find the magic hotspot (which is actually more or less where my cursor is and not, as you would expect, on top of the actual phone book), the game gives us a close-up of it. Of course, that’s not enough to actually see what’s IN the phone book, as we then have to use the hand icon to open it up. Again, there’s a whole world of bad game design in this room.
And as if that wasn’t enough, we then need to switch back to the look action to read the opened phone book. I don’t know why this couldn’t have been one action.
Most of these are just stupid puns - obviously, R. Wililams is a reference to Roberta Williams. Strangely, Ernie Leach’s number is in this book, but we never actually call it. The reason we did this in the first place is for the middle number, the one listed under B. Sayff.
In yet another amazing feat of game design, we’re going to psychically intuit that there’s a safe in this room - under the painting, of course. Laura will just kind of open this without questioning how she knows that it’s there or why she did it in the first place, kind of like she did with the statue near the stairs.
Clicking on the safe brings up the safe’s dial. If you haven’t guessed it already, we’re supposed to take the numbers next to the “B. Sayff” entry and interpret them as a safe combination. I don’t know what kind of safe has only single-digit numbers on it, but we can crack it pretty easily. The combination is 0-5-2-7.
With the safe open, we can look inside… using the hand icon. I’m not entirely sure how this makes sense.
Strangely enough, with the notepad, we only need to use the look action on it once. No multiple actions to open and then read here… for some reason.
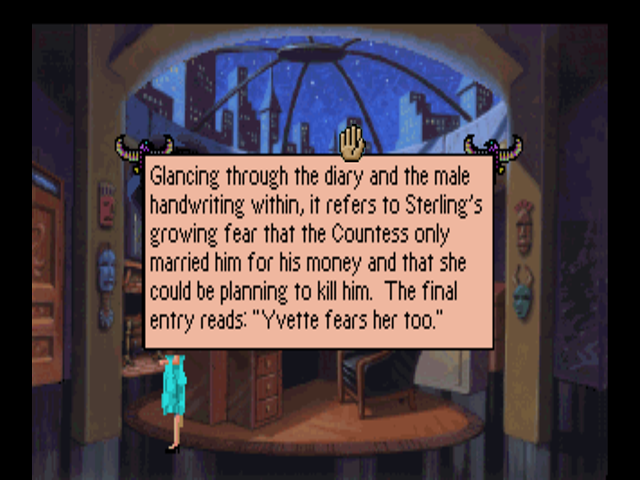
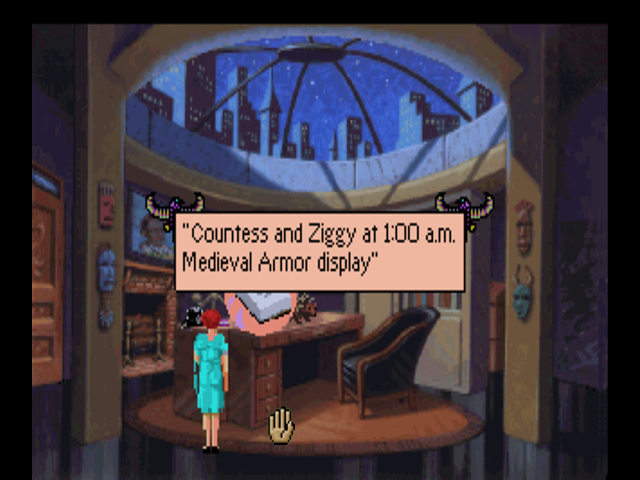
Oh look, an important clue. Actually, I’m going to spoil something here: this clue is not at all important. We never actually look into how Sterling died at any point in the game. In fact, Sterling as a sub-plot is never really touched upon other than that one conversation in Act 2 and this as far as I remember.
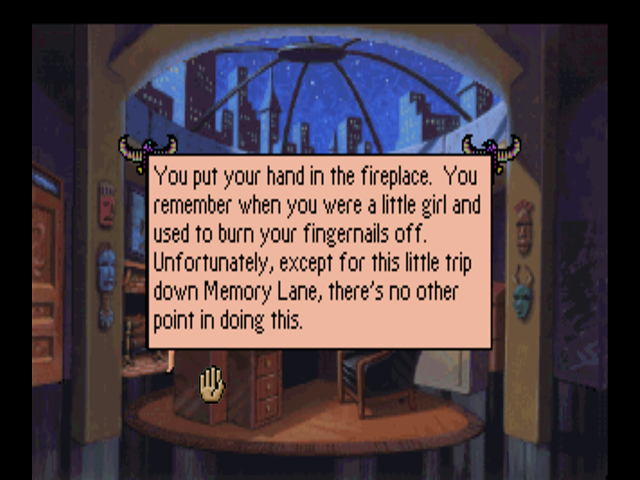
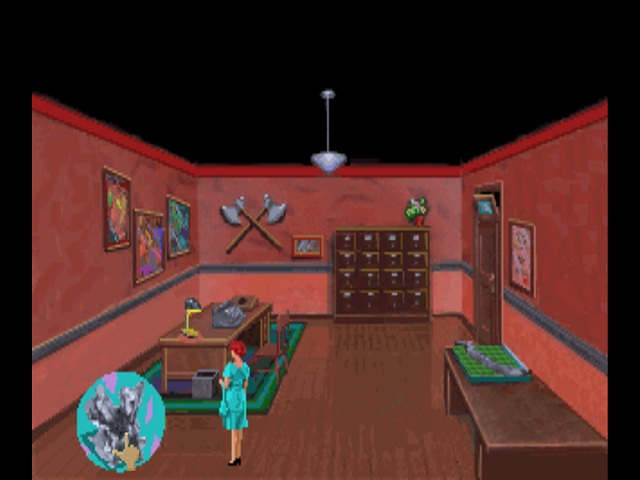
We can also look at the notepad on Carrington’s desk. While the notepad is easier to click than the phone book was, it’s still a bit of a challenge to get the click to register. So okay, you’d think we have everything, right? Except you’d be wrong because there’s an item we need in here which is ALSO not immediately obvious. The item is in the fireplace… except we can’t just reach in there and take it even if we know it’s there. Trying to do so will get us a lovely tale from Laura’s childhood.
Instead, we need to look at the fireplace first to find out there’s a piece of charcoal at the bottom, which we can then take.
You might be asking yourself, “What the hell? Why are we taking a piece of charcoal from the fireplace?” Well, remember how we took that notebook off Dr. Carter’s body? The top page of the notebook is missing when we get to it, but there are indentations on the next page.
By rubbing the charcoal on it, we are able to read the imprints on the next page. They read:
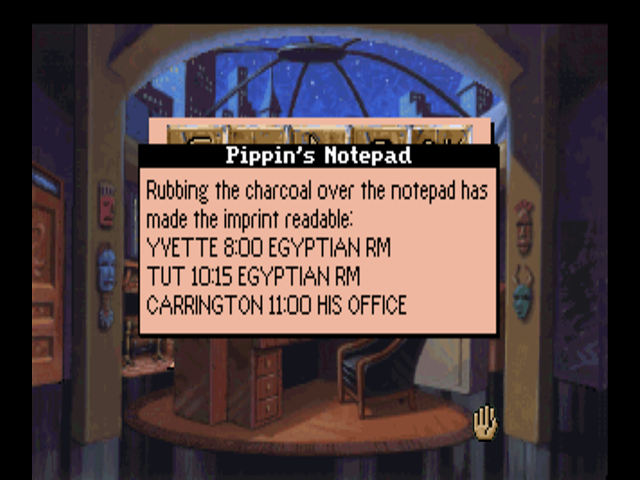
Interesting. We did find that footprint near Dr. Carter’s body… did Yvette kill him? A random woman becoming unhinged and killing people is a thing Laura has seen before.
There is ONE other thing we can do in Carrington’s office, and that is use his intercom to listen in on conversations. The only problem is… remember how I said that the phone book was really hard to click on? The intercom is like that times ten.
Notice how the cursor is several times the size of the buttons. I tried spamming clicks on this for a good few minutes and couldn’t get any of the buttons pressed consistently. Worse, every time you miss one of the buttons, the game gives you a message saying you missed the buttons. Game design!
The good news is, we’re done here and can go back into Yvette’s office to go steal her stuff.
First is Yvette’s light bulb. Being in Carrington’s office for a few minutes gave the bulb enough time to cool so we can touch it. Of course, your first instinct playing this game would be to use the hand icon on the lamp. That actually turns it back on and will eventually cause it to heat up again (the developers were nice enough that if you realize your mistake and immediately turn it off, you don’t get penalized). Instead, we need to look at the lamp first.
There you are! With this, we can fix the light going down the secret staircase and continue ever forward toward progress… as soon as we root through Yvette’s trash.
Oh look, there’s a crumpled-up piece of paper in the trash - truly, a staple of the point-and-click adventure genre and something that totally had not been overused to the point of cliche long before Dagger of Amon Ra came out.
On closer inspection, the paper is actually carbon paper, and somehow transforms into a neatly-folded sheet when Laura looks at it sternly.
With that, Yvette’s office is done. If we had gotten the carbon paper on the way in, we could have read it on Yvette’s desk lamp… but thankfully, there’s another, faster way to do the same thing.
Back at the stairs, we replace the light bulb. How anyone else got up and down those stairs (and people clearly did) with the bulb out without breaking their necks is a mystery. We can use this light to read the carbon paper as well, so let’s go ahead and do that.
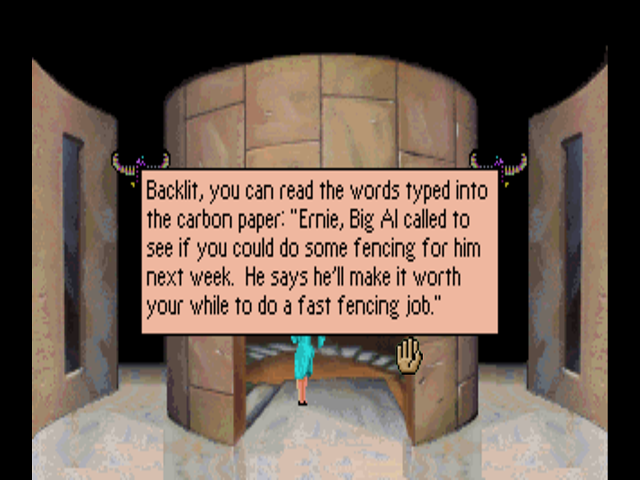
Very interesting. Ernie is apparently being used as a fence for what is probably the mafia. I wonder if those wet paintings in the art gallery are in any way connected to this? The real question is… why was this in Yvette’s garbage can? And written on carbon paper? These mysteries will be answered… never.
Welcome to the lower level of the Leyendecker Museum. We actually already know about the one secret down here - we learned it from Yvette in the previous update - so I’m just gonna go ahead and post the whole thing.
Straight ahead is Wolf’s office, and to the left is the Alcohol Lab. We’ll go into Wolf’s office first if only because it is probably the deadliest room in the game. On a side note, that mirror-looking thing to the left is actually an emergency case that contains a lantern - we could use the dinosaur bone to smash it, but that will attract Wolf who will throw us back upstairs… and then use magic to fix the glass to a perfect, unbroken state when we go back down.
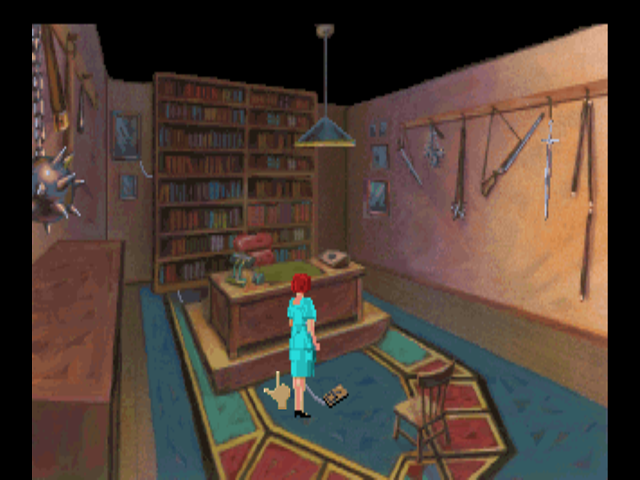
See that mousetrap in the middle of the floor? It contains one of the two items we came here to get.
What you might not notice is the wire leading up the bookcase to the painting in the top-left corner. This is one of three possible deaths in this room - touching the mousetrap causes a gun to pop out and shoot the area around the mousetrap.
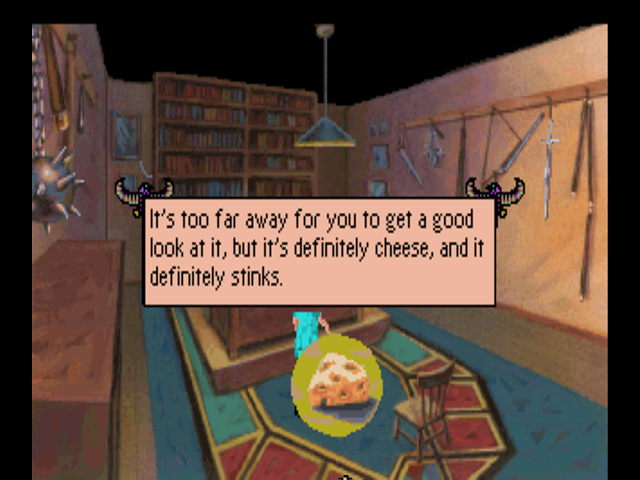
Also, all of the weapons are electrified somehow except the broadsword. The electricity won’t kill Laura, but the broadsword will fall on her and somehow impale her if she tries to interact with it. Instead of doing any of those things, we’ll do something that I guess makes sense if you know the gun is there and hit the mousetrap with the dinosaur bone. This causes the gun to go off but not hit Laura, and lets us pick up the cheese.
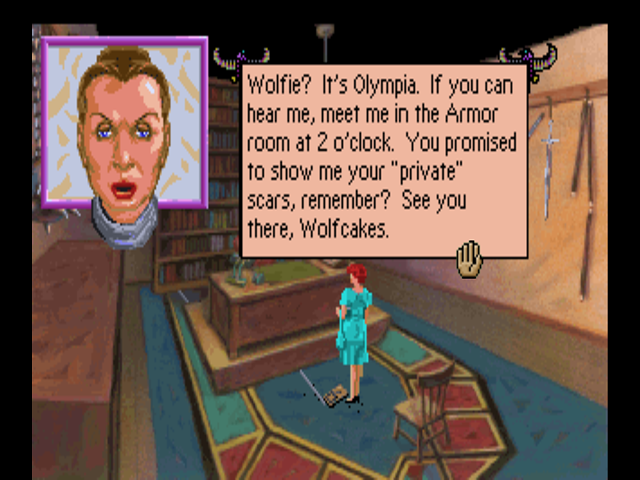
Shortly after we do this, the intercom in Wolf’s office goes off, alerting us to another possible meeting later this evening.
Once that’s over with, we can find the second item in this room. If we look around at Wolf’s bookcase, and keep spamming clicks because seriously there’s like six hotspots that cause a zoom-in and only one of them has the item in it, we eventually find a book of poetry.
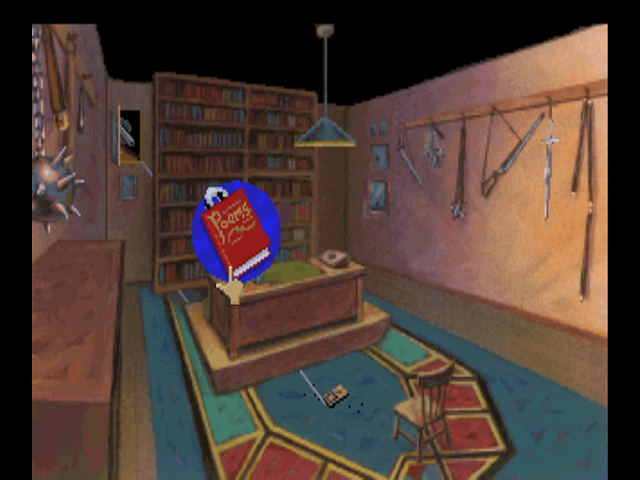
Inside the book is a garter with Yvette’s name sewn into it. Seriously, who does that? The garter also has a note attached to it that we need the magnifying glass to read.
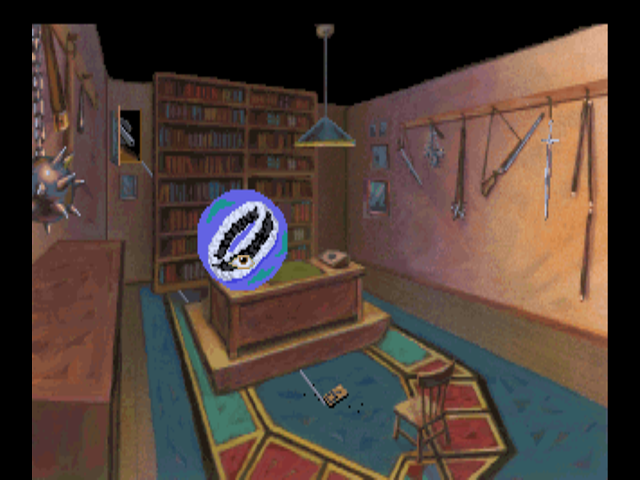
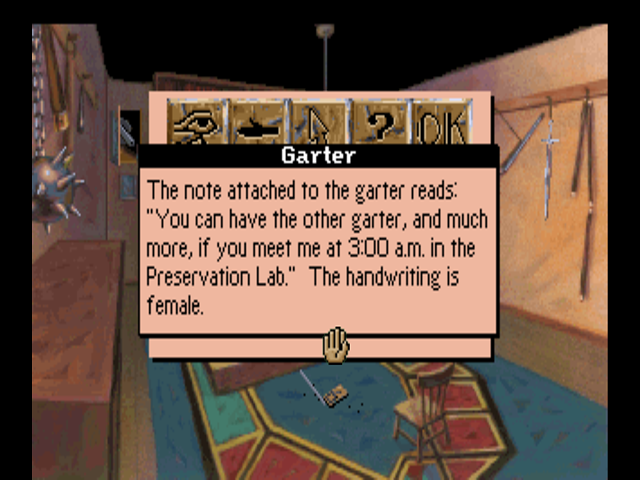
Seriously, what’s with these people and leaving random items with notes in them asking for meetings?
Anyway, that’s all there is to do in Wolf’s office. There is one more death here, which has no associated graphics (it’s literally a black screen) but I got footage of it anyway.
If you try touching the painting near the weapon rack, it reveals a button that opens up a door between the bookcases. Laura will automatically go in, and then die on a black screen.
Next update, we’ll go to the Alcohol Lab, find the Dagger of Amon Ra (again) and explore more of the Leyendecker’s basement.
1 Like
Update 10: Memory Loss
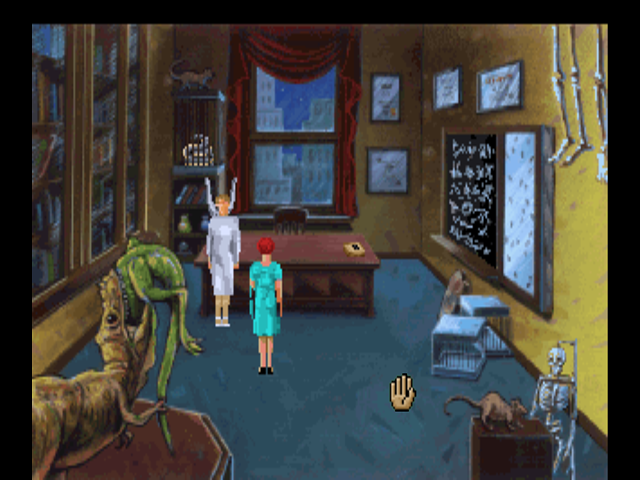
So… there was one little thing I forgot to do while still on the first floor. This isn’t actually a problem - I believe you can do this at any point before going past the Alcohol Lab. We need to do this to trigger an event flag. Before we head on, let’s go back upstairs and go to Dr. Myklos’s office.
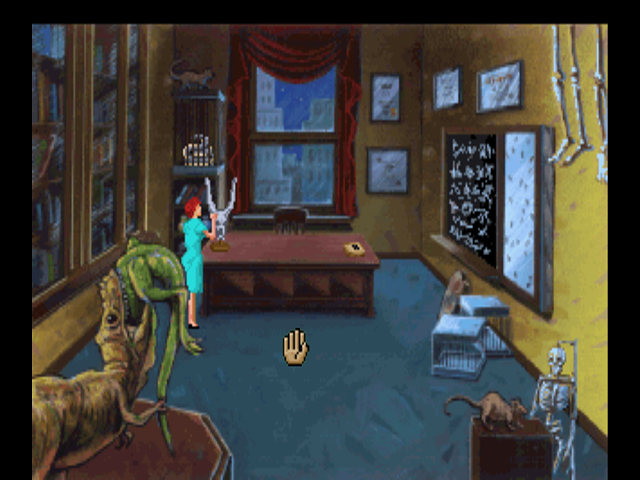
Dr. Myklos’s office is uh… yeah. While the little bottle near the cursor is actually what we came in here for, there’s actually something more important (assuming you’re not using a guide) in here. See that object in the sheet underneath the blackboard, against the right wall?

Seeing the second half of the Rosetta Stone gives us the translations for the latter half of the alphabet. This actually glitches out one of the conversation topics in Laura’s notebook (namely the journal we found in Carrington’s safe, called “Sterling W-C’s Journal” in the notebook) because it happens to sit in the middle of the hieroglyph translations. Just above the Rosetta Stone, on Dr. Myklos’s blackboard, is the puzzle we’re actually going to need it for.
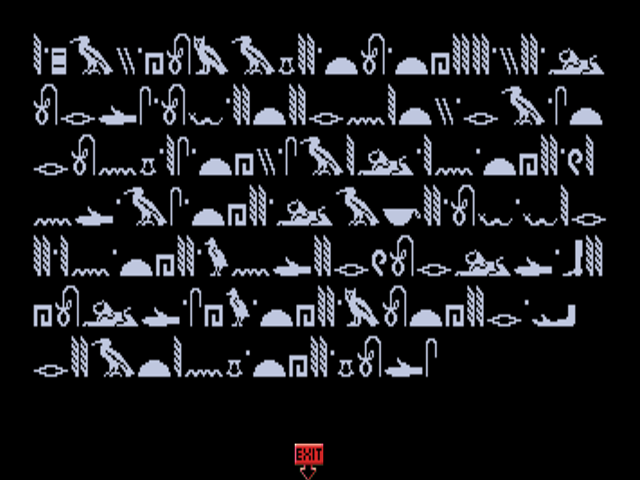
According to Gamefaqs (since I am far too lazy to do a puzzle like this), the message translates to:
I PAY HOMAGE TO THEE, YE LORDS OF ETERNITY. RA, STRONG IS THY SAIL IN
THE WIND AS THE LAKE OF FIRE IN THE UNDERWORLD. BEHOLD SHU, THE MOTHER,
CREATING THE GODS IN SILENCE FROM WOMB. QUICKER THAN GREYHOUNDS AND
FLEETER THAN LIGHT, LET ME NOT BE BURNT, LET ME NOT BE CONSUMED, LET ME
NOT PERISH AS MY MUMMY LIES PROSTRATE IN MY TOMB.
I was kind of surprised that they mentioned greyhounds in something supposedly from ancient Egypt. It’s actually debated where the dogs came from - some people say Egypt, while others say that while the Egyptians had dogs similar to greyhounds, they’re not actually related. Interesting stuff.
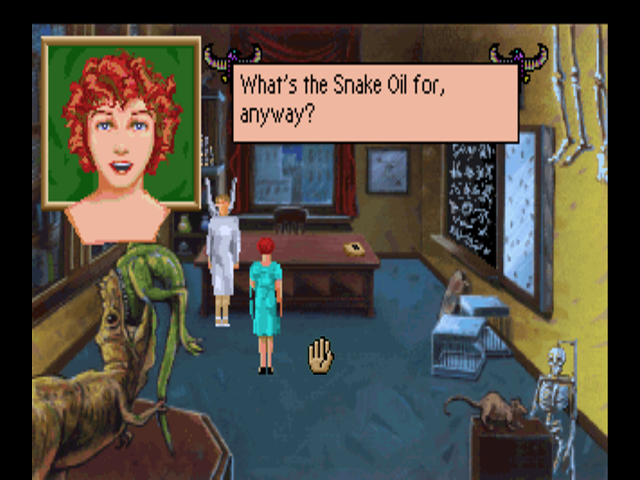
Anyway, once we’ve checked out everything else in the office, we can take a look at the bottle on the desk.
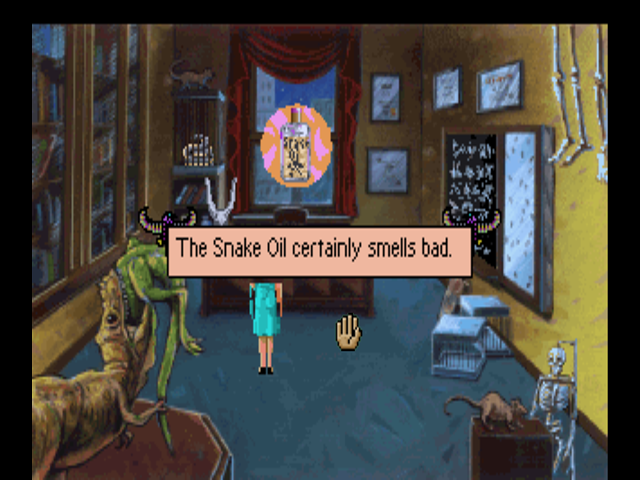
If we try to take it, however, Dr. Myklos will drop whatever she was doing and run upstairs to grab it.
After an exchange of pleasantries, Laura asks why Dr. Myklos is keeping a thing of snake oil on her desk in the first place.

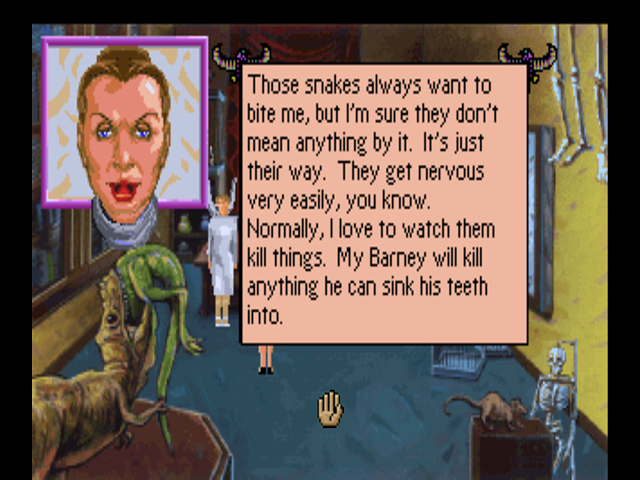
Speaking of Barney, let’s take a look at him (once Dr. Myklos wanders off again).
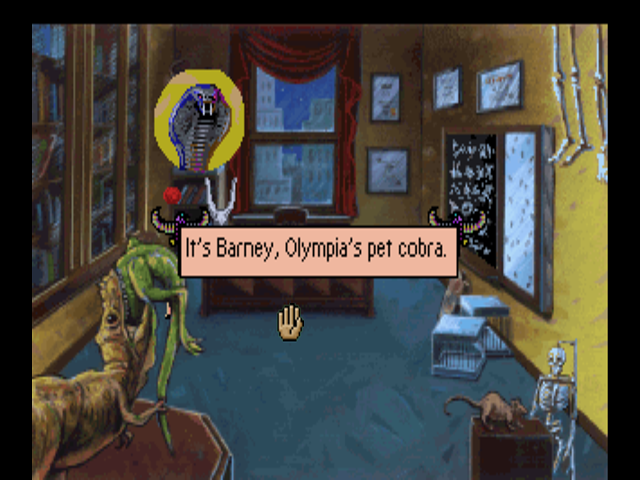
Little red pixels for eyes, constantly bared fangs, a cage sitting on top of a bookshelf… what could possibly go wrong?
Oh right, one other thing I wanted to mention here. Going into Dr. Myklos’s office is actually one way to find out about the secret staircase - once you leave her office, you’ll hear the door go off and see the statue’s head pop up. This is assuming you haven’t opened the stairs at least once before, in which case she’ll actually close them on you. I’ll skip the trip back downstairs, which we’ve already seen.
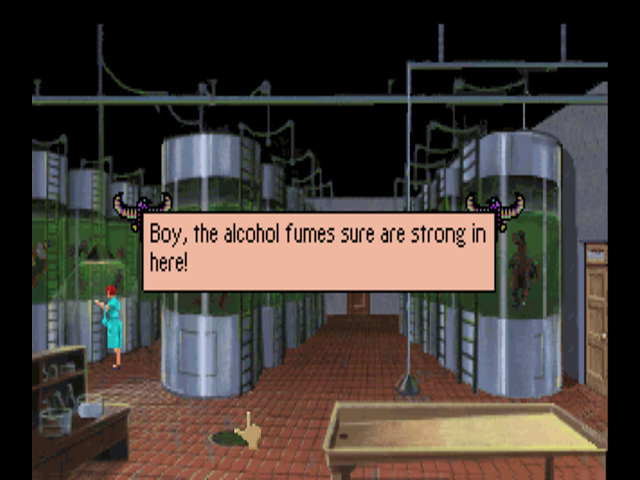
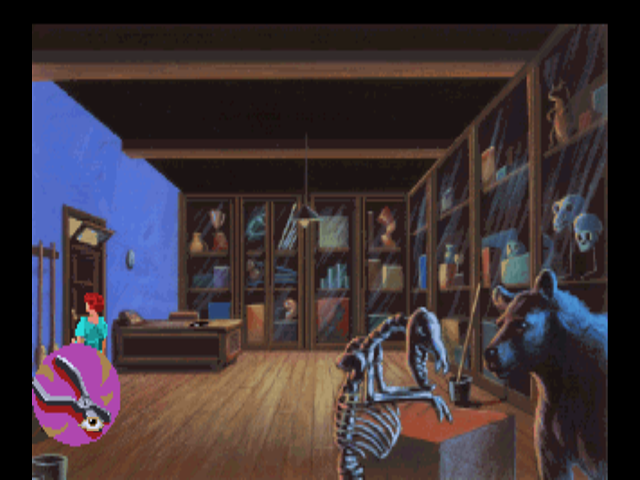
This is the Alcohol Preservation Lab. This is another relatively deadly room in that there’s a gimmick - because of the strong alcohol fumes, no one is allowed in here for very long. Once you enter the room, you’re put on a death timer. The game does give you some warnings, but if you don’t know what you’re looking for in here it could actually be pretty easy to die.
As soon as we enter, the game gives us a message about hearing whispering coming from Ernie’s office. Ernie’s office is the door to the right - the door on the back wall is the Mammalogy Lab, which is locked right now. Let’s go ahead and use the water glass on Ernie’s door. This might be important…
 : “Interesting. I never noticed that before.”
Oh boy. Here comes the juicy part where Ernie reveals a secret door or something…
: “You never noticed what, my love?”
Holy SHIT. To get a sense of time here, Yvette was busy making out with Detective O’Riley in her office when we came down the stairs after visiting Dr. Myklos. She quite literally teleported from making out with O’Riley to flirting with another man in under a minute. THAT’S Heteromancy if I’ve ever seen it.
: “You have a tattoo of the Eiffel Tower on the inside of your left thigh.”
: “Ahh, you are doing zees to distract me, no? But I am worried about you, my Ernie.”
: “You are so beeg and so strong, but zees Icepick fellow, he is a dangerous one, no?”
: “Yeah, he’s dangerous. But I’ll pay him his dough. Ernie Leach always pays his debts.”
: “Maybe you can do some more fencing for zees Big Al. He pays well.”
: “Yeah, Big Al’s a good customer, but there’s only so much fencing I can do for one guy.”
: “Zees Icepick might try to make an example of you before you can pay him off. He keeps leaving ze threatening messages!”
: “Don’t worry, baby. Icepick knows he won’t get his dough if he kills me.”
: “Maybe I can get into a hot poker game down at the Harlem Swinger and win enough to pay him off.”
: “No, no, no! Ze gambling is what got you into zees mess, my Ernie!”
: “Maybe you’re right. But I’ve got bigger problems tonight. I saw something I wasn’t supposed to see.”
: “What?”
: “You’re better off if I don’t tell you about it. Now, what’s this on top of your Eiffel Tower tattoo?”
Wow. Yvette might actually be a better journalist than Laura. I mean, yeah she flirts with absolutely everyone but she’s gotten far more scoops than Laura has tonight - assuming she saw Dr. Carter’s body first and wasn’t the killer. I’m not entirely sure what Ernie is referring to here (it might come up later, I’m doing these updates as I go) but it’s reasonable to think he’s talking about Dr. Carter’s murder, since he showed up right around the time it happened.
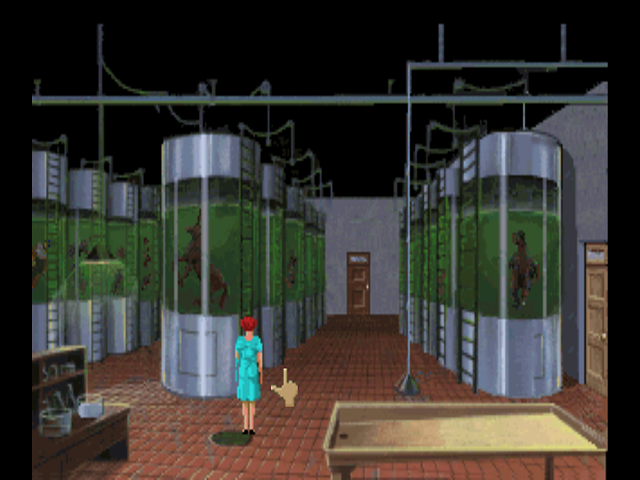
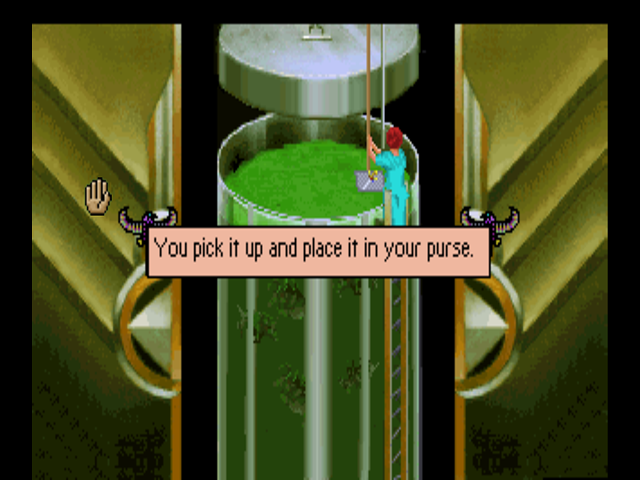
While we’re here, we may as well look at some of the vats. Most of them don’t have anything interesting in them, least of all Vat 13, which is the second one to the right in the row of vats Laura is looking at.
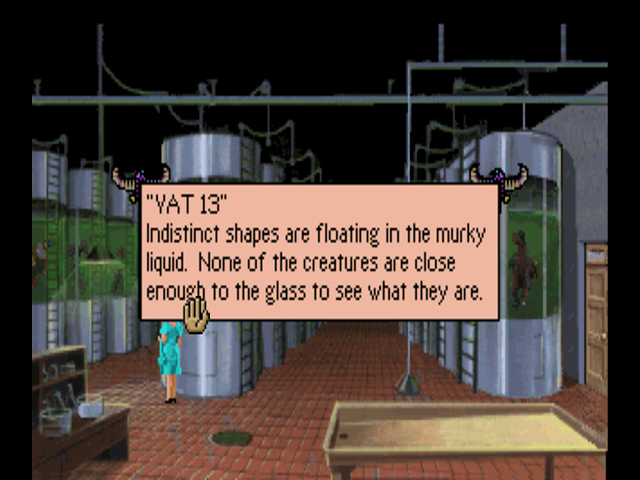
I think you’re supposed to find the clue on this later, but let’s find out what’s actually in that vat. Laura can climb up any of the vats and will grab a mysterious wooden scoop from thin air to stir up the contents. I can’t say for certain, but I think checking a vat lowers the amount of time you have in here faster than if you simply stay on the ground level.
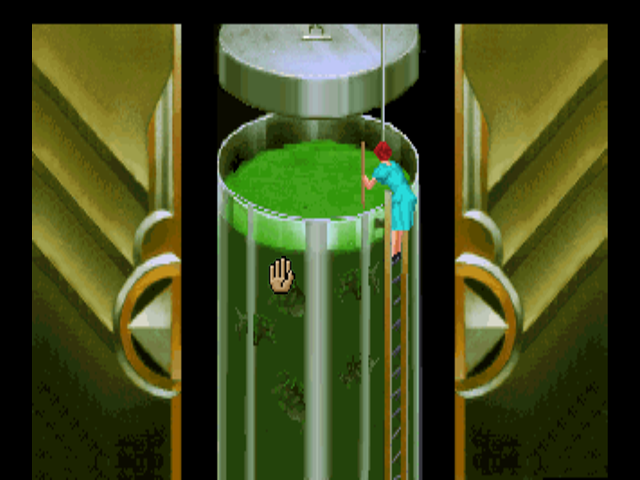
Wait. That shape… and the colors…
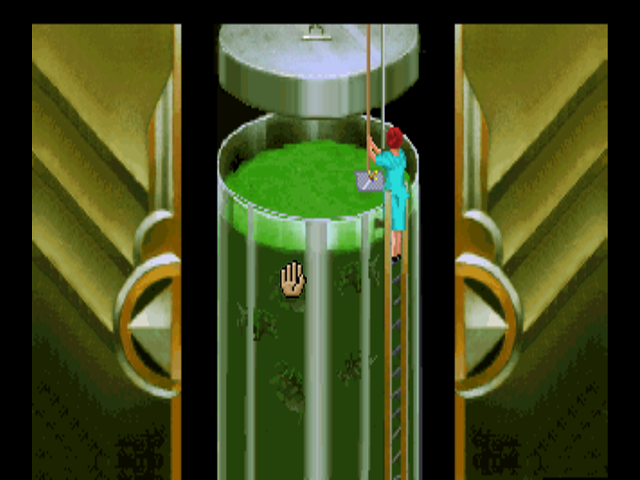
The game actually has like, eight text boxes that pop up hyping your discovery. Unfortunately, due to the way the game handles transparencies on this screen, I can’t get a screenshot of them.
Oh look, we found the real Dagger of Amon Ra! This time, Wolf’s not around to stop us taking it. So, what does Laura do with it?
Well, I guess that’s one way to handle a priceless artifact. Laura then quickly gets down before the alcohol fumes cause her to fall into the vat.
As we touch the floor again, the first warning about the fumes pops up. Fortunately, we won’t be in this room long enough to trigger the death - in fact, what we’re going to do is go immediately north to the Mammalogy Lab.
This conversation with Dr. Myklos is actually word-for-word identical to the one in her office… minus this part. It’s also easily missable - you’ll see why soon.


Jeez, I guess those alcohol fumes really did get to Laura. She looks stoned off her gourd. Dr. Myklos urges us to leave so that she can lure her ferret out of hiding, causing Laura to leave the room automatically. When we get back to the Alcohol Lab…
The reason the conversation in the Mammalogy Lab is so easy to miss is that once you pick up the Dagger, you’re put on a very short timer before Wolf automatically shows up and throws you out. You have to be pretty quick to make it to the lab in time.
Wolf throws us back into the downstairs foyer. It’s kind of weird that he doesn’t force us upstairs (since the areas downstairs are meant to be staff-only) but this will give us the chance to give Wolfie the finger… say by using this bone to smash the emergency glass.


Behind the glass is a lantern, presumably put there in case of the power going out in the basement. The real question is how they’d expect anyone to find and break the glass in the dark. Now that we’ve broken Wolf’s precious emergency case and stolen the lantern, we should probably book it upstairs. There’s nothing more to do down here anyway… plus, we have the Dagger! At this point, it would make sense to go look for Dr. Carrington (since Ernie is still presumably in his office staring at Yvette), show him the dagger and get out of the museum. Mystery solved!
Actually, before we do that… there’s something we can use the priceless Dagger of Amon Ra for. We’re headed past there anyway if we’re going to find Dr. Carrington, so let’s just do it on the way there.
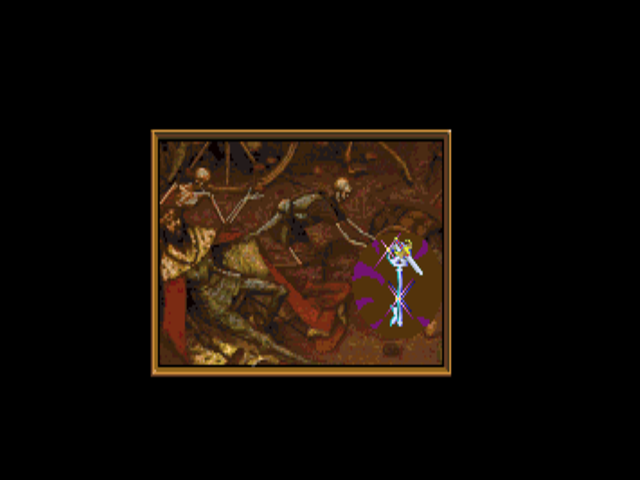
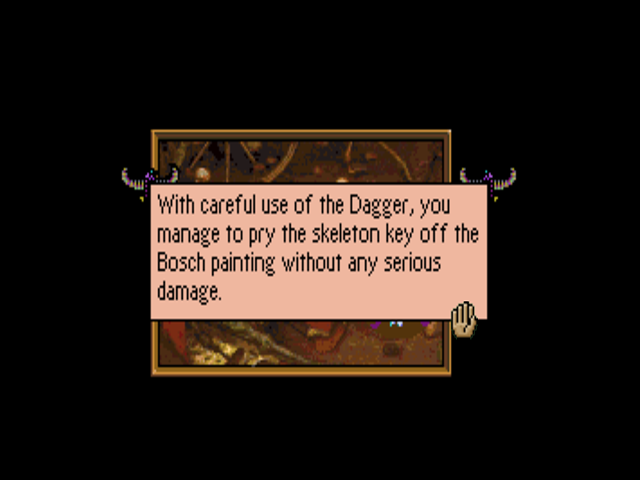
We now have the skeleton key, though we don’t know what it goes to yet. Still, can’t be a bad thing to have, especially with the workers locking stuff up at random all the time.
Now that we’ve gotten the dagger, there are a few things we can do. We COULD wait for time to advance by running around the museum or waiting in a room until the game’s timer ticks down. However, we also have that note from Dr. Carter’s notebook that said he was going to meet Dr. Smith in the Egyptian room at 10:00. Let’s see if we can sneak up on him there.
Going to this room at this point automatically shifts the time to 10:15 p.m.
Dr. Smith shows up, and says a few lines about being surprised. He actually doesn’t seem to know that Dr. Carter is dead. When Laura asks him about his alibi…
: “At the party, of course. You saw me there.”
: “Actually, I didn’t see you there at that time.”
What Laura fails to mention is that she didn’t see him at 8:00 because she was busy discovering his dead body.
: “But you must… oh, well, there was that phone call.”
: “Was Dr. Carrington in his office?”
: “No, he was at the party.”
: “Did Mr. Heimlich tell you who was calling?”
: “No. He didn’t take the call… and I don’t know who told him about it.”
: “You and Dr. Carter seemed to argue a lot about the Dagger of Amon Ra…”
: “We had our differences of opinion, yes.”
: “Did you kill him?”
: “Miss Bow! I am shocked that you would ask me such a thing! I’m leaving!”
With that, Dr. Smith leaves the room. While he doesn’t have a great alibi, it would seem weird for him to be the killer but then insinuate that Wolf can corroborate his alibi, don’t you think? There is one other problem as well: if he was in Dr. Carrington’s office on the other side of the museum taking a phone call, how did his ankh necklace wind up at the crime scene? We actually can’t ask him about that now, leaving us with no choice but to go back and try to find Carrington somewhere else. Let’s try his office - maybe there’s a clue over there! At the very least, maybe Wolf has fucked off so we can explore downstairs some more.
On the way back to the stairs, we come to the Pterodactyl room, and for a brief second, this flashes.
This is one of the more weird time shifts in the game - this one is actually scripted, but it means we somehow spent an entire hour talking to Dr. Smith. Okay, Laura. Remember your training. Remember what happened the LAST time you screamed after you found a body? Just keep calm, ignore what’s happening here and go directly to Carrington’s office. Finding him and returning the Dagger is a top priority. If O’Riley or Wolf find you, they’re going to search your purse and find the Dagger!

Dammit, Laura!
Like Dr. Carter’s death, we get a close-up of this new dead body… which is also headless. It looks like someone cut the wires holding up the pterodactyl and impaled the person before decapitating them - except wait, something’s off here. Even if you had the pterodactyl rigged to fall on someone, it wouldn’t pierce them like that. This body reeks of having been killed somewhere else and then arranged here for us to find.
The killer was even smart enough to remove anything that might’ve been in the corpse’s pockets. They must realize that we found Dr. Carter’s notebook! Okay Laura, change of plans. We need to hide somewhere. We don’t know when this person was killed, but it would have to have been within the last hour, since we came through here to get to the Egyptian room and didn’t see the body then. Let’s take a look at the map…
Oh, I know a good spot! Yvette mentioned there are secret passages in the museum, right? See that little room between the Life Mask exhibit and the foyer? Maybe there’s a passage there, and we can use that to go back to the foyer and then book it to Carrington’s office!

Uh-oh. I don’t see any hidden doors here. Wait a second… look at that mask up in the top-right, across from Japan. It’s a different color. Maybe that’s the switch!
Oh boy. That’s Ziggy’s head. I’d tell Laura not to scream again, but we all know what’s going to -
Yep. There it is.
Oh, crap.
Next update: Laura nearly has her cover blown… and another murder!
Update 11: Porcupine Killer
When last we left Laura…
Oh right, she’d been caught by Wolf and O’Riley while standing directly next to a severed head while also carrying the Dagger of Amon Ra in her purse.
: “You’ve got some explaining to do, young lady. Why are you screaming?”
: “I… found… Mr. Ziggy’s head.”
: “Very odd how you are always findink ze bodies, Miss Bow. I think ve should be going back to my office and interrogatink you now.”
: “Here now, Wolf. The young lady just found a man’s head. Give her a moment before you get out the thumbscrews, then.”
: “Thank you, Mr. O’Riley.”
: “Don’t thank me, lass. I’m not saying you didn’t kill the man, I’m just trying to restrain Mr. Heimlich’s enthusiasm for his job.”
: “But I vill get results! Let me talk to her privately!”
: “Now, I realize you’re just trying to help, Wolf, but I think we can learn what we need from the lass without harming her.”
: “She could lie and you’d never know it! You Americans are too soft on your criminals!”
: “I just walked in and found his head! That’s all.”
: “Well, Mr. Heimlich does have a point, lass. It’s a wee bit curious that you keep showing up at the murder scenes before anyone else. How do you explain that, then?”
: “Just lucky, I guess.”
: “Well, you do seem to be a wee bit small to be sawing off a man’s head, I’ll say that much.”
: “Zis fraulein could have had help! Or maybe she’s very clever!”
: “Or maybe you’re trying to pin the murders on her so you can find the murderer and save your job, eh?”
: “My job is quite secure, Herr O’Riley.”
: “Oh, really now? A security chief who allows burglars to steal the exhibits, then overlooks several murders happening under his nose? I’d think twice about your security methods if I was running things here.”
With that, Detective O’Riley and Wolf fuck off to grab the crime scene kit, after giving us another stern warning not to leave the museum - not that we can, as Ernie locked us in after the party. This next part of Act 3 is kind of a clusterfuck of event flags that don’t work out very well, so there is a LOT of waiting.
Anyway, we know what our goal is: find Dr. Carrington, return the dagger, and get out of the museum. Up until now, we could find Dr. Carrington (along with all other non-dead NPCs except Ziggy and Ernie) wandering around the museum. This time, he’s nowhere to be found. Let’s take the initiative and head to his office ourselves.
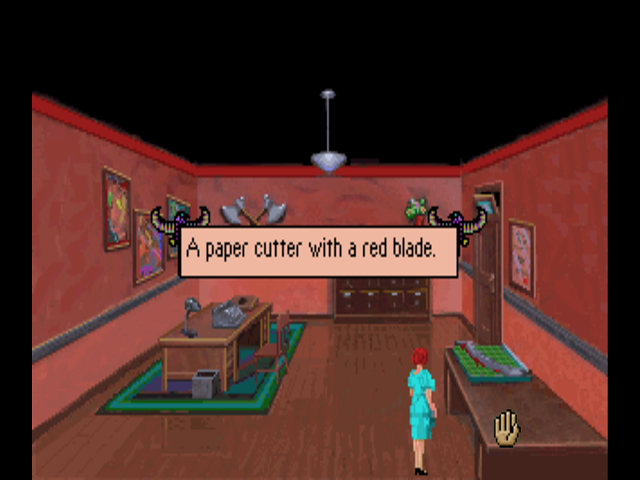
We have to stop in Yvette’s office to get to Dr. Carrington’s (note: this actually isn’t true. I’ll explain later.) and while we’re there… oh look, her paper cutter is covered in red liquid. I wonder what that’s all about. As soon as we examine the paper cutter, Dr. Myklos just kind of wanders in.
She’ll complain at us for being in Yvette’s office, but doesn’t actually try to kick us out or get Wolf or anything. It’s one of the most bizarre scenes in the game. I’m also not sure whether she’s telling the truth here - she works with animals, so I’d imagine she knows what blood looks like. There’s also a conversation (which is just more flirting) between Yvette and Dr. Smith we could have run into if we kept going in and out of Dr. Carrington’s office right before finding Ziggy’s body where she says she spilled some strawberry jam, so I’m not sure what the truth actually is.
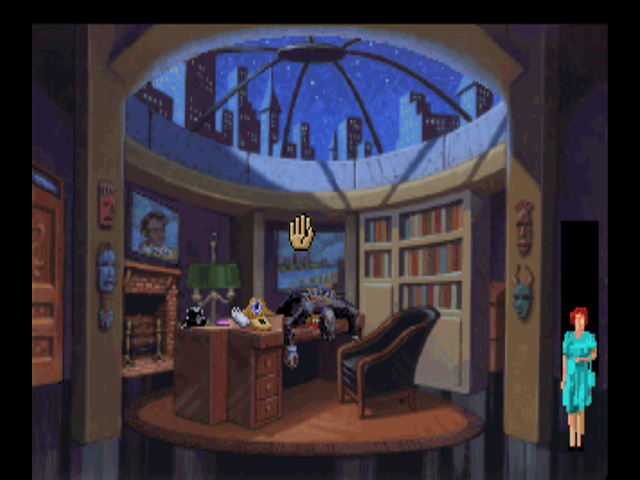
Carrington’s door is unlocked, so let’s just go in there…
Oh no. Laura, we’ve been over this. You’re going to scream and…
To Laura’s credit, she only gasps this time. Great job, Laura! Now if only you had done that for the first two murders…
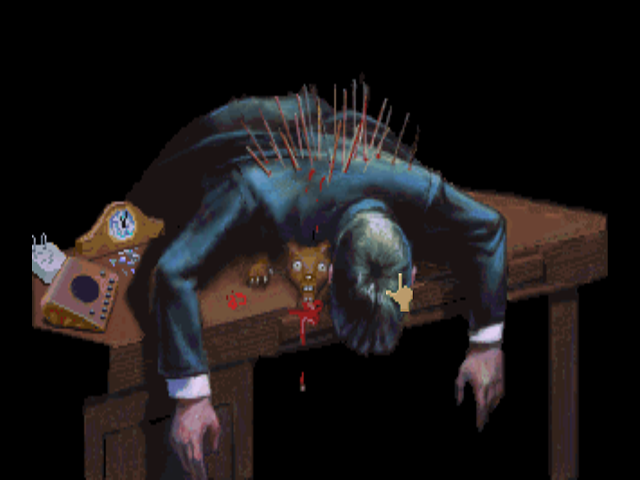
Welcome to the dumbest murder scene in the game. We can actually examine the porcupine to find out…
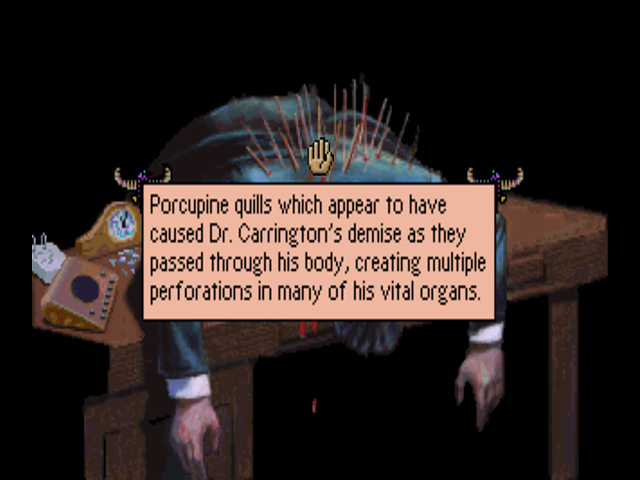
Note: Porcupines do not actually work that way. Their quills are maybe two inches long, not two feet. There’s not much we can do with Dr. Carrington’s body right now - his keys are gone (though the game won’t tell you that) and there’s no other evidence in the room we can collect, short of finding out that the clock stopped at 12:04 a.m.
With that, time advances to 12:45 a.m.
Oh, remember how I said we didn’t necessarily have to stop in Yvette’s office to get to Dr. Carrington’s? There’s actually another way in, using the bookshelf trap from a few updates ago in Wolf’s office.
Because we have the lantern, rather than dying we can use Wolf’s bookshelf as a secret, one-way passage to Dr. Carrington’s office. Dr. Myklos also has one of these in her office:
The passage in her office leads to the Alcohol Lab, which allows us to creep in on Yvette for the second time tonight.

We can also dick around in the armor room and find out that Dr. Carter’s body has been hidden in one of the armor suits. The Armor room is right between the Egyptian exhibit (where Dr. Carter was killed) and the Pterodactyl room (where Ziggy’s body was found assuming he wasn’t killed in Yvette’s office).
The way to progress, however, is to wait for Yvette to leave Ernie’s office (she does so after Carrington’s body is found) which allows us to grab a couple of things.
First is this weird-looking hoop under Ernie’s desk.
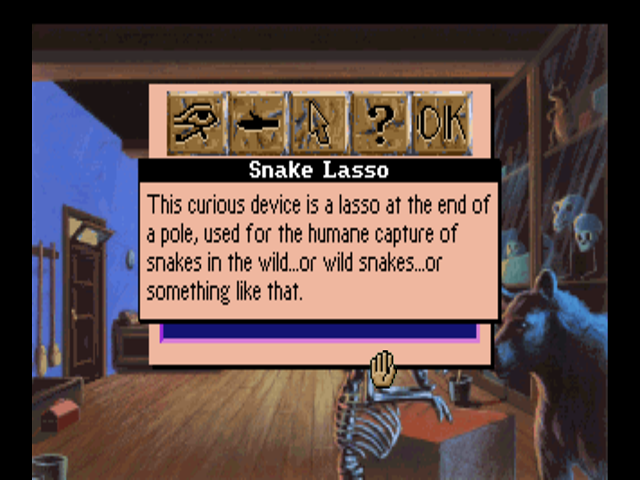
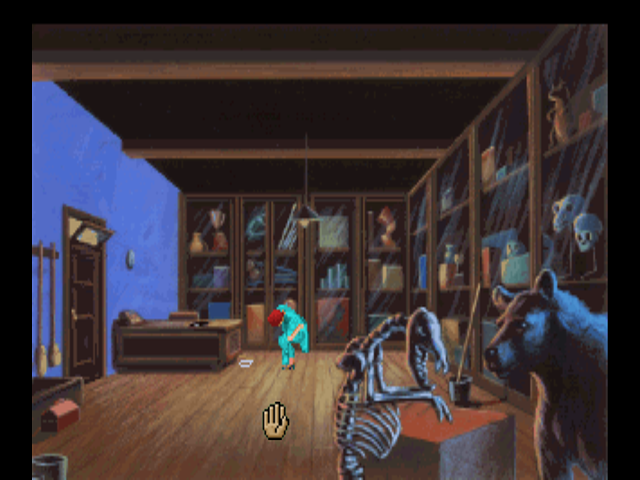
The hoop turns out to be a snake lasso. We don’t have any immediate use for it, though if we hadn’t gotten the cheese from the mousetrap in Wolf’s office, we could use the lasso to trigger the trap instead of the dinosaur bone. We can also look in Ernie’s toolbox…
And find a pair of wirecutters. These actually are immediately useful. We can also examine Ernie’s desk to find a log of what’s in those vats outside.
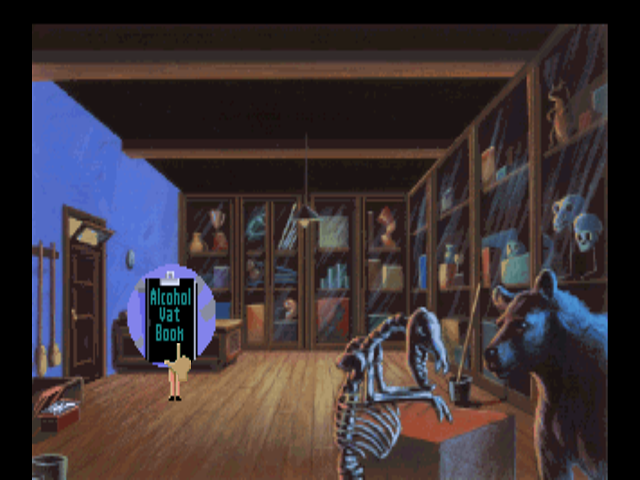
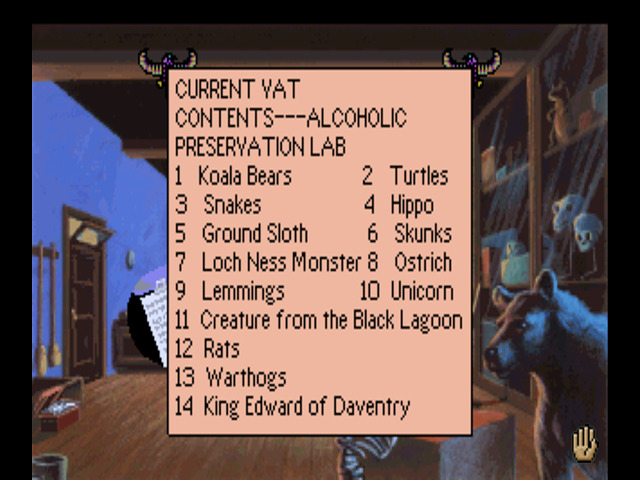
I’m not entirely sure how this is supposed to help you divine that the Dagger was in Vat 13 the entire time.
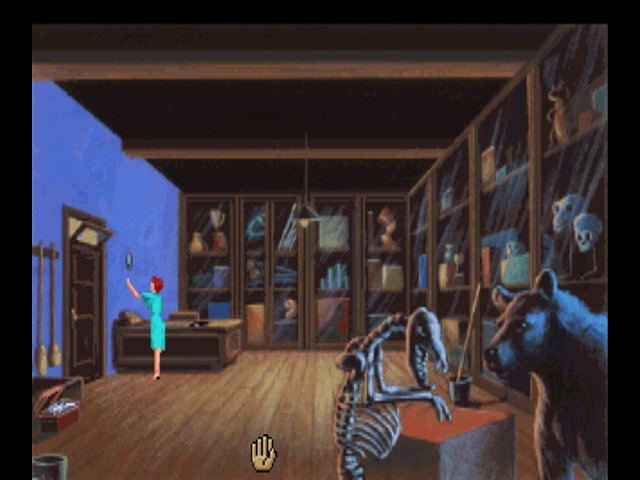
Finally, this thing near the desk is actually a switch for a hidden passage. Unlike the other two we’ve encountered, it doesn’t open a door directly in Ernie’s office.
I should also mention that Ernie’s office is on a timer - if you take too long, Ernie will eventually come back and ask you to leave. I got this right after opening the passage, but it doesn’t always happen that way.

Now comes what is in my opinion the worst part of Dagger of Amon Ra: playing the waiting game. There’s no way to trigger the next time shift short of just wandering around until it decides to come up on its own. There’s one thing I wound up doing between Ernie’s office and just kind of sending Laura up and down the stairs until the time shift happened.
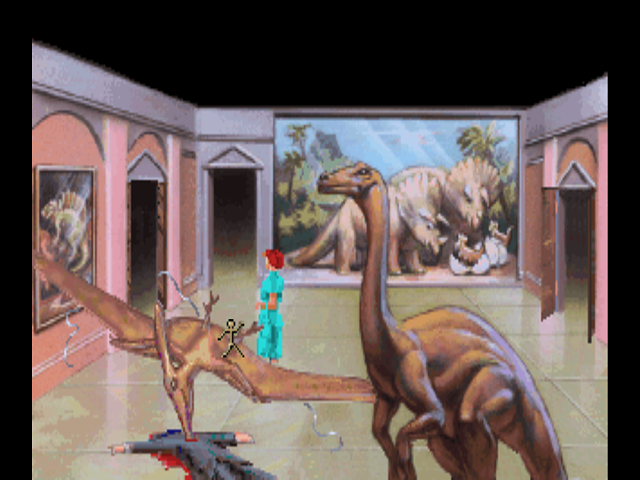
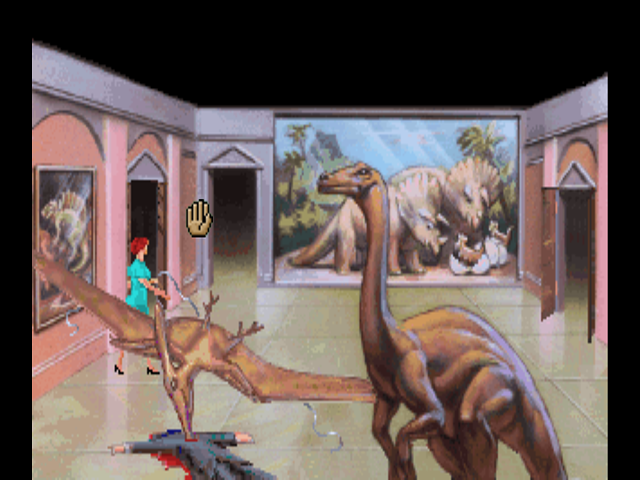
If we use the wirecutters on the downed Pterodactyl (to do this, you need to get the close-up on Ziggy’s body and then use the wirecutters on the bottom-left wire, as for some reason Laura will refuse to cut the other two) we can obtain a clipping of wire. Surely messing with the crime scene and potentially causing Laura to be mis-identified as the killer was worth it to obtain this wire.
Ten minutes of walking up and down the stairs later…
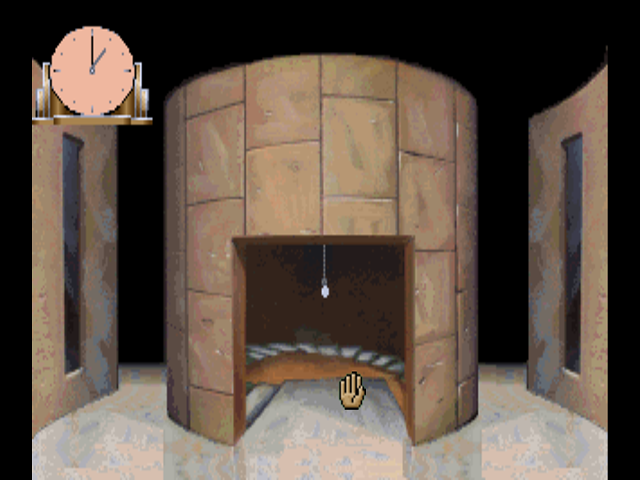
The time is now 1 AM. This doesn’t change a whole lot, except for the fact that one door in the basement that was previously closed is now open. Back at the Mammalogy lab, Dr. Myklos is nowhere to be found. We can also see a secret passage on the wall - this was the passage that opened from the switch in Ernie’s office.
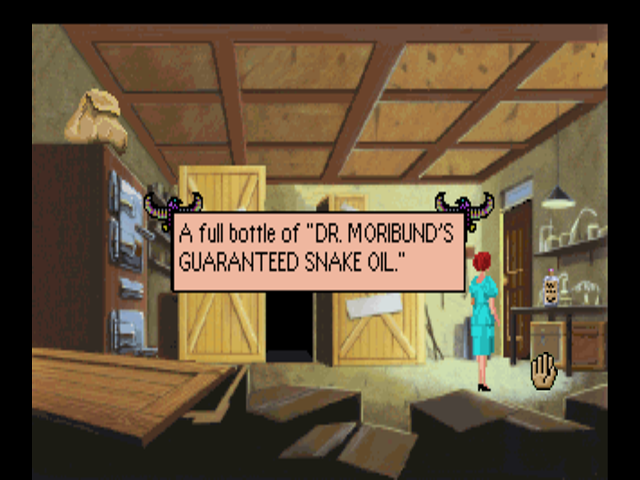
Dr. Myklos apparently left her snake oil down here, so let’s grab that before she comes waltzing in like she tends to do.
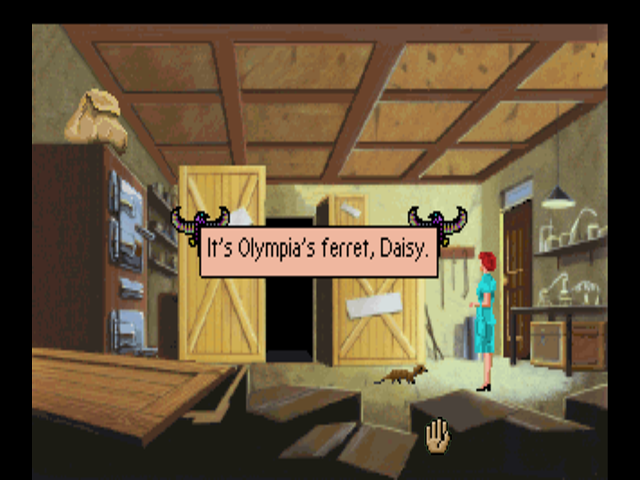
Oh look, it’s Daisy! Maybe we can help Dr. Myklos out and grab her…
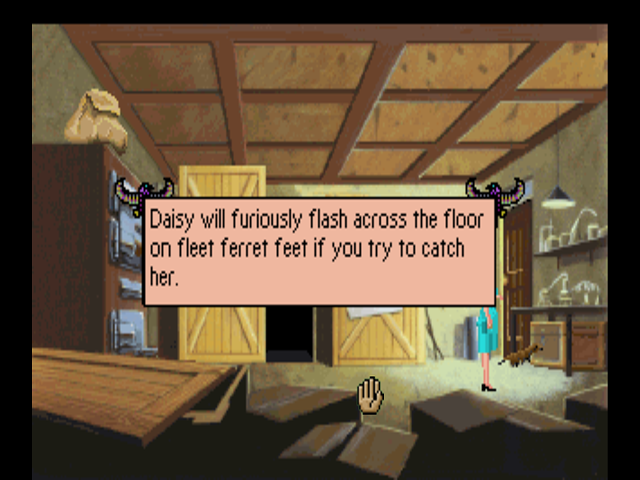
We can’t actually do anything with Daisy, but she seems really interested in that chest underneath the table. I wonder what that is…
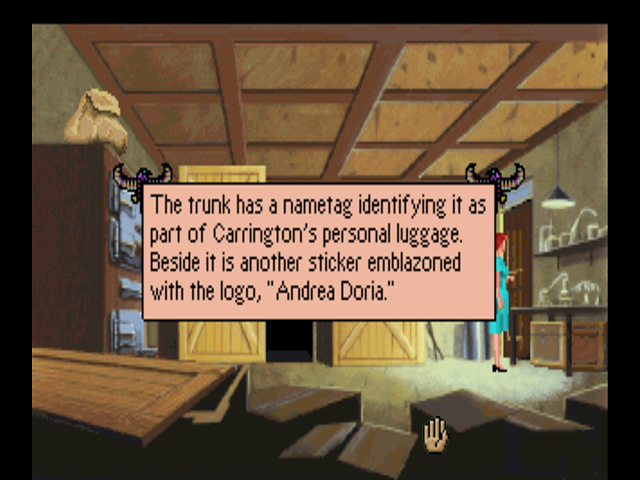
Uh-oh… I’m starting to get a very bad feeling about this. The trunk is actually locked right now - and is one of the most dickish traps in the game, to the point where there’s no way to know it’s a trap unless you die to it. We could unlock it with the skeleton key we found in the painting, but instead, let’s do something completely illogical.
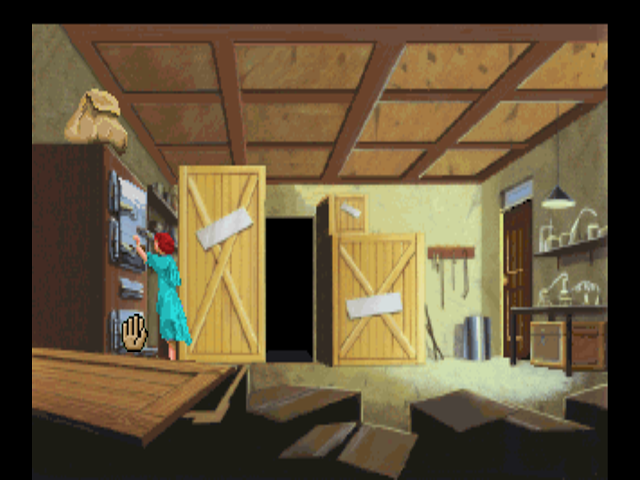
On the far wall is a cold storage unit.
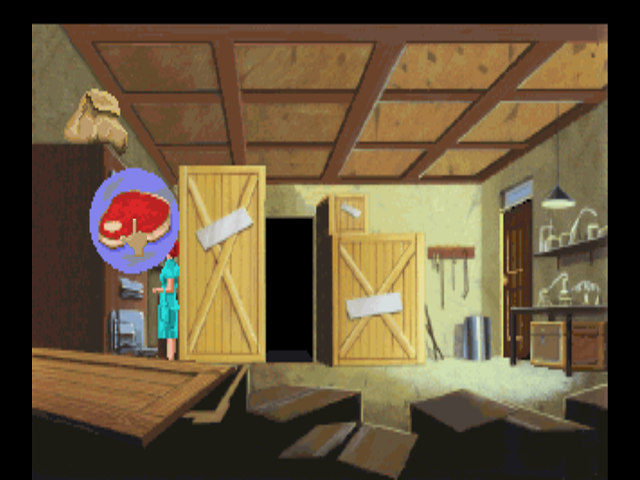
If we look inside, we get a close-up of a rancid piece of meat. Why would we take this, you ask?

The answer is that once you open the trunk, you trigger a 5-second or so timer. There are flesh-eating beetles in the trunk. How did they get there? Hell if I know. You can’t see them when opening the trunk, and Laura has no reaction until they come out and start eating her.
The correct answer to this trap is to immediately open your inventory and dump the slab of meat into the trunk. This causes a segment reminiscent of King’s Quest V where the background music changes to an army march. The beetles take the slab of meat…

And just kind of run off with it, leaving Laura to whatever is in the trunk.

This doesn’t even elicit so much as a gasp from Laura, who apparently has gone through the Seven Stages of Iji and is now ready to commit alien genocide. The skeleton contains an important evidence item, but good luck knowing it’s there - using the “look” action gives you a generic “Hey dipshit, it’s a skeleton!” response.
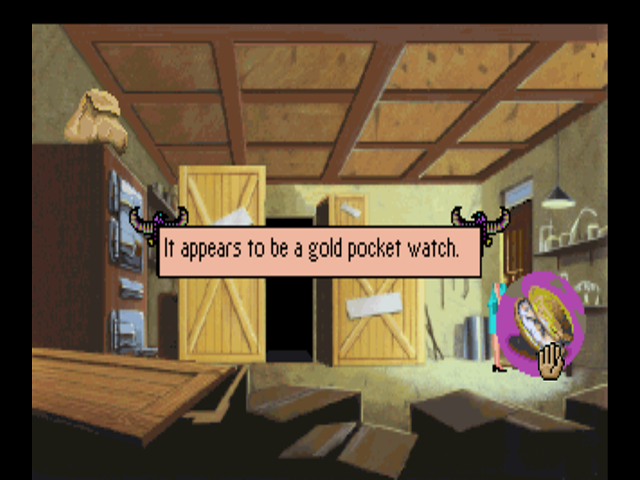
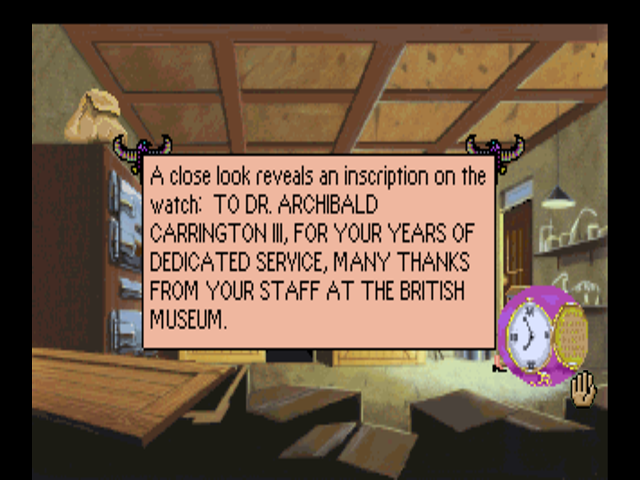
Oh, crap. This was the trunk that we saw the body get dumped into in the intro sequence. The question now is - if this is Dr. Carrington, who was the guy we saw impaled on the porcupine in Dr. Carrington’s office? I think it’s about time we went back and investigated the fake Dr. Carrington some more. We could go all the way back up the stairs to do this, but we should see where this passage goes.
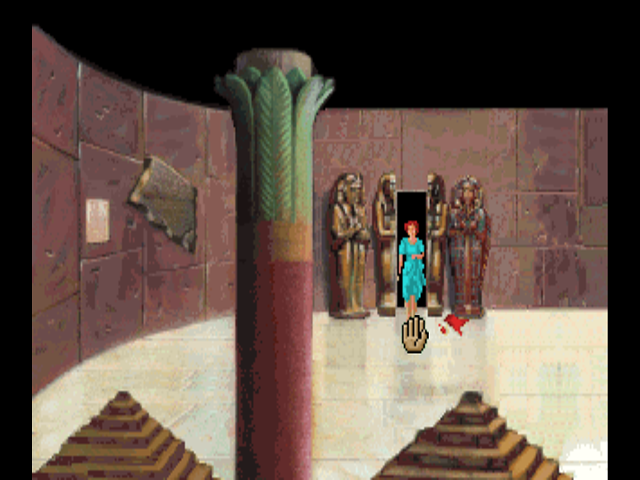
Well, I suppose this explains some things, namely how Yvette got her footprint by Dr. Carter’s body. The passage lines right up - and if she knew about it, it would also go to reason that Ernie did as well. This is how Ernie was able to see Dr. Carter’s murder despite not being anywhere near the party until the end. Let’s just progress back to Dr. Carrington’s office.
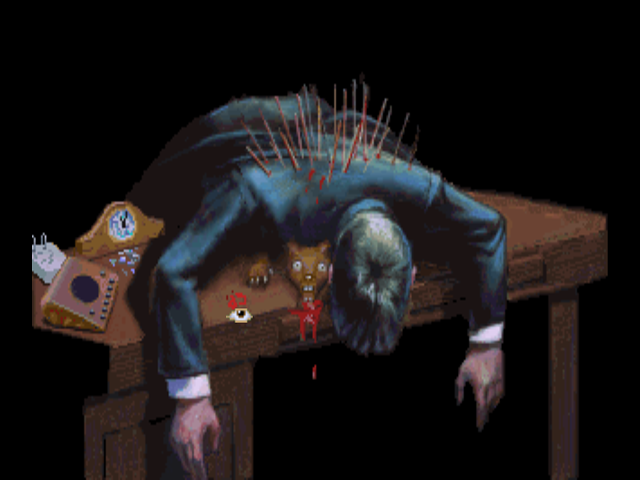
If you look at where the cursor is, the letters “CP” are there in blood. There’s a good chance you’d miss this just looking at the murder scene, and it’s not really clear what the letters refer to. Time for ANOTHER dickish pixel hunt of a hotspot.
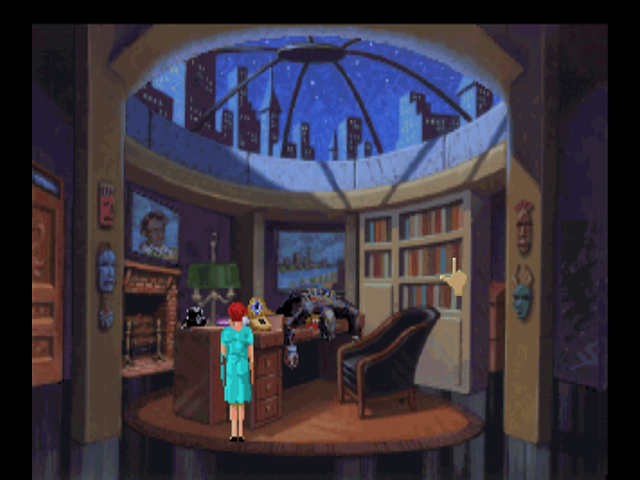
See the spot where the cursor is? That one, single, solitary book is the only hotspot on Carrington’s bookshelf. We actually could’ve gotten this the first time we came in here as far as I know. The dickish part is that the look action and the magnifying glass will not tell you that anything is here, even if you examine the exact spot on the shelf.
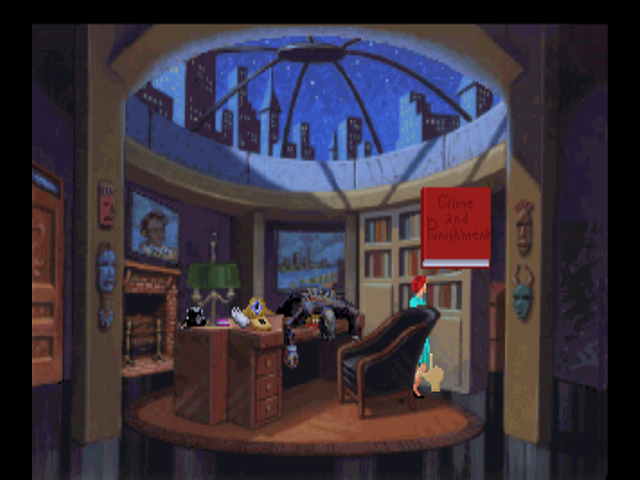
That exact spot happens to contain a first-edition translation of Crime and Punishment - this is what you’re supposed to get from seeing the “CP” on the desk.
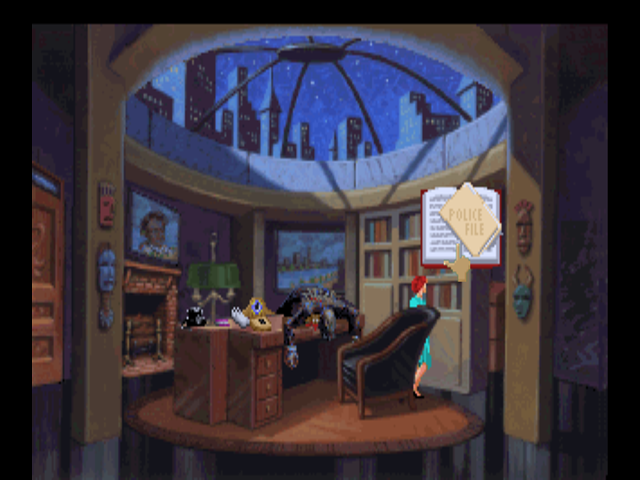
Inside is a convieniently-labeled police file. We can’t actually look at it here, but we can take it and add it to our inventory. This, along with the pocketwatch, are key clues to the dagger theft and the murders. Looking at the file in our inventory, however, gives us the longest item description this side of Dark Souls. The title is “Watney’s File”.
 : “You read a police report on the criminal career of Watney Little, con-man extraordinaire.”
: “The file contains an amazing list of offenses, mostly fraud, conspiracy to commit fraud, and various degrees of larceny.”
: “Glancing at the top of the page, you notice that the investigations were conducted by Scotland Yard. You also notice that the last entry describes Little’s recent escape from Dartmoor Prison.”
: “Clipped to the outside of the folder is a small handwritten note that reads simply, “Remember our deal.” Apparently, this file was provided in exchange for somebody’s silence… or service.”
Next update, we’ll finish Act 3.
1 Like
Back in the Mammalogy lab (I took the screenshots of the police file from a separate save), the time advances to 1:45 AM as soon as we discover Carrington’s skeleton.
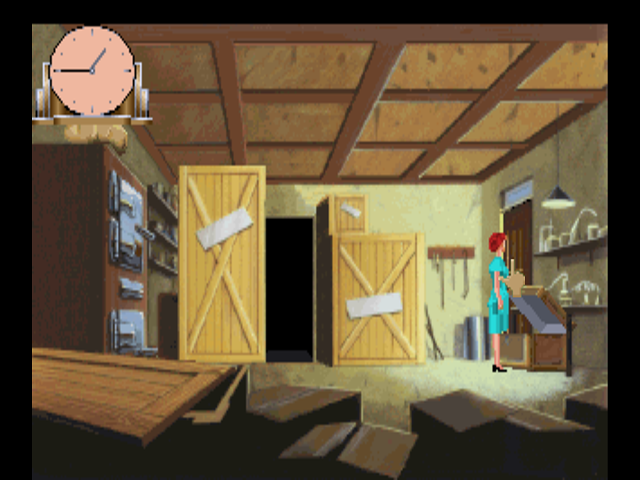
The next few time shifts are all timed rather than scripted, meaning that we don’t have a whole lot of time to see everything else in Act 3. In fact, it’s possible to miss this conversation between Yvette and O’Riley that kind of blows the lid on a lot of what’s been going on up to this point.
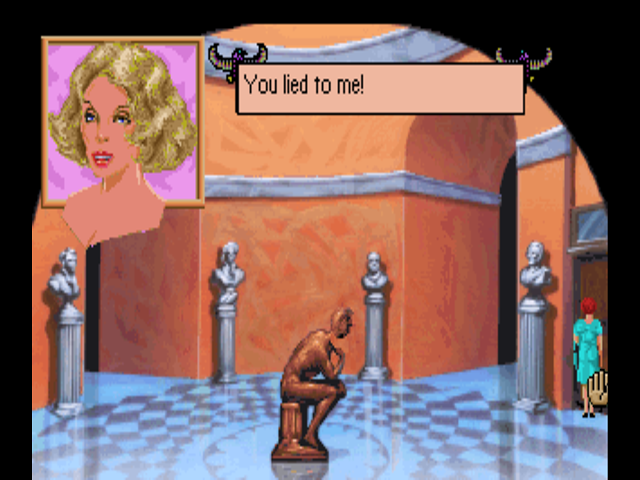
: “Well, lass, I guess that makes us even. You lied to ME!”
: “You had something to do with ze Dagger burglary!”
: “You’ve been sleeping with someone else! I saw you go off with that dock worker!”
: “I’ve never slept with Steve! And ze Ziggy fellow, he told me about you and ze Dagger!”
: “And you BELIEVED that little weasel? I’ve arrested him more times than I can count!”
: “Ze Ziggy, I know him a long time. He would not lie to me.”
: “That man’d lie to his own MOTHER if someone paid him for it!”
: “Ziggy, he says you were working with ze Carrington to steal ze Dagger!”
: “Lies! You can’t be trusting the man! If he wasn’t already dead, I’d pound the truth out of him!”
: “Maybe you already did…”
: “Were you sleeping with the little rat, then?”
: “Of course not!”
O’Riley hears us at the door, and the conversation stops there.
Anyway, welcome to the worst part of the game - playing the waiting game. I actually recorded a dick-around video that I’ll post here once Twitch decides to let me export it that will show off exactly what I did for the twenty minutes realtime it took for me to get the time change to happen. Edit: The Dicking Around Video
In the meantime, the time changes in the most awkward way possible as Laura walks in on Yvette and Ernie making out for the second time this evening. For those who watch the video, the time change is not triggered by walking in on them. You do, in fact, have to wait long enough.
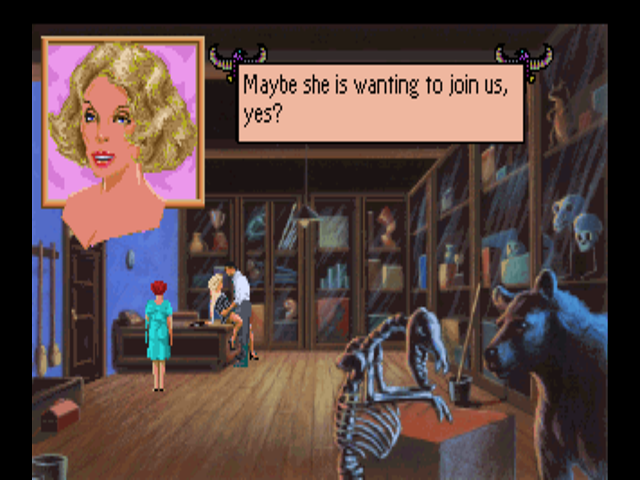
By the way, I never do find that conversation in the Armor room. After twenty minutes of dicking around later, we return to the Mastodon room…

Oh, hey Ernie! I’d probably be tired too if I’d had to bang Yvette multiple times in one night.

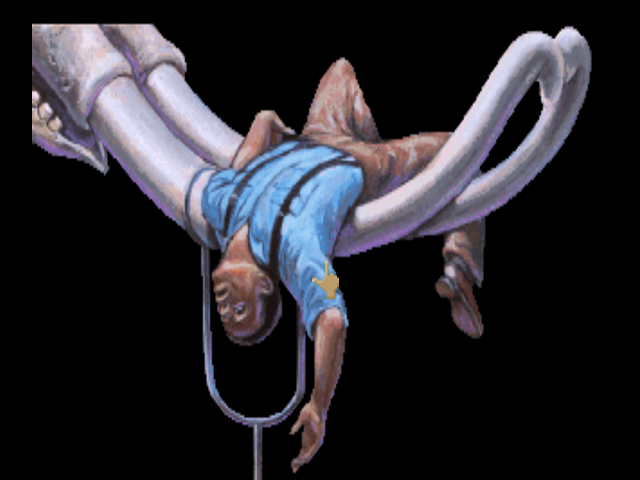
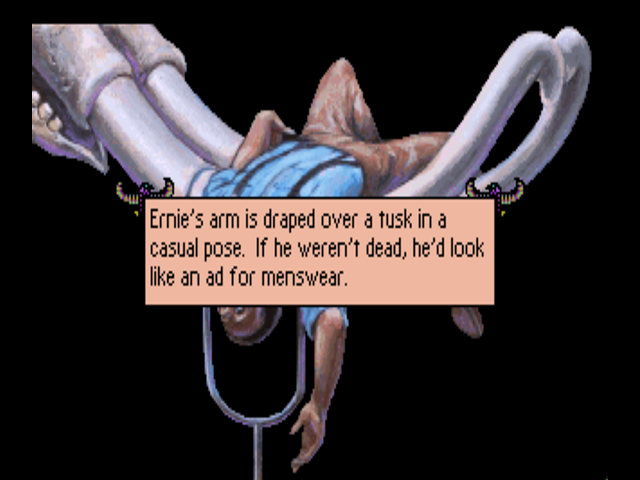
Oh… you’re dead. Why am I not surprised? There’s not much we can do here, as going through any door will have Laura just kind of warp to the art gallery.
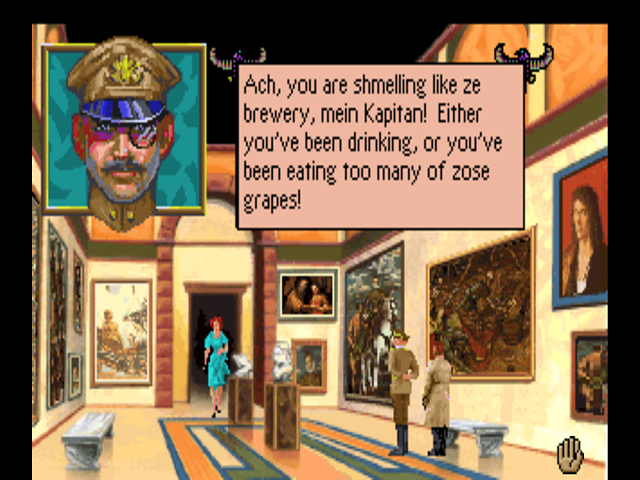
And of course, Wolf and O’Riley are waiting. At least this time, they didn’t just outright catch Laura looking at a dead body.
: “Sure and begorrah, a man needs a little nip from his flask now and then, doesn’t he?”
: “Personally, I do not require ze drinking of ze alcohol. It vould impair my physical and mental zkills.”
: “ERNIE LEACH has been MURDERED!”
: “What was that, lass?”
: “Ernie is dead!”
: “Zo, you’ve finally come to us to confess, iss that it?”
: “Confess? No, I’m reporting a murder!”
: “Und you vere ze first one to find ze body again?”
: “Well, I guess so…”
: “Quite a coincedence, fraulein. I think ve should be INTERROGATING you to learn ze TRUTH! I’ve had enough of your LIES!”
: “Calm down, Heimlich. If there’s any interrogating to be done, I’ll be the one who does it.”
: “Now then, lass, where did you find the body?”
: “The mastodon room. He’s hanging from some mastodon tusks.”
: “Ach! He’s probably just zleeping on ze job!”
: “No, I’m sure he’s dead!”
: “Well, I’ll go take a look at him, then. If I need to talk to you, I’ll find you later.”
With that, Act 3 finally ends and we move on to the second-shortest act of the game… and the final time I’ll need to waste 20+ minutes dicking around to get the timer to move. Apologies for the short update!
1 Like
So, before I start this update, I’m just going to warn anyone reading: coming up are a lot of very long, very pointless conversations that kind of have nothing to do with what actually goes on in the game. If you couldn’t tell from the last update, this is the part where the developers basically started trying to pad the game out as much as possible. I’ll try to keep it brief.

We’ve gotten the “good job” message, so that means we’ve found all of the possible evidence items we could up to this point. Act IV gives you a lot of time to find stuff if you haven’t already… but we’re nearing the point of no return in terms of searching the museum for stuff.

Act IV dumps Laura back in the statue room behind the art gallery. While you would think that we’d want to do something logical like try to find a way out of the museum, we’re instead going to go into Yvette’s office. This is actually a required event flag as far as I know.
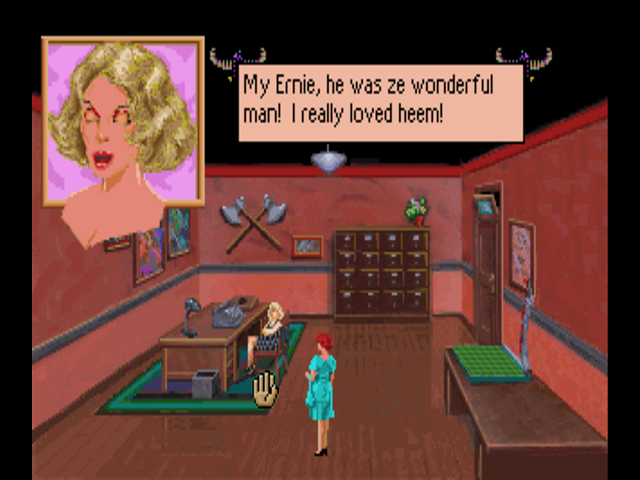
Inside, we find Yvette (whose voiceactress is either really good at conveying someone who has literally no emotions or just kinda sucks at voiceacting, take your pick) mourning the loss of Ernie. How she figured this out so quickly, I have no idea.
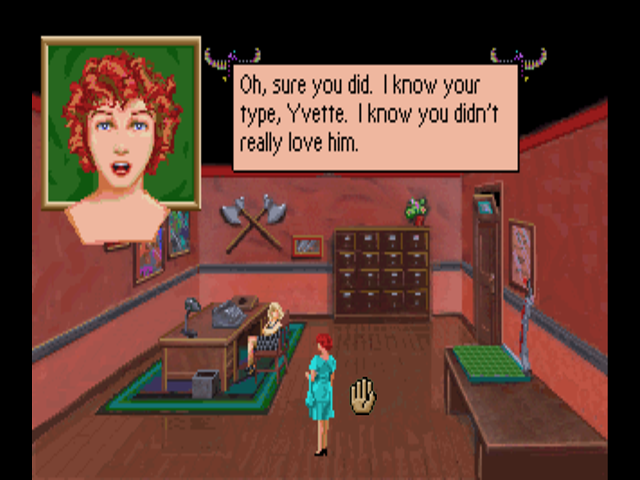
Anyway, remember that time we eavesdropped on Yvette and Ernie in Ernie’s office a few updates ago? This conversation is basically only here in case you somehow miss that and covers largely the same grounds (Ernie owes money to a loan shark named Icepick, and Yvette was trying to find him stuff to fence for extra money on the side). Now we’re going to take a dive straight into the nonsensical.

: “Why ees that?”
: “Because you’ve been spending so much time with Mr. Dorian.”
: “Oh, you mean ze Steve! He ees ze attractive man, but we are only ze friends, no? But my Ernie, what will I do without him?”
: (sarcastically): “I can see you’re upset. I’ll leave you alone.”
So, this whole part is really weird and doesn’t fit with the rest of the game at all. The only time that Yvette and Steve are ever seen together up until this point is in the final conversation in Act II. In fact, while you can see most of the other party attendees wandering around in Act III, Steve is not one of them. Honestly, it seems kind of like laziness by the developers - since Steve is going to explain where he’s been, but all of the places he’s been are also places we’ve been to around the same time. The devs probably should’ve put these scenes in so it flowed more naturally… but they didn’t.
Anyway, Laura storms out of Yvette’s office…
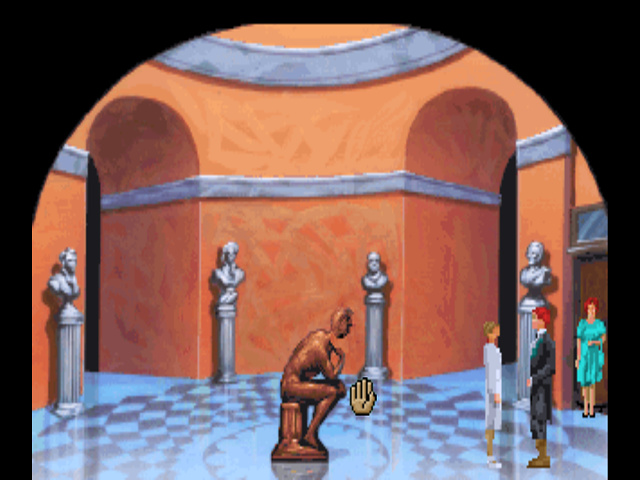
Only to find Steve and Dr. Myklos standing outside Yvette’s door.
: “Steve… uh, Mr. Dorian!”
 : "Miss Bow!’
: “Thank you for showing me your scars, Steve. They were very, very nice!”
Dr. Myklos walks off, presumably to go stare at her cobra or something. Who really knows with her?

: “Well, uh… women keep carrying me off.”
: “Carrying you off?”
: “You don’t seem too upset by all the attention.”
: “Well, I would rather have spent the time with you.”
: “I’d think a big, strong man like you would have been able to get away from them if you wanted to do so.”
: “Well, I hate to be rude, and I did end up finding you here…”
: “Have you heard about the murders?”
: “Uh… murders? Oh, I guess somebody did mention that.”
: “You seem kind of distracted.”
: “Yeah, well, I’ve got news for you, too. I think some of the paintings in the Old Masters Gallery are forgeries. The paint is still wet on some of them!”
Laura attempts to make the counterpoint that Steve is a freaking idiot and post one of those Slowtaku gifs with his face photoshopped onto it, only for Yvette to open her door. Don’t worry, Laura, got you covered.

Clearly she hasn’t had anyone to make out with for several minutes.
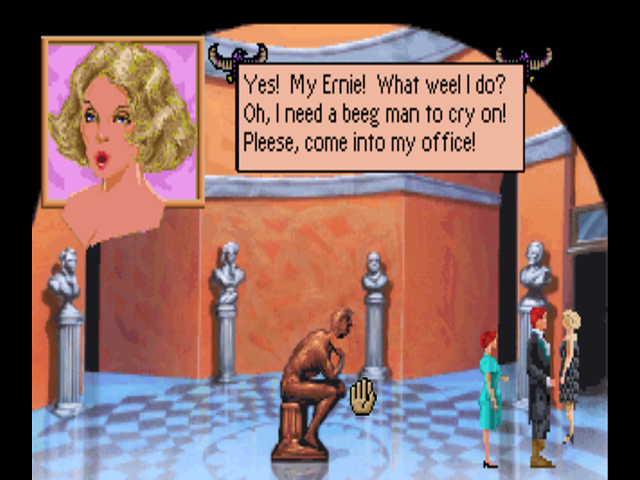
Man, that Black Widow perk really gets you places.
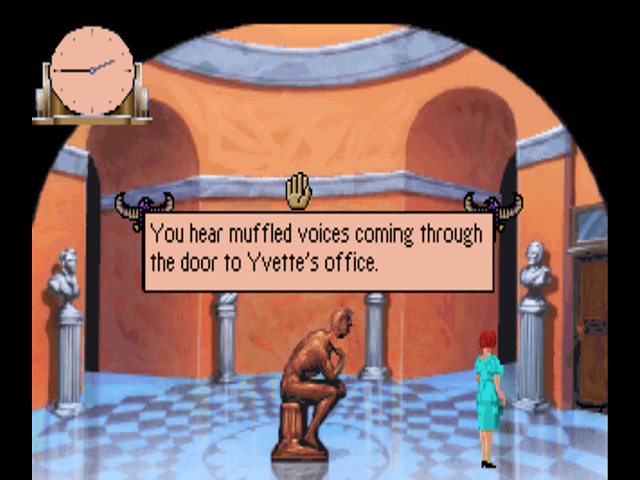
With that, time shifts to 2:45 AM. I’m just going to skip Yvette flirting with Steve and cut right to the chase.
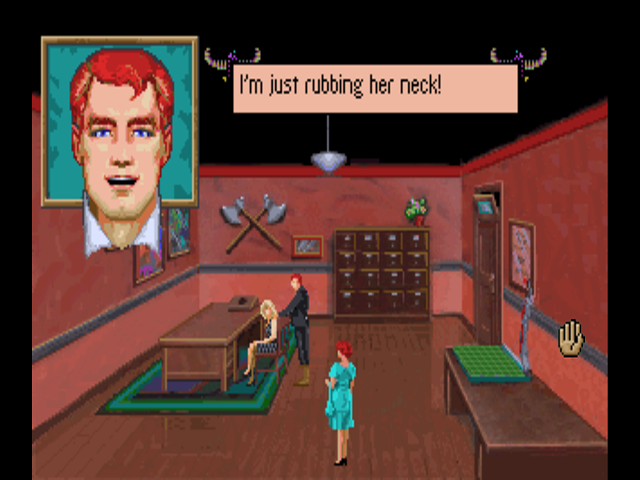
Not with that facial expression you’re not. Laura storms out… and promptly decides to go breathe in some alcohol fumes.
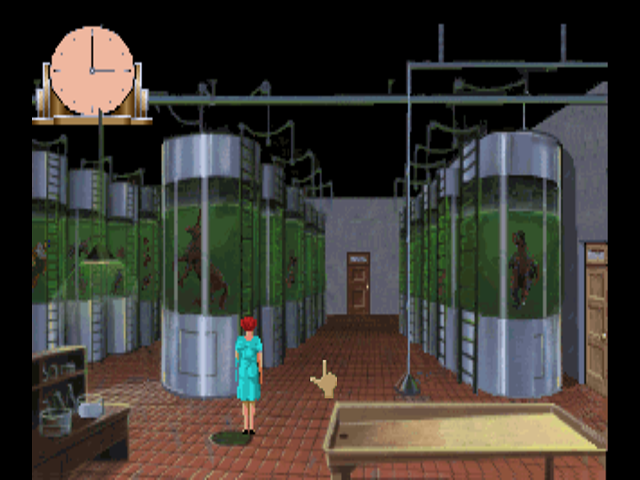
There’s nothing to do here, but this is the trigger to set the time ahead. I think it has something to do with Yvette’s planned meeting here at 3AM. Having taken in enough fumes to get that drunken feeling of courage, Laura then decides to storm right back into Yvette’s office…
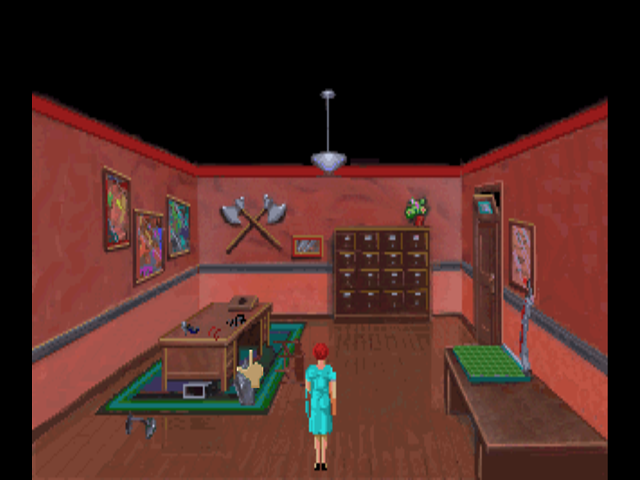
Uh-oh.
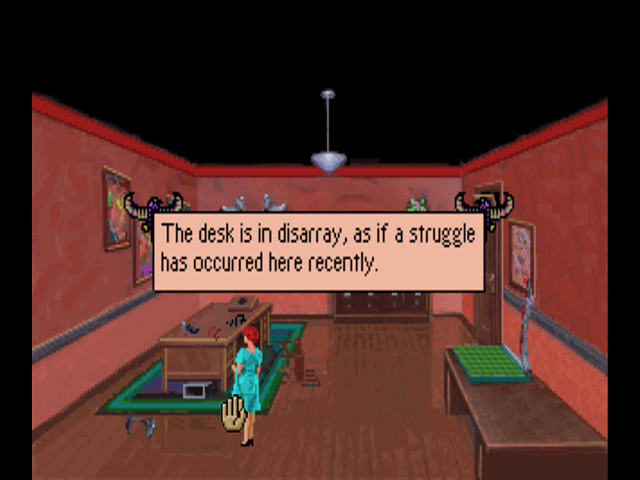
We can look at the stuff on Yvette’s desk - the first item is one of her shoes. We can actually take this, though it’s not really clear why.
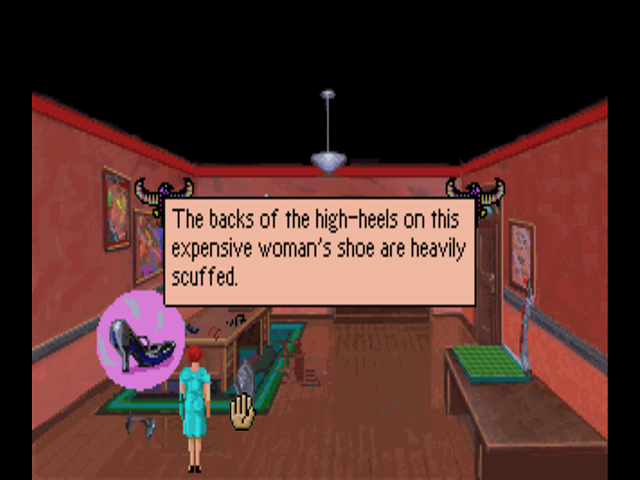
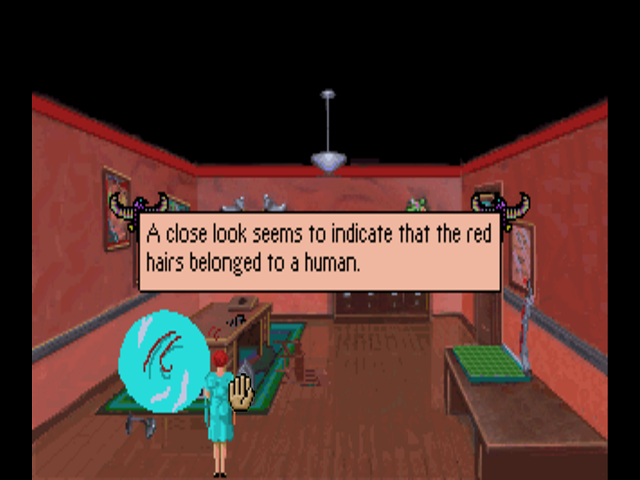
There are also some red hairs here. The game won’t let us take these, telling us to leave it for the police… which kind of makes no sense given we just took Yvette’s shoe.
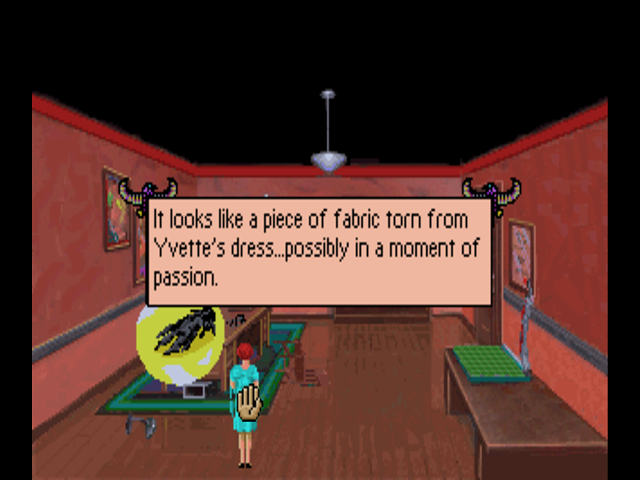
Sounds like Yvette is in trouble. I wonder where she could’ve gotten off to? She couldn’t be downstairs, we’d have seen her on the way up. Let’s go try the other side of the museum, and…
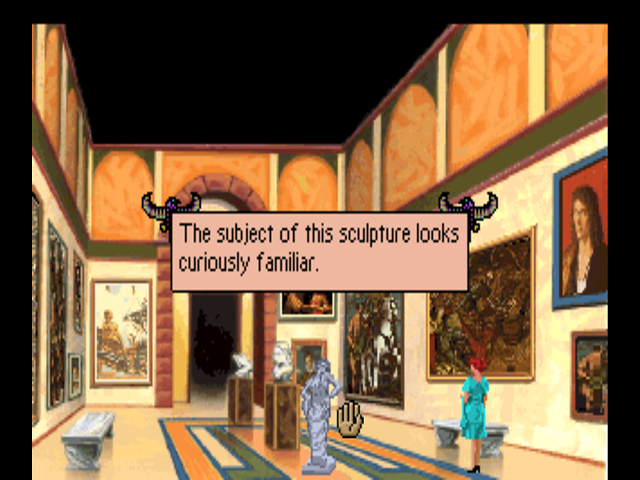
Oh boy. Laura, I think I know where Yvette went.
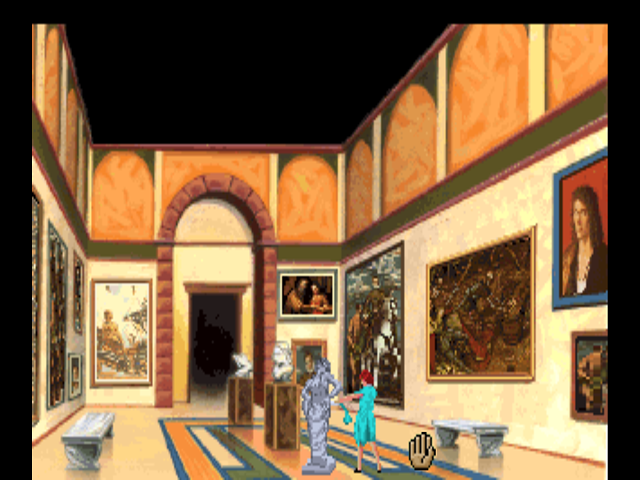
A good whack with the dinosaur bone (seriously, it’s like the second most-used item in the game) reveals…
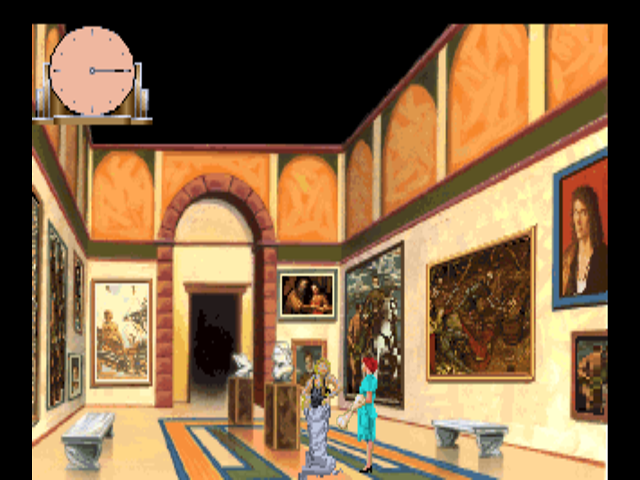
That it’s 3:15 AM. Also that the statue is Yvette’s body in plaster. This whole thing kind of makes no sense and is actually what got me into playing Dagger of Amon Ra in the first place - the version of it I had (on a CD with the first seven King’s Quest games) had safety saves at certain points of the game. One of them was more or less right here, and I was so intrigued as to what context they needed for this murder to make sense that I wound up playing through the game with a guide several years later (I’d never have figured half this bullshit out as a kid).
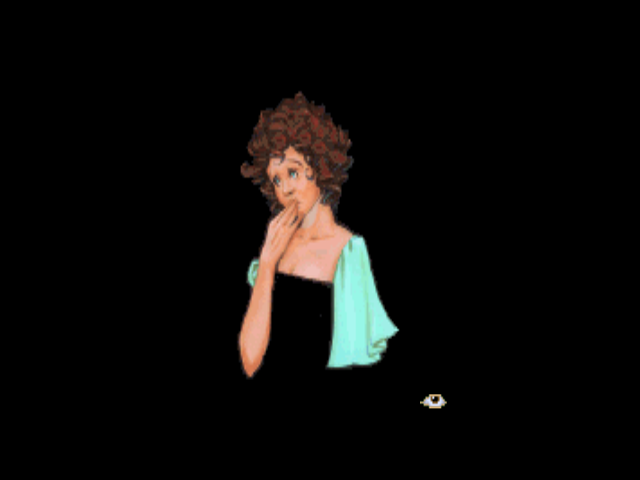
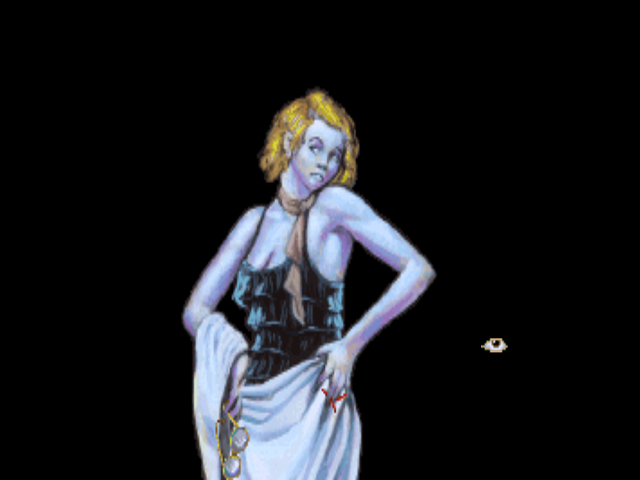
So yeah, the art here kind of doesn’t fit with what this murder scene is actually supposed to be. It also kind of makes no sense that the killer would just have a ton of plaster sitting around to cover the corpse in… and that they did it in just under half an hour… and that they took the time to put the body in plaster but didn’t think to take the eyeglasses or the hair she’s holding.
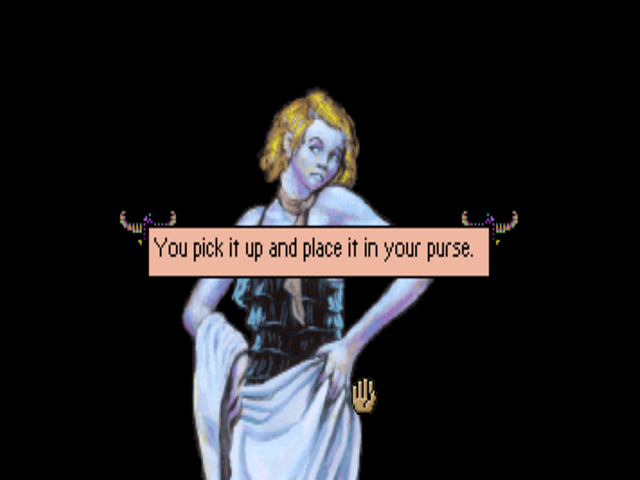
We’ll just take both of those… in a minute. There’s actually something we need to do first that is game-ending if we don’t do it before we take the stuff off Yvette’s body. What we want to do, against all logic, is head back into the armor room.

There, we can see a boot lying in a puddle of blood. We absolutely, positively need this boot and will not have time to come back and get it once we take the items from Yvette.
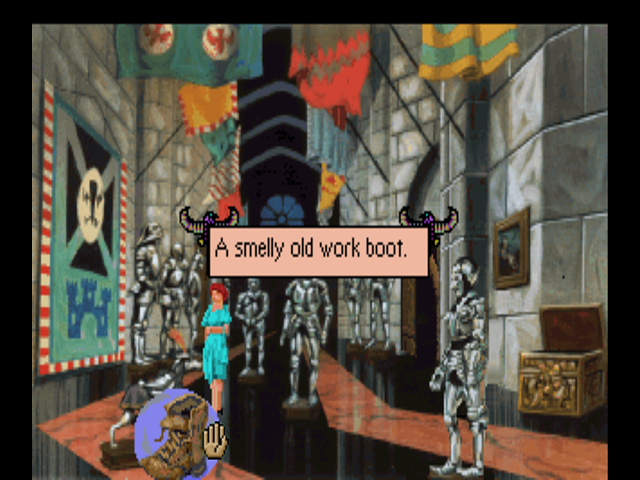
Once we take that, and go back to Yvette’s body to take the glasses and hair sample, we get thrown directly into a cutscene.
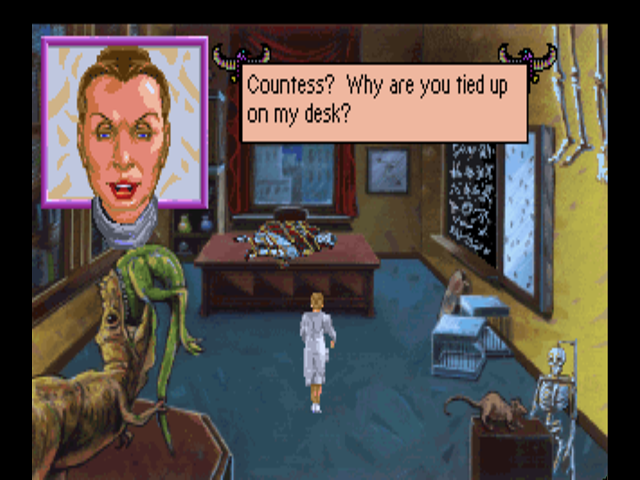

: “You seem a little under the weather. Are you okay?”
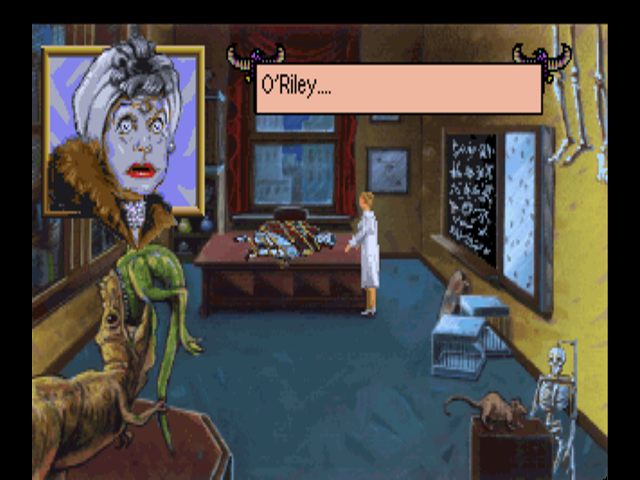
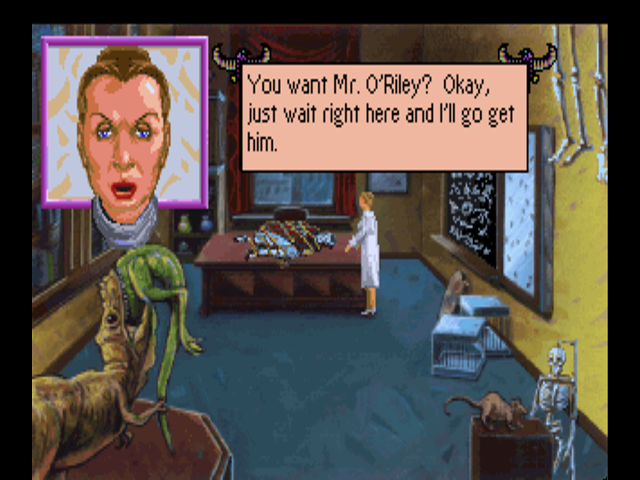
This scene honestly makes no sense to me at all. I get that Dr. Myklos is a little socially awkward, but there’s no possible way anyone could be that dense.
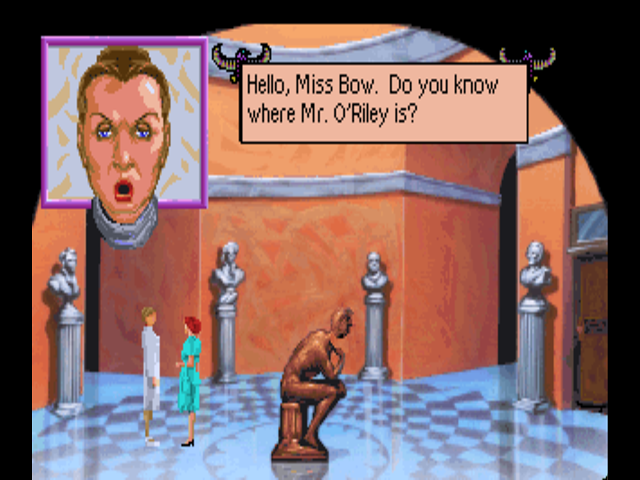
: “Well, no, not exactly. I assume he’s still in the museum.”
: “Well, I’ll find him. If you see him first, would you tell him that the Countess is dying on the desk in my office?”
: “The Countess is dying? What’s wrong with her?”
: “Well, she’s looking rather pale… her eyes are glazed… and she’s not breathing much. I’d guess she’s been bitten by a snake.”
: “By a snake?”
 : “Metal Gear?!”
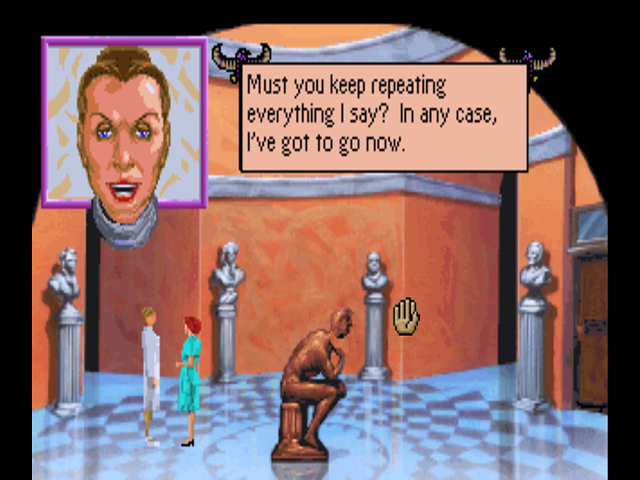
Well, time to go charging right into Dr. Myklos’s office to see this for ourselves. By the way, the Countess’s last words are a clue that Laura has no way of knowing and yet will be crucial to solving the murders. Plot design!
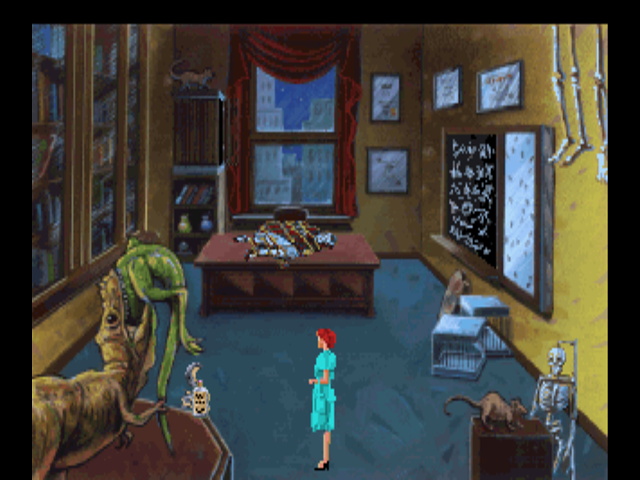
As soon as we walk into the office, there’s another cutscene where Barney comes out of the bottom-left corner of the screen. Like the steamer trunk in the Mammalogy Lab, you’re put on a timer of a few seconds before Barney comes and kills Laura. Fortunately, we have the one thing snakes fear: bipedal tanks with nuclear capability… or snake oil.
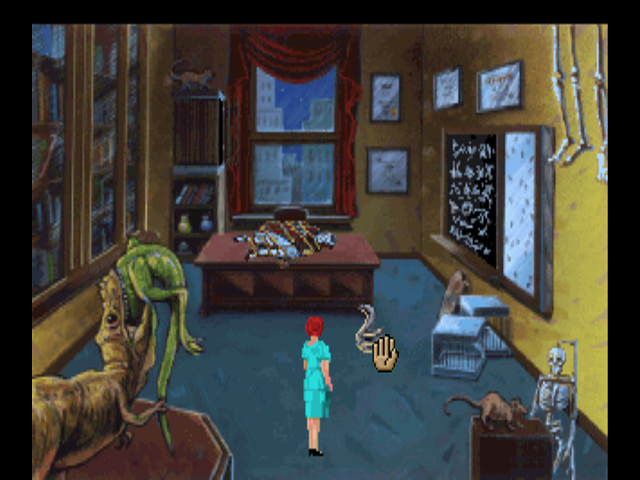
By using the snake oil three times (the snake oil has four uses, so if you’ve used it on anything before this, you’re screwed unless you refill it in the alcohol room) we can push Barney into a corner… and then use the snake lasso on him. Strangely, this has to be done manually, and if you take too long it’s another death.

Ready to witness the worst-drawn scene in the game? I know I am!
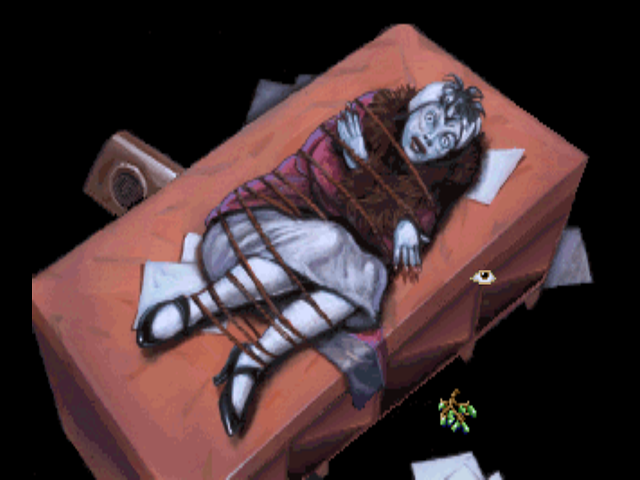
Perspective! The Countess is totally dead at this point and has nothing of interest on her… but we can look at those grapes on the floor.
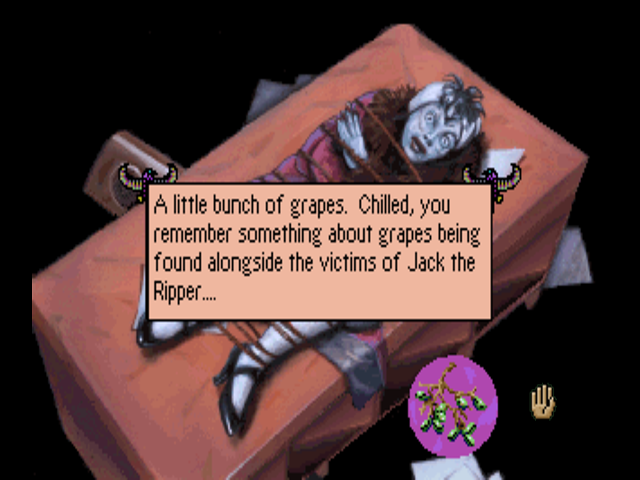
Once we take the grapes, we’ll be going straight into the point of no return: Act V. First, though, I’ll do a little death roundup so that we can review all of the murders and the evidence. That will be the next update.
1 Like
Bonus Update: Death Roundup
 Dr. Archibald Carrington III
Cause of Death: Strangulation, body later eaten by beetles.
Time/Place of Death: Late August, 1926 aboard the Andrea Doria. Skeletonized remains found in steamer trunk in Mammalogy Lab.
Evidence: Body identified by gold pocketwatch and placement of remains.
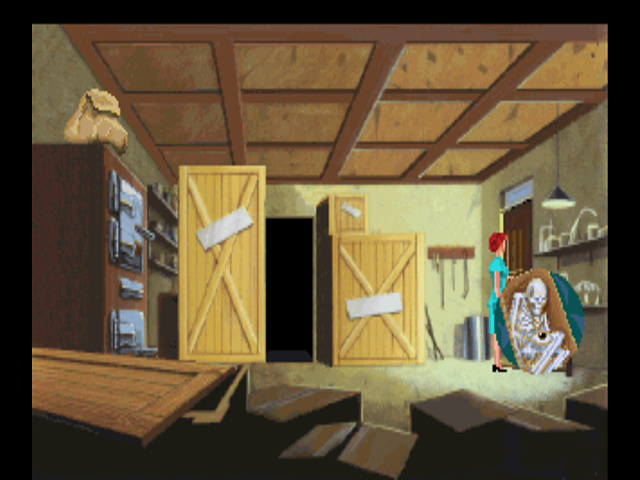
Dr. Pippin Carter
Cause of Death: Stabbed with replica Dagger from museum gift shop
Time/Place of Death: Roughly 8:00 PM, body found in sarcophagus in Egyptian exhibit.
Evidence: Bloody footprint left by Yvette, gold ankh necklace belonging to Dr. Smith, notebook found on body.
Known Meetings:
Yvette at 8:00 PM in the Egyptian room
Dr. Smith at 10:00 PM in the Egyptian room
Dr. Carrington at 11:00 PM in his office
Countess Lavinia Waldorf-Carlton
Cause of Death: Snakebite from Egyptian cobra while tied up.
Time/Place of Death: Somewhere between 2:30 and 3:15 AM, Dr. Myklos’s office
Evidence: Vine of green grapes left on the floor near Dr. Myklos’s desk. Dying words were “O’Riley”.
Known Meetings:
Ziggy and Dr. Carrington at 1:00 AM in the Armor room (never happened due to both Ziggy and Dr. Carrington being dead)
Ernie Leach
Cause of Death: Unknown
Time/Place of Death: Unknown, but likely between 1:30 and 2:00 AM. Body was moved to the Mammoth room after death.
Evidence: Told Yvette that he had “seen something he wasn’t supposed to”, was known to be in debt to a loan shark.
Known Meetings:
Met with Yvette twice, including once shortly before his death.
 Watney Little
Cause of Death: Impaled on porcupine. Police baffled as to how this makes any sense.
Time/Place of Death: 12:04 AM in Dr. Carrington’s office.
Evidence: Police file detailing escape from British prison used as blackmail. Letters “CP” written in blood indicating where the file was.
Known Meetings: None
 Yvette Delacroix
Cause of Death: Unknown. Body covered in plaster after the fact.
Time/Place of Death: Between 2:45 and 3:00 AM, murder likely happened in her office.
Evidence: Pair of broken eyeglasses and strands of red hair found at the scene.
Known Meetings:
Det. O’Riley: 2x
Ernie Leach: 2x
Dr. Smith: 1x
Rameses Najeer: 1x
Laurence “Ziggy” Ziegfeld
Cause of Death: Impaled on replica pterodactyl and decapitated.
Time/Place of Death: Somewhere between 12:30 and 1:15 AM, Pterodactyl room.
Evidence: None. Wirecutters used to cut the Pterodactyl down later found with traces of beige fabric on them.
Known Meetings: None
So, remember when I said this game has all kinds of dickish game design? There’s actually one thing I forgot on the Countess’s body - I took screenshots all the way up to the end of Act V before realizing I forgot it.
If you look at the Countess’s body, this is what you get:

So you’d think there’s nothing on her, just like all of the other dead bodies where we’ve looked at them and they have nothing on them. That’s where you’d be wrong.
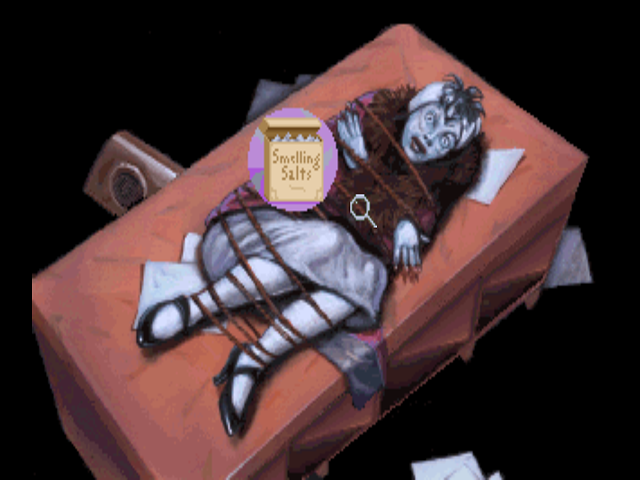
Instead, you have to use the magnifying glass on her corpse for some reason. This reveals that she has a box of smelling salts on her. Like the boot from last update (which only appears after Yvette is found dead), this is another item that will make the game unwinnable if you miss it. You also only have one chance to get it - as soon as we stop looking at the body, the game passes the point of no return.
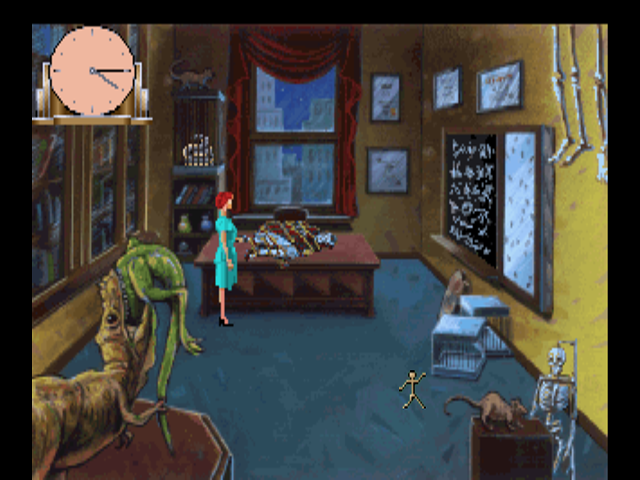
Once we hit the “exit” option, time advances to 4:15 AM. Laura automatically leaves Dr. Myklos’s office and heads to the Mammoth room. From this point on, the game becomes essentially a timed autoscroller as we escape from the killer.


As the title card fades, Laura starts out in the Mammoth room with a new running animation that she’ll be using for the rest of the game. Going the wrong direction at any point causes a death - so what we’ll do right away is run to the right and shut the doors to the Pterodactyl room.
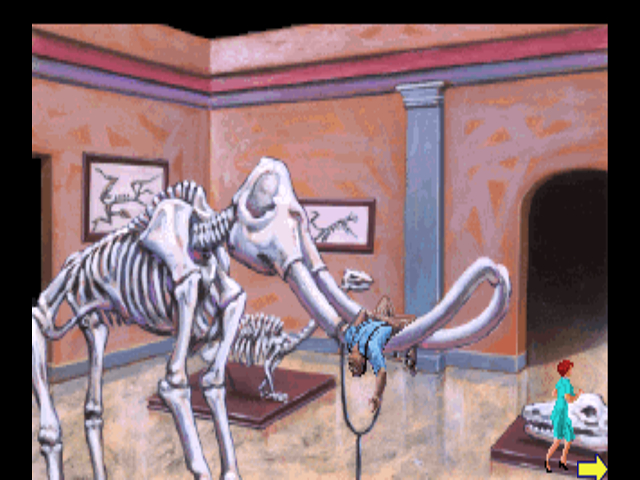
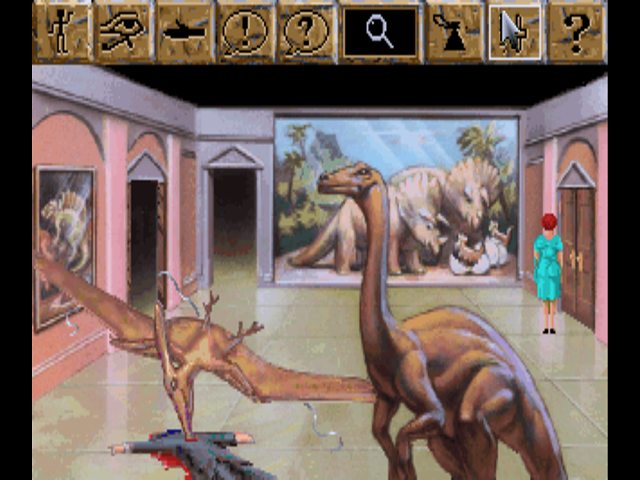
Here, we need to use the wire from the pterodactyl to wire the door shut. This is the first major screw-over of this act: if you didn’t clip the wire earlier, you won’t have time to do it now.

Doing this gives us time to run through the door to the Armor room. Failing to wire the door means that the killer will automatically catch up with Laura as she goes into the next room.
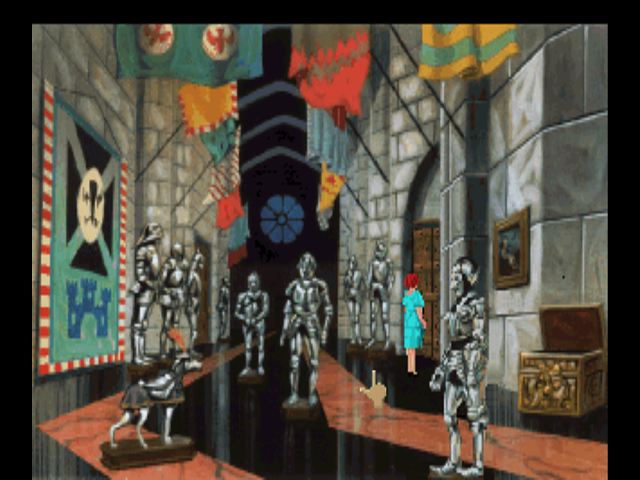
Again, we need to close the door. Thankfully, the Armor room has a wooden bar that Laura can place across the door to lock it. From there, we continue north to the close-up of the armor room outside that locked door we were never able to open.
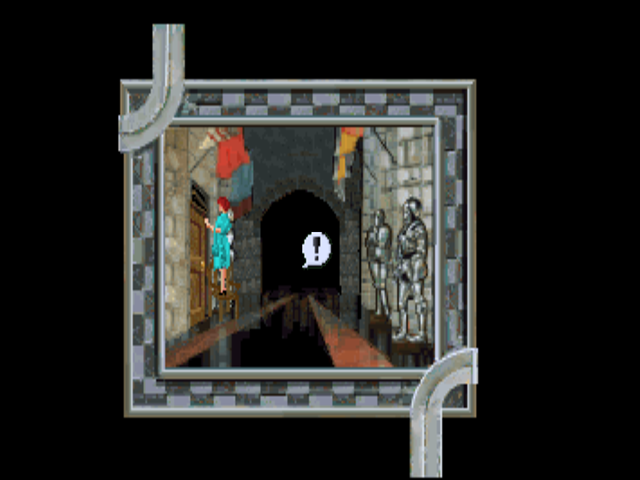
This time, there’s a chair outside the Armor room - it’s never there before this. You might not even notice this the first time through this act, but we need to push the chair in front of the door and open the window. The idea here is supposed to be that Laura is creating a diversion to buy herself some more time.
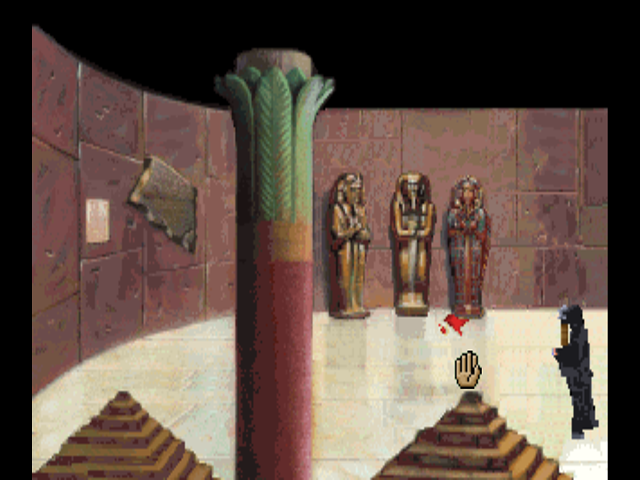
Next, we run into the Egyptian room. It’s not obvious, but the sarcophagus on the left is openable. Laura will use it as a hiding place with a very short animation I wasn’t able to get a screenshot of. There’s also a very brief (glitchy) pop-up message saying that there’s a smashing sound coming from the other room. The killer will enter the room briefly and leave without opening any of the sarcophagi.
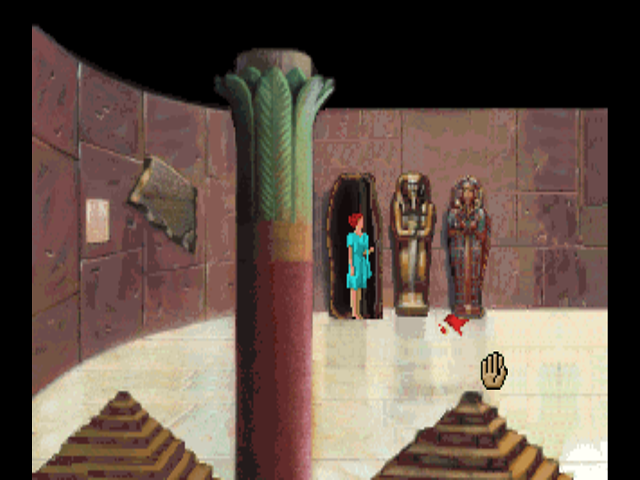
With the killer presumably off to check the Life Mask room (since that’s the only other place Laura could’ve gone), we head out of the Egyptian room and back to the Armor room.
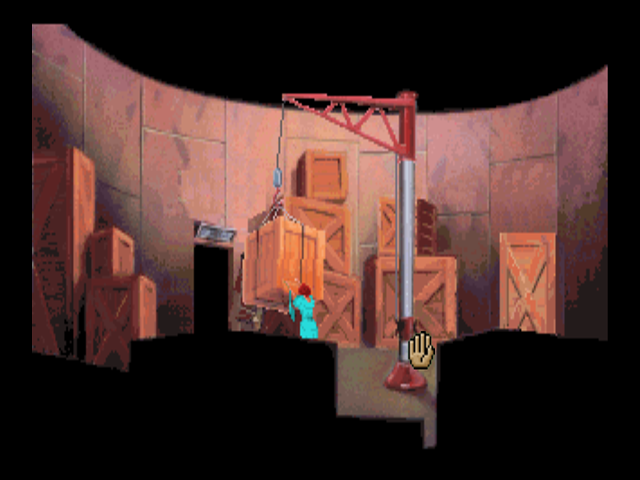
The now-smashed door leads into a room full of crates, including one that convieniently happens to be hanging on a crane. Laura can push this in front of the door…
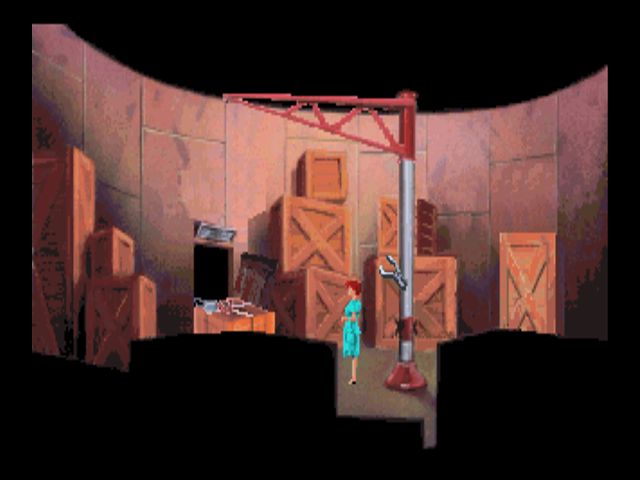
And cut the wire with the wirecutters to barricade herself in.
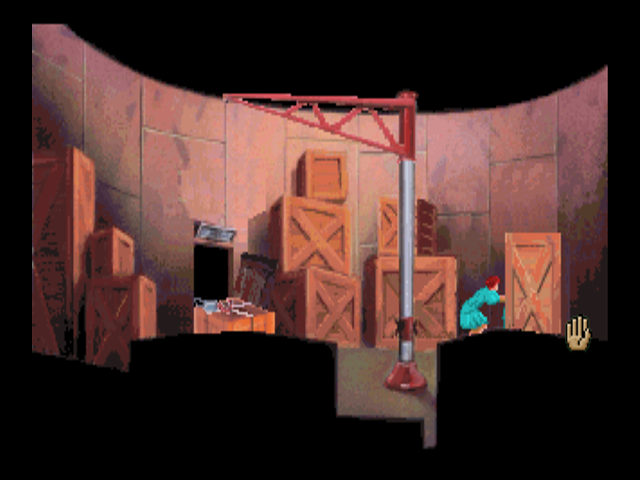
While this may have seemed like a dumb idea, Laura does have a way out. Behind that suspiciously flat-looking crate…
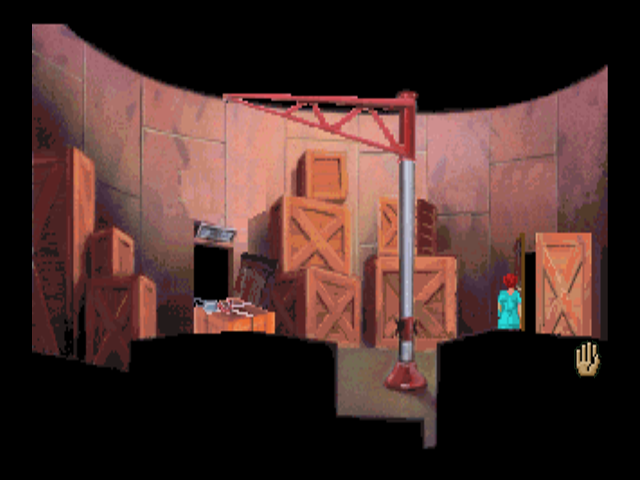
Is a secret door to an elevator that goes down into a part of the basement we haven’t been to yet.

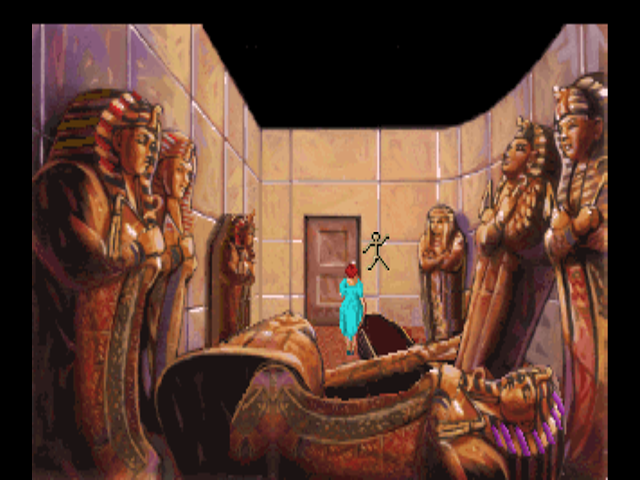
Welcome to Mummy Storage. Unfortunately, it’s another area that’s kind of hard to get screenshots of due to the timer, which stops when Laura gets in the elevator but immediately starts up again when she gets out. The door doesn’t lock, and we’re out of things to bar it with… or are we? Looking in the open casket causes Laura to pick up a mummy. There’s no animation for this whatsoever - you just click the casket and the mummy appears in Laura’s inventory.

The next puzzle is kind of nonsensical, to the point where the hintbook has a whole section for people who got to this point (somehow avoiding all of the possible ways to make the game unwinnable) and had no clue how they were supposed to stop the killer from getting in. The answer?

You put the mummy in front of the door. I’m not entirely sure how that’s supposed to make sense, given that we’re dealing with a killer who broke down a barred wooden door in a matter of about ten seconds, or how the mummy is supposed to stop the door from opening. The next puzzle is kind of equally nonsensical. See how all of the sarcophagi have snakes on their heads?

The answer is to use the snake lasso on the head of the nearest sarcophagus, which opens another secret door. I’m not entirely sure how the people we’re about to meet got in here without it.

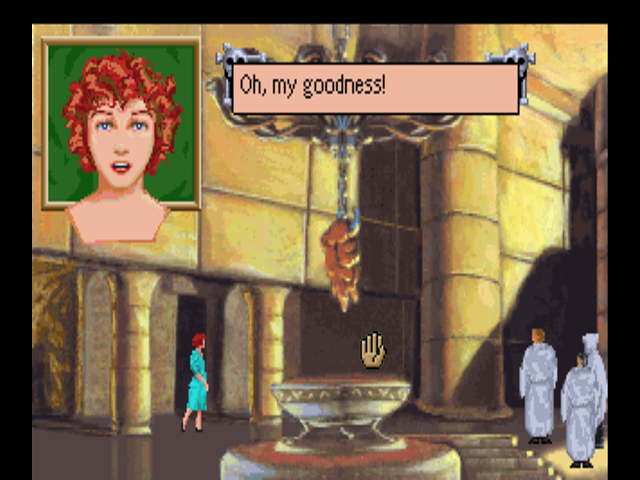
So… remember back in Act 2, when the Countess suggested that there was a cult of Amon Ra worshippers who were after the dagger? Yeah, we just kinda stumbled right into their secret cult headquarters. The two cultists closest to Laura immediately spot her.
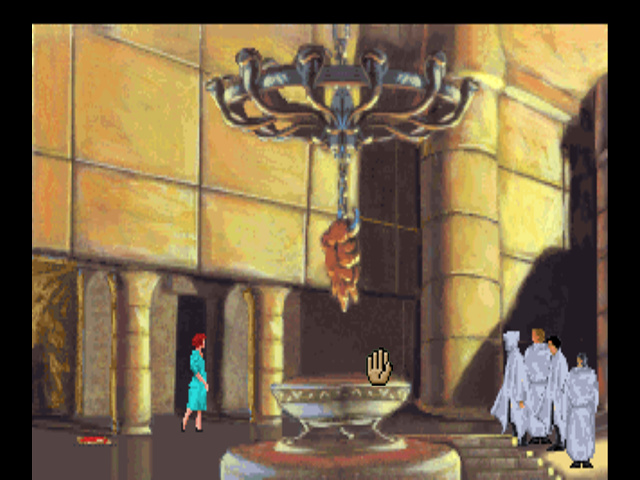
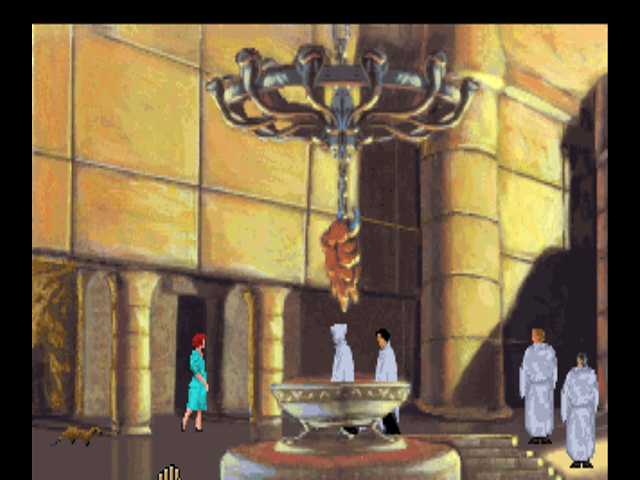
As they come for Laura, we get our last sighting of the beetles from Dr. Carrington’s trunk and Dr. Myklos’s ferret.
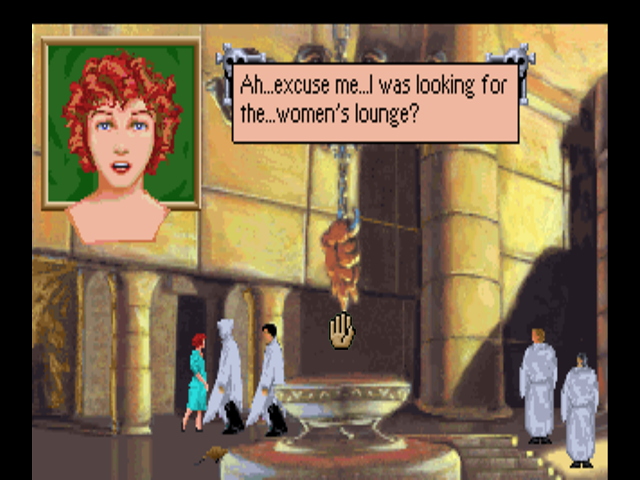
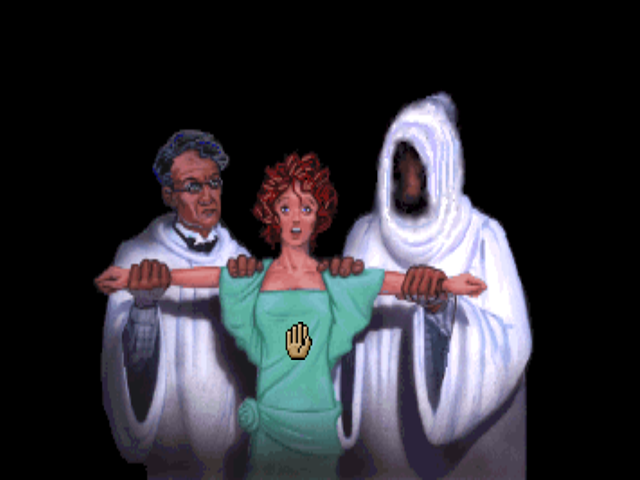
Rameses Najeer and his cult buddy (who I suspect is Dr. Smith) take Laura up onto their weird sphinx altar. This is the second major screw-over of Act 5. Remember how in Act 2 and later on in Act 3, we found the two halves of the Rosetta Stone and copied the hieroglyphics down? If you don’t have both of those by this point, it’s an automatic death.
: “Are you going to kill me?”
: “Of courthe not.”
: “Kill ith thuch an ugly word. Actually, we’re going to THACRIFITHE you to Amon Ra!”
: “Can we talk about this?”
: “There ith nothing to dithcuth. You thould be proud to die in thuch an honorable fathion.”
: “Young Egyptian maidenth uthed to FIGHT for the privelige of being thacrifithed to the great Amon Ra.”
: “Now, wait a minute! I thought the ancient Egyptians didn’t make HUMAN sacrifices!”
: “Hmm. You’re familiar with the hithtory of anthient Egypt, Mith Bow?”
: “Well, I’ve learned a few things.”
: “Perhapth we thould test you…”
: “Do I have any other options?”
: “We can tetht you, or we can thacrifithe you. It’th your choithe.”
: “I’m liking this idea more and more. What kind of a test is it?”
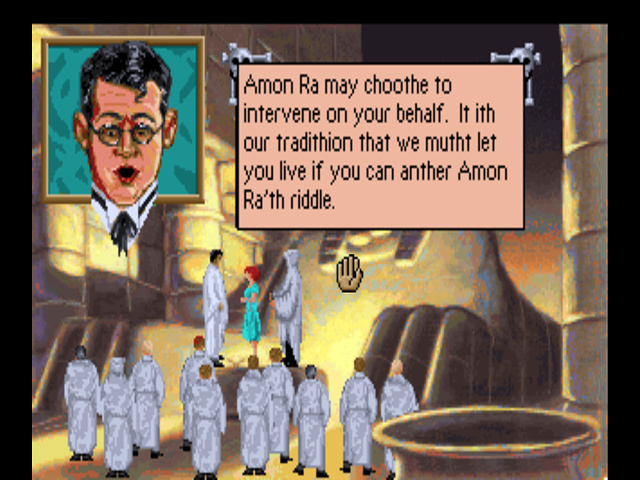
I hate typing out Rameses’s lisp, so the basic idea is that we have to answer the riddle in hieroglyphs. The first part of the riddle:
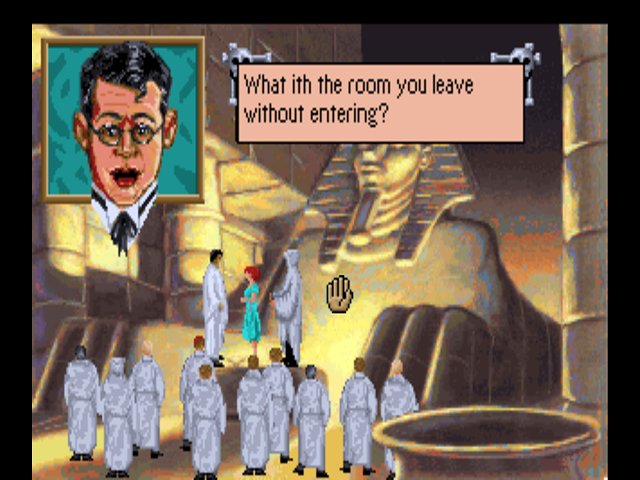
The answer is buried inside that mess of hieroglyphs on Dr. Myklos’s blackboard, meaning that the devs actually expected you to take the time to translate it for the answer. Fuck that noise.
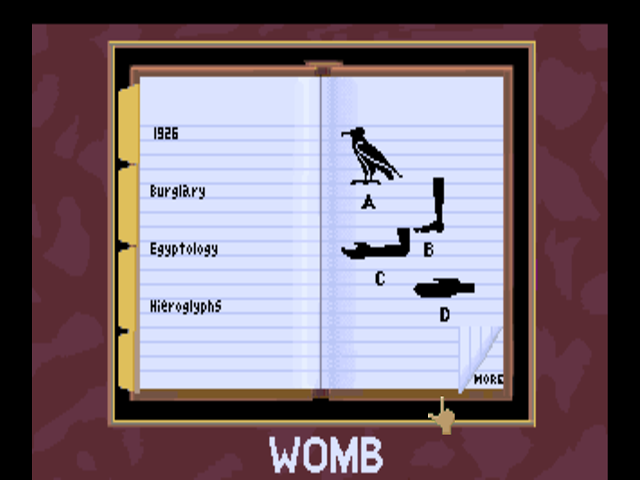
The answer is womb, which we have to spell out in Laura’s notebook.
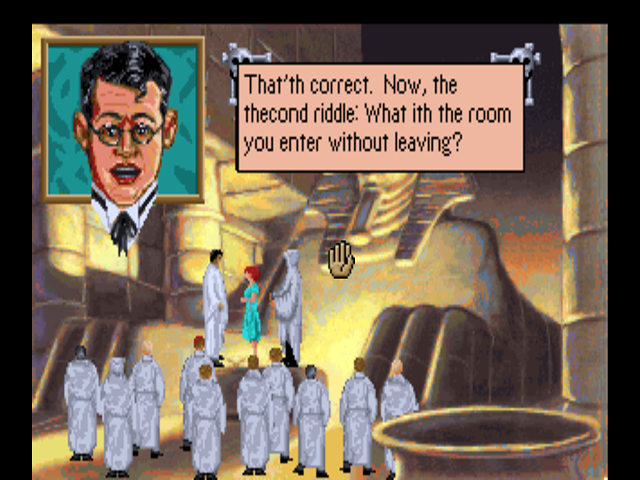
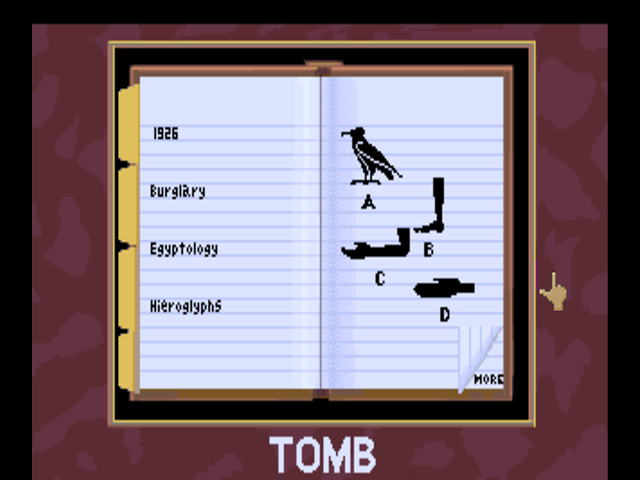
Again, this whole thing is kinda dumb.
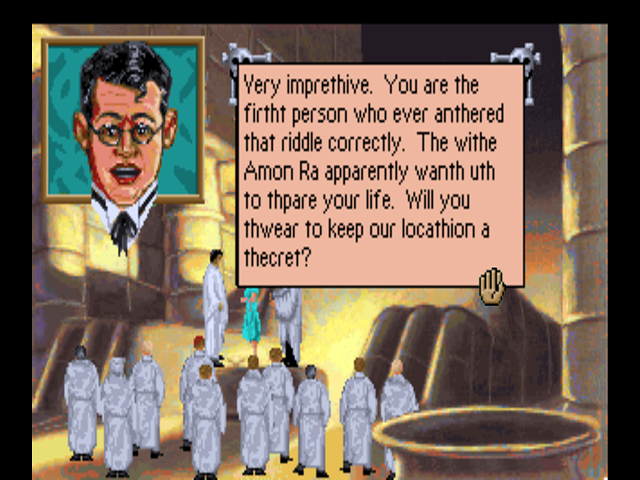
: “Of course!”
: “Then you may leave. May the great Amon Ra guide your footthepth.”
: “Thank you! Now I just have to outrun the person who’s been chasing me.”
: “Who ith chathing you? Do you think they’ll find their way in here?”
: “I’m not sure who it is, but I believe it’s the same person who stole the Dagger of Amon Ra from its display case. And I’m sure they’ll find their way in here.”
: “If that ith true, they will NOT leave thith room alive. I thuggest you leave through our thecret ethcape route behind the altar. Go now, and remember your promithe!”
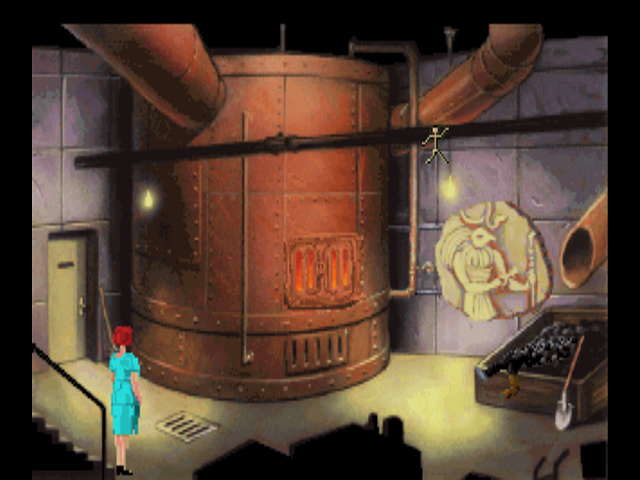
The secret passage leads to the boiler room, where… wait, who’s that in the coal bin?

Oh, it’s just Steve. This is the site of the final two screw-overs of Act V. If we forgot to get the smelling salts off the Countess’s body (or just didn’t know they were there) we’d be unable to revive Steve. After a few minutes, the killer shows up and kills Laura.
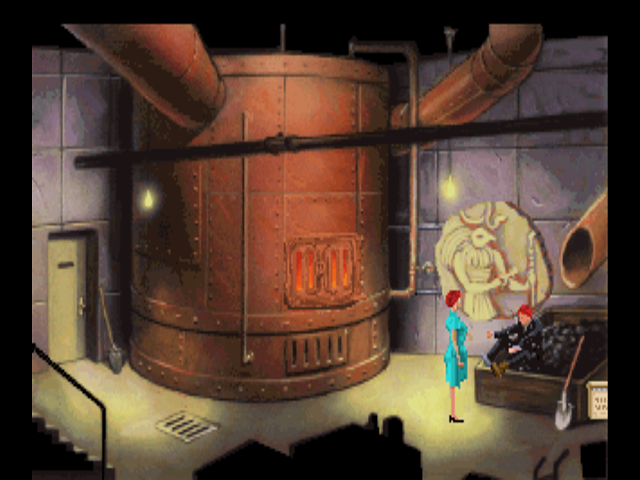
Once you use the smelling salts on him, Steve sits up in a very awkward pose for about five seconds. Remember the boot we had to go out of our way to get back in the last update? This is where we need that. If Steve leaves this position without his boot…
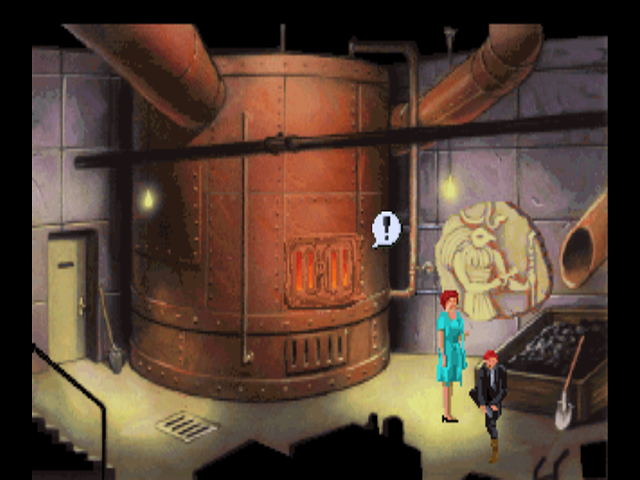

He immediately keels over and dies, ending in the killer catching up and Laura dying. Again. What we have to do is give him his boot while he’s in that awkward sitting position, which allows him to safely touch the ground.
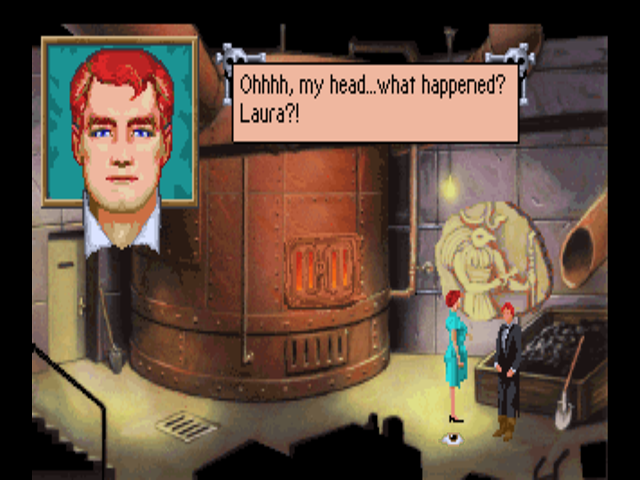
: “Yes, Steve. I was so worried about you… are you all right?”
: “I think so. I remember hearing somebody coming up behind me, and as I turned around, somebody slugged me. Cripes, my head hurts.”
: “They must have dumped you down the coal chute. Let me see where you were hit.”
: “I’m all right, I’m all right. Don’t touch it.”
: “Honestly, you men can be such crybabies. Do you think you can walk?”
: “We have to get out of here. Somebody’s been murdering everybody in this museum, and whoever it is is after me.”
: “I can make it. I’m with you. Where do we go?”
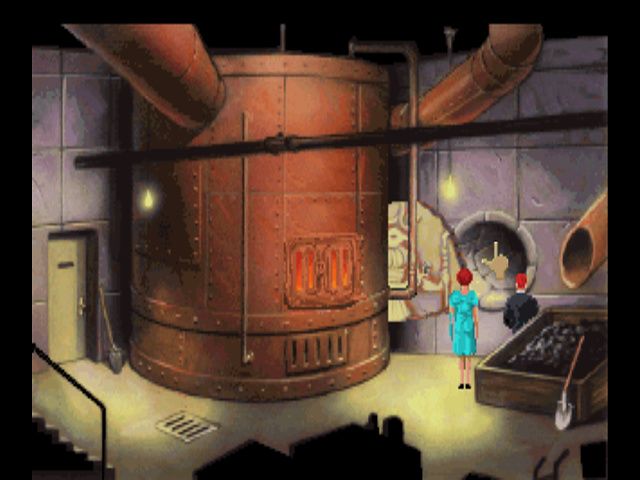
This secret passage seems like a good start. Hilariously enough, if you have the game’s speed on maximum, Laura will slide directly up the passage at highway speeds while Steve takes his sweet time. Like all of the game’s other secret passages, you are put on a death timer the second you enter it until you turn your lantern on.

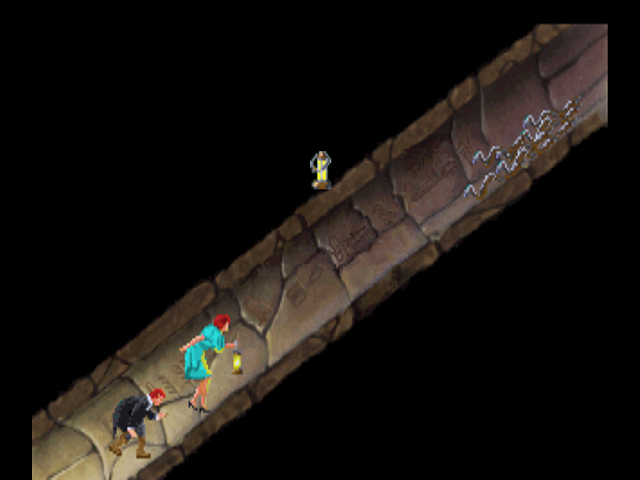 "
"
Oh, crap. Fortunately, we have just enough snake oil left to repel the entire horde of cobras. Don’t ask me how that works when we needed three-quarters of the bottle to corner a single cobra.
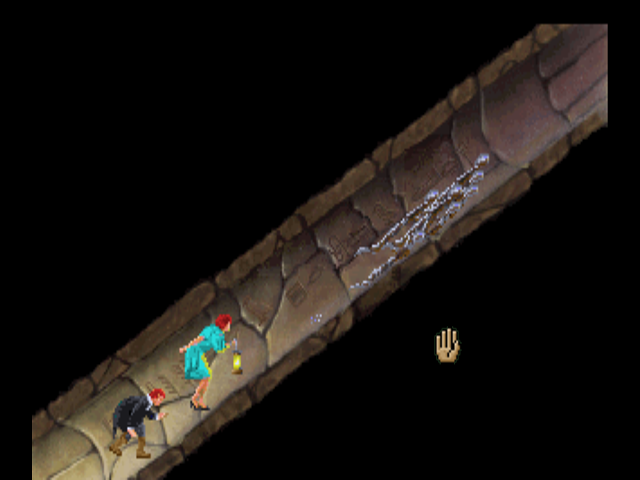
Of course, as soon as we get past the snakes, there’s another obstacle. Time for screw-over number five, and the final screw-over of Act V.
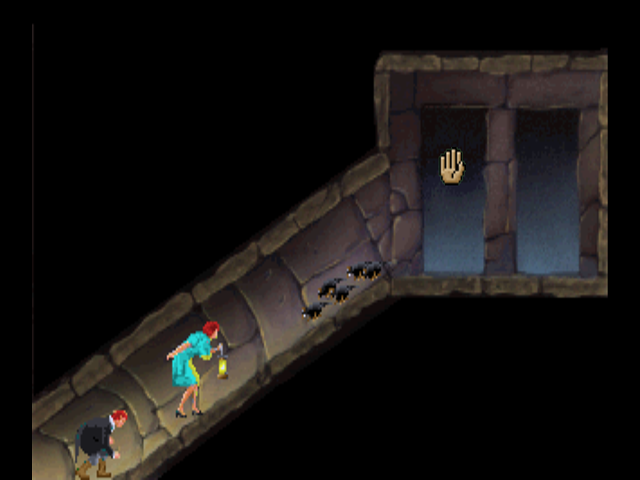
Remember the cheese from Wolf’s office? We need to throw that cheese at a specific spot, namely the first doorway above the rats. This is actually a chute that leads into the furnace.
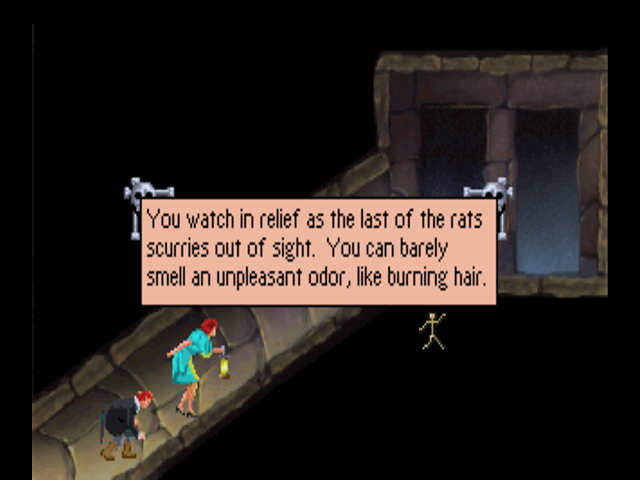
Shortly after the rats start moving to their deaths, Steve hears gunshots coming from the cultist room. This kind of begs the question: if the killer had a gun the entire time, why the hell didn’t they use it when they were chasing Laura around?
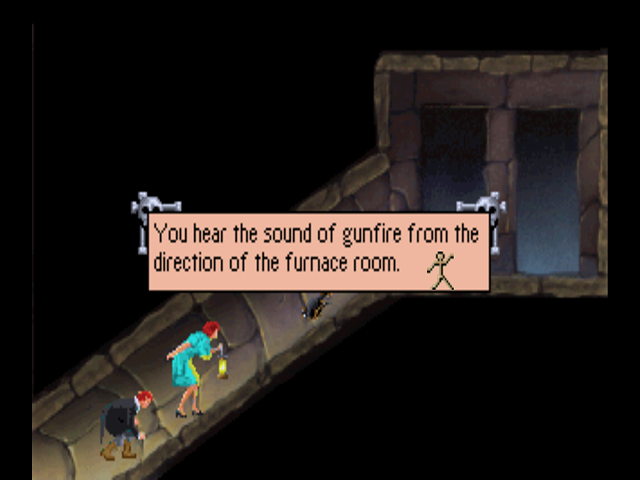
Taking the doorway on the right brings us…
Directly out of the mouth of the T-Rex in the dinosaur area. The T-Rex (named “Rex”) has a gimmick I haven’t mentioned up to this point. See that plaque near the right side of the screen? Pressing that makes Rex’s mouth move while a voice rattles off some dinosaur facts.
We know the killer is right behind us, and is probably about to exit the T-Rex through the shortcut. The time has come to push the button. Don’t hold back. Galvanize!
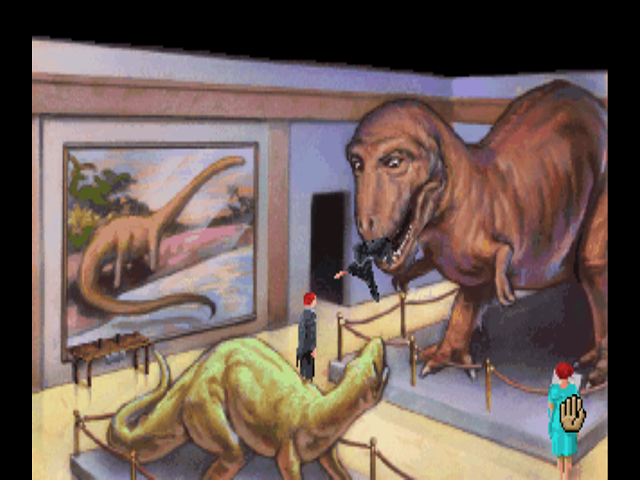
And oh look, we’ve caught ourselves a killer. In true Scooby-Doo fashion, Laura and Steve move to unmask the killer…
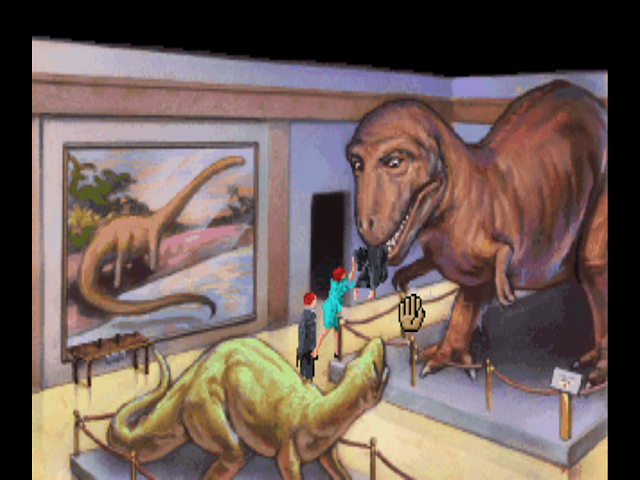
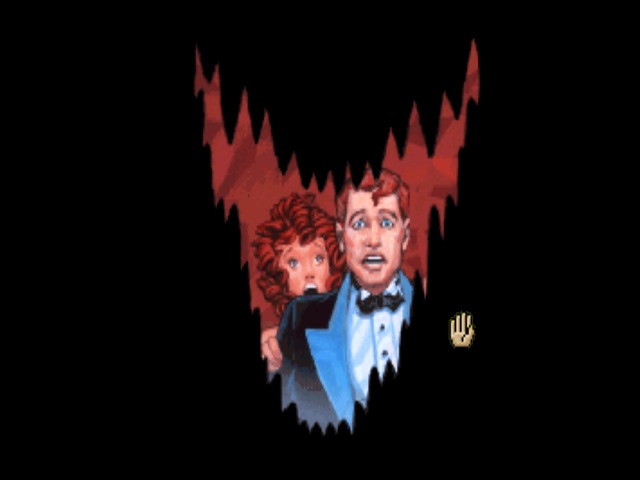
But we never see who it is. No, seriously, we don’t. Shortly after this scene from the killer’s point of view, the screen goes black and up comes the title card for Act VI.
Next time: The final update!
1 Like
Time for the last update! Naturally there are going to be spoilers here, so if you haven’t read the rest of the LP, don’t start with this part!


Act 6 is kind of an oddball in that it contains a completely nonsensical situation made up entirely for the stupid pun to work.

This is where all of those evidence items come in handy. We won’t actually need to present any of them, but the game basically checks to see if you have them or not before it will allow you to finish the game - even if your answers are correct. The coroner is also telling the truth when he doesn’t mention the theft of the paintings from the art gallery: there is actually a conversation in the armor room (which I tried multiple times to get to work but couldn’t) between the Countess and the fake Dr. Carrington about the forgeries. The coroner will ask us about it, but it’s possible to get all of the questions related to the art thefts wrong and still finish the game provided you have all of the evidence items and answer all of the questions about the murders and the theft of the Dagger correctly.
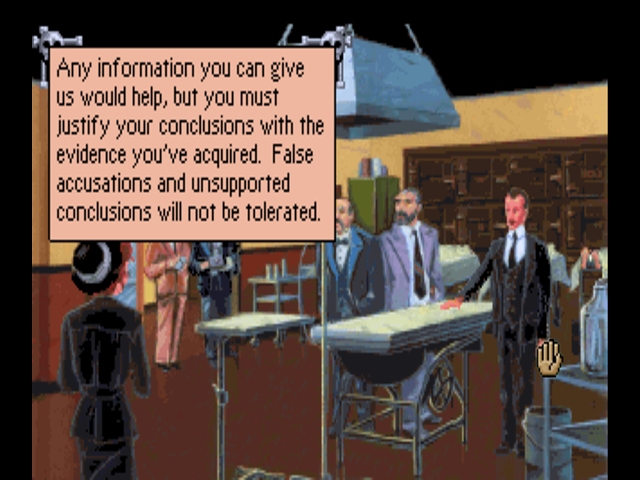
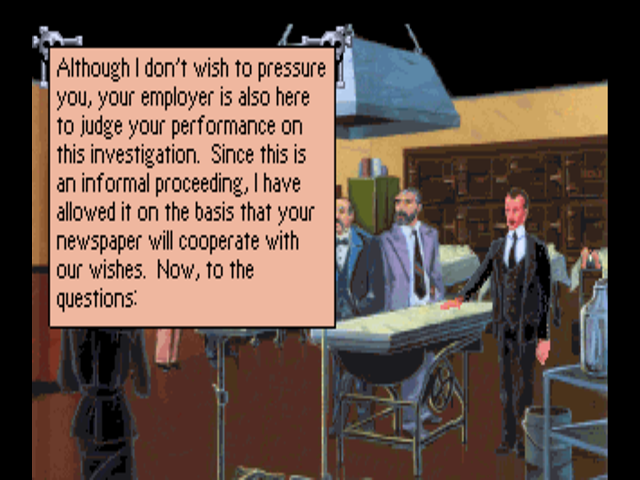
Each question gives us two menus to choose a person and a motive (for the murder-related questions). Both items must be selected correctly to finish the game.
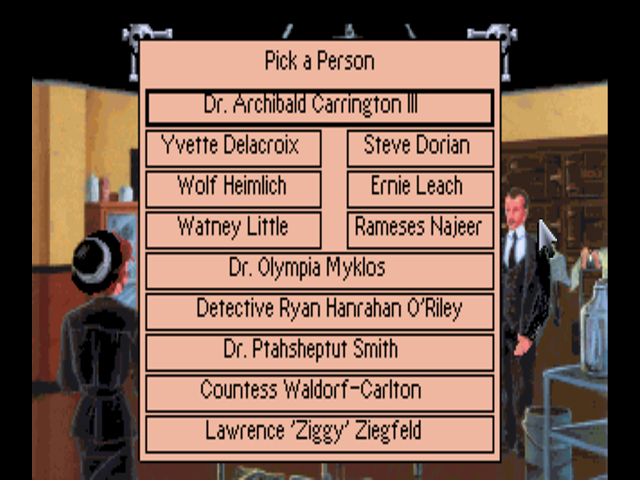
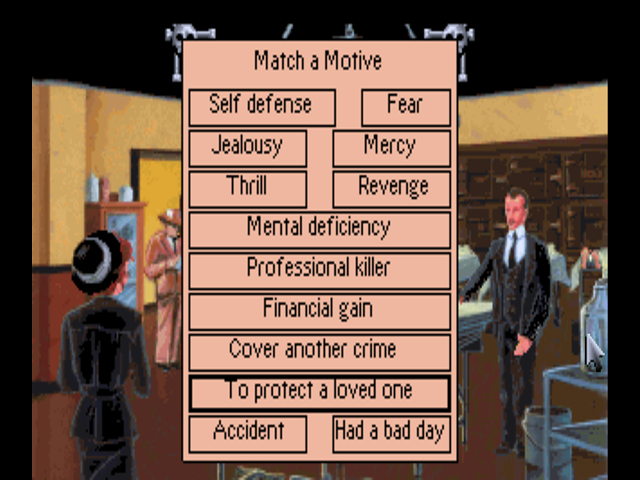
Question One

Dr. Carter’s murder is actually the most difficult to solve out of all of them. Both of the clues found at the scene (Dr. Smith’s necklace and Yvette’s footprint) were planted there by the real killer - though how you’re supposed to figure this out, I have no idea. The closest I can come is that Yvette’s footprint more or less lines up with the secret passage from Ernie’s office, and Dr. Smith’s necklace would have been covered in blood had it dropped off during the actual murder rather than being found on top of the bloodstain on the floor.
On top of that, you also have two people with a potential motive for killing Dr. Carter. Dr. Smith wanted the dagger back and also turned out to be a batshit insane murder cultist, but Watney Little (aka the fake Dr. Carrington) also kind of had a motive: if he’s the one who stole the Dagger in the first place, he could be doing it in an attempt to stop the investigation into the theft. We also know O’Riley had something to do with the theft, so he’s basically got the same motive that Watney Little does assuming Yvette was right.
Honestly, I still believe that it’d make more sense for Watney Little to have done it, but the game expects us to blame the Irish for everything. The correct answer is Detective Ryan Hanrahan O’Riley, motive being Financial Gain. The logic basically follows mine.
Question Two
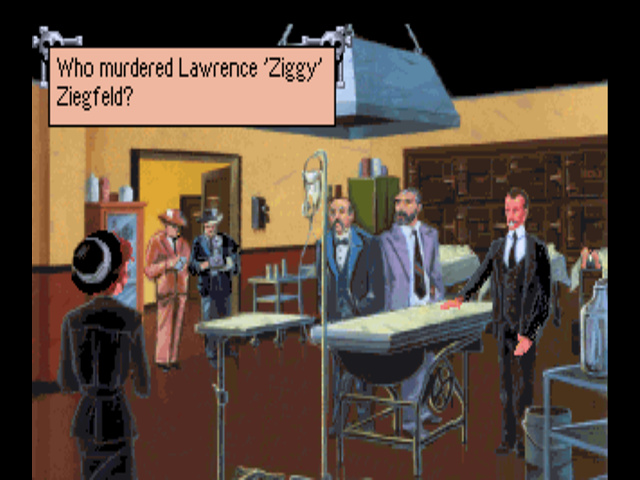
The game’s logic here is also kinda shaky. The assumption is that Ziggy was murdered for his involvement in the thefts from the art gallery - we know he was involved because he was supposed to attend the meeting with Watney and the Countess in the Armor room (the meeting found on Dr. Carrington’s desk). It honestly kind of makes no sense to me why O’Riley or Watney Little would go after Ziggy, since ultimately the art thefts really weren’t going to get in the way of the Dagger investigation.
The correct answer is Detective Ryan Hanrahan O’Riley, motive being Cover Another Crime.
Question Three
This one is easy. We know that Ernie was killed because he saw something he wasn’t supposed to - he even tells Yvette as much. What he saw was Dr. Carter’s murder. The secret passage that the button in his office opens up goes right into the Egyptian room, so it’s not a stretch to imagine he could’ve seen O’Riley walking away from the crime scene.
The answers here, unsurprisingly, are Detective Ryan Hanrahan O’Riley and Cover Another Crime.
Question Four
So… the conversation that’s supposed to key you in on this is something I purposely didn’t show, because it would have made it immediately obvious that O’Riley is the killer. At the end of Act 3, you can listen in on a conversation between O’Riley and Yvette where he outright tells her that he’d kill her if he found out she was sleeping with anyone else, because O’Riley is the most dense man in the universe. In addition, the red hair found on Yvette’s body is his, as are the glasses (which is a little weird because there’s no mention of him ever wearing glasses).
This one is actually a bit different. The answer remains Detective Ryan Hanrahan O’Riley, but the motive is either Jealousy or Revenge. Either one works.
Question Five

The Countess was the primary mover behind the art forgeries. You can find this out if you witness the meeting between her and Watney Little in the Armor room, but I was never able to get that to work. The entire reason for her murder is also kind of a stretch - from what I’m told, if you question her she’ll admit to knowing that Dr. Carrington is a fake, and so the theory is she had to die because Watney and Ziggy both died. The main piece of evidence here is the handful of grapes near the Countess’s corpse. O’Riley only mentions loving grapes twice (once in his office in Act 1, and then a second time after Ernie dies) but it’s definitely there.
Fifth verse, same as the first four: Detective Ryan Hanrahan O’Riley, Cover Another Crime.
Question Six

This one is really easy, assuming you got past the beetles and didn’t assume they were an insurmountable deathtrap. The skeleton is Dr. Archibald Carrington III, who never made it off the Andrea Doria before being killed and replaced.
Question Seven

This one’s easy. We know it couldn’t be O’Riley because he wasn’t on the Andrea Doria. We do know, however, that Watney Little was impersonating Carrington and likely had all of his keys to the museum. The answer here is Watney Little. The game doesn’t ask what his motive is, because it’s not simple enough to fit on that menu.
Question Eight
I’m not entirely sure why they bother asking you this, especially since there’s no way you’d get the last question without having Watney’s police file. The answer is Watney Little.
Question Nine
Another easy one. We know that only three people knew that Dr. Carrington was actually Watney Little in disguise, those being Ziggy, the Countess, and O’Riley (the last one is implied by the existence of the note on Watney’s police file). While Ziggy and the Countess might have a motive to kill him, namely covering up the forgery scheme, O’Riley has a stronger motive - killing the only other person who knew for sure who stole the Dagger.
The answers are, again, Detective Ryan Hanrahan O’Riley and Cover Another Crime.
Question Ten
This is the first question where the game will start telling you if your answer is correct or not. If you’ll remember, the Dagger was stolen from its case without the case being damaged at all. There are only two people who had access to it: Dr. Carter and Dr. Carrington. Since it wouldn’t make sense for Dr. Carter to steal a dagger he considered to be his, the only person that really makes sense here is Watney Little, which is the correct answer. Watney originally hid the Dagger in the museum gift shop (where we found it in Act 2).
Question Eleven
We know that Watney Little had a note on his police file telling him to cooperate. The only person who could have had access to that is a member of the police - and only Detective O’Riley fits the bill there. No surprise that it’s him, then.
##Questions Twelve, Thirteen, and Fourteen


I’ve already detailed how this is figured out, but the answers are the Countess, Watney Little, and Ziggy, respectively. You might think the answer to the last one would be Ernie, given that he’s a fence… but no, Sierra had to go make a stupid pun. You’ll see soon.
Question 15

This one’s a dead giveaway. You see Rameses Najeer’s face during the scene where Laura gets captured by the cult… and then again when he asks her the riddle. I’m not entirely sure how you could get this one wrong unless you thought it was Dr. Smith.
Question 16
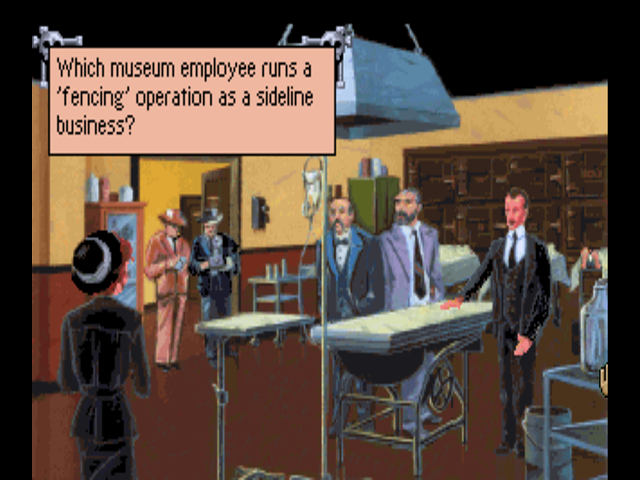
We already know this one is Ernie from the carbon paper and from the multiple conversations between him and Yvette. However…
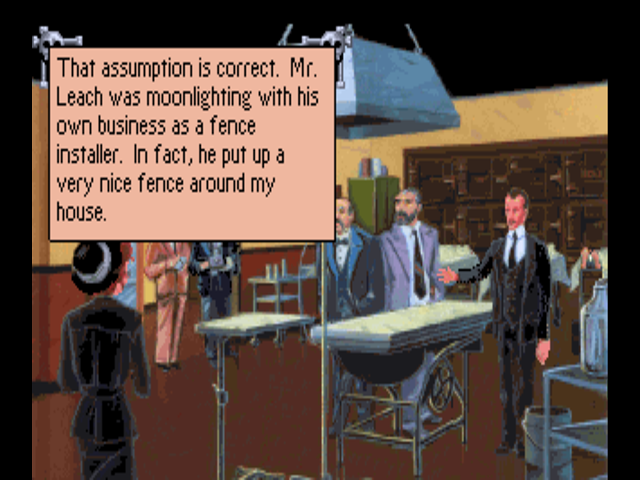
Yeah, fuck that entire pun. Assuming you have the evidence against O’Riley and all of the questions answered correctly, you get a bonus scene. This is (I believe) the only place in the game or the manual where they tell you who Dr. Smith actually is (he’s the curator of the Cairo Museum in Egypt).
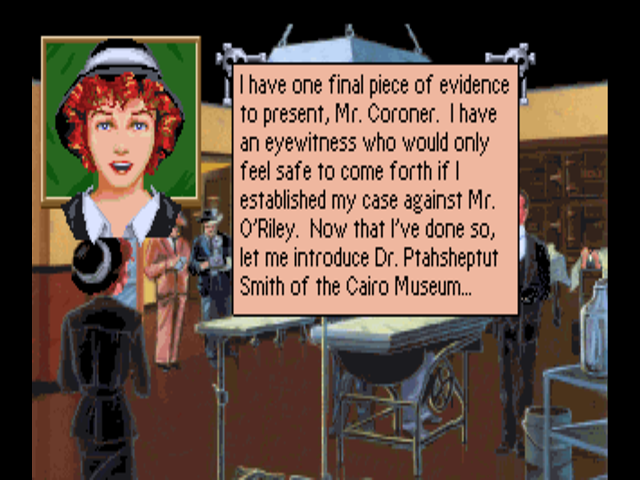
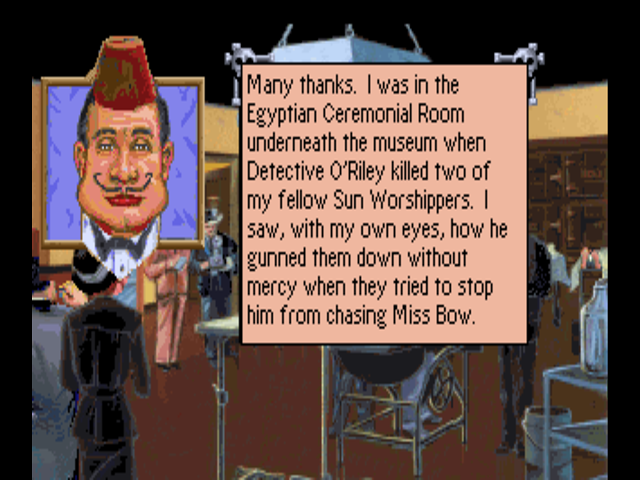
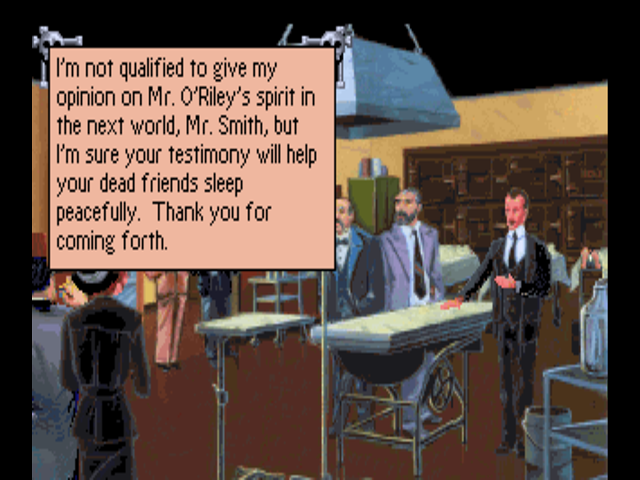
Once that scene ends, we move on to the actual ending.
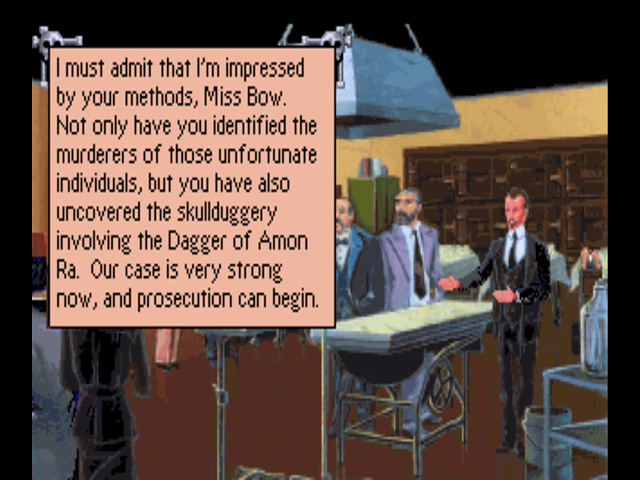


I’m not sure what kind of police department relies on the speculation of a total outsider to determine who they charge with crimes, but okay. The End, right? … or is it?
: “…damned interfering Laura Bow…”
“… thinks she can get away wi’ squealing on me, does she?..”
: “…well, she’s got another thing coming…”
: “Do you hear me, Laura Bow? You’ll pay for this…”
: “…if it’s the last thing I ever do!”
Spoilers: Laura Bow gets thrown into the dustbin at Sierra mere days after the game is finished and is never heard from again apart from a very brief reference in Gabriel Knight 1 implying that she went back to New Orleans and is teaching classes at a college there.
… And, that concludes my LP of Dagger of Amon Ra. There is a short epilogue, but unfortunately due to the way the game handles transparency, I can’t get any of my screenshot tools to capture the text boxes. I’ll post what I have… and in the style of the other LP of this game (which I did not know existed until sometime around when I finished Act III) I’ll just make up my own epilogue for the screenshots that didn’t take.
It was later returned to the museum in Cairo.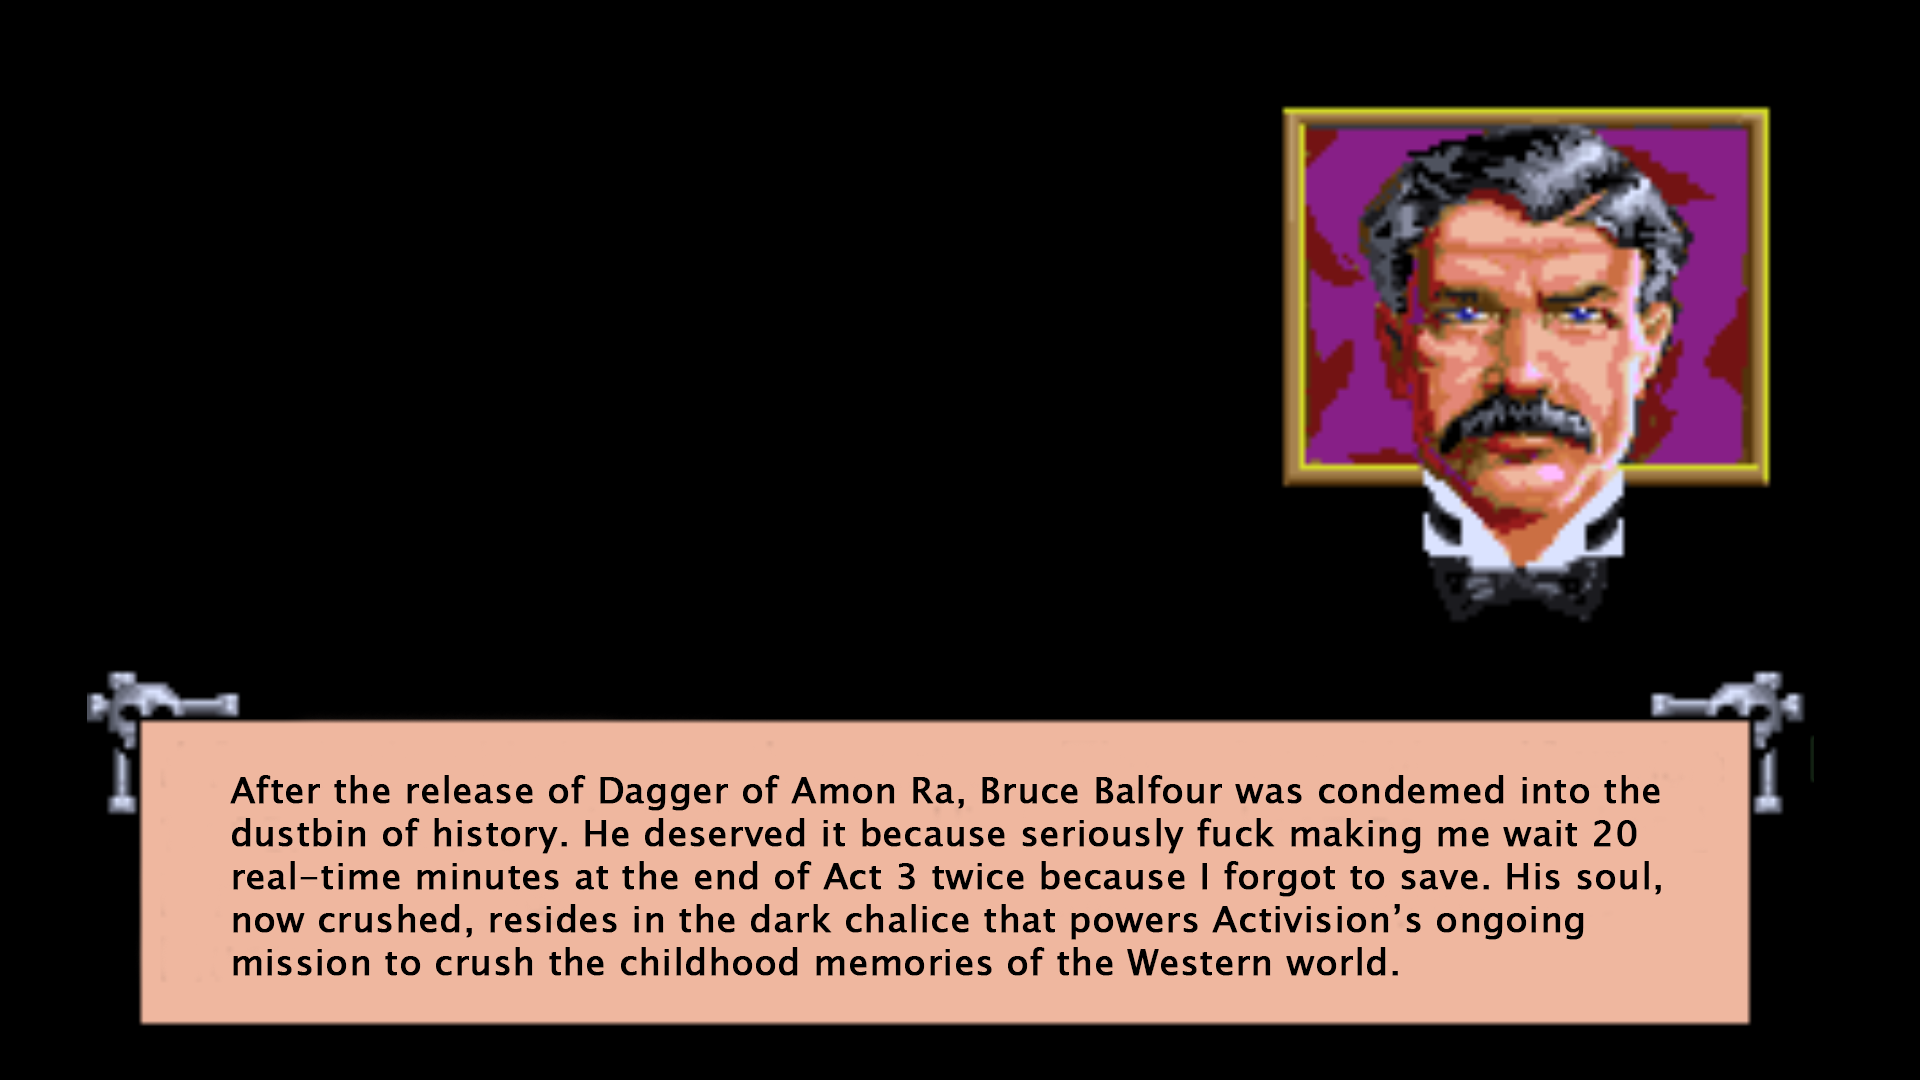
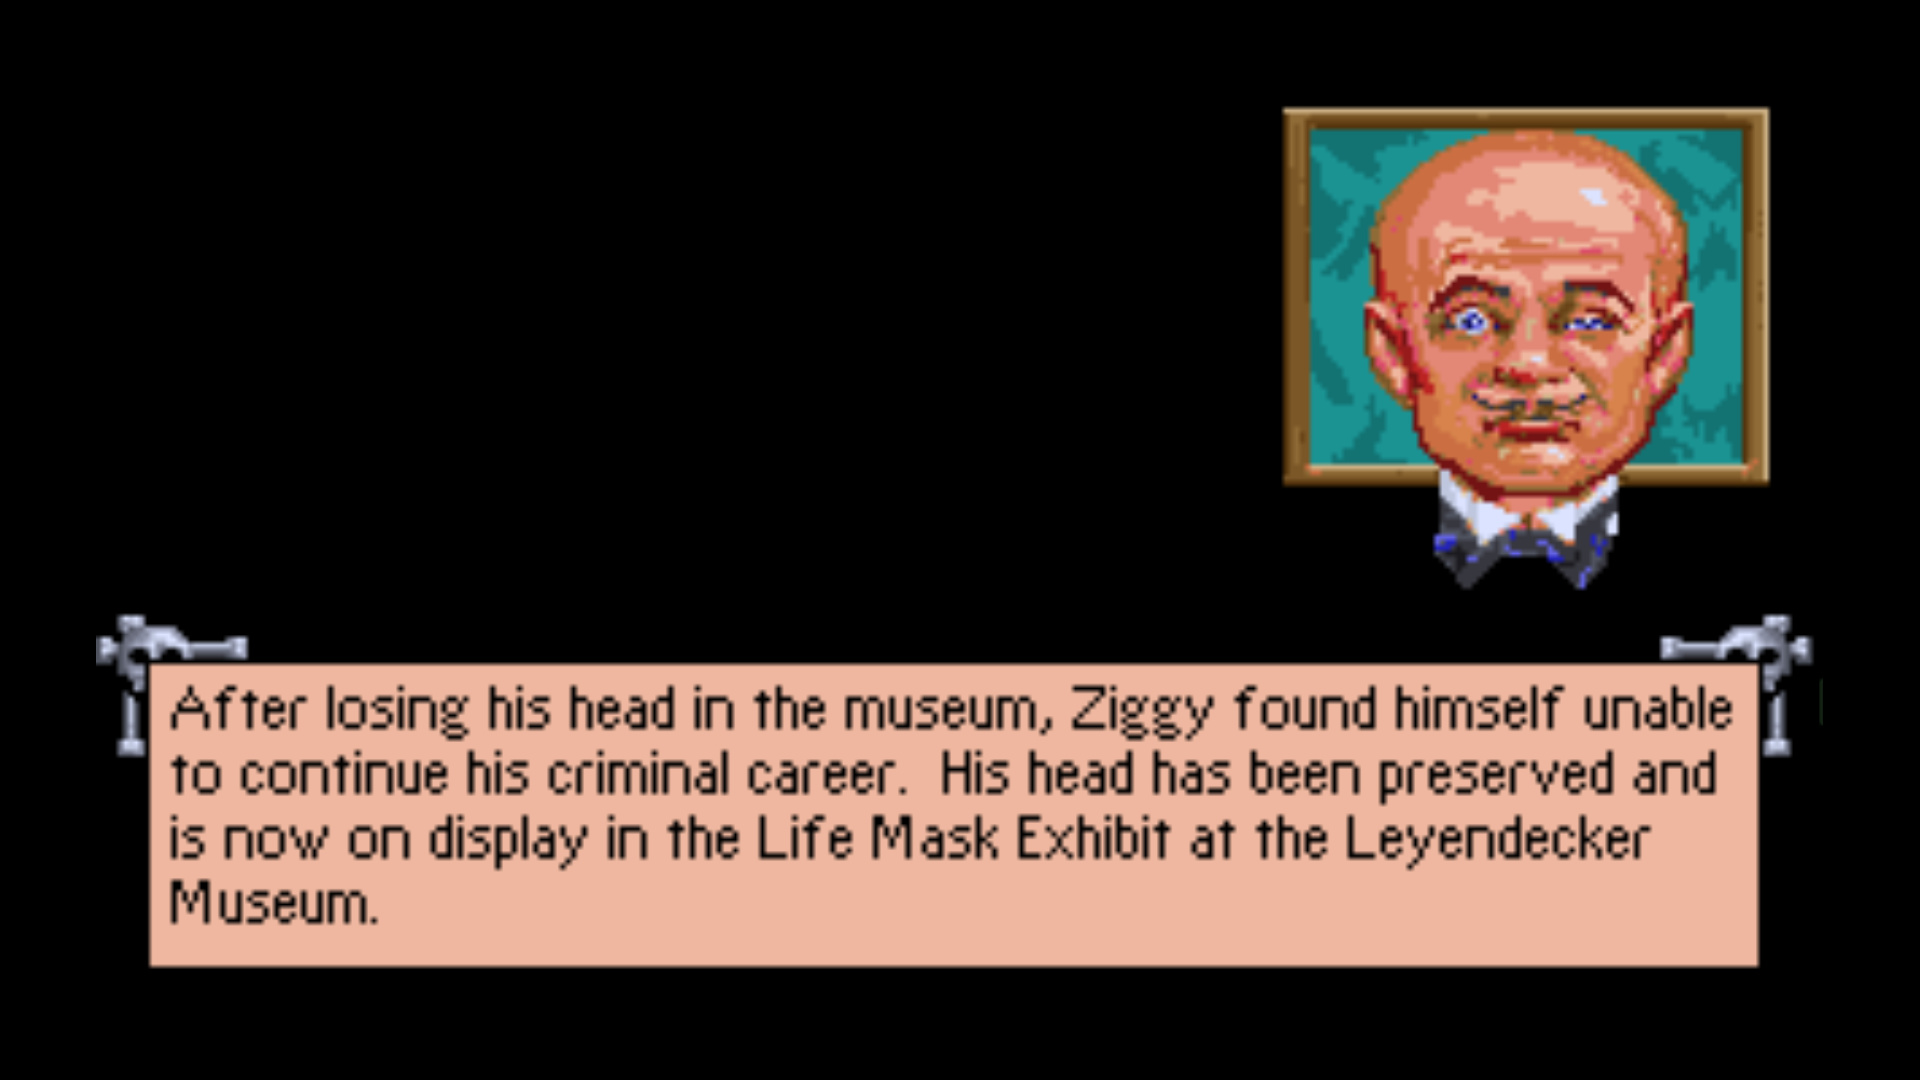
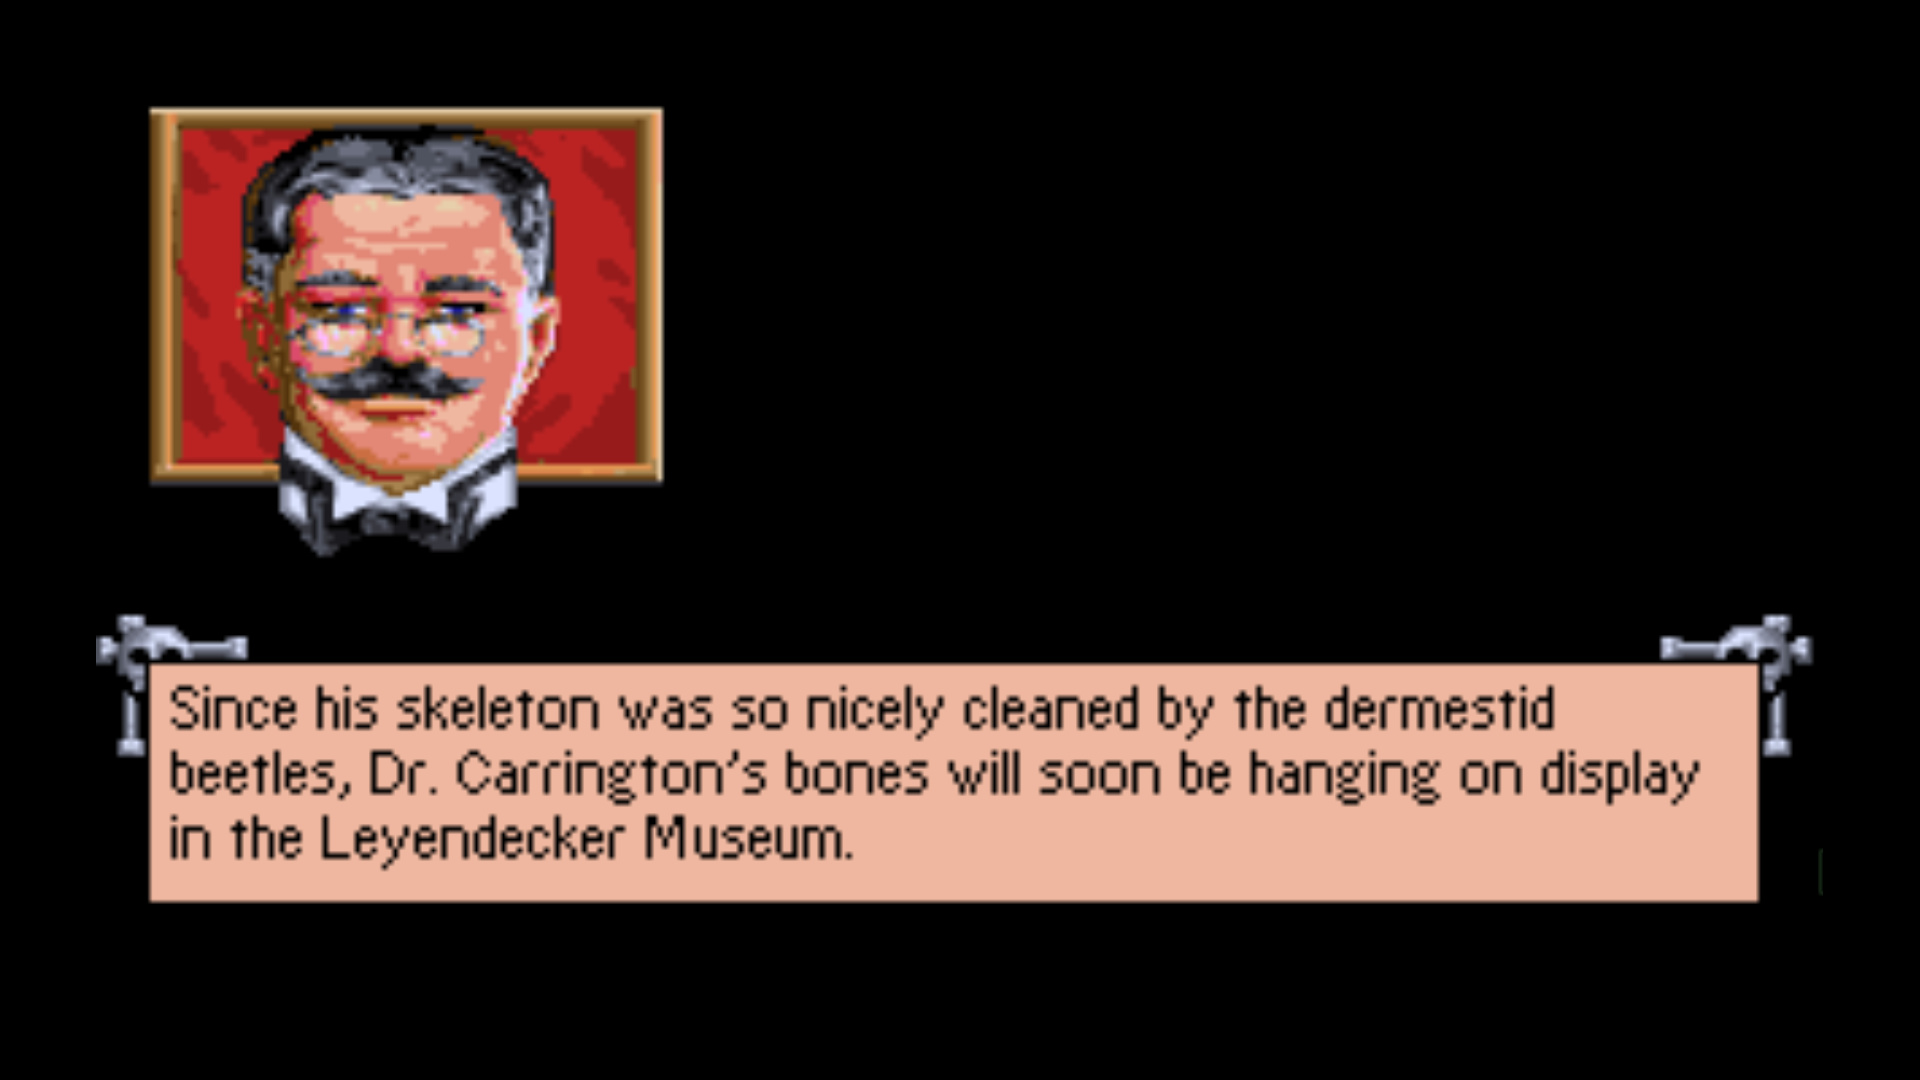
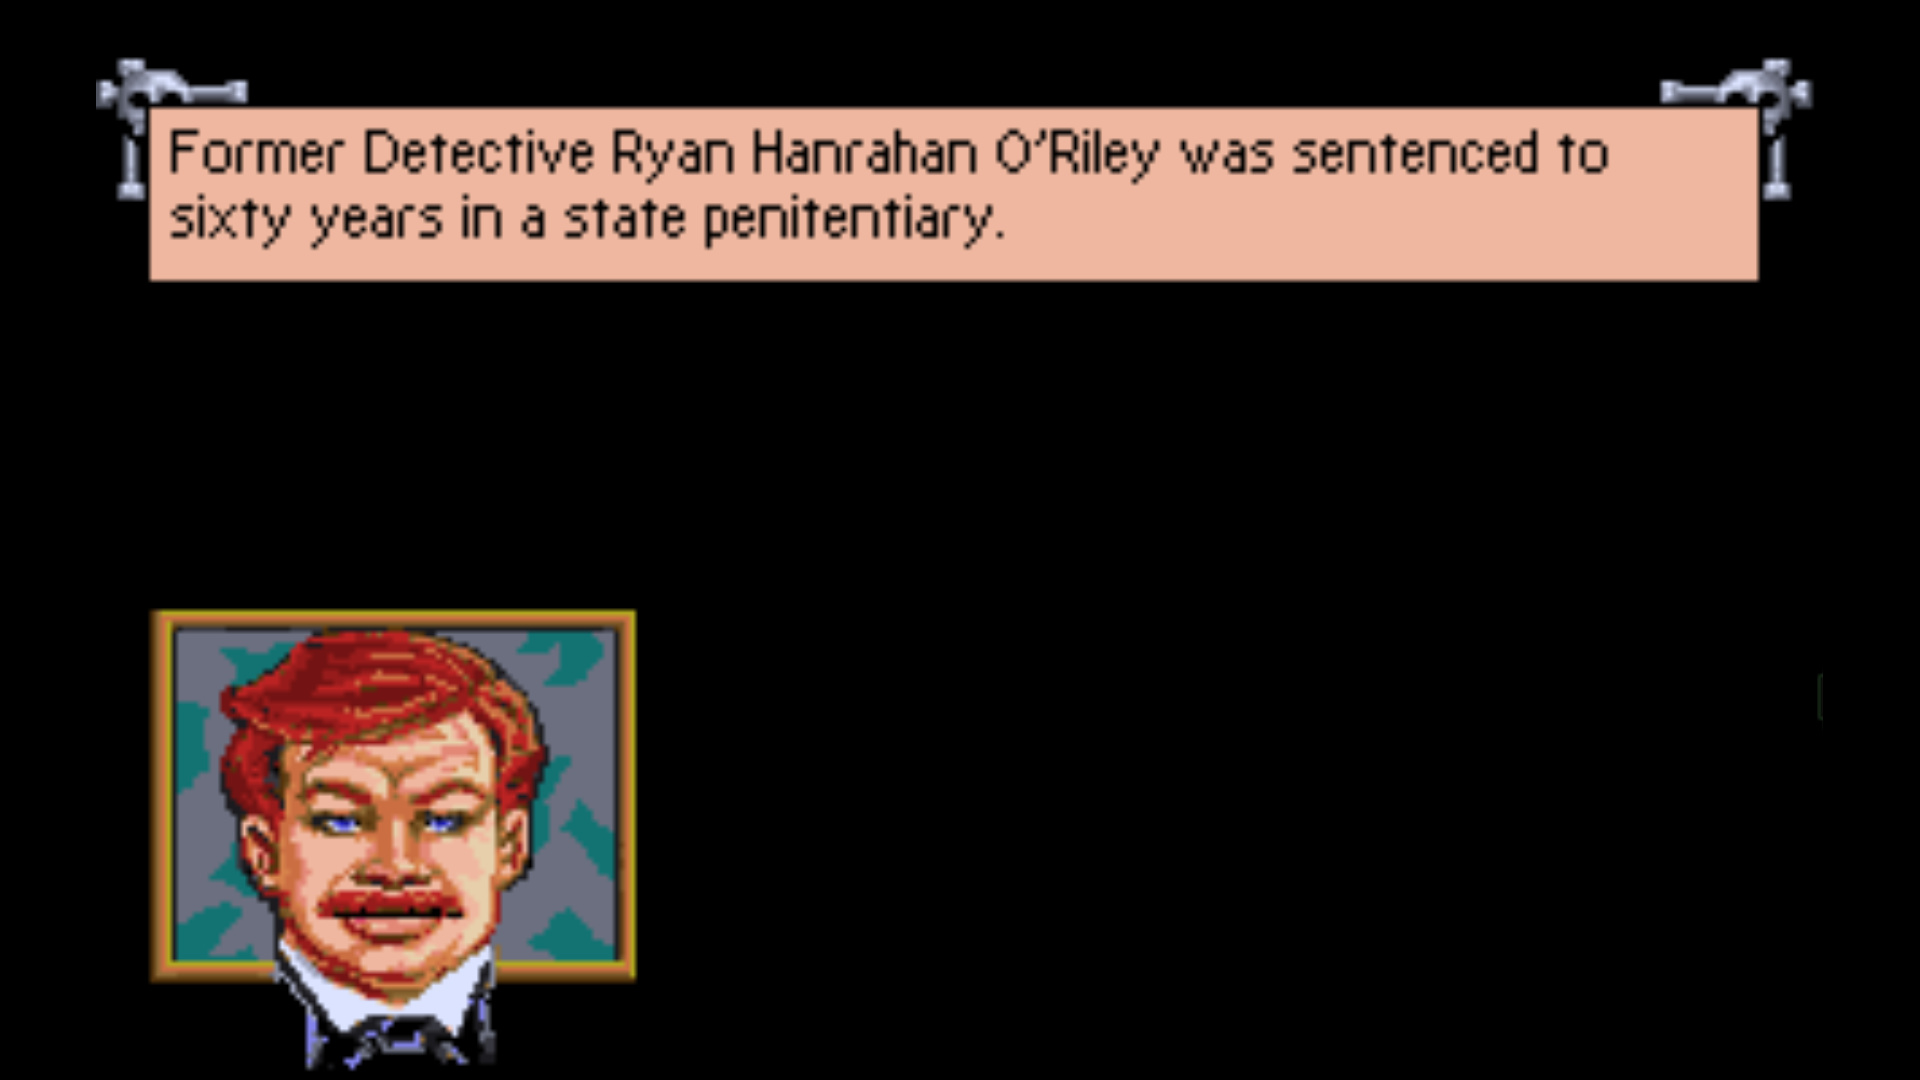
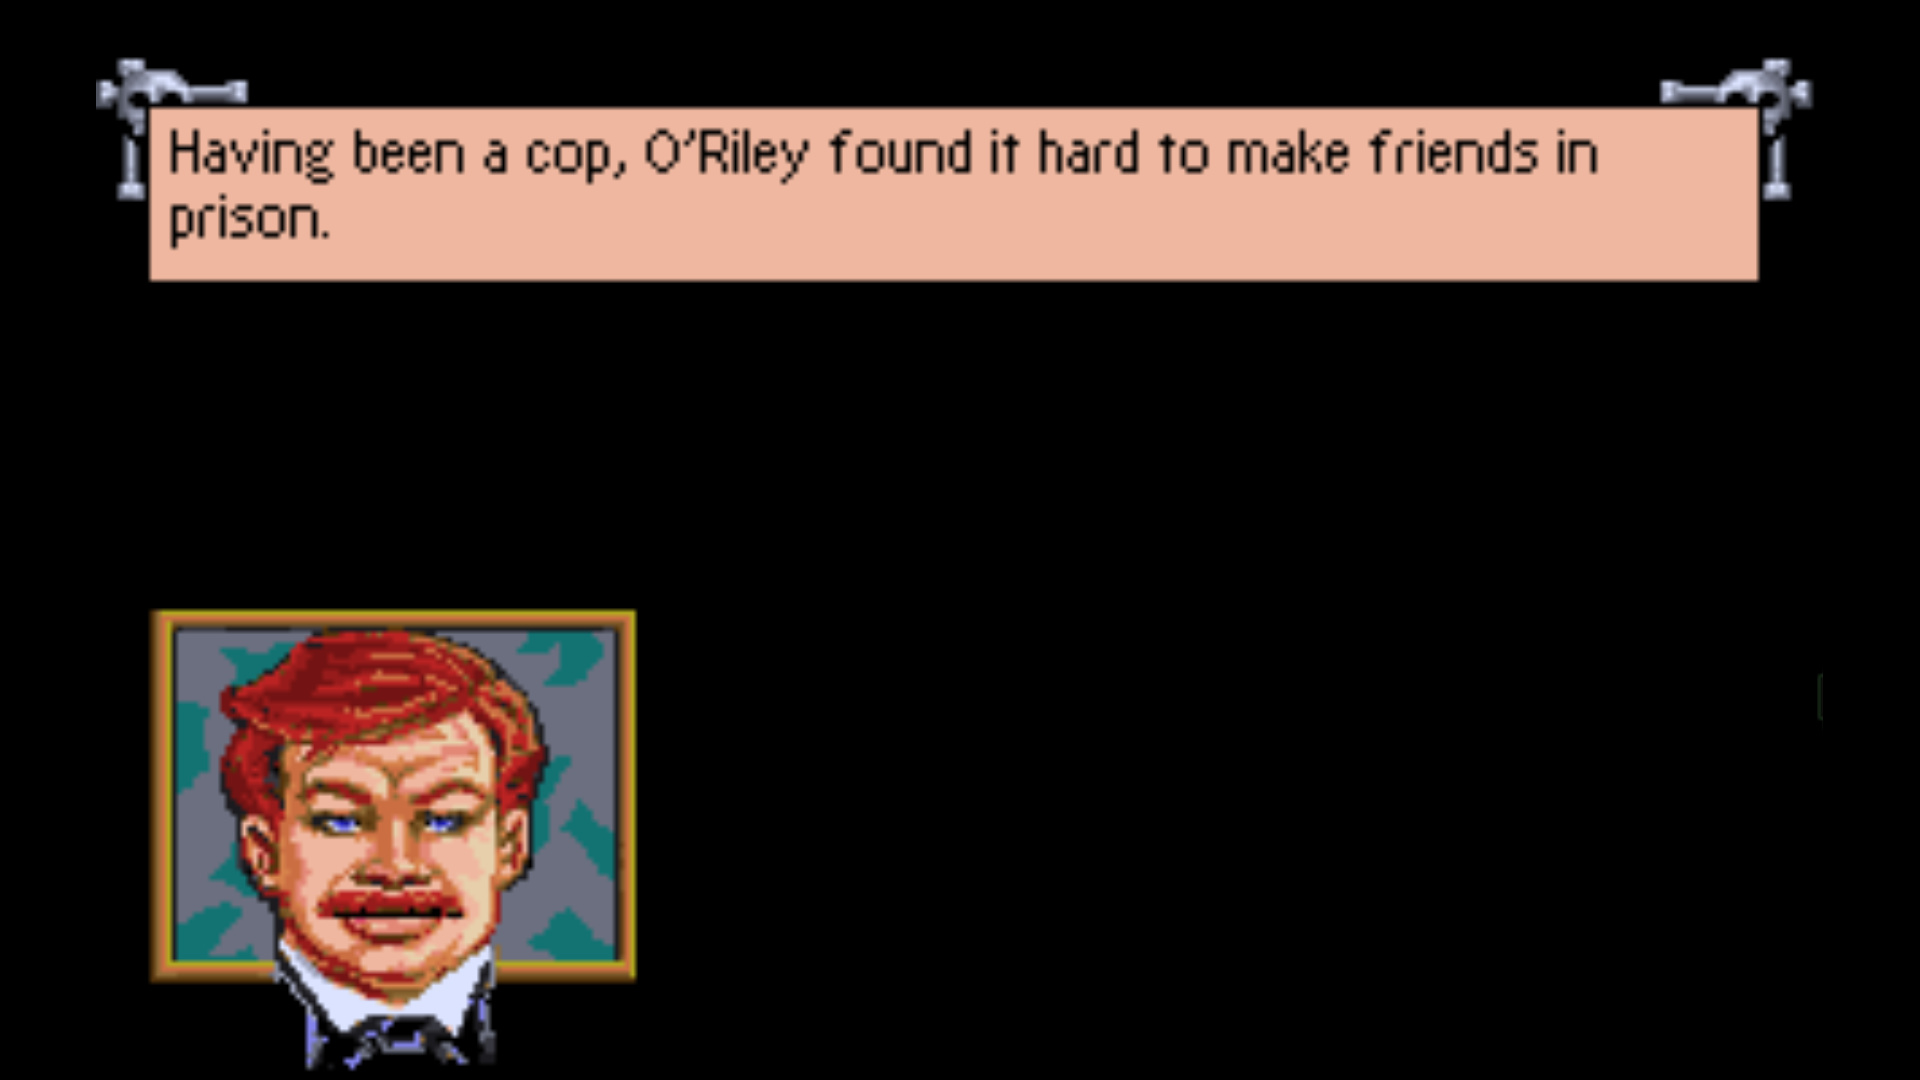
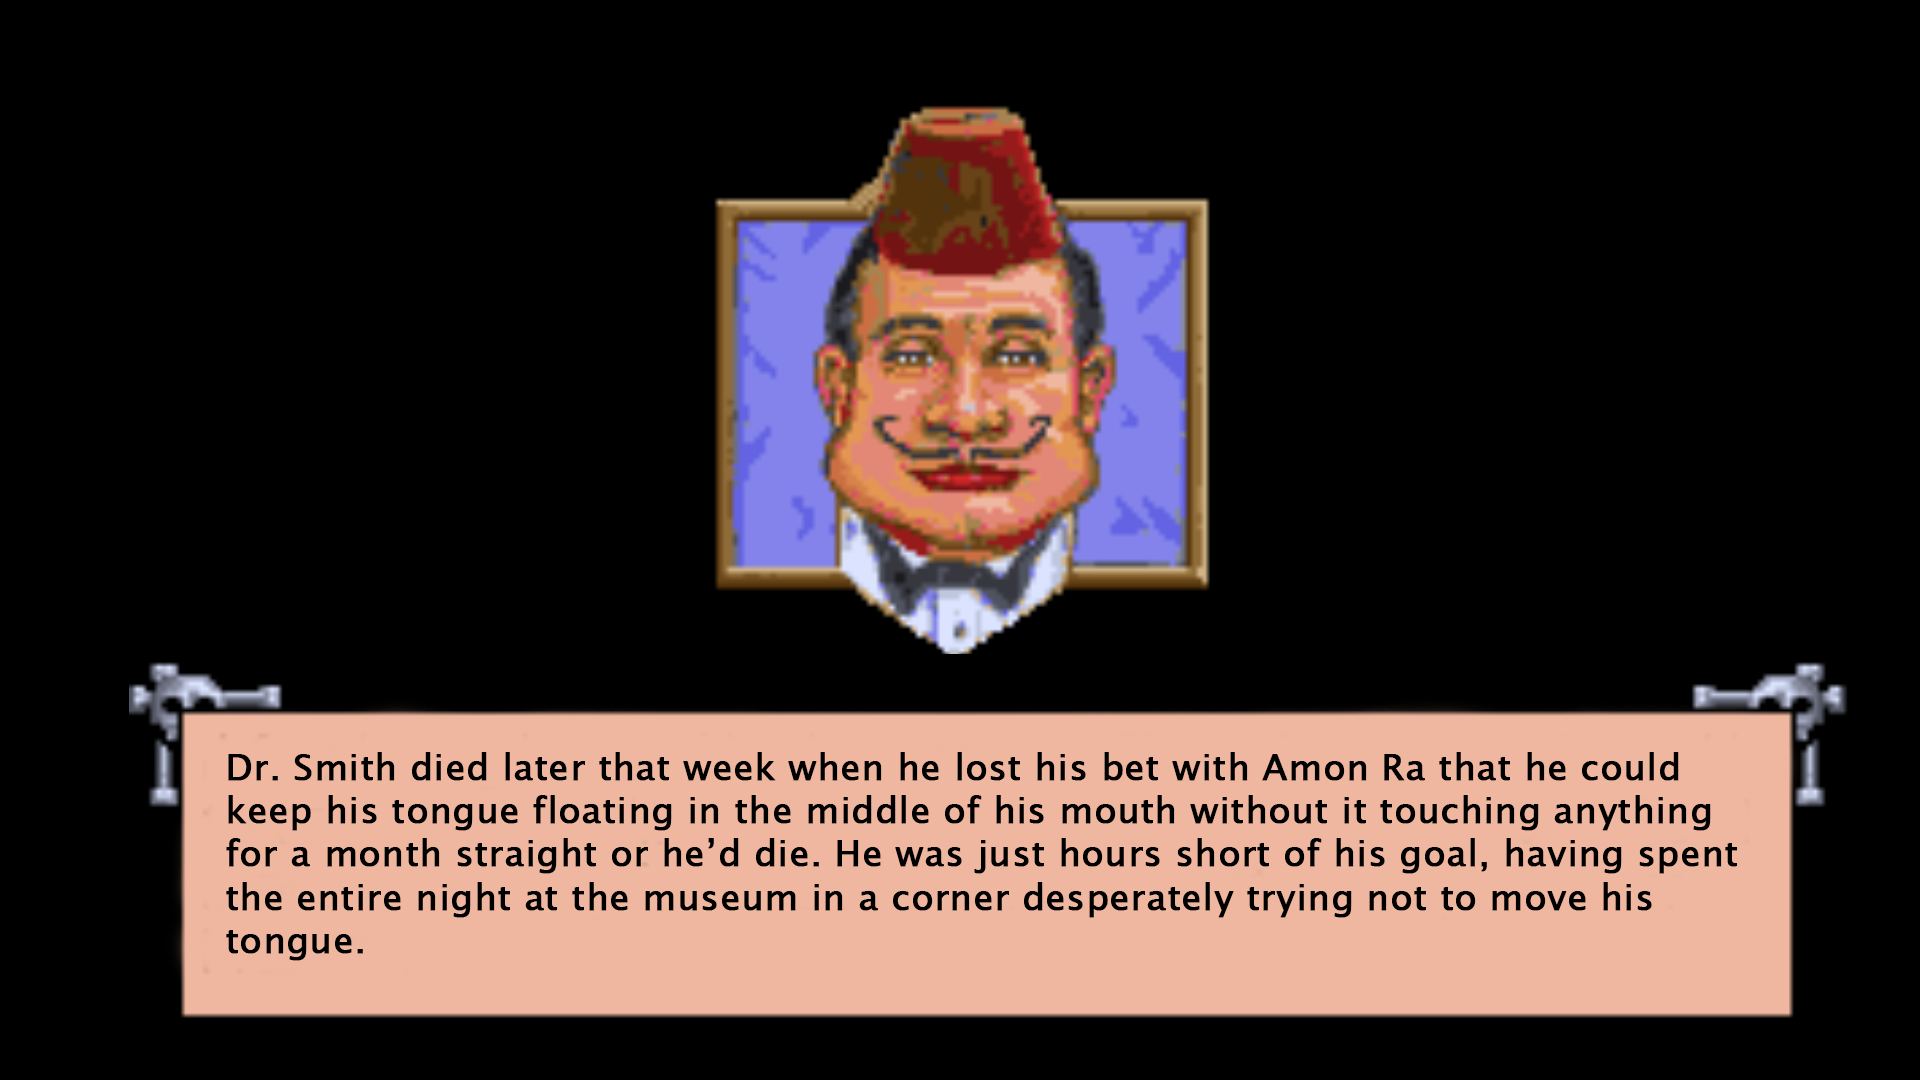
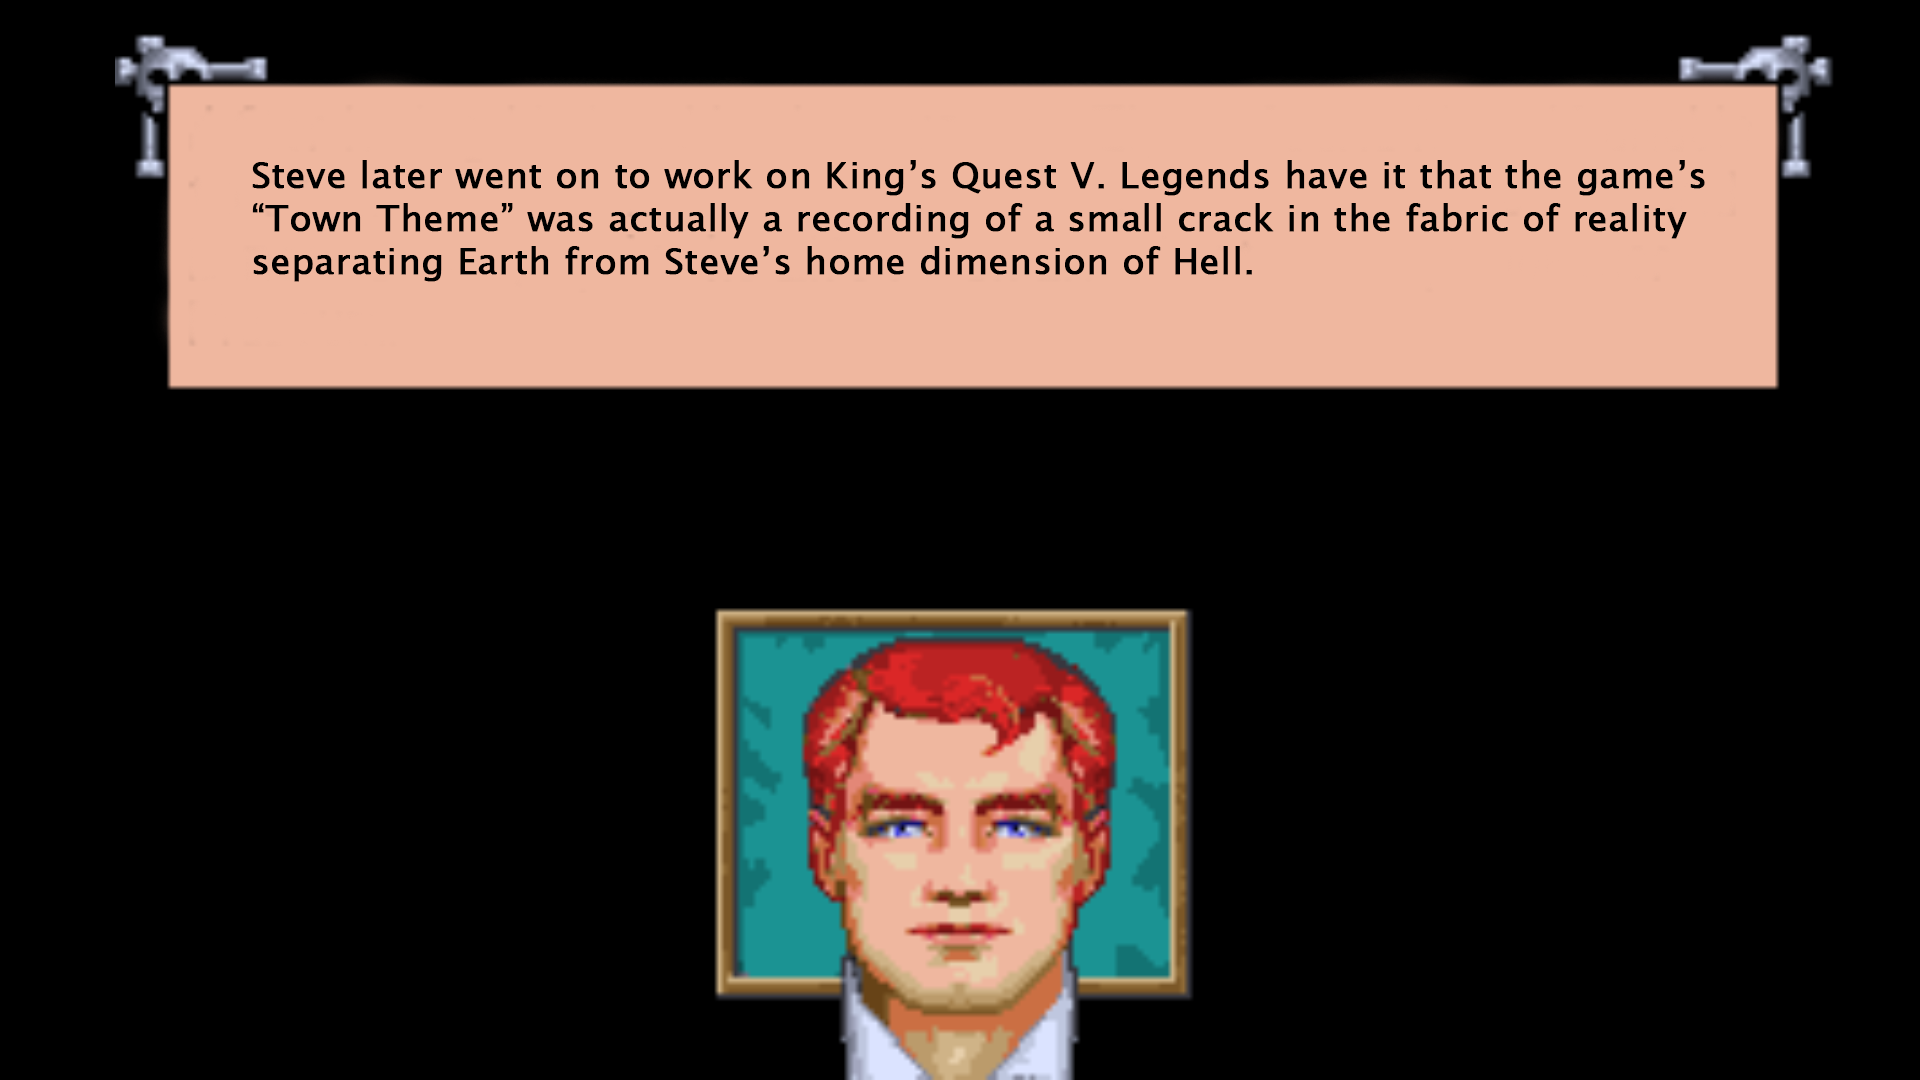
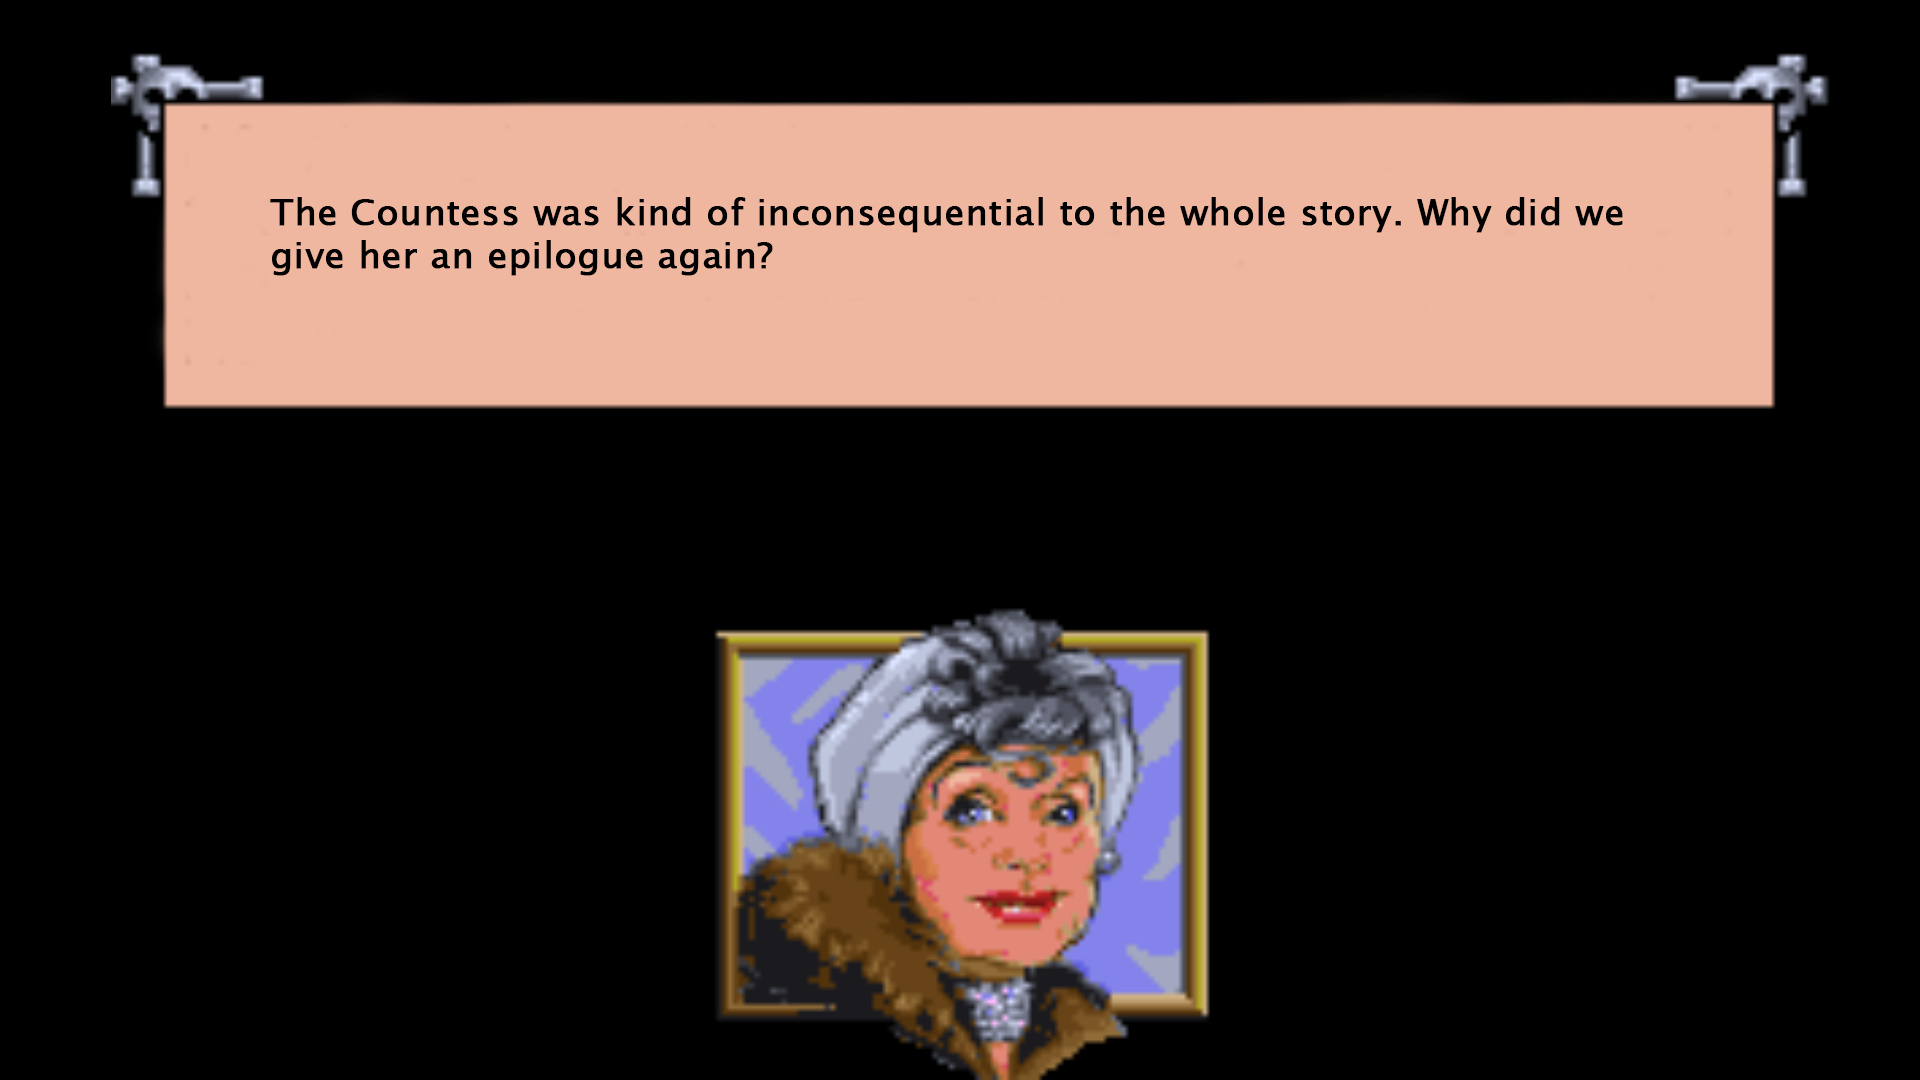
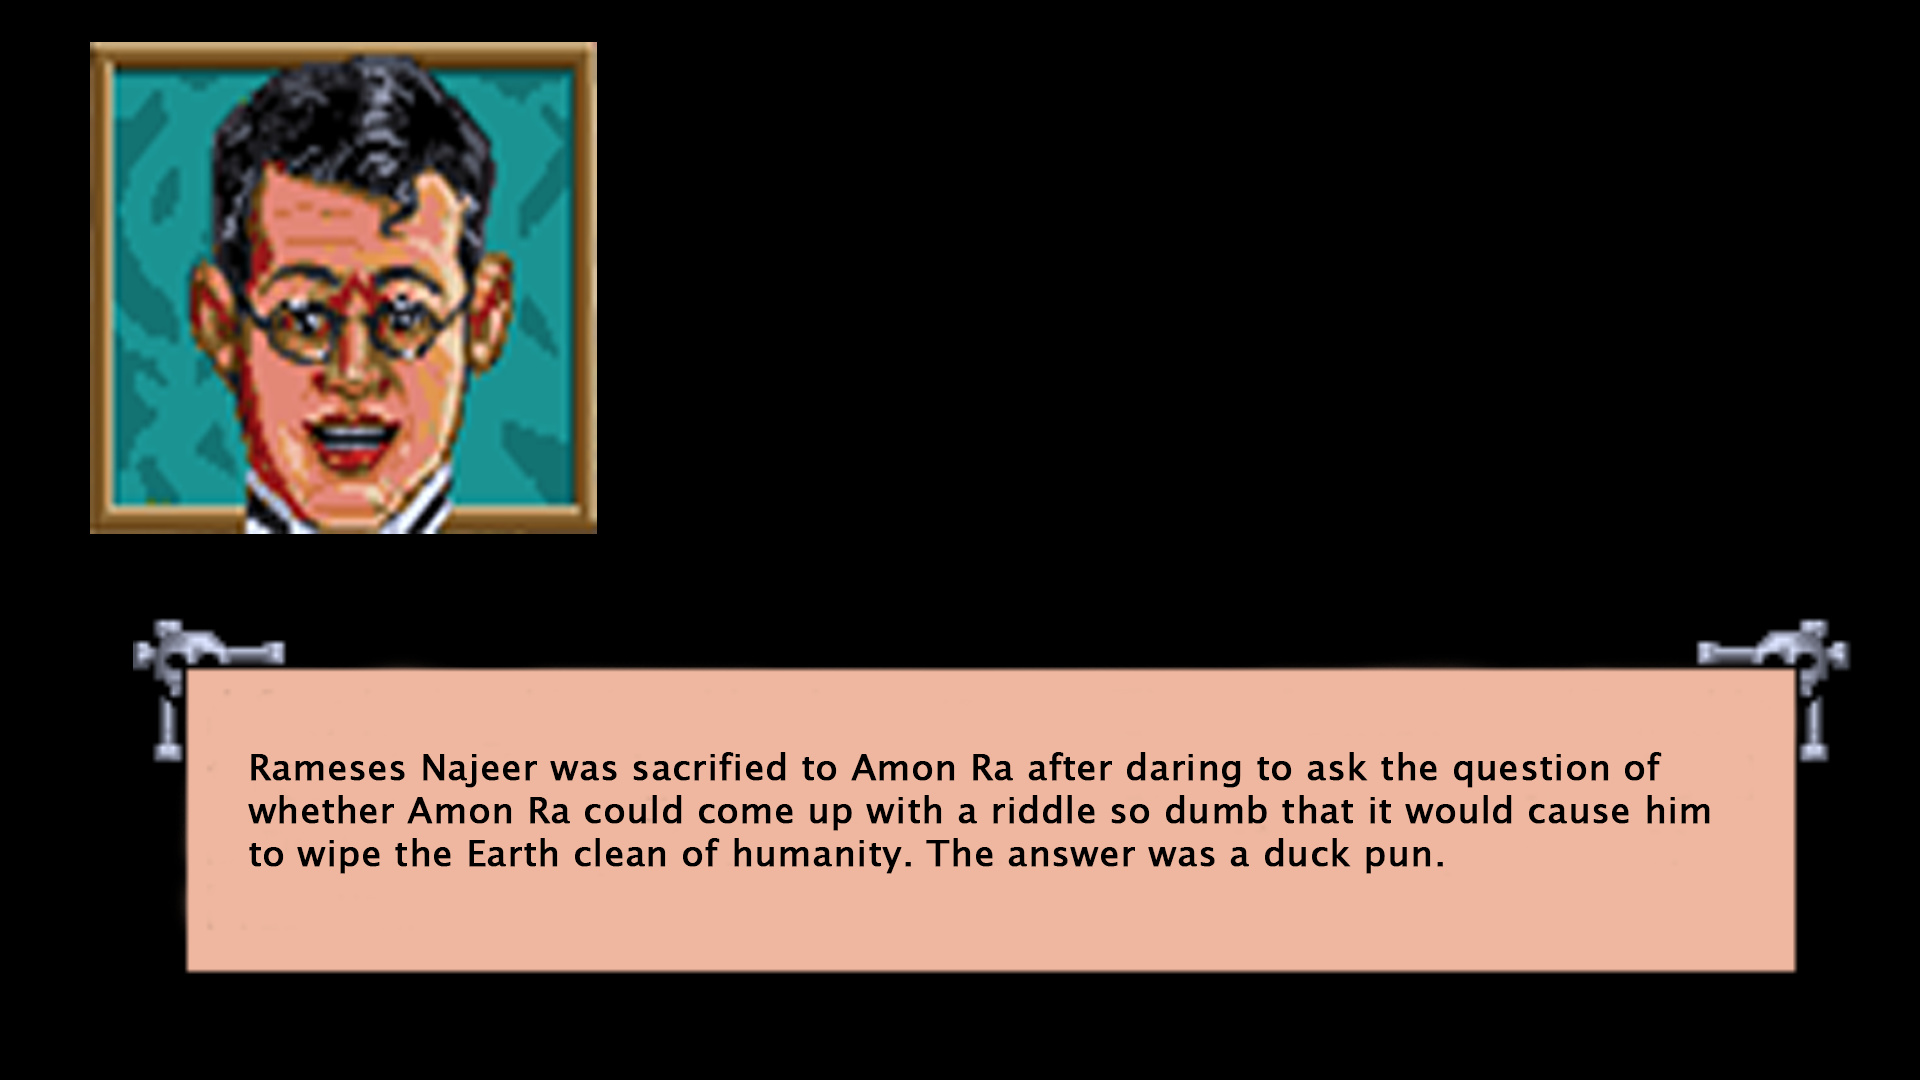
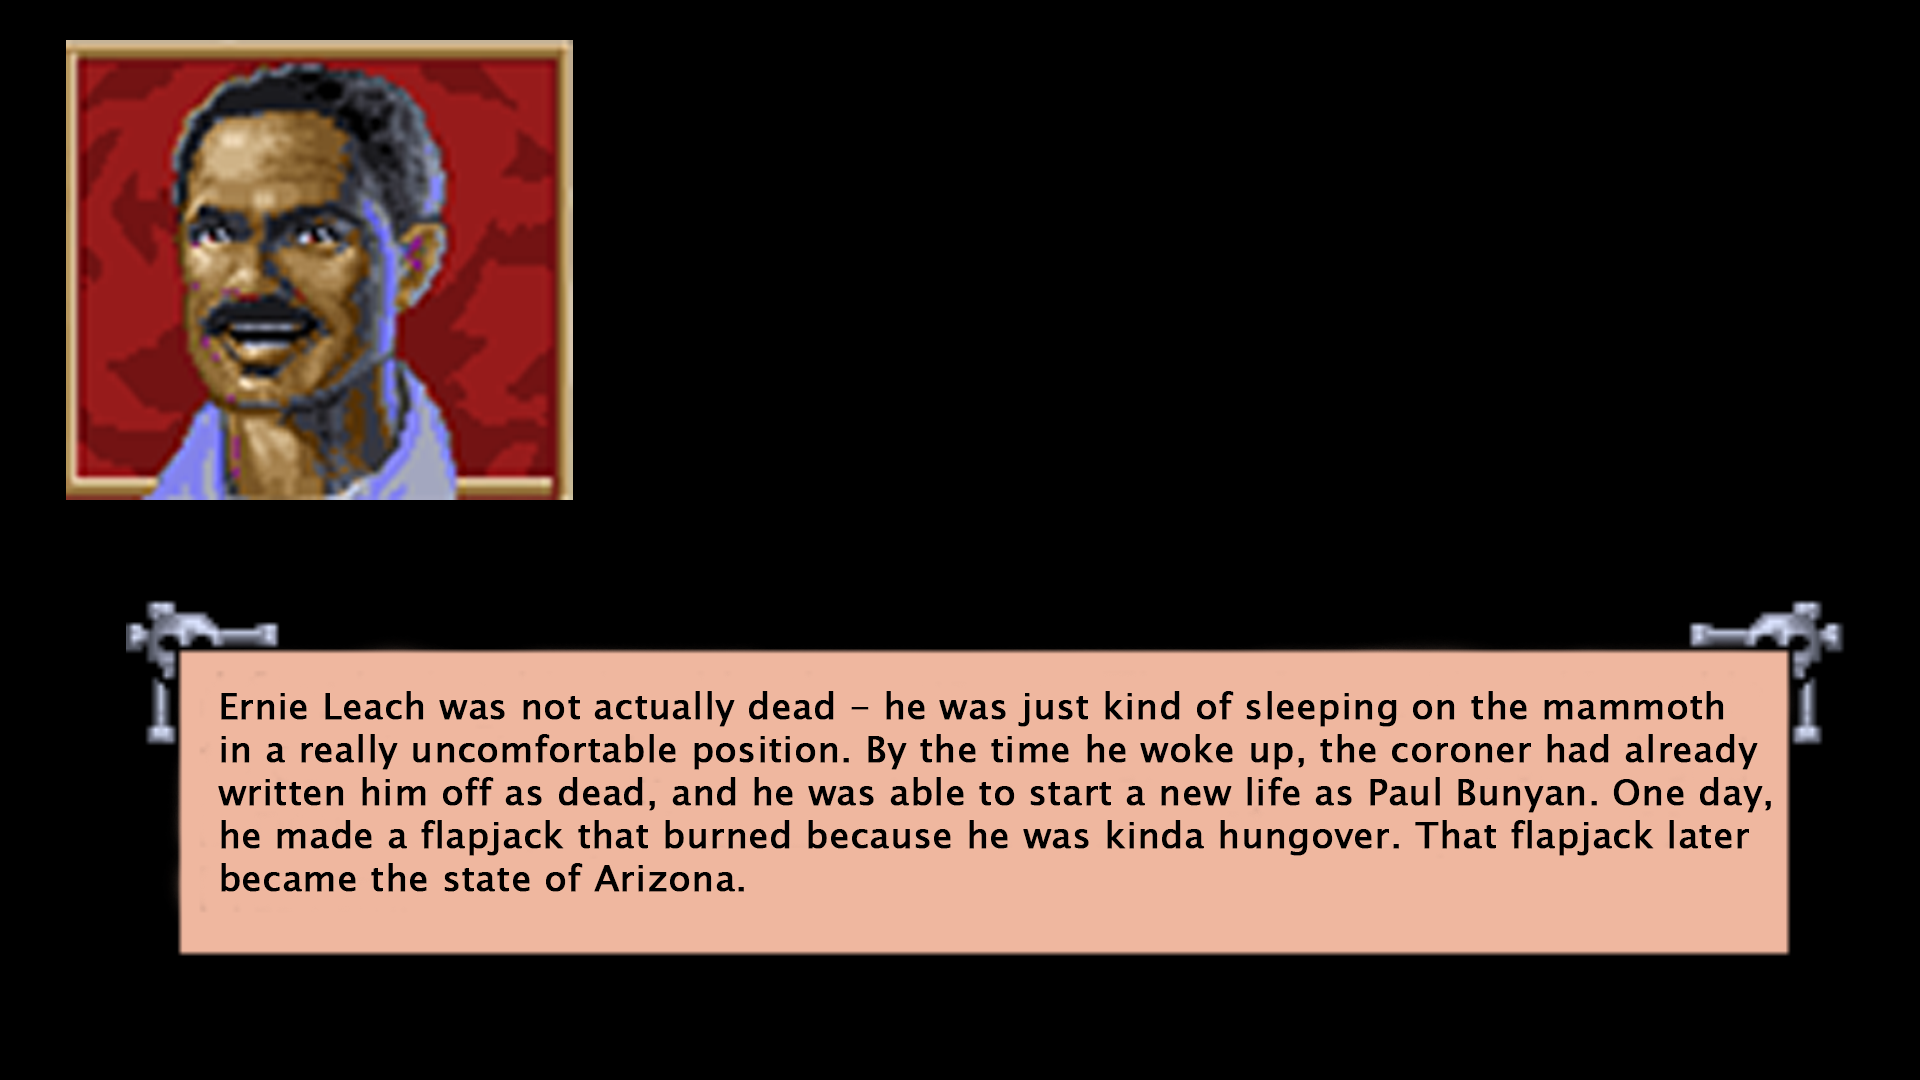
Okay, NOW I’m done. There’s also another romance scene between Laura and Steve I’m not going to show. I’d like to thank The Dark Id, whose LPs kind of pushed me over the edge into doing one of my own. I’d also like to thank all the people who read this - either as I was posting it or as a whole now that it’s done, because I really wasn’t expecting that anyone would. I apologize for screwing up the epilogue - at some point I’ll go back and record it, but I still think mine is better.
Thanks again for reading!
1 Like
Well done on the LP! Dagger of Amon Ra is a weird little game, with some very odd moments that can get pretty laughable (Especially if you’re listening to the full audio version). I think Laura’s painfully obvious eavesdropping is my favourite part. Definitely a step down from how we peeped on people in the Colonel’s Bequest!
I’m not sure if I should use a spoiler tag since the LP is now finished, but just in case: I agree that it’s a bit weird that basically every murder gets pinned on O’Riley. When I first saw this game I assumed it would be a tangled web of multiple murderers and it’s our job to untangle them. That seems like a task worthy of an intrepid reporter wouldn’t it? It seems a little too easy that O’Riley is the mastermind behind basically every bit of intrigue.
1 Like
I went back and recorded the epilogue, along with the very tail end of Act 5 and the entirety of Act 6 - I would’ve edited the earlier stuff out but there’s a kind of hilarious animation when you have the game on the fastest speed right after you rescue Steve from the coal bin.
https://www.youtube.com/watch?v=reTDicvfpz4
With that, this LP is now complete. @moderators can go ahead and put this in Completed LPs.