A Fine Dark Souls III to You [Finished]


We’ve finished the main game and it’s time to tackle the first of two DLCs (The second of which, at the time of writing this, has not come out yet). Traditonally the DLCs are considered the best parts of their games. And to some extent. Dark Souls III’s first DLC, Ashes of Ariandel, got a rather lukewarm reception, unfortunately. The most common complaint being that it’s too short. But I actually liked it and felt it was just the right length. Not the best part of the game but to me that speaks more for the quality of the main game than against that of the DLC. And since we’re starting the DLC I’ll go a bit over what each of the DLCs added to their respective games and what sets them apart, if anything. I won’t cover them all at once, though.

Crown of the Sunken King
As far as Dark Souls DLC areas go, this is my favorite. This might surprise those who know that Dark Souls II is by far the Souls game I like the least, one of my chief complaints being that the level design is lacking. But that is the part that Shulva gets right. From the very beginning it tries to establish that you can go anywhere in this vast looking area. You enter and immediately see a Ziggurat, which is your destination without a doubt. Since you’re standing there staring at the thing already you also look around a bit. Looking down into what might at first assumed to be a death pit you see creatures walking around. Even though it’s ultimately not that big of an area it gives you the impression of being huge.

You’re quickly introduced to this areas mild puzzle elements. Hit weird swith things and pillars get raised or lowered. They can damage enemies or create platforms for you to walk on. Some do both. This slight puzzling continues on once you enter the shrine, which is why some people compare it to a Zelda temple. By hitting switches you unlock an item needed for progression, some neat extras here and there as well as a bonfire.

In retrospect, the bosses weren’t THAT great, but a welcome breath of fresh air in Dark Souls II, as the game didn’t have an awful lot of monster bosses. They are still fun to fight, though. Elana likes to summon adds (one of which can be a previous boss) and can wreck your day with Pyromancies and Hexes. Sinh is a cool fight against a dragon that can actually go airborne, as opposed to Kalameet from the first game’s DLC. Then there was the co-op area but all the co-op Areas from Dark Souls II’s DLCs were shit and the boss for this one is just three NPCs that do NPC things and are very tedious to solo. I am still baffled that some people apparently liked this boss fight.


[details=Boss Name and Picture]Champion’s Gravetender

[/details]

And so we meet our first boss of the DLC. If you don’t know what this fight entails ahead of time it can be really tough. If you don’t it’s gonna be really simple. Compared to bosses of past games’ DLCs this one is comparatively easy. I believe this is due to the fact that this boss drops the Champion’s Bones, which you need to access the PvP arena.

At first glance this boss seems like it’s just a random NPC accompanied by a couple wolves. It’s wise to kill the wolves first. Then deal with the guy who acts exactly like a standard NPC. Or how a standard NPC would act with a unique Weapon. He uses the Valorheart, a Shield and Sword combo. As in, this one inventory item is both sword and shield. But all in all he’s just that: A regular NPC. He doesn’t even have all that much health for an NPC. That’s because the Champion’s Gravetender is only half the fight.

At about half health the Gravetender’s Greatwolf, which you can meet twice before this fight, joins the fray. For each of the two previous encounters you defeat the wolf at he’ll start with a little less health. If you didn’t focus down the Gravetender while the Wolf showed up you’ll now have to deal with two opponents, which is where this fight can get tough. In that case I recommend dealing with the Gravetender first. Because while the wolf has the same moveset as in the previous encounters at first, that’s just phase one.

Once the wolf heats up he becomes much more aggressive. Chaining dashes together more frequently and more times in a row. In addition to that he also gets an ice breath which, as long as you’re in the right spot at the time, allows you to get in a quick combo or two. It bears mentioning that he’s vulnerable during his howl he does to transition into the second phase and he CAN be stunned into a state where he can be visceral attacked. This may allow you to flat-out skip phase two. It’s my prefered way of dealing with this fight because Phase 2 of the Wolf is the hardest part of the fight by far.

After winning the fight we don’t get a Boss soul. Instead we just straight up get the Valorheart as well as the Champion’s Bones.

Thinking about it now I really think it would have been cool if they recycled the gimmick of the Old Monk from Demon’s Souls, where the Old Monk was actually another player with a Boss’ health bar. I think that’d be a really cool way to spice up this encounter somewhat.

Valorheart
Weapon once wielded by the Champion of the Undead Match. A special paired set consisting of a broad sword and a lion shield.
the champion fought on, without rest, until he lost his mind. In the end, only his page and a lone wolf stayed at his side.
Skill: Lion Stance - While in stance, use normal attack to thrust forward with shield up, and strong attack to execute a shield bash with a lion’s roar.

Champion’s Bones
The charred but warm bones of a champion.
Long ago, an Undead declared a fight. A fight to celebrate their undeath, and so to preserve what remained of their souls. So it was that the Undead Matches were born. The merit of an Undead is measured in deaths. Could there be a greater gift for such a creature, than a fight that has no end?
Note: Burning this at the Bonfire in Firelink Shrine lets us join a PvP arena. I actually recorded PvP footage including the Arena, but because the video I made with that footage also features parts of the DLC we haven’t seen yet I’m gonna post it once we’re done with the DLC


We’re gonna go to an interesting bit of the DLC today and below I’ll give you my thoughts on the rest of the DLCs, which were the best parts of their respective games.

Crown of the Iron King
After the first Dark Souls II DLC did so well Crown of the Iron King needed to live up to that. For me personally it didn’t, but I’ve heard quite a few people naming it as their own favorite. The area itself is very long and quite big. First we are working ourselves down Brume Tower, finding several Ashen Idols of a child of dark along the way. The challenges are relatively varied but I’m not that big of a fan of the areas itself. It’s a good jump up in difficulty from Crown of the Sunken King. At some points I felt that the enemies were too plentiful and what could have been an interesting part of the level became more tedious as a result.

For all my gripes with the level design, which I don’t really want to go into much further, it also falls a bit short in terms of two of its three bosses (if you want to count the blue Smelter Demon). I’ve gone on record saying that I don’t really like Fume Knight. I always found the fight kind of bland. Don’t get me wrong, it’s one of the hardest fights of the game, but I never really found the boss very interesting.

However, this DLC also has my favorite Boss Fights of Dark Souls II: Sir Alonne. It’s set up nicely, has cool music and feels very dynamic. It’s a shame the area leading up to him is a slog and not worth actually fighting through. Just running to the boss is basically the way to go. It is one of the co-op areas, Iron King having two of them, and all of them are very bad. However, it’s also the only co-op area with a unique boss (The others feature straight up NPCs, a palette swap, and two of another boss we already fought).

Crown of the Ivory King
This one takes us to the frozen over city of Eleum Loyce with a blizzard raging. At release a few people thought it was supposed to be Anor Londo. While that turned out to be false, considering that Irithyll is also a frozen city, it wasn’t too far off. The area itself is fairly straightforward, but pretty long. And that’s just the first run through it. Because unless you want to either fight an invisible first boss or a second boss with powerful adds you’ll have to go through it twice. The second time with the blizzard gone. This removes some of the chunks of ice that either hid paths or additional enemies. There’s several lenghty new paths that unlock at this point. As a result this DLC is definitely the longest. I might even say too long. But it also has a part where you roll a snowball down a mountain and it grows large enough to kill several enemies on a bridge and fill a gap within said bridge so you can cross it, unlocking a shortcut back to a place you don’t wanna go back to anyway (But you totally could).

The incentive for going through it all again and explore all the additional parts, of course, is to find Knights to assist you during the final boss of the DLC. Otherwise the fight would be you kiting up to four enemies. The idea being that you find the Knights who then sacrifice themselves to shut three portals that constantly spawn tough enemies with a fourth Knight (that is unlocked from the start) being there to help you out with the boss if they’re still alive. If you have all the Knights the actual boss will only come out once your Knights have either died or sealed the portals, which can take several minutes. The actual boss fight is actually cool but what comes before every single time you want to fight it is… meh.

Artorias of the Abyss
To many this is the holy grail of Dark Souls DLC. The area itself is solid and more Dark Souls, back when it came out there wasn’t much more to ask for besides that. We explore an area we’ve technically already seen in parts only now we’ve travelled to the past and it looks quite different. While the initial area is a pretty forest we soon see signs of the Abyss running wild and over the course of the DLC we go deeper and deeper until we eventually end up in the Chasm of the Abyss.

On the way there we have to fight what many find to be the best boss in the series: Artorias of the Abyss. While I disagree on the “best” part it’s definitely a great fight and I have to relearn it at least partially every time I play the game again, which is a good thing. The other three bosses aren’t bad either. The Sanctuary Guardian greets us right at the beginning of the DLC and with it’s aggressiveness is a sign of things to come. Manus is a larger but still very ferocious opponent while Kalameet slows it down a bit again but is still tough and feels like a climax of its own, despite being kind of a bonus fight.

The plot, funnily enough, is a mushroom telling us to save a princess. When I first played this I was half expecting there to be a reference to Bowser instead of Manus at the end.


This time we’ll explore most of what’s left of the Painted World of Ariandel. We’ll only be leaving the last boss for next time. The Bonus video will cover everything except any of the bosses. It once again features shibbotech and Skippy Granola. It’s that one session that was recorded before the last one was live, and the main reason that the flow of time is convoluted in this Let’s Play.

So what about them Painted Worlds
You might have noticed that the Painted World of Ariandel alludes to things we’ve seen in the Painted World of Ariamis in Dark Souls. You might now be wondering what the point of these painted worlds is why are they there? And why are there’s more than one of them. IS there even more than one or is it just one that went through a couple iterations like the outside world?

The latter is the most likely explanation as the painted world tries to draw parallels to the linking of fire and the ages of fire and dark. This comes complete with some embracing the rot, like the first corvian that we meet immediately after entering, and the ones that want it burned away, like the corvian in the settlement. The outside parallels to those would be the Hollows of Londor in favor of the Dark, as well as the Way of White who wants to link the Flame, perpetuating the the age of a fading flame. And while everyone has their opinion on this it is never made clear which of those options is better for humanity as a whole.

The painting always seems to have been a “place for the forlorn”. The Painted world of Ariamis appeared to be more of a glorified waste bin for people that have no place in the outside world for whatever reason, it was closely linked to Velka, Goddess of Sin. Some might see this as a sign that being sent to the painting was some form of punishment. But to my knowledge there’s nothing in the game that confirms that. The world of Ariandel seems more like a place to seek refuge by comparison. And apparently it can be left by its inhabitants, seeing as Sulyvahn was born in the painting. Whether this was because there was nothing forlorn about him or if anyone could just leave at any time is not clear either. In any case, the only people who know left are those who’ve been told they don’t belong in this place of belonging (our humble selves as well as Sulyvahn).

There’s still some dialogue we haven’t heard yet as well as a post credits stinger (I mean, there are no credits, but it’s a stinger for sure). And of course the boss. But we’ll be seeing all that next time.


And so we conclude the first DLC, Ashes of Ariandel. A long trek through a variety of snowy landscapes followed what I think is a really great boss fight. Let’s have a look at that as well as the items we can find in the DLC.

[details=Name and Picture of Boss]Sister Friede

[/details]

The first phase of this fight has Friede move very slowly, attacking more methodically. Once you figure out her moves she shouldn’t me much of a problem to you. She doesn’t have much health either. After all this is only the first phase of the fight.

Her attacks mostly consist of various swings with her scythe, which just requires you to learn how to dodge them properly. Additionaly she can also freeze the ground in a staright line in front of here followed by a leap attack. The ice creep will build up frostbite while you’re standing on it, and after a short time it will “explode” into icicles erupting from the ground. She can also summon ice creep in a cone shape in front of her. Her most recognizable attack sees her turning invisible and jumping around. She’ll often jump behind you so if you weren’t able to tell where she landed by listening for the sound of here landing or the dust settling afterward it’s worth a shot to just turn around. You’ll be able to see her again if you get close. Some people also recommend hitting her with throwing knives or arrows, which will still be visible after Friede turns invisible. If you don’t find her for too long she will attack you with a powerful scythe attack, which is probably her most dangerous attack.

It’s worth mentioning that, while she will flinch after being hit, she’ll just get hyper armor and attack you after a couple hits, so stunlocking her isn’t possible.

[details=Name and Picture of Boss]Sister Friede and Father Ariandel

[/details]

After Friede has been defeated she collapses and underneath her forms a pool of blood which extend all the way to Ariandel, who then goes nuts and just slams his bowl around (some people insist it’s the Lordvessel because if Souls Loresters are to be believed everything is somehow related to the Lordvessel, Velka and/or Lloyd). Ariandel sets fire to the place which somehow revives Friede as a Host of Embers, so now we have to deal with both of them.

Friede acts largely the same but is far less aggressive than before. She also has the ability to heal herself and Ariandel. Just hitting her interrupts it immediately. Ariandel is a whole new variable to the fight, though. He has a couple of combos with his bowl, where he’ll slam it on the ground repeatedly. Sometimes the third hit will be very explosive and deadly. Sometimes he just swings the thing as well. At a longer range he can also charge towards the player followed by an attack and breathe fire breath has a very long range, so long as you’re not in front of him you can get a couple really easy hits in on him that way.

Since Friede and Ariandel share a healthbar you can attack both to win the fight, but it’s much easier to focus on Ariandel. He’s bigger and easier to hit, he also has lower defenses and takes more damage from most attacks. When hit enough he’ll also collapse and you’ll be able to visceral attack him for probably the rest of their health bar. If you summoned Gael prior to the fight he will support you during this phase, but not the first. I don’t know exactly why this is the way it is but Gael is weird anyway, as you can summon him whether you are Embered or not. He also doesn’t count as a phantom, technically, meaning you could summon as many players as you like AND also bring Gael along. He also does not increase the bosses health.

[details=Name and Picture of Boss]Blackflame Friede

[/details]

This is a two-phase boss fight with a surprise third phase. Each phase gets its own health bar which pissed some people off, but it’s essential in order to make the third phase a surprise. I at least thought it was a cool moment to think I beath Friede and Ariandel only to have the real fight ahead of me still. This really is what put that fight over for me. It’s probably the hardest fight in the game. By now I can reliably solo her after a few tries. But the first time I was stumped here for a bit. In my NG+ Bonus run I took this to the extreme and took more tries than ever before for some reason despite already having beat the boss solo before. Of course, there’s also people who find this easy.

However, if you’re not one of those people you’re free to bring Gael along to help you out. I would recommend this over summoning players because players increase the defenses of Friede and she’ll take so many hits that it stops being funny.

She will always start the fight with her a Blackflame Explosion thing where she’ll jump up to come crashing down with black flames erupting from the ground with trails of more black flames moving from her along the floor. I recommend getting a feel for how close you can get without getting hurt because if you can get in close afterwards it’s a good chance to get in a hit or two. She’ll also do this attack throughout the fight.

While she has some moves that are similar to her first phase she has mostly new moves. Her combo got much longer. Once you’re able to read it and know which is the last hit you can dodge towards her to get in a hit. She has a really mean grab where she rushes towards you. If it connects she’ll straight up decapitate you with her scythe. You can, of course, survive this. But it’s best not to get hit by that. She also has a more minor grab. She’ll just hook you in with her scythe to follow with more attacks. She can still summon ice creep in a large cone in front of her, she usually won’t hesitate to attack you after doing it. She can also still turn invisible of course, only this time she’ll cause more ice creep in a straight line, jump away again and do it another time, then jump away again to follow with a homing black flame trail. Since it takes a while to charge that one it’s a good chance to get in a hit or two.

She has a lot of health, more than either of the other two phases so you should aim to conserve as much estus in the third phase. One trick that never occured to me when playing is also to just use an Ember after the second phase as a free one-time heal and slight health extension.

So, let’s have a look a the Dialogue that we can only get when being on our path to the Lord of Hollows ending.
Vilhelm will adress you as a Lord of Hollows, but otherwise his dialogue will be the same. Friede has a couple variations, though.

Meeting her for the first time:
“Lord of Hollows, I know not the missteps which led thee to this painted world. But they duty is all, and thy duty lieth elsewhere. Return from whence thouh cam’st.”

Giving the player the Chillbite Ring:
“Ahh yes, there is a thing thou shouldst by rights possess. A remembrance of this cold world, for the great Lord of Londor. May it help thee bear they duty.”

Opening the path to the boss fight:
“Be forewarned, eager Ash, Should this world wither and rot, Even then would Ariandel remain our home. Leave us be, Ashen One. Thou’rt the Lord of Londor, and have thine own subjects to guide.”

Dying to the boss:
“Return from whence thou cam’st. Yuria surely awaits thee.”

“Leave us be, Ashen One. Thou art the Lord of Londor and have thine our subjects to guide.”

Then there’s Yuria’s Dialogue which I actually showed in the video.
“Ahh, our Lord and Liege. Twas the soul of my sister. Elfriede…A poor wench turned to Ash, who would abandon Londor… If thou wouldst, let it nourish they Lordship. And in return, do her one small kindness. Remember those who stayed by her to the end, in the shadows cast by fire… And lastly, my Lord, take up thy rightful mantle, of usurper.”


Soul of Sister Friede
Soul of Sister Friede. One of the twisted souls, steeped in strength.
Use to aquire numerous souls, or transpose to extract its true strength.
Friede was the first Ash to enter the painting, but together with the good Father, they chose rot over fire.

Friede’s Great Scythe
A great scythe wielded by Sister Elfriede, with a curved blade thinly coated by Painted World frost that easily breaks the guard of shields.
In the painting, the scythe is a symbol of a long-lost home, possibly explaining Elfriede’s preference for it.
Skill: Elfriede’s Stance - Conjure a magic bladed support scythe into the left hand while the great scythe remains in the right, a stance derived from Elfriede’s former swordmanship. Use normal attack to leap forward and swing twice, or strong attack to coat the earth with running frost.

Rose of Ariandel
A flail used by the bulbous Father of the Painted World to shred his own skin, producing blood to appease the flame. Both a weapon and a miracle catalyst.
Ariandel, being the restorer of the Painted World, knew that it was painted with blood, and only blood could protect the secret.
Skill: Awakening - Violently flail oneself to trigger an awakening that temporarily boosts the strength of miracles, just as the good Father used the rose himself.

Ordained Set
Garb of Friede, Sister of the Painted World. A light blue dress sewn with thick fabric.
After renouncing everything, Friede discovered a people that she wished to protect, and assumed the precise form that they yearned for.

Chillbite Ring
One of the bite rings native to Carim. Increases frost resistance.
This ring would never grace Friede’s hand, for the painting and it’s frost became her home.

Champion’s Bones
The charred but warm bones of a champion.
Long ago, an Undead declared a fight. A fight to celebrate their undeath, and so to preserve what remained of their souls. So it was that the Undead Matches were born. The merit of an Undead is measured in deaths. Could there be a greater gift for such a creature, than a fight that has no end?

Valorheart
Weapon once wielded by the Champion of the Undead Match. A special paired set consisting of a broad sword and a lion shield.
The champion fought on, without rest, until he lost his mind. In the end, only his page and a lone wolf stayed at his side.
Skill: Lion Stance - While in stance, use normal attack to thrust forward with shield up, and strong attack to execute a shield bash with a lion’s roar.

Vilhelm’s Armor Set
The black Armor of Vilhelm, Knight of Londor, and a nice fit for any lean Hollow.
This hollow knight, who served the three sisters who founded the Sable Church, was particularly loyal to the eldest, and was known as a cold-blooded hangman.

Onyx Blade
Elfriede, the eldest amongst her sisters and leader of the Sable Church, bestowed this sword to her knight.
Only, the sword was a farewell gift, and acceptance signified the knight’s resignation from Elfriede’s service.
Skill: Elfriede’s Blackflame - Enwreath blade with blackflame, born of the similarly-hued flame that smolders within her.

Contraption Key
The key to the contraption leading to the attic of the archive found on the edge of the Corvian settlement.
After Sir Vilhelm led a white-haird woman to the attic of the library, he kept this key as if it were his life.

Slave Set
Armor Issued to slave knights. The fine craftsmanship made this a symbol of honor.
Long ago, only the Undead served as slave knights, warriors used as fodder in the bleakest of battles.
They grew decrepit, their skin charred black and their bones twisted. Eventually they went outright mad, but were never relieved from duty.

Millwood Armor Set
Armor worn by knights of Millwood. The charbronze breastplate and the thick black cape are adorned with the symbol of the Ethereal Oak.
When the fabled Millwood forest was discovered it was a vacant ruin. The only thing left was the Ethereal Oak, stood rotting. No corpses were discovered, yet their belongings lay neatly on the ground.

Millwood Battle Axe
Battle axe wielded by Millwood Knights. Its blade is blessed by the symbol of the Ethereal Oak
A hefty axe normally wielded by the mightiest of warriors.
Skill: Warcry - The unique warcry of the Millwood Knights entailed a leap straight toward the enemy and a fearsome roar.

Earth Seeker]
This large twin-bladed axe forged with bronze is a ceremonial weapon normally used in sacred rites.
Millwood is a land of primitive earth worship where chieftain knights served as high priests.
Skill: Earthen Wrath - Thrust weapon into earth with a prayer to trigger explosive tremors.

Quakestone Hammer
A Stonehammer wielded by the Millwood Knights, with a head of naturally-formed stone.
The Knights of Millwood would fight hand-in-hand with the earth itself, and this weapon, among the oldest in Millwood, is symbolic of that relationship.
Skill: Quake - Burrow hammer head into the ground with a great slam, and use strong attack to upheave earth, creating a shockwave that rumbles like a mighty warcry.

Millwood Greatbow
Greatbow crafted with black oak and wielded by Millwood Knights. Only specialized great arrows can be fired from the bow.
It is said that the Millwood Knights used these to face their sworn enemy, the Abyss Dragon.
Skill: Pierce Earth - Fire a greatarrow with a burst of strength and a prayer that violently shakes its target and explodes on impact.

Millwood Greatarrow
Heavy, sturdy greatarrows made of black oak that deal heavy damage but have limited range.
Can only be fired using a greatbow.
It is said that the Millwood Knights used these to face their sworn enemy, the Abyss Dragon.

Ethereal Oak Shield
Charbronze shield used by Millwood Knights that slowly regenerates HP.
This shield appears to be blessed by a great, if faded, image of the ethereal oak.
Skill: Weapon Skill - Equipping this shield in the left hand allows one to perform the Skill of the right hand weapon.

Captain’s Ashes
Umbral Ash of the Captain of the Millwood Knights. With this, the shrine handmaiden will prepare new items.
Long ago, when the Millwood Knights lost the forest they called home, they began a journey so long that even thoughts of their sworn enemy washed away, replaced by a vision of a cold and brittle wood.

Crow Quills
Thrusting sword wielded by Corvian Knights, and a special paired weapon. When twin-handed, brandish four thin-edge blades in the left hand.
In their infatuation with Sister Friede, the Corvian Knights swore to protect the painting from fire, and to this end, took to the execution of their own brethren.
Skill: Quill Dart - Simultaneously throw temporarily substantial illusions of the four thin-edged blades wielded in the left hand.

Crow Talons
Talons used by Corvian Knights. Inflicts five perpendicular slashes, causing heavy bleeding.
In their infatuation with Sister Friede, the Corvian Knights swore to protect the painting from fire and to this end, too to the execution of their own brethren.
Skill: Raptor Flurry - Spread right and left talons like a broad set of wings and launch into a tornado of consecutive attacks.

Follower Armor Set
Armor worn by the Farron Followers.
When a warrior of Farron fell to the Abyss, the tall, lean Followers, with their hollowed eyes, quiety appeared in groups to hunt them down.
Farron and its Watchers fell to ruin, but the Followers survived as a wandering pack of Hollows.

Follower Sabre
Great curved sword wielded by Farron Followers. Its great weight enables heavy-handed chain attacks.
The Followers brandish their swords to hunt warriors taken by the Abyss. Their technique is honed to face men, implying those yet to lose their human aspect are their likeliest prey.
Skill: Prying Wedge - A chain attack that wedges below foes and swings upward, breaking their guard. Strong attack can be used to follow up the onslaught with a fatal blow.

Follower Javelin
Light spear wielded by the Farron Followers. Balanced to allow for throwing.
The Followers attack in groups, surrounding foes, shielding themselves, and thrusting their spears at their foes. On a final command, they hurt their spears at their fallen foe, to give the retired warrior an honorable send-off.
Skill: Hurl Spear - Emulate the practice of the Followers by throwing an illusory spear that assumes temporary form.

Follower Torch
An offensive torch used by the Farron Followers. Provides light and doubles as a weapon
Some forms of the Abyss manifest as pus within the body, treated from ancient times with fire.
Skill: Breathe Fire - Spit a combustible fuel across the torch to breathe flame in a front-sweeping motion.

Follower Shield
Standard shield used by the Farron Followers. Crafted with wood and reinforced with metal.
Imbued with a faint resistance to the Abyss.
Skill: Weapon Skill - Equipping this shield in the left hand allows one to perform the Skill of the right hand weapon.

Parting Flame
The pyromancy flame of Livid Pyromancer Dunnel that attracts the echoes of the death.
When Dunnel lost his hideous spouse, he gave his own pyromancy flame as an offering, which transformed into a parting flame. Not long after, Dunnel became a mad spirit, cursed to wander the lands.
Skill: Parting Flame - Release store of death echoes to gain a modest dose of Estus.

Floating Chaos
Pyromancer Dunnel was fascinated by this ceremonial art employed by the clerics of the Smouldering Lake.
Summons a fire-spitting chaos orb.
Chaos burns away in the blink of an eye, but was the primordial life born in the Bed of Chaos, and a grievous symbol of Izalith’s sin.

Frozen Weapon
One of the spells left behind by the young sorcerer Sulyvahn before leaving the Painted World. Imbues right-hand weapon with frost.
Sulyvahn was born and raised inside the painting yet had little use for his frigid homeland, since he had not yet experienced loss.

Snap Freeze
One of the spells left behind by the young sorcerer Sulyvahn before leaving the Painted World. Creates a cloud of near-freezing mist.
Sulyvahn was born and raised inside the painting, yet had little use for his frigid homeland, since he had not yet experienced loss.

Way of White Corona
A lost Way of White miracle. Launches a white discus which slices into foes and returns to its conjurer.
Long ago, when the imprints left by the gods were still deep, miracles of the Way of White existed alongside aureoles.
Those who yearned for the long-lost aureoles fully believed that they would return, one day.


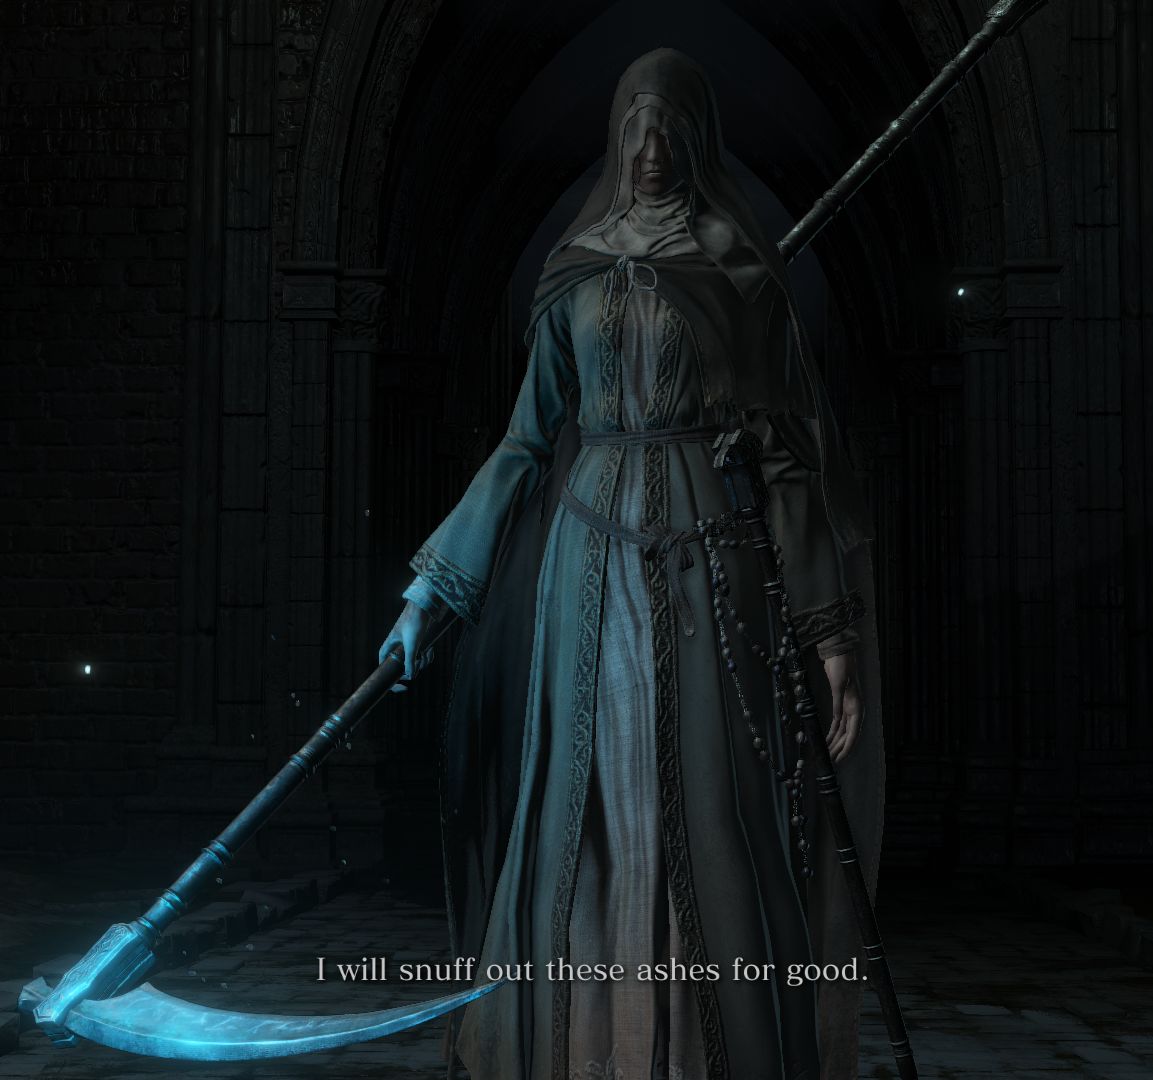
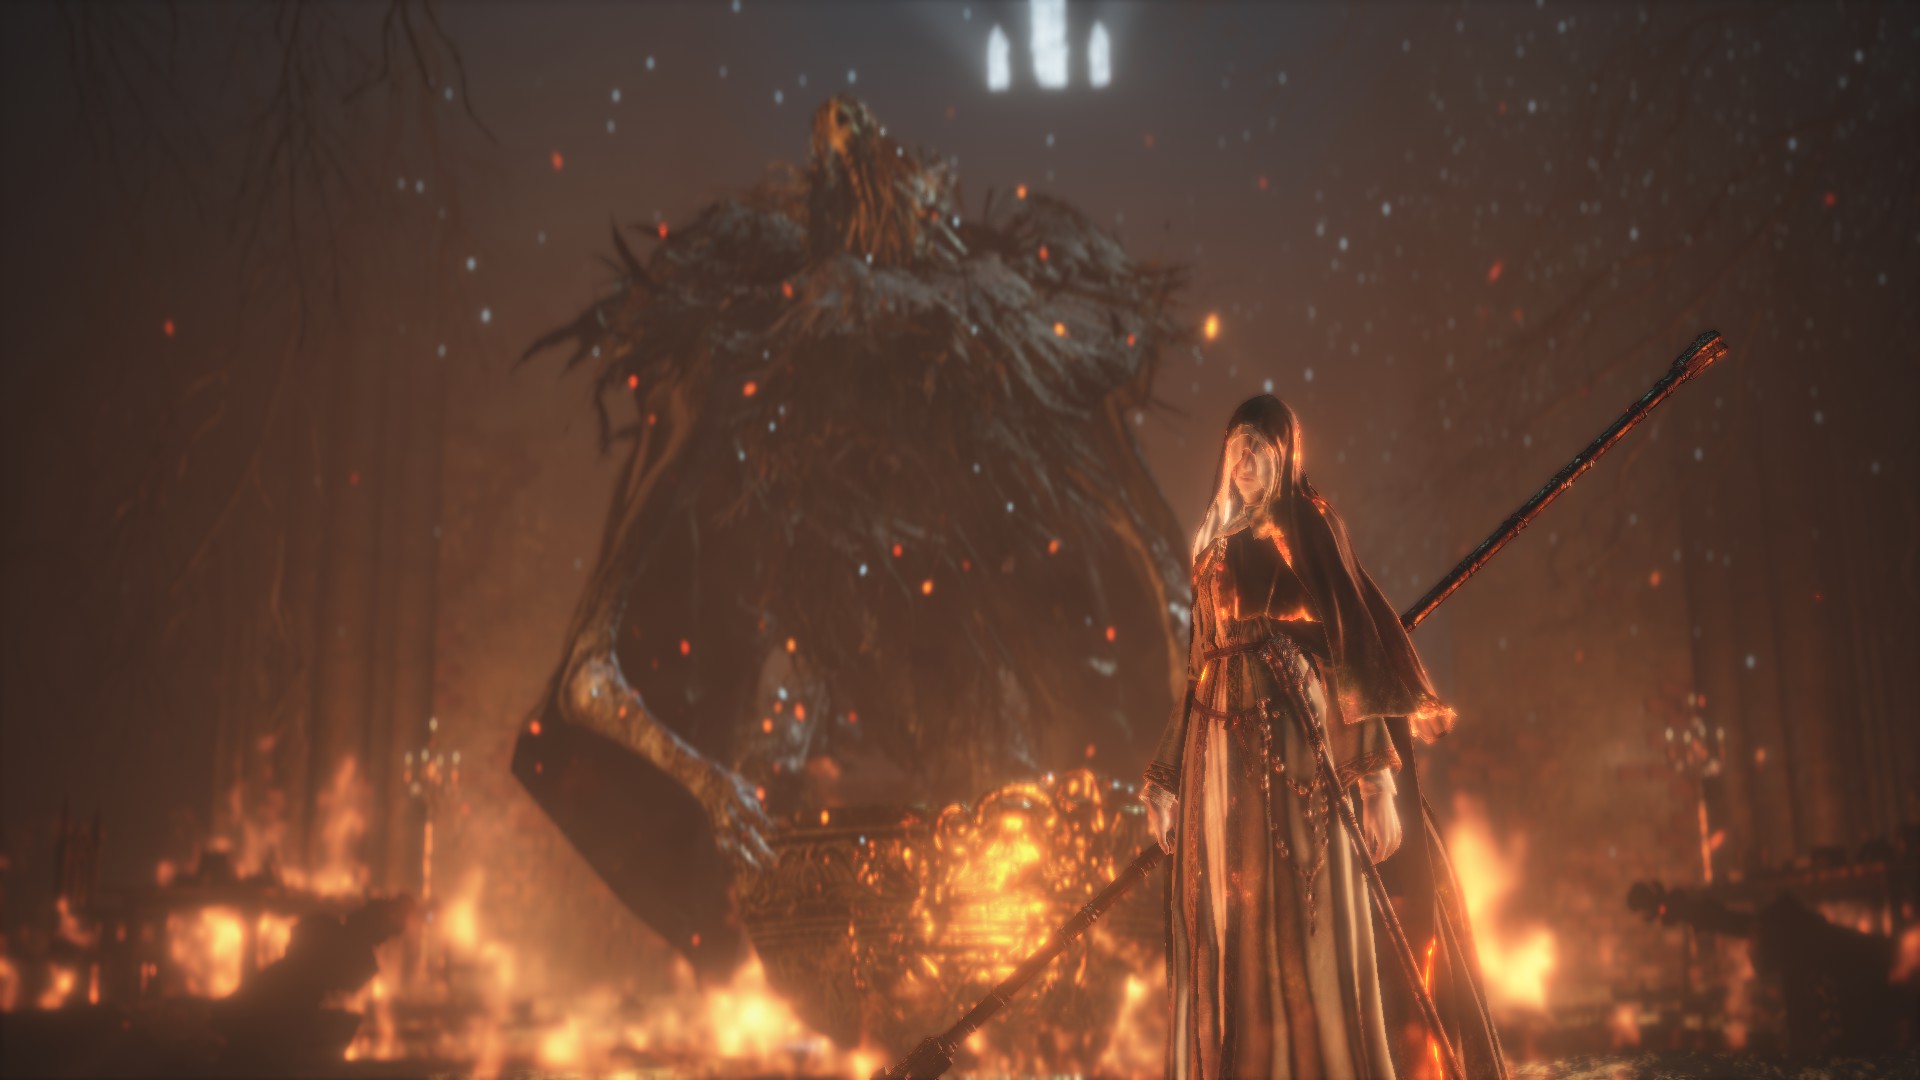
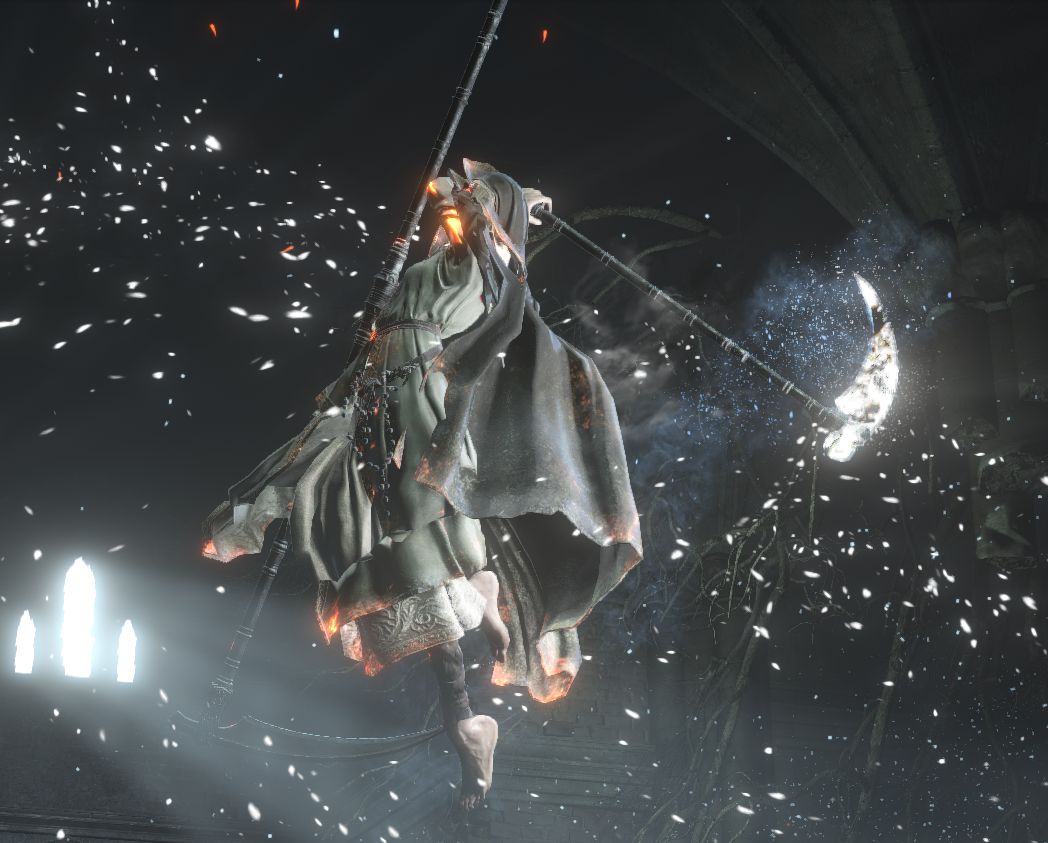
I know last time I said we’d only get filler this update but you’re getting that filler in addition to the proper update. Which I guess means it’s no filler anymore, but bonus content. Isn’t this great?

Covenants
I sometimes mentioned the covenants but I usually forgot all about rewards for leveling up the covenants. While I’m not willing to show every covenant I’ll at the very least be going into what makes each covenant unique (or not unique) here.

Way of Blue
Obtained from Emma in the High wall of Lothric
"Pale blue sheepskin parchment detailing the moon of an ancient accord. Equip to pledge oneself to the Way of Blue. Members of the Way of Blue are the beneficiaries of an ancient accord. When a dark spirit threatens them, a blue spirit will grant them assistance, and help root out the invader. Summoning takes place automatically while this is equipped."

The Way of Blue is a covenant that will automatically summon a blue, friendly, phantom if you get invaded. These phantoms can either be Blue Sentinels or Blades of the Darkmoon. I reckon this covenant is primarily used by people who want to stay embered but still go solo but ALSO don’t engage in PvP. I mean, alternatively they could play offline. I’m not saying this is the only group of people who uses it, but I think you can see that the amount of people who would have this covenant equipped probably isn’t too high and as such it can take a while to get summoned as a helper for members of the Way of blue (though it did happen to me three times in one session, as shown in the PvP video). Another problem is that this covenant doesn’t yield any rewards, however minor. Aside from potentially having a helper when invaded. But I believe a bit more incentive to run around with the Way of Blue on would go a long way.

Blue Sentinels / Blades of the Darkmoon
Obtained from Anri when talking to her during the first encounter in the Road of Sacrifices
Blue Sentinels:
“Faded sheepskin parchment depicting the Darkmoon and a sword. Equip to pledge oneself to the Blue Sentinels covenant.
When a member of the Way of Blue is threatened by a dark spirit, the Blue Sentinels, in compliance with an ancient accord, assume the form of blue spirits, and help to root out the leader.
Summoning takes place automatically while this is equipped.”

Obtained from Yorshka in Anor Londo after requesting to join the covenant.
Blades of the Darkmoon
"A silver pendant depicting the Darkmoon and a sword, the crest of the Darkmoon Knights, the original Blue Sentinels. Equip to pledge oneself to the Blade of the Darkmoon covenant.
When a member of the Way of Blue faces a dark spirit, the Blades of the Darkmoon, by an ancient accord, help to root out the invader. Summoning takes place automatically when equipped."

The Blue Sentinels and the Blades of the Darkmoon are functionally identical. They share ranks and rewards. Basically, they are two items to access the same covenant. For the sake of simplicity I’m going to refer to the two as “bluecops”. Bluecops are the counter part to the way of blue as they are the ones being summoned when a member of the Way of Blue gets invaded. Your goal as a bluecop is to kill the invader. Once successful you will receive a proof of a concord kept.

Proof of a Concord Kept:
“Blood-drained, shrunken ear. Souvenir taken for subduing the guilty.
The knights called the Blades of the Darkmoon punish the guilt-soaked offenders of the Gods and take this proof of their conquest. The earless corpses of the guilty will be left behind as a warning to others, inspiring both fear and respect for the Gods. Such is the eternal mandate of the Dark Sun.”

When defeating an Aldrich Faithful there’s also a chance of receiving a Proof of a Concord Well Kept, which counts as two Proofs of a Concord Kept. I havent found any conclusive info that this only happens when being a Blade of the Darkmoon rather than a Blue Sentinel. Given that the two are identical otherwise I doubt it, but it’s possible.

Proof of a Concord Well Kept: “Distinguished proof that one has hunted the enemies of the gods, as per the ancient accord with the Way of Blue.
The layered ear of a dark spirit is the mark of a particularly guilty offender, one who has flagrantly violated one god or another.
Use to acquire two Proofs of a Concord Kept.”
.

You get rewards for offering a total of 10 and 30 Proofs of a Concord Kept to Yorshka.

Darkmoon Ring (For 10 Proofs of a Condord Kept)
Dark Souls III: “Ring of the moon deity Gwyndolin, youngest son of Gwyn, the First Lord.
Adds many slots for attunement.
Gwyndolin, also known as the Dark Sun, commands the Darkmoon Knights, and bestows this ring upon the best of them.”

Dark Souls (as Darkmoon Seance Ring): “This ring is granted to adherents ofGwyndolin, Darkmoon deity andlast born of Gwyn, Lord of Sunlight. Grants additional magic and attunement slots.
The Dark Sun Gwyndolin is the only remaining deity in Anor Londo. His followers are few, but their tasks are of vital importance.”

Darkmoon Blade (For 30 Proofs of a Concord Kept)
Dark Souls III: “Miracle of those who devoted themselves to the Darkmoon covenant.
Reinforces right weapon with Darkmoon light.
Miracles of the Darkmoon are tales of revenge, but Captain Yorshka recites only for the sake of remembering her brother, with out knowledge of its meaning.
Perhaps this is better, as revenge is better left to the Blades.”

Dark Souls: "Miracle granted to those bound by covenant to Gwyndolin, Lord Gwyn’s lastborn. Boost right weapon with rays of Darkmoon.
The power of the rays of the Darkmoon are manifested in vengeance, and the deeper the animus, the more devastating the attack.

Warriors of Sunlight
Obtained from the Room with the Estus Soup in the Undead Settlement
"An ancient talisman depicting a holy symbol bestowed upon the Warriors of Sunlight. Equip to pledge oneself to the Warrior of Sunlight covenant.
Warriors of Sunlight are brilliantly beaming co-operators who place their golden signatures to help those in need, for it is their duty to deliver a great conquest to their summoner."

The Warriors of Sunlight, or Sunbros, as they are often called, are players that are being summoned as co-op phantoms. Their summon signs are orange instead of the usual white. The same applies to the tint on their phantom when summoned. Upon successfully aiding a host to kill a boss will grant them a Sunlight Medal as a reward.

Sunlight Medal
Dark Souls III: “A medal received by members of the Warrior of Sunlight covenant for victory over the final foe when summoned. The summoner also gains the same medal.
The medal, engraved with the holy symbol of the sun, is slightly warm and reminds one of the great honor of a shared victory.”

Dark Souls II: “A medal depicting the sun. Offer it to the altar to strengthen bond with your covenant.
The slight warmth of the medal makes valor brim within one’s bosom. The brave fighters who bore these medals are gone, but the sun never sets. On this day begins the contest to find the Sun’s truest son.”

Dark Souls: “This faintly warm medal, engraved with the symbol of the Sun, is the ultimate honour, awarded to show those who summon the Warrior of Sunlight and complete a goal.
The symbol represents Lord Gwyn’s firstborn, who lost his deity status and was expunged from the annals. But the old God of War still watches closely over his warriors.”

Additionally you can use a Red Eye Orb or the Red Sign Soap Stone to invade as an orange tinted red phantom. This will allow you to get Sunlight Medals by doing PvP instead of co-op. Invading in such a way is also supposed to priortize being matched against a host that has already been invaded. To engage in jolly co-operation with the other invader, so to speak, to keep in spirit with the covenants original purpose of, y’know, co-operating with others to achieve a common goal. Even if that goal is murder. Rewards are awarded after 10 and 30 Sunlight Medals are offered to the broken statue in Lothric Castle.

Sacred Oath: (For 10 Sunlight Medals)
Dark Souls III: “Miracle of those chosen by the Sunlight covenant.
Temporarily boosts attack and damage absorption for self and those in vicinity.
This is the tale of the Sun’s firstborn, his faithful first knight, and the brave dragonslayer who served them both.”

Dark Souls II: “An ancient miracle said to have been devised by warriors who once served the God of Sun.
Provides a temporary boost to the attack and defense of its caster and all nearby allies.”

Great Lightning Spear: (For 30 Sunlight Medals)
Dark Souls III: “Primal account of Lightning Spear, which tells of an ancestral dragonslayer.
Hurls a giant lightning spear.
Gwyn, the First Lord, slew dragons with his sunlight spear, a tradition upheld by his firstborn and the greatspear he wielded.
Much of this resplendent tale of father and son, while epic, remains tragically untold.”

Dark Souls II: “A miracle that launches a great spear of lightning.
Said to be the legacy of an ancient clan whose leader was revered as the God of Sun.
The name of the clan has been lost to time, but the gross incandescence of our magnificent father shall never wane.”

Dark Souls: “Miracle passed down by those bound to the Warrior of Sunlight covenant. Hurl giant lightning spear.
The weapon of the God of War, who inherited the sunlight of Lord Gwyn, but had respect only for arms, and nothing else.”

Mound Makers
Acquired from Hodrick in the Pit of Hollows in the Undead Settlement
"A malformed vertebra found by the mad, with a queer symbol on its inside, proof of the shackles of the Gods. Equip to pledge oneself to the Mound-makers covenant.
The mound-makers wish only to add to their mounds, becoming mad spirits whether summoned as co-operators or invaders.
They are blithe to those around them, for in their minds, any kill might lead to another shackle."

This covenant is for people who don’t give a shit. It’s my favorite covenant to invade people as. Not only is the purple glow you get as a phantom really pretty you can also do whatever you want. I mean, kinda. Your goal still is to kill people. But who you kill is up to you. You can win instantly by killing the host OR you could kill a certain number of phantoms (equal to the number of phantoms already in the world, but at least one). Once the mission is accomplished you get a Vertrebra Shackle.

Vertebra Shackle
"A special bone collected by members of the covenant of Mound-makers, discovered in the corpses of their victims.
Only one such bone is found in the vertebrae, and the Mound-makers believe it to be a shackle of the gods. In their minds, each victim is another connection, an addition to the family."

Whether a Mound Maker uses the Red Eye Orb to invade or the White Sign Soap Stone to be summoned, they always function the same. Aid your host, stab them in the back or overtly attack them right from the start. There are two ways in which I think you could improve the covenant: First, I think it’d be nice if you got something for helping the host reach or defeat the boss. The other thing would be to get Mound Makers the DX crotch chop as a unique gesture that autoplays every time they accomplish teir goal. (Of course the gesture should also be available to use as pleased). You rank the covenant up for offering Vertebra Shackles to the freaky skull altar in the Pit of Hollows. Here’s the rewards you get for your shenanigans:

Bloodlust (For 10 Vertebra Shackles)
“Katana of the old Mound-maker.
The Mound-maker piled sacrifices upon the altar, but became the final offering himself, leaving this katana as a gift for his dear family.
Skill: Bloodlust - Stain blade with one’s own blood to temporarily grant uncanny sharpness. For one driven by bloodlust, nothing deserves to remain standing.”

Warmth (For 30 Vertebra Shackles)
Dark Souls III: “Peculiar pyromancy of the Mound-makers. Creates a gentle flame that restores HP on touch.
They feared separation from the gods and sought a familial bond, perhaps leading to the creation of this flame of harmony.”

Dark Souls II: “One of the lost pyromancies preserved only in the Undead Crypt. Creates a gentle, warm flame that heals those who touch it.
Fire can be a show of strength, but it is also a symbol of wisdom and comfort. Fire is what the caster wishes it be.”

Rosaria’s Fingers
By asking to join the Covenant when kneeling in front of Rosaria in the Cathedral of the Deep
"Sacred seal of Archdeacon Klimt, who served Rosaria, Mother of Rebirth. Equip to pledge oneself to the Rosaria’s Fingers covenant.
Rosaria’s Fingers collect tongues in her name. Some do it to be reborn; others do it to help comfort their voiceless goddess."

This is the basic PvP covenant. You a Red Eye Orb or a Red Sign Soapstone to invade as a red phantom to kill the host. You don’t need to join Rosaria’s Fingers to earn the Pale Tongues, which act as covenant items, only to hand them in.

Pale Tongue
"Proof of a red orb invader’s victory over a Host of Embers.
Claiming tongues as trophies was originally the practice of an infamous troupe of invaders, who offered them to their speechless goddess."

That’s basically it. Invade hosts, kill them, enjoy their tears. Especially if they add you as a friend just to invide you to a steam group with some passive aggressive name to “own” you. Because apparently that’s a thing 14 year olds do these days. Ah, how I wish I was still young… but don’t forget to give Rosaria your tongues to get your rewards.

Obscuring Ring (For 10 Pale Tongues)
“Ring bestowed upon the Fingers of Rosaria, invaders who seek tongues for their goddess.
Hides the presence of the wearer when far away.
It is said that Rosaria, the mother of rebirth, was robbed of her tongue by her firstborn, and has been waiting for their return ever since.”

Man-Grub’s Staff (For 30 Pale Tongues)
“taff of the man-grubs who guard Rosaria’s Bed Chamber. Their holy symbol is formed at the tip. Wielder’s luck strengthens effects of sorceries.
The man-grubs have clearly been reborn, but as what?
Skill: Steady Chant - Boost the strength of sorceries for a very short period. Works while equipped in either hand.”

Watchdogs of Farron
By requesting to join at the Greatwolf of Farron in Farron Keep.
“Ancient medallion depicting the crest of a wolf. Symbolizes the pact with the Old Wolf of Farron. Equip to pledge oneself to the Watchdogs of Farron.
The Watchdogs ensure that the warriors sleep in serenity, by taking the form of loyal spirits and hunting down those who would trespass the woods of Farron.
Summoning takes place automatically while this is equipped.”

The Watchdogs of Farron are an area centric covenant. And they get a rather large playground that covers the entirety of the Crucifiction Woods and Farron Keep. You’ll be summoned into the worlds of people progressing through the area and your job is to prevent them from doing so by killing them dead. Don’t turn your back on the wolf pack. You might wind up in a body bag. If you actually kill a host you get a Wolf’s Blood Swordgrass which you can turn in at the Greatwolf of Farron.

Wolf’s Blood Swordgrass
"A leaf signifying duty fulfilled by the Watchdogs of Farron, who stand beside the old wolf to ensure serenity to those at rest. Depicts a swordgrass leaf stained with dried blood.
Long ago, the swordgrass leaf quietly identified members of the Undead Legion. In the rotted forest rest the spirits of warriors past, their acceptance and gratitude toward their guardians is expressed eloquently by the humble leaf."

While it’s never happened to me hosts apparently don’t need to be embered to be a target for an invasion. You also don’t necessarily need to be in the Crucifiction woods or Farron Keep to invade someone as a Watchdog, but you’ll always invade someone currently going through those areas no matter where you were at the time your invasion happened. As usual you get rewards at 10 and 30 Swordgrasses offered.

Olf Wolf Curved Sword (For 10 Wolf’s Blood Swordgrasses)
“Curved sword bearing the soul of the old wolf that stays with the Watchdogs of Farron.
This sword, like a wolf on the prowl, boosts attack and restores HP with each consecutive hit.
Skill: Wolf Leap - Slice into foes with a large spinning motion, then leap out of harm’s way and follow through with a strong attack.”

Wolf Knight Greatshield (For 30 Wolf’s Knight Swordgrasses)
Dark Souls III:
“Greatshield of a knight tainted by the dark of the Abyss, and master of the wolf’s blood of Farron.
Boasts consistent defense and divine protection against various status effects.
Skill: Weapon Skill - Equipping this shield in the left hand allows one to perform the Skill of the right hand weapon.”

Dark Souls (as Greatshield of Artorias):
“Shield born from the soul of the great grey wolf Sif, guardian of the grave of the Abysswalker Knight Artorias.
Boasts consistent defense and divine protection against various status effects.”

Dark Souls (as Cleansing Greatshield):
“The steel greatshield used by the Knight who succumbed to the Abyss.
Artorias, deeply scarred by the abyss, used this to form a barrier to protect his compatriot Sif. Although this drained the shield, its magic defense remains high.”

Wolf Ring (For 30 Wolf’s Knight Swordgrasses)
Dark Souls III:
“Ring associated with Abysswalker Artorias, one of the Four Knights of Gwyn, the First Lord.
Increases poise.
Artorias had an unbendable will of steel, and was unmatched with a greatsword.”

Dark Souls:
“One of the special rings granted to the four knights of Gwyn. The wolf ring belongs to Artorias the Abysswalker. Artorias had an unbendable will of steel, and was unmatched with a greatsword.”

Aldrich Faithful
By requesting to join at the corpse of Archdeacon McDonnel in the room with the two Pontiff Beasts in Anor Londo
"The holy symbol of the Cathedral of the Deep, and crest of those who see beyond fire to the age of deep waters. Equip to pledge onself to the Aldrich Faithful covenant.
The faithful ensure that Aldrich, Devourer of Gods, remains undisturbed, by taking the form of loyal spirits and hunting down those who would trespass the ruined cathedral.
Summoning takes place automatically while this is equipped."

Another one of those covenants that center around an area. In this case it’s the Anor Londo part of Irithyll. Basically everything after Pontiff. It’s essentially the same as the Watchdogs of Farron except for a different area, really. They even have the same color as a phantom (blue with a reddish tint). For successfully killing a host you’ll get a Human Dreg.

Human Dreg
"Proof of a duty fulfilled by the Aldrich Faithful, who patiently await the Devourer of Gods’ return.
Dregs are the heaviest things within the human body, and will sink to the lowest depths imaginable"

Much like the other auto-summon/invade covenants the covenant symbol in the upper left of the screen will flash white whenever you are eligible to be summoned. You don’t need to be in the area you’re supposed to be defending but there’s certain areas where PvP is disabled (mostly boss rooms) and you can’t just hang out there hoping to be summoned. Like all the other covenants the breaking points are 10 and 30. Once you’ve given enough Human Dregs to MdDonnels corpse you’ll get the following rewards.

Great Deep Souls
"Sorcery which improves upon Deep Soul. Fires powerful darkened soul dregs
Archdeacon McDonnell, a sorcerer himself, delighted in the cathedral’s stagnating souls. For him, they represented the glorious bedrock of this world."

Archdeacon’s Great Staff
"Large staff bestowed upon Archdeacons of the Cathedral of the Deep.
The Archdeacon McDonnell’s trespass, the sin of channeling faith for sorcery, transformed what was once merely a symbol of ecclesiastic authority into a catalyst of sorceries.
Skill: Steady Chant - Boost the strength of sorceries for a very short period. Works while equipped in either hand."

Those are all the covenants of the base game. There’s one more in the Ringed City DLC and I’ll be covering that once we get there.


Let’s go on through the Dreg Heap and meet our first boss of this DLC. I began showing some of the item descriptions on screen as we pick up items, though. They might not be on screen for long enough to read sometimes, if this is the case you may either have to speed up your reading or I cut it off because there was a part I didn’t want obstructed or something.

Some extra info on the Lapp Questline: If you don’t find the treasure in the swamp (a Titanite Slab, though, some also say it’s the Ring of Favor +3) he will actually go and find it for you. I don’t know what exactly triggers it but it’s worth mentioning that our little buddy, true to his word, actually will go and fetch it for us. Though, he’ll only get the Titanite Slab for you, which might mean the Ring of Favor doesn’t matter after all.

[details=Name and Picture of Boss]Demon Prince

[/details]

This fight has a really interesting dynamic. While both the Demon from Below and the Demon in Pain do basically the same things they both have a powered up, and a powered down state they can be in. Powered up they are very aggressive and melee centered while a powered down demon will hang back a bit and use ranged attacks. Most annoyingly, they can toxic you.

The fight will begin with the Demon from Below powering up immediately, while the Demon in Pain will stay depowered for a few seconds. Once the Demon in Pain also powers up the one from Below will eventually perform an attack where he smashes his fists into the ground, causing a small explosion. This Powers that demon down. They will continue powering up and down and for the most part only one of them will be powered up. It’s best to attack that one as the weakened one’s attacks are easier to avoid while fighting the strong one because their ranged attacks can usually be avoided by moving around.

Generally, when fighting a powered up demon, it’s a good idea to wait for one of their attacks and then dodge under them. Meanwhile, should you decide to focus on the weakened one, you really need to pay attention to the other one as it’ll just come in at you while you try get some hits in.

Once you manage to kill one the other one can be dealt with much more easily. But which one you defeat last will determine the boss’ moveset in phase two, when the last demon will revive as the Demon Prince.

The Demon Prince has mostly the same attacks as the two demons, however they are a bit souped up, often have an AoE or a tail of fire going along the ground. Additionally he gets aerial moves. One has him form a fireball before flying up to throw it down. He can also perform a swooping attack. I found both of those are fairly easily dodgeable if you go towards the Demon Prince and dodge for good measure.

There’s also a grab. Nothing too fancy, just picks you up and throws you around.

The following moves, or rather sequence of moves, depend on which demon you killed last. If it was the Demon in Pain he will summon two floating fireballs that will continuously launch smaller fireballs at you. Shortly after the demon itself will fly away to gain distance and breathe fire into the air to create a large ball, once complete a meteor shower will rain down. The moments prior to this are great for getting some hits in, but as soon as the meteors start falling it’s best to keep moving until it all blows over.

If the demon killed last was the Demon from Below the Demon Prince gets some sweet Lasers to work with. He begins by flaying away and charging up briefly. It’s best to rush towards him as quickly as possible. If you can manage to get close fast enough you can get a lot of damage in and potential stun him for a visceral attack. He will follow up with an explosive laser burst that goes straight forward, but deals AoE damage all around the demon. So best gain some distance when he does that.


Soul of the Demon Prince
The demons, birthed from a common Chaos, share almost everything between them, even the pride of their prince, and his nearly-faded flame.
So that the last demon standing may rekindle it.

Demon’s Scar
This chaotic thing, the last flame kindled by a demon prince, is shaped like the claw marks of a demon.
It is both a fiery bladed weapon, and pyromancy flame.
Skill: Spin Slash - Spin to stoke a fierce chaos flame, and use momentum to transition into a spinning strong attack, creating an evanescent lava chamber.

Seething Chaos
The last flame lit by the demon prince.
This pyromancy hurls a clump of chaos.
Upon impact, this clump of chaos seethes wildly, condenses briefly, then explodes violently.
To the demons, these clumps are shreds of life.

Aquamarine Dagger
A dagger fitted with aquamarine crystal.
Engraved with a prayer in the old tongue to ward off incident. Perhaps it was a parting gift given to one sent off on great travels.
Skill: Crystal Blade - Release magic for the aquamarine crystals, creating a fleeting blue crystal blade, lengthy enough to swing as a straight sword.

Giant Door Shield
Unusually shaped paired greatshields resembling great doors
Heirlooms of the knight who was known as the protector of the meek, yet who failed to protect anyone.
Skill: Shutout - Get a stalwart defense, and shield bash, or strong attack for a heave that holds shields to block nearly all damage.

Desert Pyromancer Set
Dark Souls III: Garb of the desert pyromancers, who once walked the halls of the Earthen Peak. It is said that the thin, burgundy cloth breathes with magic.
Desert pyromancers, most of them female, were known for their great fans of flame, and enchanting looks.
But what is enchanting can also be deadly, especially when clothed in such alluring garb.

Dark Souls II: Sorceress hood from the distant land of Jugo. Appears to be a plain, thin fabric, but is permeated with powerful magic.
Desert Sorceresses have enchanting looks, and they use them to catch people off guard.
Oddly enough, even those who are perceptive enough to realize the ploy fall prey to their seductions with alarming regularity."

Flame Fan
Pyromancy of Zoey, descendant of the desert pyromancers. Use repeatedly to brush the fan left and right.
Zoey possessed true beauty, as did all the desert pyromancers, but hers did not poison, and so she became the unassuming queen of the feeble ones.

Murky Longstaff
The long-handled staff wielded by the murkmen who rise from the depths.
Slathered with a black murkiness, and fit for dark sorceries.
Skill: Chant from the Depths - Works with staff equipped in left or right hand. Briefly boosts the strength of dark sorceries.

Murky Hand Scythe
A short-shafted hand scythe wielded by the murkmen who rise from the depths.
Enveloped by a black dampness, and imbued with the strength of dark.

Harald Armor Set
Armor worn by the Harald Legion, who sought the dark soul.
The armor sank into the dark with the legion, where their cavities bloated in grotesque displays, never again to fit any ordinarily-shaped body.

Harald Curved Greatsword
Giant gold-decorated curved sword wielded by warriors of the Harald Legion, who sought the dark soul.
The swords sank into the dark with the legion, where their blades were severely corroded.
Skill: Sever - Hold the giant blade with both hands and slash repeatedly at foe’s feet.

Small Envoy Banner
The small banner used by envoys of Great Lord Gwyn in the days of yore.
Face the ringed cliff and hold the banner high to summon facilitators of transport.
For the pygmies, who took the dark soul, the Great Lord gifted the Ringed City, an isolated place at world’s end, and his beloved youngest daughter, promising her that he would come for her when the day came.
Note: We haven’t picked it up yet, but this is in the room immediately after the Twin Demons boss fight


Now that we’re entering the Ringed City proper we’re about to face some of the tougher challenges the game has to offer.

You might have noticed that I stay more quiet about the lore than usual. While we do get a couple neat tidbits of information it’s putting it into context that makes it interesting. And if below wall of text is any indication it’d make the videos even longer if I covered it inside them. Fair warning: The below does, aside from facts, feature speculation and interpretation. It also delibarately leaves stuff out that would spoil things that are yet to happen.

Also: Here’s the Bonus LP Episode that should have gone along with last week’s update.
Episode R: Plinky and Plonky
Covers everything up to the Demon Prince. Once again featuring shibbo and Skippy.

The Ringed City, The Darksign and the Firelink Curse
Seeing as this LP is about to and this is probably the last chance for a big lore dump. So it’s about high time we talk about the Darksign, among other things. And there’s no better place to do that than the Ringed City, which is both symbolic for the Darksign itself. Where the Darksign is a ring of fire that contains the dark, the ringed city seems to be in its own bubble as well. In the Kiln as well as from the Dreg Heap we could see the Darksign sun accompanied by the orange sky. Down below in the ringed city we there is no eclipse. Just the regular yellow sky we’ve throughout most of the game before the eclipse. Could also be that we somehow traveled to the past… or future. But it’s more likely that we are in a place completely isolated from the rest of the world.

Description of the Small Envoy Banner
"The small banner used by envoys of Great Lord Gwyn in the days of yore.
Face the ringed cliff and hold the banner high to summon facilitators of transport.
For the pygmies, who took the dark soul, the Great Lord gifted the Ringed City, an isolated place at world’s end, and his beloved youngest daughter, promising her that he would come for her when the day came."

This is the first time this youngest daughter of Gwyn is mentioned. We are told to find the Dark Souls we need to find Filianore. Filianore meaning Daughter of the Sun. “Filia” is latin for daughter, “Anor” as in Anor Londo means Sun in elvish. Another interpretation would be that it means “Friend to the Dark” as “Philia” is greek and can be translated as brotherly love while “Noir” means black in french. Perhaps it is supposed to evoke both. After all she is the daughter of Gwyn, Lord of Sunlight, and resides in a city that is home to the pygmys, beings of Dark.

Filianore, together with the Ringed City, was given to the Pygmies, primeval humans, as a gift by Gwyn. While it stands to reason that Gwyn gifted the city, presumably as thanks for their unsung contributions in the war against the dragons there’s that lack of credit the humans got for their efforts that makes me believe it was not as simple as that. He likely placed his daughter in this city of humans to spread his cult of the way of white. He did his best to make sure humanity and with it the dark could never truly prosper. Humans helped Gwyn fight the dragons but no one remembers this fact. Now that line from the intro of Dark Souls about that furtive Pygmy, “so easily forgotten” makes more sense. It’s forgotten because the Pygmies have never properly entered history and we only know about them from the first game’s intro.

From the Description of the Ringed Knight Armor, Spear and Straight Sword:
“Black armor/spear/sword worn/wielded by the Ringed Knights.
The armor/arms of early men were forged in the Abyss, and betray a smidgen of life.
For this reason the gods cast a seal of fire upon these spears, and those who possessed them.”

The info about the pygmies/humans being involved in the war about the dragons comes from the Ringed Knights’ shields, which we havent found yet, but we’ve seen them.

From the Description of the Dragonhead Shield and Greatshield
"This shield, as hard as a great boulder, is formed by the head of the descendant of an Archdragon.
The Ringed Knights, by command of the gods, stood amongst the ranks who set out to slay the dragons, but their contributions were never lauded."

While the fact that the Darksign is not natural has been assumed to be true previously, it’s now confirmed. And the human’s role in the war against the dragons is quite a revelation, every source so far never made mention of them playing a part only divine beings (and a traitor dragon) were ever mentioned. But why were they denied to be a part of recorded history? The only other person we know has been erased from history was Gwyn’s first born son and his sin was allying himself with the dragons.

There is no evidence that the humans sided with the dragons as well. The above description very much makes clear that the opposite is true. They fought under orders of the gods but they simply weren’t credited. It’s probably as simple as the humans being beings of Dark. It’s a known fact that Gwyn feared the Dark. So much in fact, that he was content using himself as fuel for the first flame to prevent the inevitable age of Dark from ever happening.

As for why he feared the Dark? We can’t say for sure. Could just be that he wanted his legacy to live on somehow, as a being in possession of a Lord Soul, which affiliates him with Light. Compared to what happened in Oolacile during Gwyn’s Age of Fire the Ringed City, a city of humans and the Dark, doesn’t have anything nearly as bad as the Chasm of the Abyss. So it’s not clear if what happened in Oolacile is the nature of Dark or if the Abyss is just a less friendly variant of it that came to be due to the use of the Darsign, which is a literal ring of fire around the dark, to keep it in check. This goes as far as that the linking of the bonfires could be viewed as lighting up a giant, more spiritual, darksign to stop the Age of Dark from happening. There’s also the fact that by the time of the Artorias of the Abyss DLC the Ringed City and by extension the Darksign have probably already existed. At the very least it’s set after the war against the dragons.

The perpetual linking ofthe flame is also very much unnatural. At least if Kaathe is to be believed (by the way, Kaathe is confirmed dead. The original japanese script has Yuria lament that she could not fulfill Kathe’s dying wish as she herself dies)

“Lord Gwyn trembled at the Dark.
Clinging to his Age of Fire, and in dire fear of humans,
and the Dark Lord who would one day be born amongst them,
Lord Gwyn resisted the course of nature.
By sacrificing himself to link the fire, and commanding his children to shepherd the humans,
Gwyn has blurred your past, to prevent the birth of the Dark Lord.”

If you believe that Kaathe is too biased there’s also Aldia from Dark Souls II
"Once, the Lord of Light banished Dark, and all that stemmed from humanity.
And men assumed a fleeting form.
These are the roots of our world.
Men are props on the stage of life, and no matter how tender, how exquisite…
A lie will remain a lie.
Young Hollow, knowing this, do you still desire peace?"

And Vendrick has the following to say:
“Drangleic will fall, The fire will fade, and the souls of old will reemerge.
With Dark unshackled, a curse will be upon us…
And men will take their true shape…”

“Fire came to be and with it disparity.
Heat and cold, life and death, light and dark.
Dark was seen as a curse.
Shadow is not cast but born of fire.
And the brighter the flame, the deeper the shadow.
Inherit fire and harness the dark.
Such is the calling of a true leader.”

“One day fire will fade and dark will become a curse.
Men will be free from death; left to wander eternally.
Dark will again be ours and in our true shape
We can bury the false legends of yore.
…only is this our only choice?
Seek strength. The rest will follow.”

The brothers Aldia and Vendrick clearly reached different conclusions as to what the nature of the undead curse is and how to deal with it.

Vendrick, despite being human, appears to follow the reasoning Gwyn could have possibly had. With the flame which holds the Age of Dark back fading, so does the darksign that seals away the dark within man, turning them undead. The are incapable of dying properly. But is this really the natural state of things? After all humans return to a bonfire, representing the first flame if they fall. Not just that, it’s also possible to interfere with that link that humans have to the bonfire. It’s what Seath did when he forced us to awaken at a bonfire in a prison cell.

Aldia’s take seems to be that humans only assumed a “fleeting form” because of the Dark and the Undead Curse, which is called the Firelink Curse by Lothric. Aldia believes that mankind can only achieve it’s true form by overcoming the undead curse. Breaking the curse as a whole seems to be impossible but the player character in Dark Souls II has the ability to negate its effects using the power of the crowns. Ultimately the Scholar of the First Sin Ending of Dark Souls II sees the player just walking away to lead an existence as one outside of the firelink cycle. Though, calling it a cycle might be a bit of a misnomer as Dark Souls III implies it’s more of a downward spiral with the flame growing weaker and weaker, despite being continously rekindled.

At this point it’s a common theory that Gwyn linked the fire to humanity, which could be the First Sin of which Aldia is a scholar (Alternatively the relighting of the First Flame itself could be that First Sin). Considering the above that checks out. Not only did Gwyn refuse to accept an age of Dark but he also instated a faith, in the way of white, to force humans to continue linking the fire and providing their humanity as fuel for the first flame. Gwyn seemed to value perpetuating the age of fire over his own life. But was it a noble sacrifice for the greater good? Or as Kaathe put it, simply resisting the course of nature? Aldia seems to feel the same way.

Some questions, though, will most likely never be answered for sure. And I’m one of the people who find it more fun to ponder them. It’s best to keep in mind that Hidetaka Miyazaki created the lore with his own experience reading english language fantasy novels in mind. While he does have some grasp of english he could very often not understand certain passages and found that he had a lot of fun filling in the blanks with his own, probably better, ideas. So before you complain about not getting concrete answers, consider that the shit you can smoke up has the potential to be so much cooler. Plus you can insert insignificant characters like Lloyd and Velka all you want and give them value. You can also isnist that the Dune Worm in Smoldering Lake is actually Solaire or something. I dunno, some people believe that.

1 Like


On into the Abyssal Swamp. Looking at it it seems like part of the Ringed City has sunken into it.


[details=Name and image of boss]Darkeater Midir

[/details]

Midir is a Dragon battling the Dark in service of the gods. While he is there to stop the spread of the Dark in the Ringed City he himself has been affected by the Dark. If Shira is to be believed he has not quite forgotten his duty yet but he is still a magnificent beast doomed to a slow and possibly endless descent into ruin. He is described as a descendant of Archdragons, which I find interesting because Gwyn and co. (including humans) made a pretty big deal out of genociding that race as hard as they could. It’s even more peculiar that he’s still alive considering the Ringed Knights roaming around the area are dragonslayers that are also linked to the Dark. So much so they have giant glowing Darksigns on their chests. Midir’s job is to fight the Dark.

There are several encounters with Midir. First we only see him cling to a tower. This is easily missed because we have to turn around at the right location to see him. Later on he takes a more active role by breathing fire down the path we need to follow to get through the area. He does the same thing again later, but this time we are in a position to actually attack him. Once defeated here he will fall into the dark chasm and the actual boss encounter will unlcok.

As far as the battle itself goes Midir will seem very overwhelming at first, possibly kill you with his first attacks. And so he should. This the first proper fight against a large dragon in the series after all. These are the beings that gave the gods we killed in the first game trouble so they should overwhelm one at first. The keyword here being at first, the fight is actually very forgiving. Midir as many attacks but they are all very distinct and no single hit is enough to kill you. Well, this isn’t quite true. There are two attacks that are capable of one-shotting most builds but one his a heavily telegraphed grab (I had to intentionally run into to showcase for the LP) the other one is a laser disco which he rarely does and is easily avoided as well.

Midir has a huge health pool and they definitely want you to attack his weakspot: The head. Not only does this make the fight go by faster, but it also makes the fight much more fun. What you’ll want to do is dodge his attacks in a way that positions you near his head so you can get a couple hits in. Which isn’t to say that you necessarily need to focus on his head alone but what you definitely don’t want to do is stand under it. As soon as you get under him he’ll breathe fire downwards. It will reach a bit behind him too but you can still use it to you advantage by running just out of his reach to whack his tail a few times. Does way less damage but still a good use of your time.

With that said, all of his attacks allow you to dodge them in a way that makes you end up right in front of his head. If you mess that up you’ll potentially have to run a long way to even get close to Midir again. In phase two he gets two attacks we didn’t get to see in the video. One has him summon a bunch of humanity sprites that will home in on you like the Pursuers spell. I recommend running until it’s over in this case. The other attack is the aforementioned laser disco. He’ll just go nuts and laser everywhere. It’s best to close in on him here because he will be exhausted afterwards. But not for long. To avoid getting hit by that attack it’s probably wise to just spam your dodge, just to be on the safe side.

For me this fight hits all the right notes as far as Dragon fights go. It’s a very huge and imposing opponent that is still quite mobile. Not only is it obviously fought differently from all the humanoid opponents, he’s also different from other dragons or big monster bosses. The music is fantastic and if you actually attack his head you’ll be rewarded with a visceral attack as a finish, which will usually take off the remaining eighth of his health.


Soul of Darkeater Midir
Soul of Darkeater Midir.
One of the twisted souls, steeped in strength.
Use to acquire many souls, or transpose to extract its true strength.
Midir, descendant of Archdragons, was raised by the gods, and owing to his immortality was given a duty to eternally battle the dark, a duty that he would never forget, even after the gods perished

Frayed Blade
A dragon weapon symbolizing Darkeater Midir.
The one-exquisite blade is now stained black, and frayed at the hilt. Without its sheath, it will soon crumble into nothing.
Skill: Hold - Assume a holding stance in which a normal attack sends a shockwave along the earth, and a strong attack commences a series of slashes.

Old Moonlight
A memory of an old sword found deep within Midir. This sorcery uses souls to grant form to the thought, and attack with it.
Attacks are coupled with lightwaves, and sustaining the stance before attacking increases their speed and potency.
The sword is named after moonlight, but it is slightly different than the one fashioned of the paledrake Seath. Perhaps it is rooted in an older memory, from not long after the Beginning.

Spears of the Church
A green-rusted ornament of young grass, the crest of Princess Filianore. Equip to join the Spears of the Church covenant.
The Spears of the Church watch over the Princess’ slumber, and when the church is compromised by a trespasser, the Judicator summons them as loyal spirits to eliminate the threat (Summoned automatically while this is equipped).
Loyal spirits summoned as Spears of the Church are granted a blessing of protection.

Antiquated Plain Garb
Ordinary garb from an ancient land of sorcery. The gold embellishments betray a faint residue of magic, but this clothing was never intended for battle.
When a mission visited the Ringed City long ago, one of its younger missionaries elected to stay behind. It was he who became the last recorded Spear of the Church.

Violet Wrappings
These arm wrappings, sewn with violent cloth and embroidered with gold thread, were intended for everyday use.
Yet they served well enough in many a battle, enwreathing the arms of one who would go on to embrace the sword.

Sacred Chime of Filianore
A sacred chime blessed by Princess Filianore, matriarch of the church.
Filianore’s favor knows no boundaries, and this sacred chime expands the range of vicinity-affecting miracles that heal, cure, or provide other enhancements.
Skill: Pray for Favor - Works with chime equipped in either left or right hand. Heals HP very slowly for a duration of time. Affects caster and those in vicinity.

Ringed Knight Spear
Black spear wielded by the Ringed Knights.
The arms of early men were forged in the Abyss, and betray a smidgen of life.
For this reason the gods cast a seal of fire upon these spears, and those who possessed them.
Skill: Ember - Thrust the timeworn spear and watch it restore its ancient brilliance and reignite a short-lived flame, whose dull aftermath will carry on.

Ringed Knight Straight Sword
Straight sword wielded by the Ringed Knights. The arms of early men were forged in the Abyss, and betray a smidgen of life.
For this reason the gods cast a seal of fire upon these swords, and those who possessed them.
Skill: Ember - Stand ready with the timeworn blade as it restores its ancient brilliance and reignites a short-lived flame. From this stance transition to normal or strong attack.

Ringed Knight Set
Malformed black armor of the Ringed Knights. The armor of early men was forged in the Abyss, and betrays a smidgen of life.
For this reason the gods cast a seal of fire upon such armor, and those who possessed them.

Dragonhead Greatshield
This shield, as hard as a great boulder, is formed by the head of the descendant of an Archdragon.
The Ringed Knights, by command of the gods, stood amongst the ranks who set out to slay the dragons, but their contributions were never lauded.
Skill: Dragon Roar - Even the descendant of an Archdragon perishes not, and use of this skill restores its former strength, sending surrounding foes flying with a dragon roar.

White Birch Bow
A short bow crafted with white birch. Endowed with light-manipulating magic.
The bow is a relic from an ancient land of sorceries that was swallowed by the Abyss, most known for its folktale of the heroic Abysswalker.
Skill: Unseen Arrow - Arrows shot by large pulls of the bow are enchanted with a golden spell that turns them nearly invisible.

Preacher’s Right Arm
The dessicated right hand of a white-faced locust that rose from the abyssal swamp, that happens to perform as a catalyst for sorcery.
The white-faced locusts were meant to beckon men to the dark with sermons, but most of them are unable to think past their own stomachs, the unruly mob!
Skill: Feasting Branch - Use souls to weave a sharp branch to fillet prey. Can be used repeatedly.

White Preacher Head
An empty head of a white-faced locust that rose from an abyssal swamp.
The white-faced locusts were meant to beckon men to the dark with sermons, but most of them are unable to think past their own stomachs. Someone must rise to the occasion, and restore the path of righteousness.
Perhaps that someone is you? Did you not arise from the Abyss, and did you not resist drowning in the Age of Fire? Locusts and men are kindred spirits.

Ruin Set
Armor of the company of knights who were sent to the Ringed City on an old king’s orders.
The knights sought the dark soul, but were so soundly crushed, they had little choice but to swear themselves to the Judicator Giant.
The ill-fated company was later immortalized in a dark fable, inspiring the aspect of certain golems in whom their name lived on.

Black Witch Set
The purple garb of the witch Zullie, who inteded to seduce Alva the Wayfarer, but eventually became his closest supporter, spending her entire life with him.
It is said that Zullie the witch, who was never loved, nor loved another, experienced all manner of misfortune, and yet in the end, found her purpose in life.

Black Witch Veil
The purple veil of the witch Zullie, who intended to seduce Alva the Wayfarer, but eventually became his closest supporter, spending her entire life with him.
Zullie’s veil was for travel, and to hide her affiliation with the misunderstood craft of witches.

Iron Dragonslayer Set
Stark melted iron body armor of the ancient Dragonslayer Armour.
The Armour, defeated by the Champion of Ash in Lothric, was left ages to rust, until it slipped into an abyssal swamp, where it was possessed once again by the memory of the hunt.

Blindfold Mask
An eye-occluding mask of unknown origin. Small cracks allow the wearer to see.
Strengthens dark attacks, but also greatly increases damage sustained from dark.
This purple steel creation has a certain resemblance to the Fire Keeper’s crown, but the similarity is purely cosmetic.

Ledo’s Great Hammer
Great Hammer wielded by the Silver Knight Ledo. Ledo’s hammer is by far the heaviest weapon amongst those wielded by the knights of Anor Londo.
Ledo, an eccentric who traveled aross the outskirts, became a close friend to the giants and even Havel, the Rock.
Skill: Call to Stone - Spin to lure stones to the steel hammer, and use strong attack to transition into an earth slam that shatters the stones in a shockwave.

Lightning Arrow
The few female knights who serve in the age of the gods used this miracle for dragonslaying.
Draw lightning bow to fire a lightning arrow.
The lightning arrows offer a great improvement to the range of the spears, and were said to have been used to pierce the eyes of the dragons from afar. But remember, beautiful stories are always marked by embelllishment.


Finally, we’ll be heading into Filianore’s chapel and awaken the princess. But what exactly does this entail? And what will happen once Gwyn’s youngest daughter opens her eyes? She is, after all awaiting her father. Who, how we know so very well, is long dead.

Spears of the Church


We get access to the Covenant after killing Midir
“A green-rusted ornament of young grass, the crest of Princess Filianore. Equip to join the Spears of the Church covenant.
The Spears of the Church watch over the Princess’ slumber, and when the church is compromised by a trespasser, the Judicator summons them as loyal spirits to eliminate the threat (Summoned automatically while this is equipped).
Loyal spirits summoned as Spears of the Church are granted a blessing of protection.”

This is an interesting Covenant because it allows players to take the role of a boss. While a spear of the church does not get any Estus they get a automatically regenerating Homing Soulmass type spell Additionally invaders will get higher defenses depending on how many phantoms the challenging player has summoned. Whoever wins will get a Filianore’s Spear Ornament as a reward. So you can level this covenant up both by defending and attacking.

Filianore’s Spear Ornament
“The Spears of the Church watch over the Princess’ slumber, and this serves as proof of their fulfillment of their duty. The embellished gold cloth is woven with a crest of young grass.
The Princess’ knights proudly displayed these precious flavors, which were most often seen swaying from their identical ceremonial spears.”

It is possible to reset this fight a the purging monument by reinstating the king’s decree in exchange for some souls.
The fight will usually begin with Judicator Argo holding is speech. You can kill him while he does that but whether you kill him or not doesn’t change a thing. First a Painting Guardian will be summoned, then, moments later, the Spear of the Church. Once the Spear is down to half health a “second phase” begins and another Painting Guardian is summoned. The Painting Guardians have the ability to cast a heal spell and are the only source of healing for the Spear player. If you’re playing offline or there’s no other player available you will instead fight Halflight, Spear of the Church, an NPC version of the fight. He can be handled like any other NPC opponent. You can collect the covenant items and acquire rewards whether you are online or not, though.

Ritual Spear Fragment (You get this one for free near the Covenant’s monument)
“Online play item.
A fragment of the matching ritual spears once held by the knights of Princess Filianore.
They are the namesake of the Spears of the Church.
When Spears of the Chruch face unduly treacherous foes, this allows them to draw upon former majesty, and summon a row of upward-thrusting ritual spears”

Young Grass Dew: (For 10 Filianore’s Spear Ornaments)
“A small, transparent stone that once graced the green young grass crest.
This semi-precious gem honors a Spear of Church after a battle well-fought, and is said to slightly enhance their blessing of protection. (while held, this effect is constant)”

Divine Spear Fragment: (For 30 Filianore’s Spear Ornaments)
“Online play item.
A fragment of the matching ritual spears once held by the knights of Princess Filianore.
These Divine Spears of gold were placed in the trusted hands of exalted Spears.
When Spears of the Church face unduly treacherous foes, this allows them to draw upon former majesty, and summon a row of upward-thrusting ritual spears.”

Filianore and the Embraced Shell


After ascending the staircase and entering her tower we find Filianore sitting there asleep, resting on what looks like an egg (some Loresters ™ speculate that it’s a Transposing Kiln for whatever reason). As mentioned in a previous post, Filia is latin for daughter while Anor is elvish for sun. Daughter of the Sun. Alternatively it could be viewed as philia, brotherly love in greek and noir, black in french. Friend to the Dark.

She is the lastborn daughter of Gwyn, former Lord of Sunlight and first Lord of Cinder, who left her behind in the Ringed City promising to return to her “when the day came”. What that day is, is unknown and seeing as Gwyn chose to become fuel for the first flame he clearly valued the Age of Fire over that promise. When we find her Filianore has been asleep for possibly thousands of years. The only thing we can do, really, aside from leaving, is to touch the embraced shell.

It’s awfully fragile and crumbles immediately, which awakes Filianore who looks at us rather confused. A light comes from the remnants of the shell and… umm. I don’t know really. Filianore is now a rotten corpse and we find yourselves in a Wasteland, everything is in ruins except for Lothric and Anor Londo way in the distance. Most people assume that means we’ve traveled forward in time to world’s end. Others assume that some kind of illusion has been shattered, like we shattered Gwyndolyn’s illusion after attacking the fake Gwynevere. But I don’t think that theory holds because you can actually travel back to the Ringed City and it will be as we left it. Going back through Filianore’s Church into her room she will be gone completely.

Another theory is that the Ringed City is contained within a bubble. Mainly because the sky lacks the giant Darksign we’ve seen all throughout the Dreg Heap. But but that eclipse is also not visible from the Wasteland. The Pygmy we find just when entering the Ringed City tells us that “[Filianore’s] slumber is a deceit. A lid covering an overgrown privy; a prop to keep thee from the dark soul of thine desire.”. This implies that it is an illusion of some kind. For some reason I find myself leaning towards the “a lot of time passed” theory.

Venturing into that Wasteland we can see a Pygmy King crawling, once we’re close enough we can see that his head is nearly separated from the rest of his body. He’s crawling to Filianore for help, trying to warn her that the red hood has come to eat them. To eat their dark souls.

Slave Knight Gael


Here we have Gael. One regular human being that has slain and consumed the pygmy kings in order to reform something that resembles the Dark Soul. Only it’s taken the form of blood. It’s most likely that what he wanted to do was to create a world free of the curse. At least this is what we can only assume the purpose of painting a world with the Blood of the Dark Soul is. It’s not outright stated, but I have no idea what else it could be.

After consuming many pygmies one could say that he’s become an amalgamation of humans, similar to how the Soul of Cinder is an amalgamation of Lords. Gael must have known that he had no way to maintain control of his own self when acquiring the Dark Soul and going through what could have been many many years of slaughter, assuming that what happens when we touch the egg is time passing to the end of the world. (It could of course also be just a bubble that isolates the Ringed City from the outside). So he made sure to guide us through the Dreg Heap, to the Ringed City where he was certain we’d eventually catch up with him, although in a convoluted way. He wants us to kill him to take the Blood of the Dark Soul to the Painter Girl.

With the blood pouring out of him he seems to remember part of his identity, he stands upright and fights using more human motions. And in the final phase of the fight more small glimpses of his consciousness surface every time he begins crying immediately before a stream of dark essence erupts from him. In fact, for almost all my Gael kills, he did this specific attack that lets you get in several hits for free when he was near death. Presumably to let us land the killing blow. While it didn’t happen in the main LP video it did happen in the bonus LP and all my other successful attempts. While it’s not a guaranteed thing I’m fairly sure that it’s scripted to happen more often when he’s at very low health and that there’s significance to it. But maybe someone else has had different experiences here.

The fight itself is separated into three phases. After the initial cutscene, the end of which mirrors Artorias’ intro cutscene which in turn is a reference to the introduction of the Penetrator from Demon’s Souls, Gael rushes towards you on all fours. His fighting style is very feral and he uses his sword exclusively. Easy opportunities to get hits in are when he performs a flying downward thrust at the end of a combo or after his grab, which is telegraphed by him glowing red and then dashing towards you. This phase lasts until a third of his health is gone. After that a cutscene will play. Gael collapses to the ground and starts bleeding. The cutscene makes it look like he’s bleeding from his face somewhere but the description of the blood mentions that the blood we get after winning is from the hole in his chest. Though, it’s kind of hard to see that hole actually bares his Darksign. It’s the first time we ever actually see someone’s brand as something other than an inventory item. In any case, seeing his own blood, which he calls the Blood of the Dark Soul, seems to give remind him of how he used to fight.

And so, in phase 2, we see Gael stand upright and he gets a completely new moveset. He’s much less mobile and istead moves very slowly, using ranged attacks instead of distance closers, though he can run towards you if you are too far away and while it’s never happened when I played he can also teleport towards you. In addition to his sword he now uses his repeating crossbow as well and a version of the Way of White Corona that shoots out multiple discs. Most importantly, though, his cape gets weaponized as well. In practice this means that the hitbox of his swings lingers for a bit because it usually follows his swings. The cape itself does much less damage. In fact, it’s viable to trade hits as he doesn’t do as much damage as in phase 1 overall. If you really want to avoid getting hit by the cape I suggest always dodging counterclockwise as all of his swings except the one where he swings clockwise, will have the cape be on his right-hand side, your left. Generally, don’t dodge against his attacks unless you are certain you got the timing down. It’s better to avoid his hitboxes completely than trying to minimize the time overlapping with it during a dodge roll due to it being active longer. But again, it doesn’t do that much damage and trading hits might make things go by quicker.

Once is health is down to one third he’ll begin phase 3 by weeping. Don’t be fooled. While this is an opportunity to get hits in you should first get a feel for what’s about to happen. Gael’s crying is the tell for one of his new attacks in phase 3. Skulls will erupt from the hole in his chest. While those skulls damage you on their own the real attack is them landing on the ground making it glow white. These glowing spots will be struck by lighting that can damage you as well as Gael within a few seconds. Somehow a lot of people don’t make the connection between the lightning and that. In this final phase gael’s cape still makes dodging through attacks more difficult than usual. In addition to his weep he also has a specific combo that unleashes the Thunderskulls. Generally, when you see skulls just get away to be safe. Unless you’re confident to not run into the spots they mark for the lighting. In contrast to phase 2 where he moved very slowly he now pretty much flies across the arena to get to you. I find this phase more imposing than anything. It’s not too hard avoiding his attacks and as soon as you figure out which attacks end a combo you’ll be able to output damage at a reasonable pace.

By the way, he shares no moves the first two phases. In fact, none of his phases share moves with one another. Esentially, Gael is three unique bosses with one long health bar. In contrast to Friede, which is a boss that builds on the respective previous phases but has three separate health bars, which irked some people. While it’s functionally the same it feels different to a lot of players. FromSoft must have considered that when designing Gael. I find this difference in how a challenge is viewed interesting. Because I personally feel like I’m making more progress if I have separate health bars to take down but others feel cheated that them defeating a phase does not end the fight or at least give them permanent progress. On the other hand, I would not want Gael to have shorter health bars for each phase as his big one makes him feel much more powerful. Anyway, enough with this tangent about the psychology behind boss health bars

Once Gael is down we get the Blood of the Dark Soul in addition to his Soul. Which raises the question of what exactly the Dark Souls is. Was it really as we initially assumed split up and turned into what we knew as humanity? After all, the item called humanity only ever appeared in the first game, so maybe it changed over time. Then again, the sprite of the Ember in Dark Souls III is essentially the sprite of the humanity item. Only on fire. Which implies that the flame and the dark formed one. Or it could be another “Darksign” with the flame surrounding the dark of the humanity. I’d like to point out that all this is purely speculation. Whatever the case may be, the Dark Soul in Dark Souls III has taken the form of blood or specifically, as it’s called the Blood of the Dark Soul, the Dark Soul bled or became one with the blood of the Pygmy kings Gael slaughtered. Ultimately it’s up to us to decide what the hell any of this means. Much like with the rest of the lore, we get just enough information to fuel our imagination, but not enough to get real answers. I mentioned this in the lore dump accompanying the Ringed City Streets episode, but this is very much in line with the way Miyazaki wrote the lore and what inspired him to do it, being unable to fully understand english language fantasy novels. So he had to fill in the blanks.

Some people expected concrete answers to lingering questions regardless. I’m personally very happy with the DLC and how it didn’t give us clear answers. Just a bit more info that helped us make some sense of things. And then some more info that raises more questions than it answers. I feel if it truly tried to tie it all together it would end up being forced and probably much less cool than whatever it is that people come up with. Even if goons collectively sneer as any theory mentions Lloyd and roll their eyes at Velka. Or how I personally always laughed at any theory that involves Solaire. Except the one that he’s just crazy. Because he’s nuts. Did you listen to that guy? Like… ever? That said, did you know that Siegmeyer is secretly and very clearly Old Man McLoyf? Wait, you don’t know who Old Man McLoyf is? For shame. Don’t even google it, you’re not worthy.


Blood of the Dark Souls
Blood of the dark soul that seeped from the hole within Slave Knight Gael.
Used as pigment by his lady in Ariandel to depict a painted world.
When Gael came upon the pygmy lords, he discovered that their blood had long ago dried, and so consumed the dark soul.

Soul of Slave Knight Gael
Soul of Slave Knight Gael. One of the twisted souls, steeped in strength.
Use to acquire many souls, or transpose to extract its true strength.
The red-hooded, wandering slave knight Gael sought the blood of the dark soul as pigment for the Painted World. But Gael knew he was no Champion, that the dark soul would likely ruin him and that he had little hope of a safe return.

Ringed Knight Paired Greatswords
Paired black greatswords wielded by the Ringed Knights. The arms of early men were forged in the Abyss, and betray a smidgen of life. For this the gods cast a seal of fire upon such weapons, and those who possessed them.
Skill: Ember - Cross the twin timeworn greatswords to reignite a short-lived flame. A lightning-quick upward heave slices the very air, and transitions into normal or strong attacks.

Gael’s Greatsword
Greatsword of Slave Knight Gael, the only weapon that he kept with him from beginning to end.
Originally an executioner’s sword made for decapitation, this blade is heavily chipped and stained with the blood of countless battles.
Skill: Blade of Peril - A precarious technique unique to undead Gael. Leap in any direction, slamming the greatsword to the ground, then follow with normal attack for a large spinning slash, or strong attack to back-step and jump foward in an overhead slam.

Repeating Crossbow
This crossbow, customized for repeat-firing to face mobs alone, was wielded by Slave Knight Gael.
Used in the battles of an endless journey, this crossbow is covered with twists and dinks, rusted with blood, and made extremely brittle from overuse.
Skill: Repeat Fire - Assume stance to activate repeat firing mechanism, and repeat fire with normal and strong attacks.

Dragonhead Shield
This shield, as hard as a great boulder, is formed by the head of the descendant of an Archdragon.
The Ringed Knights, by command of the gods, stood amongst the ranks who set out to slay the dragons, but their contributions were never lauded.
Skill: Dragon Breath - Even the descendant of an Archdragon perishes not, and use of this skill restores its former strength, sweeping foes with a frontal exhalation of dragon breath.

Shira’s Set
Armor of Shira, knight in service to Filianore. A rare women’s piece from ancient times.
With a spun gold shawl draped over the silver breastplate and a green woven skirt, this armor offers a subdued yet refined elegance, apropos to both a handmaiden of the Princess and one whose veins coarse with royal blood.

Shira’s Crown
Crown of Shira, knight in service to Filianore. Finely crafted with silver and fashioned with a pearl from a Man Eater Shell.
Shira delivered the crucified mad king to the darkroom, where she stayed, in her formal wear, even though none would see her.

Crucifix of the Mad King
A cross spear hung with a malformed corpse.
Once, a mad king was born to the pygmy royalty and Shira, knight of Filianore, put him to rest. But Shira’s cross spear, unable to kill the undying king, only pinned itself to him. Shira delivered them together to the darkroom, where she stayed and held them close.
Skill: Mad King’s Folly - Slam malformed corpse into the ground to briefly awaken it, then fillet with strong attack to trigger a roar, a blessing, or vexation.

Lapp’s Set
Steel armor of the amnesiac Lapp.
This plate-armor body, that covers the torso cleanly without even slight gaps, provides heavy defense.
Quite fit to conceal a hollowed body, and indeed one’s very identity.


And now for the thing I always do at the end of my LPs: Boring numbers put into some kind of context. Ah yes, stats. Since I’ve LP’d all three Dark Souls games let’s have a look at some of the facts I can still gather.

The numbers don’t match up with the stats from the end of the Dark Souls or Dark Souls II LP. I don’t quite know why, but I did go through my old folders again to make sure the numbers are right this time.

Dark Souls was my first proper LP. While I did make a couple really bad ones beforehand that was the first one I did seriously. At the time I considered it a very big project, which it was. It came out before Dark Souls II was even announced, so Dark Souls, while successful, was not quite the phenomenon it later became. It took me six months to complete the LP, but it pales in comparison with the other two. If I a new version gets released I just might do it again to have an excuse to wipe the horrible audio of the first 12 episodes of the LP off the earth. While some people seem to think this is the hardest game in the series it takes little more than playing it after the second or third game to see that it is, in fact, much easier than either of the other two.

At the end of Dark Souls I said I probably won’t do another project of that magnitude, then Dark Souls II came out and not only did it take me longer (weekly updates, sometimes more), I decided it would be a great idea to record every area twice, once on a fresh file, another one in NG+ in an effort to show footage of the NG+ changes every time they came up. Also sometimes to hide flow-breaking deaths and other shenanigans. The two full comprehensive runs I only showed half of explain the higher amount of raw footage cimpared to the total runtime of the LP. I then went on to say that I probably won’t do a project of that magnitude again.

And then Dark Souls III came out. And that’s where we find ourselves now. The Main LP was about as long as Dark Souls II while the Bonus LP was much longer this time around. While Dark Souls III has less videos than II and took me longer to complete, all that really means that my update “schedule” for III was more consistent. I only missed one week, and that was Christmas, so I think I have an excuse. Dark Souls III turned out to have some of the best individual areas, best bosses and what I feel is the best DLC with the Ringed City. As a result Dark Souls III is my favorite of the three games, which is probably not that common, most people seem to prefer one of the first two games. That said, I have no plans to take on another LP project that big… yeah my next LP, whatever it may be, will probably take two years to finish but don’t tell anybody.

Over the course of the Bonus LPs I had a total of six co-commentators in order of their appearance: Krimsh (I, II, III), JunpeiHyde (I, III), Interrupter Jones (II, III), BFC (III), shibbotech (III) and Skippy Granola (III). Thanks to all those kind folks for lending me their voices, their humor and their insights to make the Bonus LPs worthwhile. And yes, Krimsh was the only one to appear in all three bonus runs but every single one of those who participated appeared in the Dark Souls III bonus vids. Once my usual suspects weren’t available for a variety of reasons I brought in shibbo and Skippy for the home stretch. Over the course of these bonus LPs I owed Krimsh three canadian dollars (haven’t paid him yet), became a kayfabe brazilian, we managed to make time convoluted within the LP. Not a simple feat but I think I can blame Skippy for wanting to do the DLC before the Soul of Cinder and Nameless King videos.

With all that said I think the only thing left would be for me to thank you for following the LP. Seeya around!

1 Like

@moderators This LP has been completed and can be moved to completed LPs. It may also remain open.